

Following a couple recent posts on carving a sign in white oak, here and here, there were some questions about how I carved the leaves. Below are two photos of the leaves before and after painting. I’ll expand on my general explanation with this post.


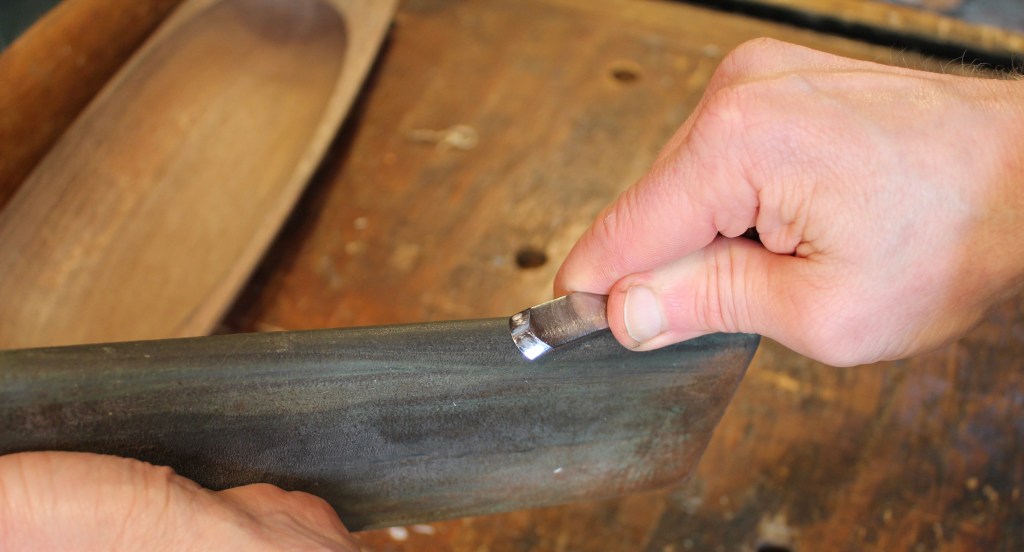
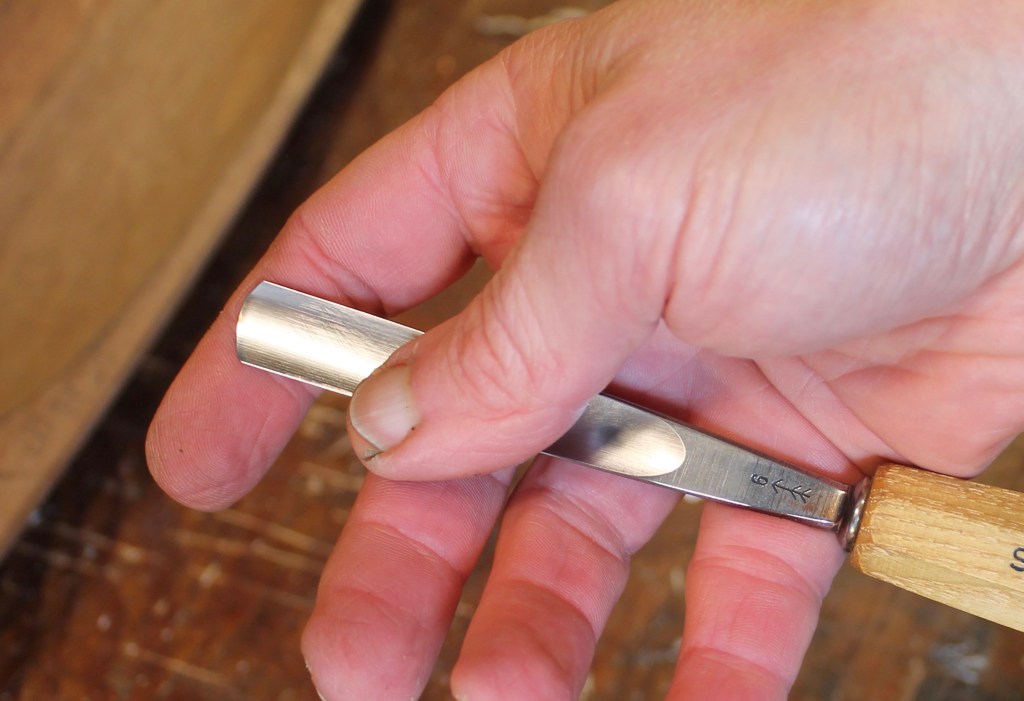
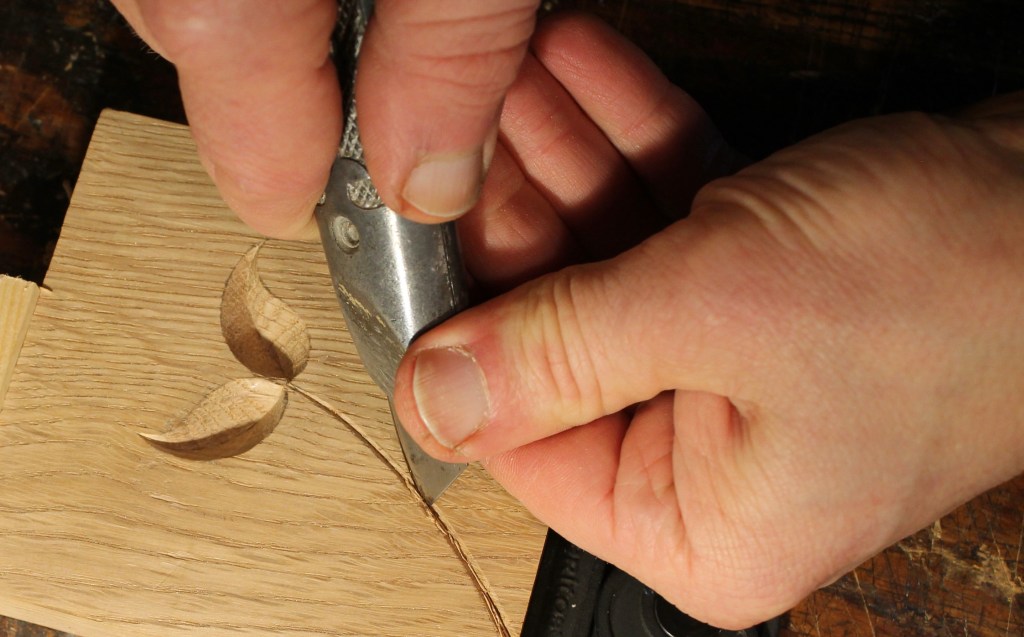
For smaller leaves in softer wood, like those on the alphabet boards in this post, I use a knife. Leaves like these in white oak call for a gouge. I’ll demonstrate with a #6 14mm (9/16″) gouge, and a utility knife for the stem. As you may have noticed in the lead photo, the shapes of both have been modified. The gouge has a cambered or bullnose shape across the edge, with the corners drawn back. This is the key for carving these incised almond shapes without the corners marring the opposite side.
I keep a few gouges sharpened like this because they can come in handy for other situations too, including letter carving. Otherwise, my gouges are sharpened straight across with, theoretically, sharp crisp corners.

I just eyeball the radius, rather than measuring, but you could use a circle template to trace a line in Sharpie onto the tool. Measuring this particular tool now, the edge is an arc of a 3/4″ (19mm) circle, so a 3/8″ (9.5mm) radius.
I begin by grinding the radius at 90 degrees to the face of the grinding wheel, then I tilt the support up to grind the bevel at around 25 degrees or a little less (I suppose). I normally take gouges to a stationary stone for honing as I show here. Here’s an alternative. I hold the stone in my right hand and the gouge in my left. I rock the gouge from corner to corner as I move the stone up and down, while sighting in between to keep the stone flat against the bevel. It’s very natural, really. Here, I’m using the face of a hard Arkansas slip stone, lubricated by oil.
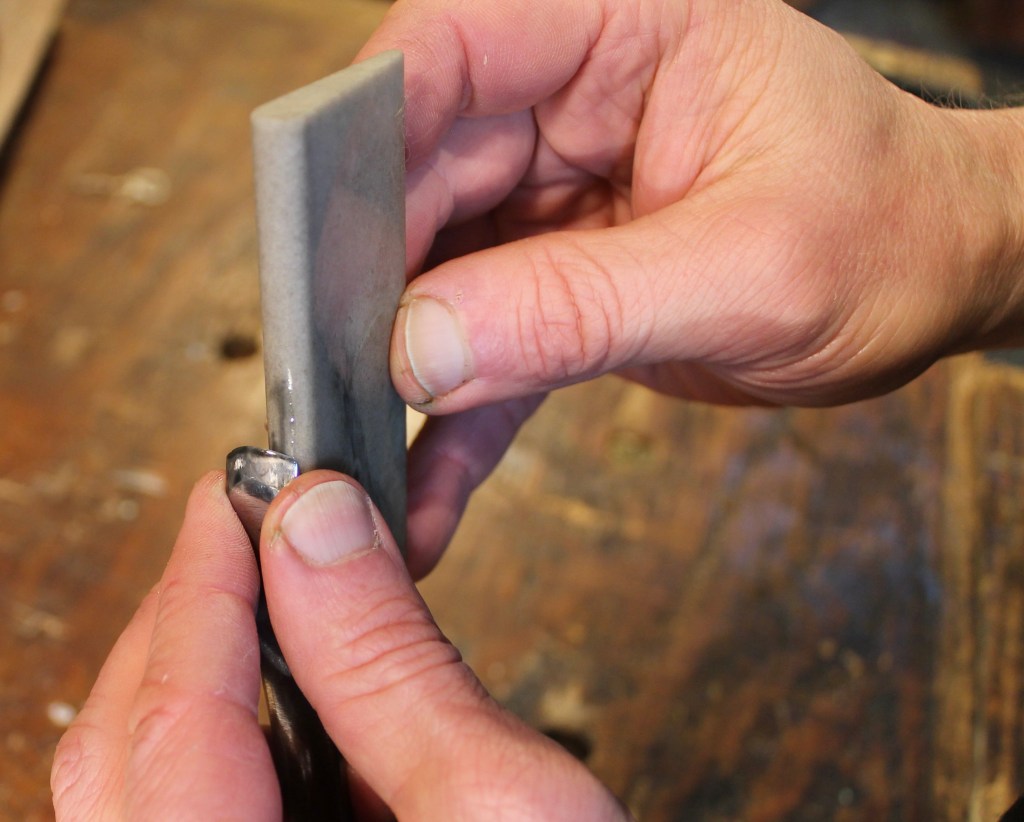
I flip the gouge over and do the same sort of thing with the rounded edge of the slip stone. My left thumb and forefinger rotate the gouge and serve as stops for the stone so as not to go beyond the corner of the gouge edge. I hold the gouge out a bit to create a slight inner bevel of maybe 2 or 3 degrees.
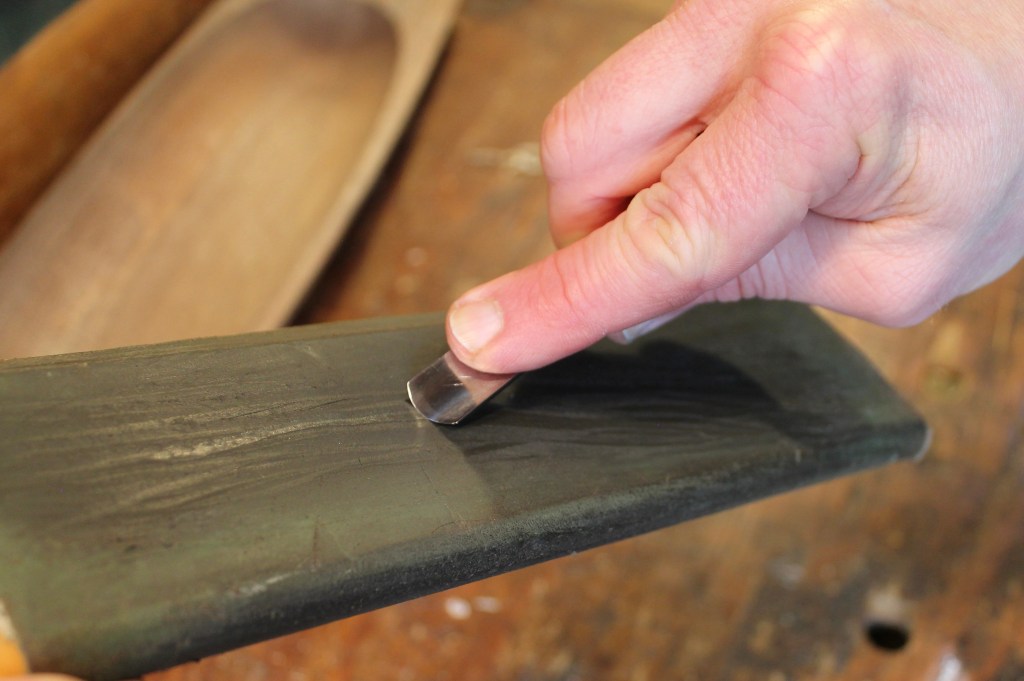
I strop the outside bevel by dragging backwards, flat on the bevel, while rotating the tool form corner to corner.
Same for the inner bevel on the round edge of the strop.
Time to carve some leaves!

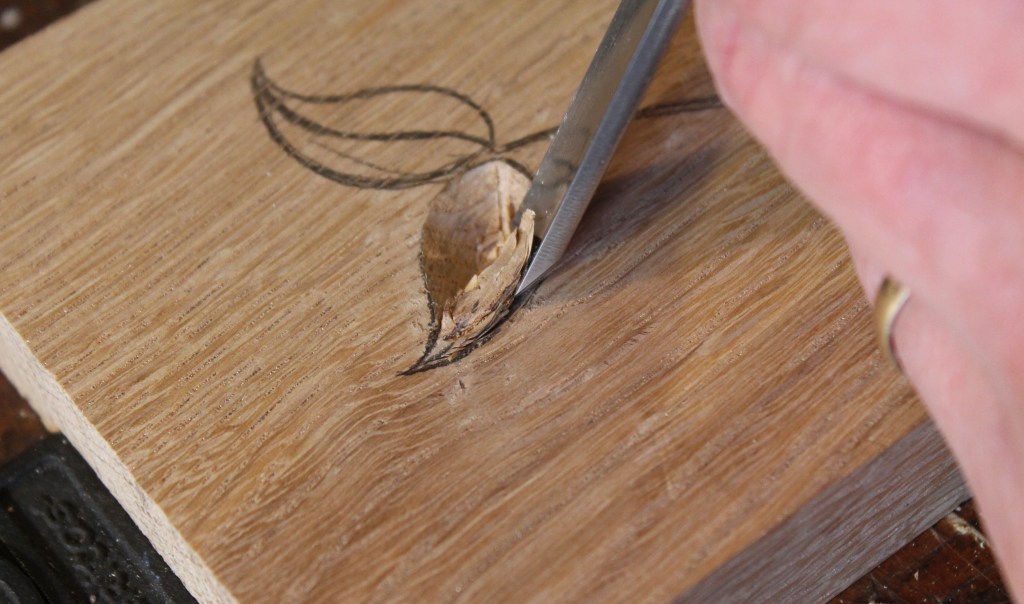
With a scrap block of the white oak from the sign, I carved a little sample of two leaves on a stem. The leaves are about 1 1/4″ (32mm) long and 9/16″ (14mm) wide. The safest thing to do first is to make a stop cut along the center line to prevent the fibers from lifting across your outline when cutting from the first side. This can be done with a vertical gouge stab or with a v-tool. In this case, I just began with a small safe excavation in the middle of the leaf, which will expand outward with successive cuts.
In the photo above, I’m making the second cut from the opposite side of the first cut.

The cambered edge shape of the gouge allows the cutting edge to reach the center while not overcutting near the corners. The chip pops out, revealing a simple leaf shape. You could quickly create a whole tree full of leaves of this simple shape, even varying the sizes, by making these two simple cuts.
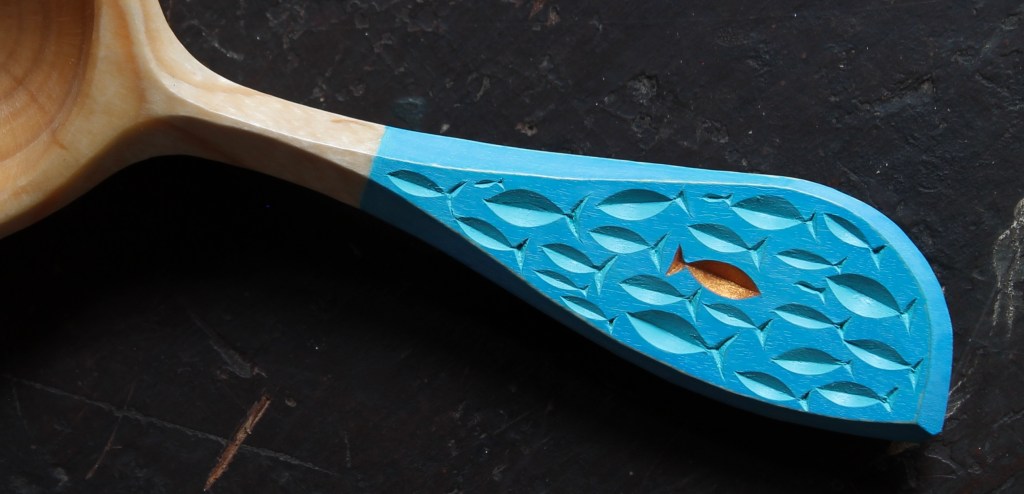
And there are many other possibilities. Eyes, footballs, fish… Here is a spoon handle employing the same technique to create fish of various sizes. The tails are triangular chip cuts, from a knife.
These leaves I’ve drawn are a little more complex in shape, so I maneuver the gouge around a bit, coming back to my drawn outline. I skew the gouge slightly now and then in consideration of grain direction.
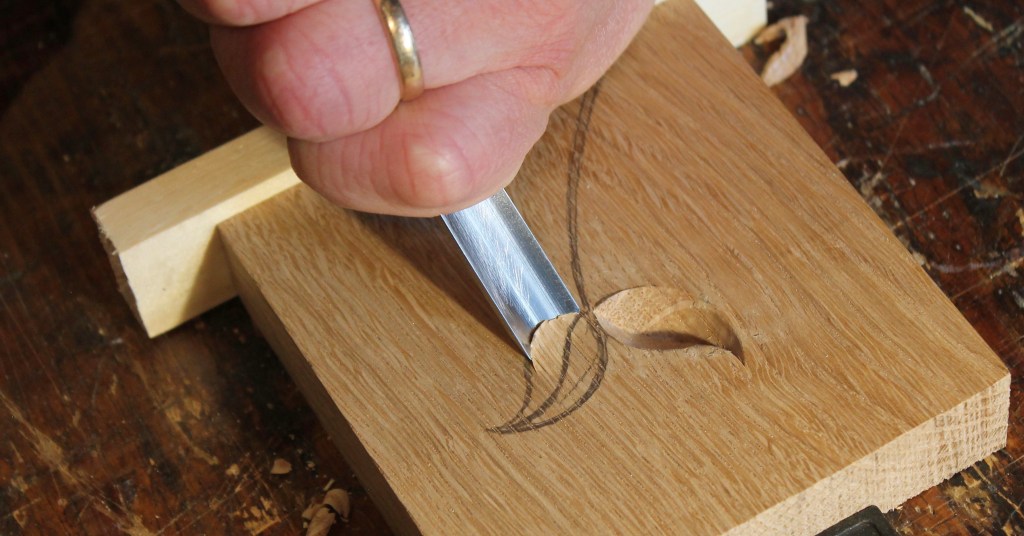
On the second leaf, I’m making the first cut right at the outline. I’m confident in how the wood is behaving and that I can get away with it.
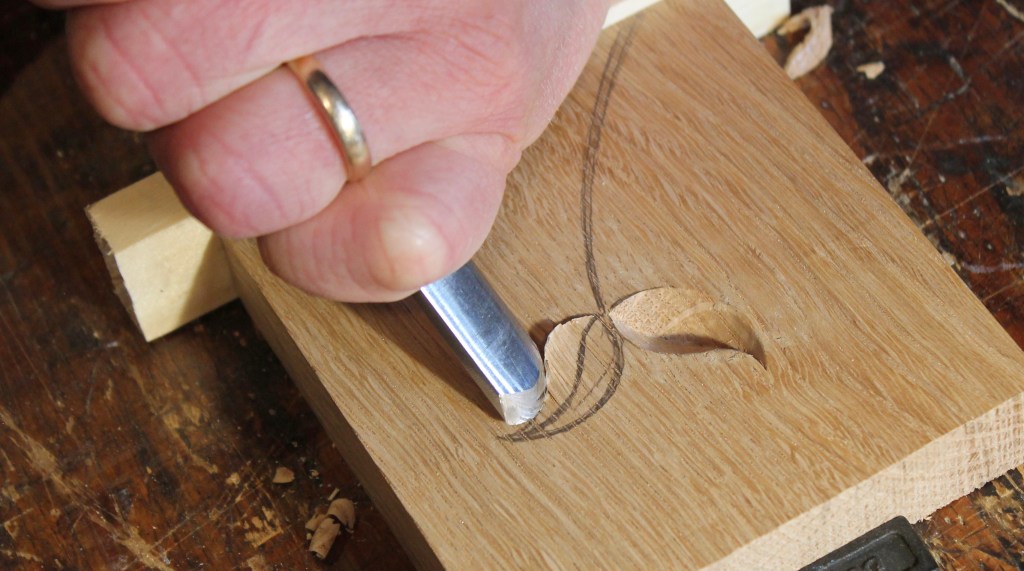
For the reversing curve approaching the tip of the leaf, I can flip the gouge upside down and press down while slicing forward.

You can see the cut and the fibers waiting to be released from the other side of the leaf.

The first cuts on leaves this size will rarely reach all the way to the bottom along the central vein of the leaf. By working back and forth from one side to the other, you’ll end up with clean sides and a defined curving central valley. Each leaf can be different, so just nibble around a bit until it’s a shape you like. Unintended shapes will probably look even more natural than your plan, so just have fun and see what happens. Leaves are low pressure!

The stem can be carved with a v-tool, gouge cuts from opposite sides, or other ways. Here I’ve decided to use a utility knife with a modified blade. It’s a standard Stanley blade, but I’ve ground a slight curve to the edge and re-sharpened it. Bevels on both sides of the blade. I think I first got this idea years ago from a video produced by Drew Langsner, featuring Swedish carver Bengt Lidstrom. The video is wonderful and packed with techniques and ideas. It’s now on YouTube here (I originally watched it on VHS). It’s at about the 58:30 mark that Bengt pulls out his utility knife to cut some designs and lettering on the bottom of a bowl.

The white oak is hard, but with a couple successive cuts I can reach the bottom of this narrow stem from one side, then the same from the other.
Here, I’m trimming and expanding one wall with a different grip.
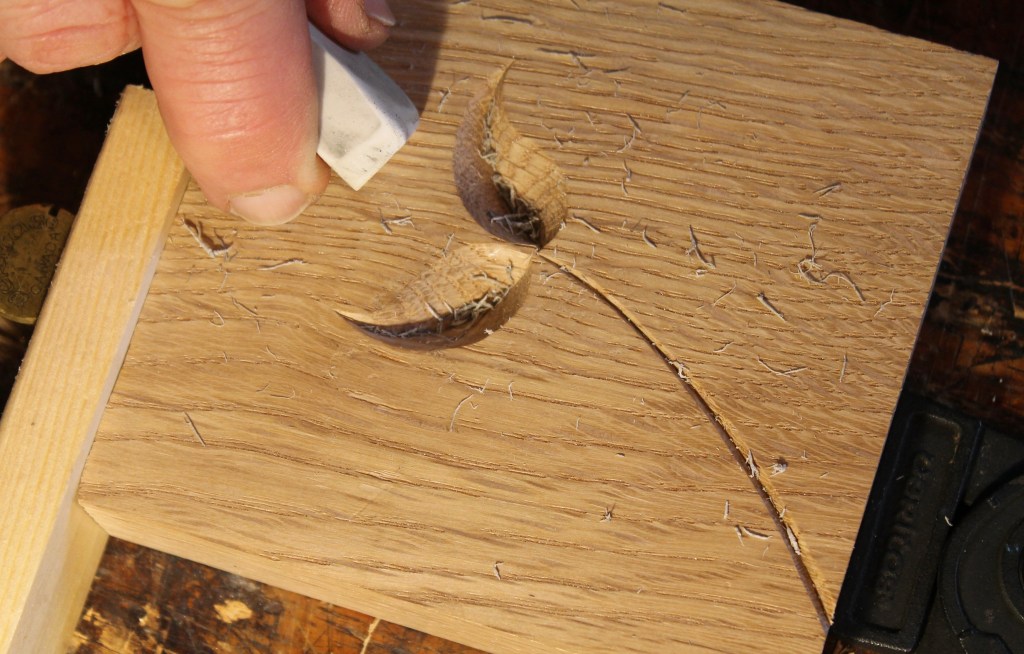
The pencil lines are a guide, but what matters is the the carving itself. Erase the pencil lies and see what you’ve got.
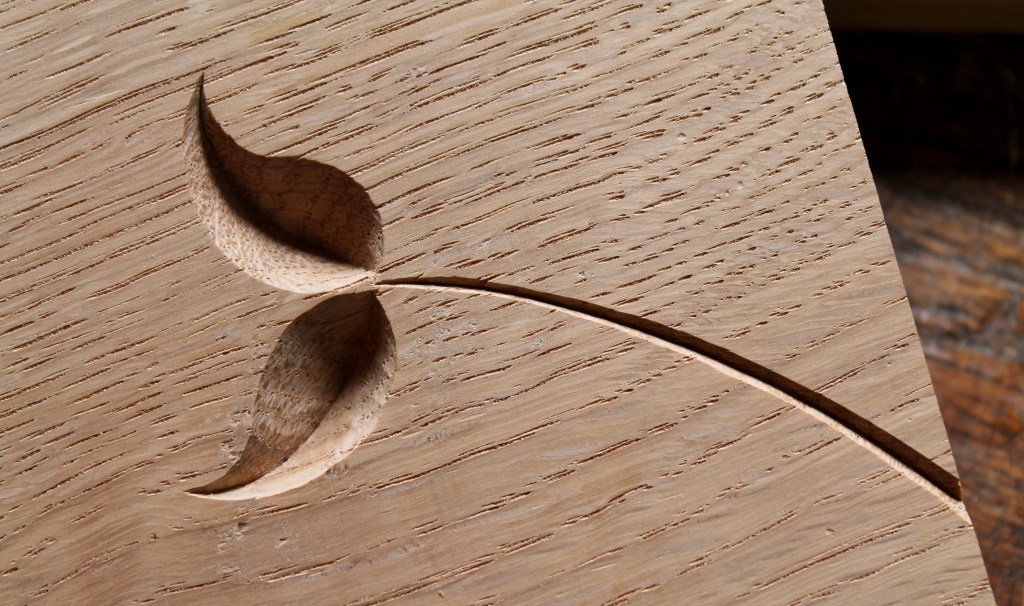
Maybe it’s a sign of an early spring!

Great post David!
LikeLiked by 1 person
Thanks for the tutorial about how to murder a gouge. I normally let my sloppy sharpening technique produce those rounded corners. 🙂
LikeLiked by 2 people
You’re a natural, Bob!
LikeLiked by 1 person
Bob, I feel your pain.
LikeLiked by 1 person
Yes, a another great post! Sharp photos and clear captions . You are an inspiration!
LikeLiked by 1 person
Another great tutorial. It’s amazing what you’re able to achieve with a box cutter and (elsewhere) a humble pocket knife.
In studying your work, which I do a lot, I’ve also wondered how you got those stems so well defined. Mystery solved!
Thanks.
LikeLiked by 1 person
Always good to see you working David and, as always, thanks for sharing!
LikeLiked by 1 person
So it’s 5:30 am here in Tasmania, and I now want don’t want to go to work but to build a drawing board and get on with some carving. I wonder if the kids at school would miss their teacher for a day! As always, this is such an inspiring post with a detailed explanation, seriously Mr. Fisher when are you going to write your book?
LikeLiked by 1 person
Ha! I hope you made the right decision, whatever that was, Chris.
Thanks for the encouragement regarding the book. Right now my plate is overflowing even more than usual, but the time will come. I look forward to it, seriously.
LikeLike
Pingback: Bowl from a Plank Part 3: Handle Pattern | David Fisher, Carving Explorations
Hi David,
Is this gauge shape the same you use for finger nail carving?
Thanks, FJ
LikeLike
Hi Frederik,
You can do finger nail carving with a bullnose gouge (a gouge with the corners pulled back). But I typically use a “normal” gouge (ground straight across) for finger nail cuts. Either way should work for fingernail cuts, but a a normal gouge won’t work for making these leaf shapes unless you make slicing cuts using the corner of the gouge, with lots of finesse.
LikeLike