
Earlier this month, I wrote a post about two walnut bowls, and there was a question in the comments about dealing with the tricky area where the grain direction merges across the middle of the hollow. I wanted to expand upon my answer with some more thoughts in this post.
I often direct all of my cuts generally toward the center of the hollow, which means cutting across, or obliquely to, the grain along the sidewalls. Another option, which I used on one of those walnut bowls, is to work directly with the grain from one end to the other. The tricky bit in that case is merging the cuts running head on into each other without going too far and lifting the grain on the other side of the divide.
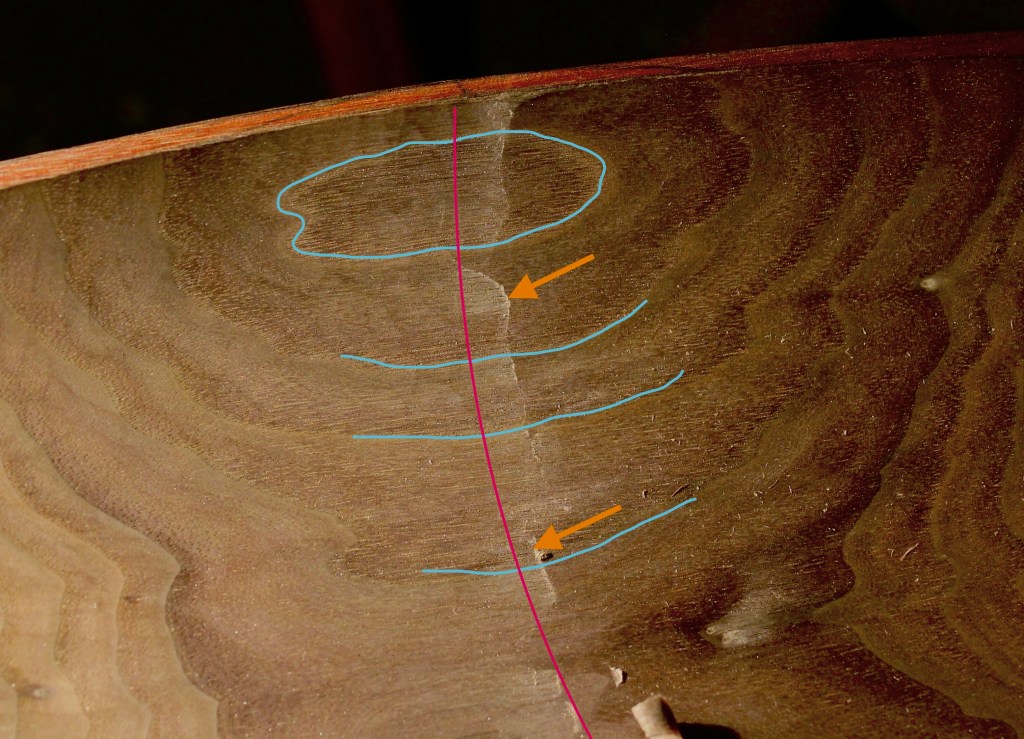
The growth ring pattern can be read to reveal the location of the dividing line. I’ve highlighted them (in part) in blue in the top photo. The center of those O’s and U’s indicates approximately where the dividing line (in red) will be. Shifting a light while you’re working will reveal areas where you’ve gone beyond it; the gold arrows point to a couple more obvious spots where I have gone a little too far after making a series of light paring cuts from the left. The light is being caught by the torn grain at the end of the cuts.

Now I can work my way down making successive wispy cuts from the right, allowing the edge to merge out of the cut before lifting fibers on the opposite side. Here I’m working with a very shallow sweep gouge for the subtle texture I wanted in this bowl. It may require a little back and forth, but you’ve also got to know when to leave well enough alone!
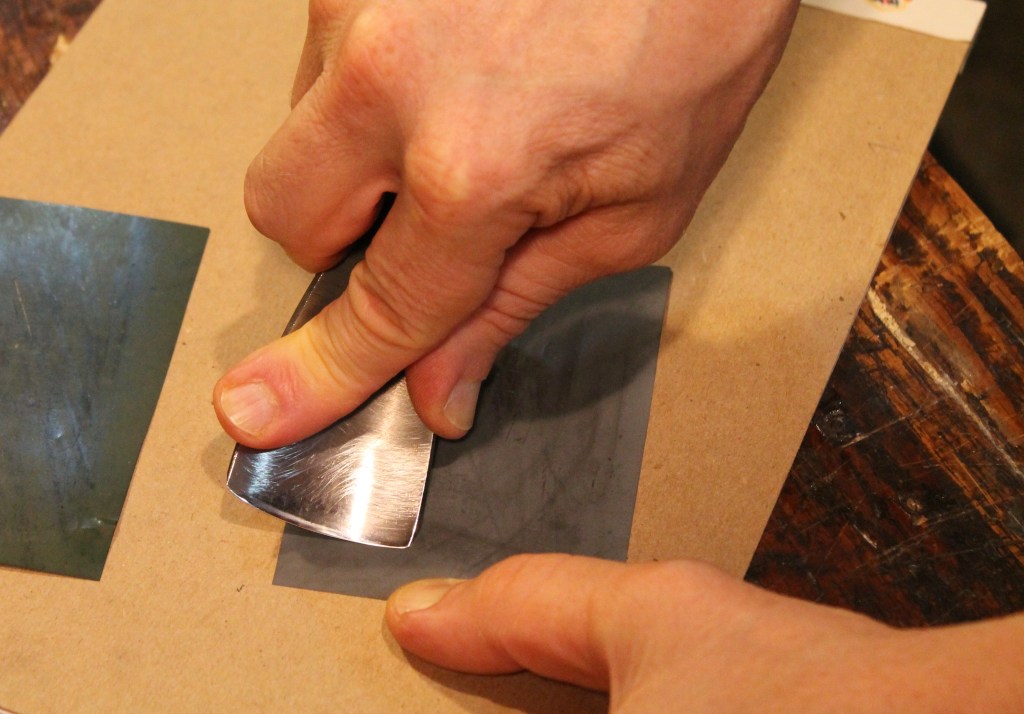
One thing’s for sure: this paring business goes a lot more smoothly if your gouge is sharp. I’ve got several posts about sharpening and there are many good ways to get sharp. I typically go from diamond stones, to a very fine ceramic, to a strop. A few months ago, I remembered I had some 3M sharpening film in a drawer. It’s another good alternative for refining the scratch pattern and polishing the edge. Essentially, it’s super fine sandpaper on a very thin strong plastic film. Looks like you can buy it lots of places, but I got mine from Lee Valley.
I have the 5 micron and the .5 micron. I just hold the edge of the sheet against some tablet cardboard with my left thumb, put the bevel flat on the film, then draw the gouge backward, while slowly rotating the edge.

The stroke finishes something like that. The stiff cardboard provides just a little bit of give to assure that the bevel is being polished to the edge without significant dubbing.
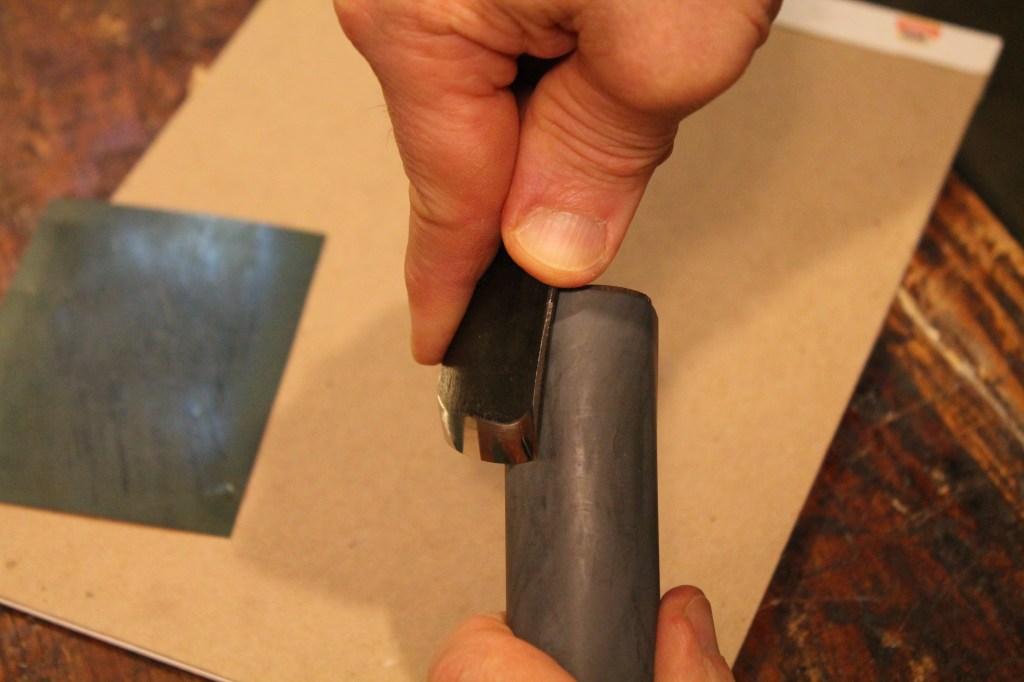
I hold the film around a dowel and rotating the edge back and across it for the inner bevel. Just a couple swipes.
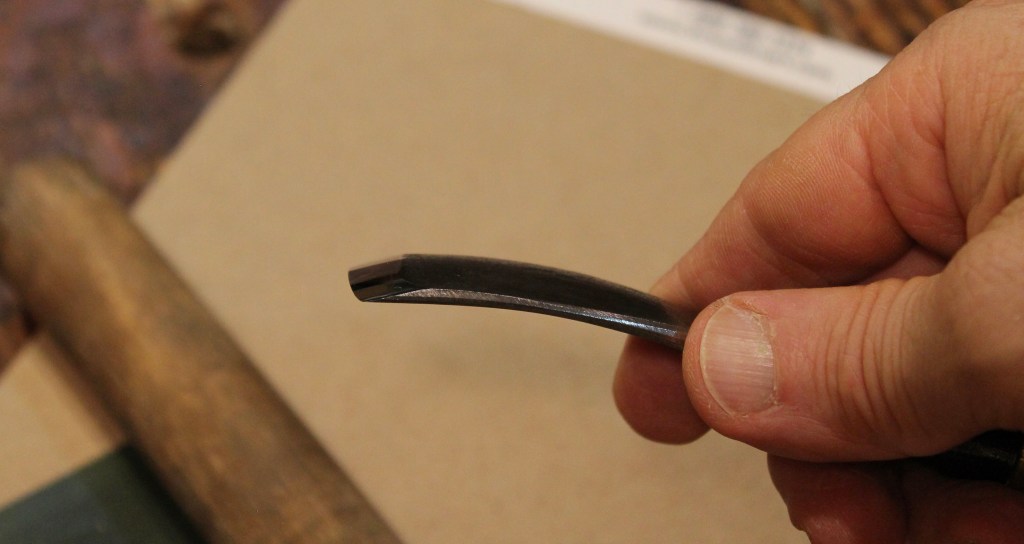
And I do need an inner bevel to keep the edge strong enough while allowing for a shallow outer bevel, which provides a lower (better in this case) angle of approach.

Hi David,
your post reminds me of reading the grain when carving a spoon bowl. Just on a smaller scale. Thanks for sharing your craft, I think a lot of people (including myself) have been inspired by your work and learned much.
Paul Dzioba
LikeLiked by 1 person
That’s a good point, Paul. Just the same as a spoon bowl, and similar on the outside of the spoon bowl. Thank you.
LikeLike
Thanks Dave for your input. I deal with opposing grain on a daily basis and when I am in that zone I lighten up on the blade and when I feel it change slightly I stop and work from the opposing side back and forth till I have a polished finish. Learning that feel takes a while but when you know it’s all muscle memory from there.
LikeLiked by 1 person
Good advice. You certainly do learn to feel grain opposition as much as see it. And that’s a good point to emphasize as well — very light cuts in that zone.
LikeLike
Good stuff. Thank you Dave. This is a part of the carving I struggle with — particularly at the bottom. Feels like I end up chasing myself down a deeper hole … til I run out of bowl. I’ve used a scraper on some of these areas, but not sure how the surface sheen matches.
LikeLiked by 1 person
Yeah, that center area can certainly be tricky, Phil. For me, in that area it especially comes down to the sharpness of the edge and extremely light cuts. It stinks when you run out of bowl! When we did that in 9th grade shop class, Mr. McInturf just had us glue another board on the bottom. Some ended up with very tall bowls.
LikeLike
Thanks Dave, in reference to sharpening, I use the wet dry sandpaper 1200 thru 2000 for that quick refinement of the gouge or knife edge. I just masking tape it to a piece of midfield and sharpen just like a Popsicle stick on the sidewalk. Then to the strop. It is amazing how sharp and durable the edge is. And the paper can be gotten at the hardware store at a good price. I stumbled into this and As you know a lot of folks overwork the edge when it needs only a touch up. For me it was like finding the holy grail. I use mostly the 1200 grit. Could go in to a mild rant about the complexities that are brought to us by the sharpening celebrities which I think is way overdone. I will save that for another day though.
LikeLiked by 1 person
I know what you mean, Bob. There are many ways to accomplish sharpening. Wet/dry paper works well. I use it sometimes depending on the situation. Sometimes I feel like using Arkansas stones, so I do. The concept is more important than specific equipment. These sharpening films are just another version of the sandpaper you’re using, but I think they go to much finer grits than typical wet/dry paper.
LikeLike
Dave,
As always, a really informative blog post!
I am finally starting to carve spoons and bowls, and will be referencing your blog, Willie, PF, etc.
An old Yankee proverb: “Life is a journey, enjoy the trail you make.”
Pete Magoon
LikeLiked by 1 person
I’m glad to hear you’ve embarked on your spoon and bowl journey, Pete. You can’t go wrong with a Sundqvist or a Follansbee.
LikeLike