

When I lay out the “rectoval” bowls like the walnut bowls featured in my most recent post, I usually simply sketch in the long side curves by hand. On those two bowls, I experimented with a technique using an improvised drawing bow.

The side rim of the bowl is defined by two non-parallel arcs. In the photo above, the outer arc needs to pass through the three points indicated by the blue arrows, and the inner arc by the red arrows. Notice that the distance between the arrows is narrowest at the widest point of the bowl, in this case about 8 or 9mm (5/16″ or so). The degree of curvature itself is a matter of taste, and I usually just say to myself, “Right about there looks good for this one.” A good starting point is to make the ends of the bowls about 80% (4/5) as wide as the middle. Then I transfer that point on the end wall to the other three quadrants (with a compass, for symmetry’s sake) and connect these three points with a continuous curve. I’ve done that, in the photo above as indicated by the pencil line connecting the three blue arrows. Now for the inner arc ending at my fingertips.
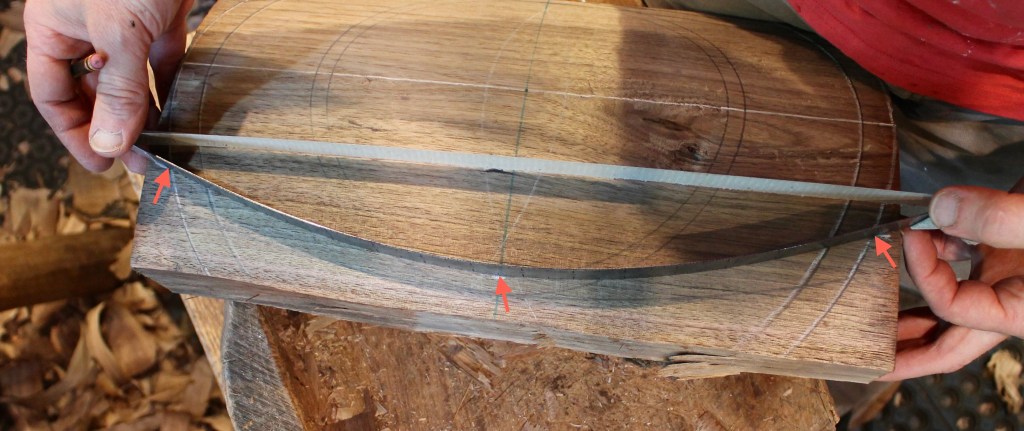
You can connect the dots by arranging the bowl on the bench with reference lines and making a giant compass to reach over the arch of the top. Or you can just draw by eye (sighting down the line can reveal irregularities in the curve). But this drawing bow turned out to be a good option too.
There are all sorts of commercially available drawing bows. I’ve never tried them, but I suppose they would work well. You could take a thin slat of wood or many other things and accomplish the same idea, but I just grabbed my trusty 18″ steel ruler off the wall and ripped a strip of duct tape. By folding the duct tape over the ends, the ruler was held in an even bend that could be adjusted easily by lifting and repositioning one end of the tape in a second. Any tape that doesn’t stretch would work as well. After a little fiddling, the arc passed through all three red points and could be traced.
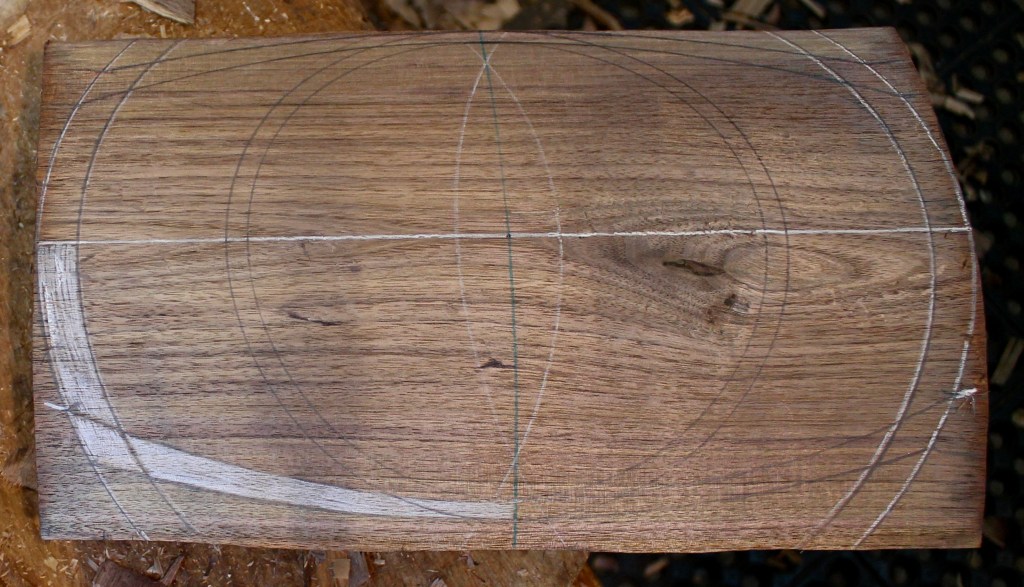
Here’s the layout filled in with white pencil on one quadrant. A bowl could be carved based on that with inner corners, but I rounded them.

Then, all that’s left is the carving.


Dave,
Thanks for this! You make it look so easy.
I watch Peter Follansbee videos re riving, and it seems he walks into the log yard and the best log splits itself, rives itself into the best possible pieces, and tells Peter “glad you came by”.
You and he have the uncanny ability to select the raw wood that will turn into your finished pieces.
An update on my patent for a log stretcher: in progress, nitpicky bureaucratic steps, but I will get there!
Pete
LikeLiked by 1 person
I have heard logs say that to Peter, Pete. I guess when you’ve rived as many logs as Peter, they communicate more clearly.
Good luck with the continued patent efforts.
LikeLike
Perfect! Thanks.
LikeLiked by 1 person
Thanks for sharing in such an understandable way. Beautiful bowls by the way.
LikeLiked by 1 person
I just bought a cheap 3,- EUR 50 cm rule with that in mind.
Instead of tape, Paul Sellers uses a light aluminium clamp to keep the rule under pressure.
LikeLiked by 2 people
Pingback: Bowl from a Plank | David Fisher, Carving Explorations