
Most of the bird bowls I make come from crooks, with the form following the flow of the fibers. In designing and making this bowl, I tried to achieve similar lines and a sense of movement within the constraints of a straight-grained blank. There were limits of course; no sharply raised tail allowed on this birdy. I began with a butternut log. Beautiful wood and a little on the softer side which made the deeply undercut hollow a little less daunting.
In future examples, I’ll refine my process for this design, but I’ll try to provide the basic idea here, beginning with the sketch below showing the initial shaping of the blank:
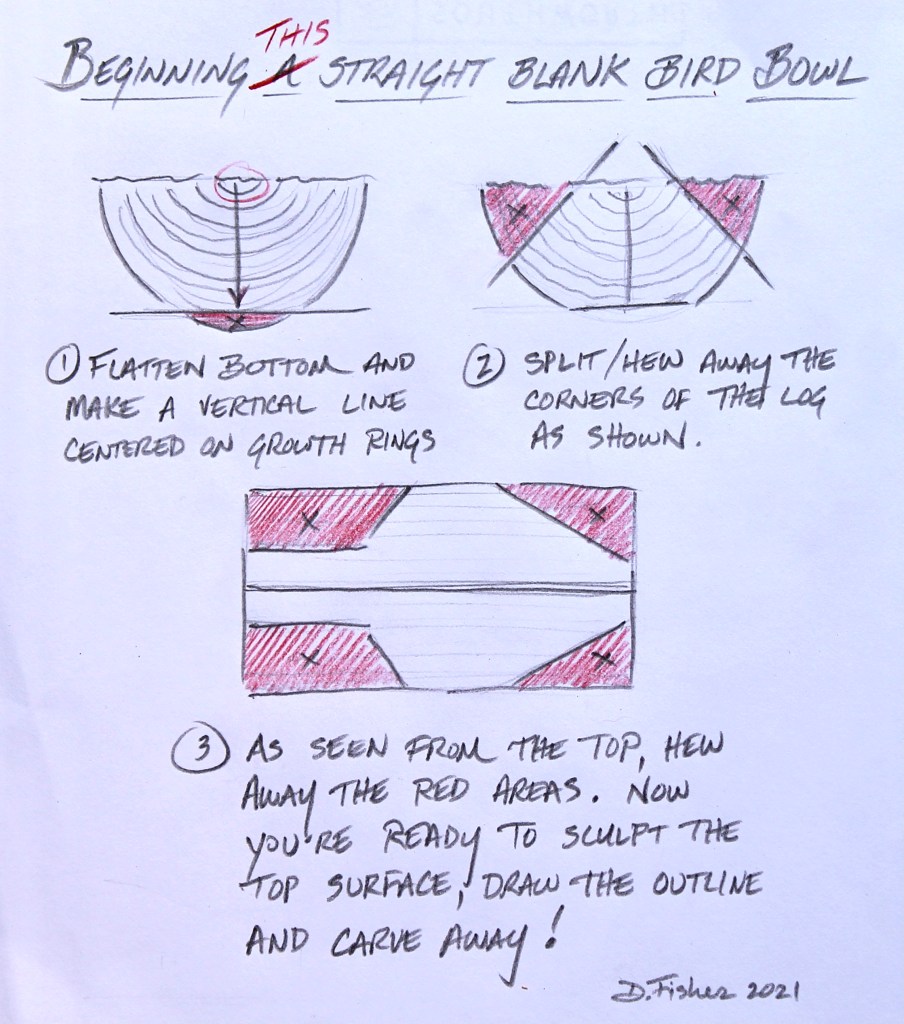
In step two, the blank is sort of a truncated version of a rooftop bowl blank. The more I think about it, to save material, you could start with a 1/4 section of a log and simply split off the inner corner. Either way, once you hew away the red sections in step three, much of the bulk is gone and you can sculpt the flowing curves into the upper surface like the photo below.
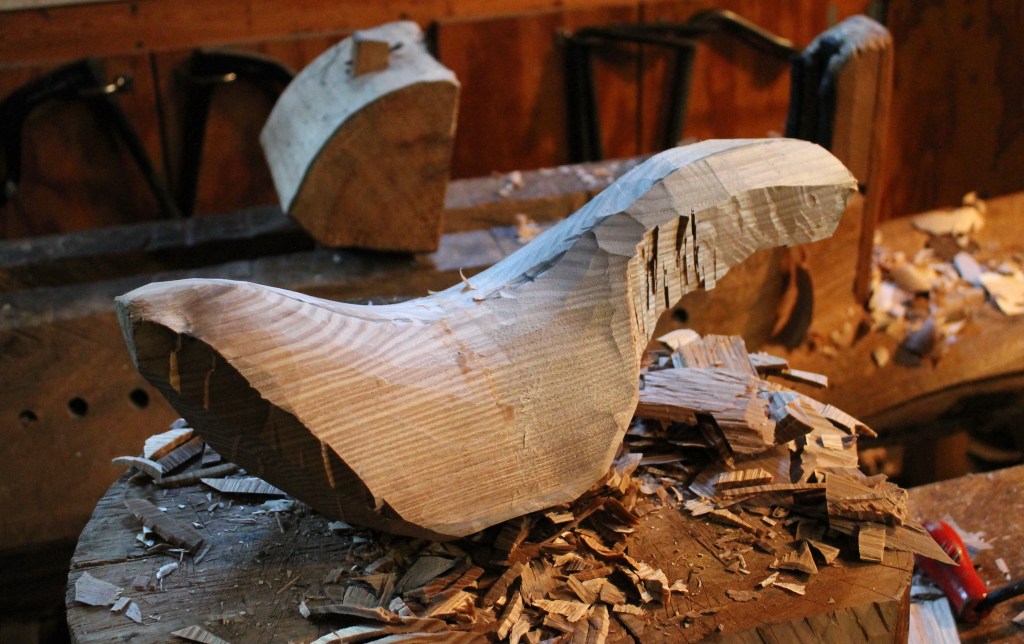
I started with an axe, then moved to a drawknife.
I also had marked the foot and hewed away the general bulk from the underside, redrawing the centerline above and below.
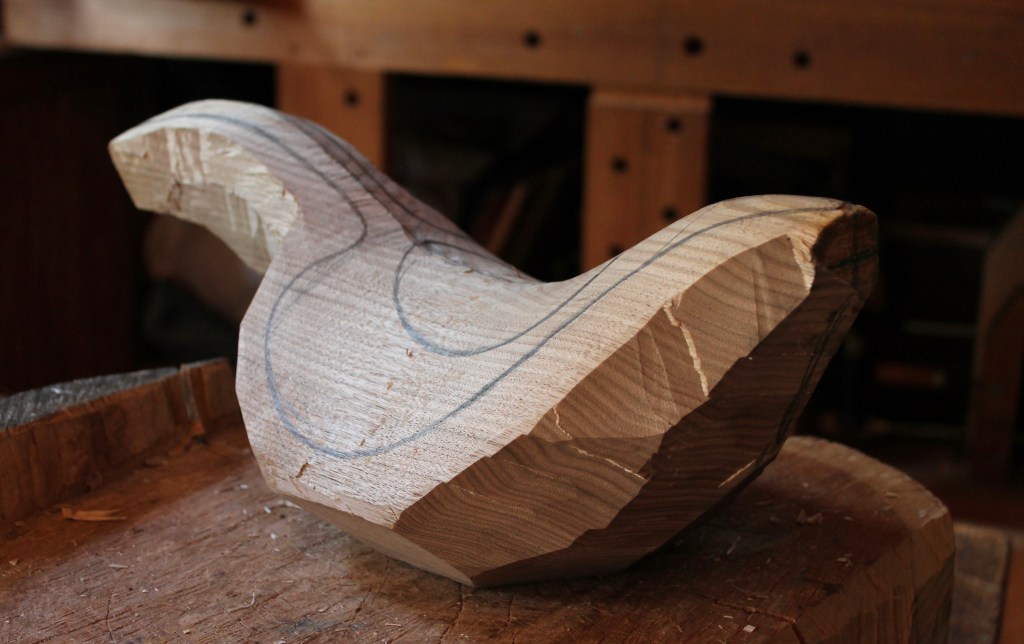
In the photo above, the upper surface has been refined a bit with a spokeshave and the outline sketched on. I just aim for some flowing, interesting curves and imagine how they will translate in three dimensions. I work it out on one side, then transfer a few key spots to the other side using compass techniques, then sketch out the other side. Then start chopping wood away and see how things take shape

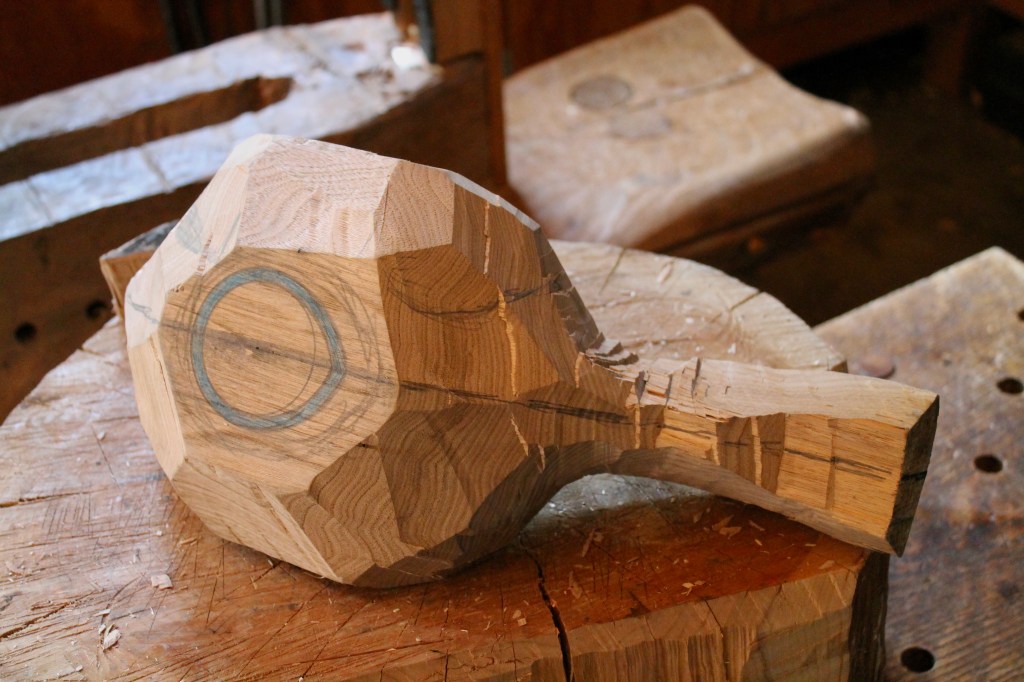
While I was waiting for the butternut bowl to dry, with the process was fresh on my mind, I started another one in white pine. The top half of a pine tree snapped off a couple blocks up the street and I was able to grab a beautiful clear chunk. So the photo above is the same general design, but in pine. You can see that I’ve begun to carve the hollow with a bent gouge, but that’s about as far as it can go. The combination of small opening, deep blank, and wide rim/wings, called for a steep and deeply undercut hollow.
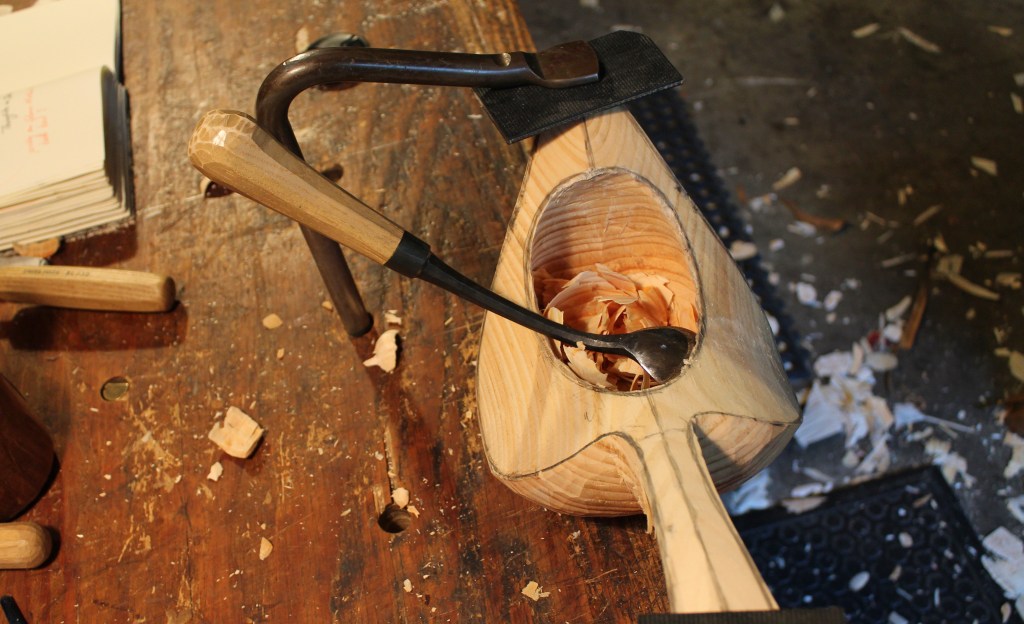
I moved to spoon gouges. In the photo above, I’m using a gouge I bought at Lie-Nielsen several years ago made my Nic Westerman. I think he calls it a “swan neck.” To begin the cut the gouge is nearly upside down, then the gouge moves in a tight arc under the rim…
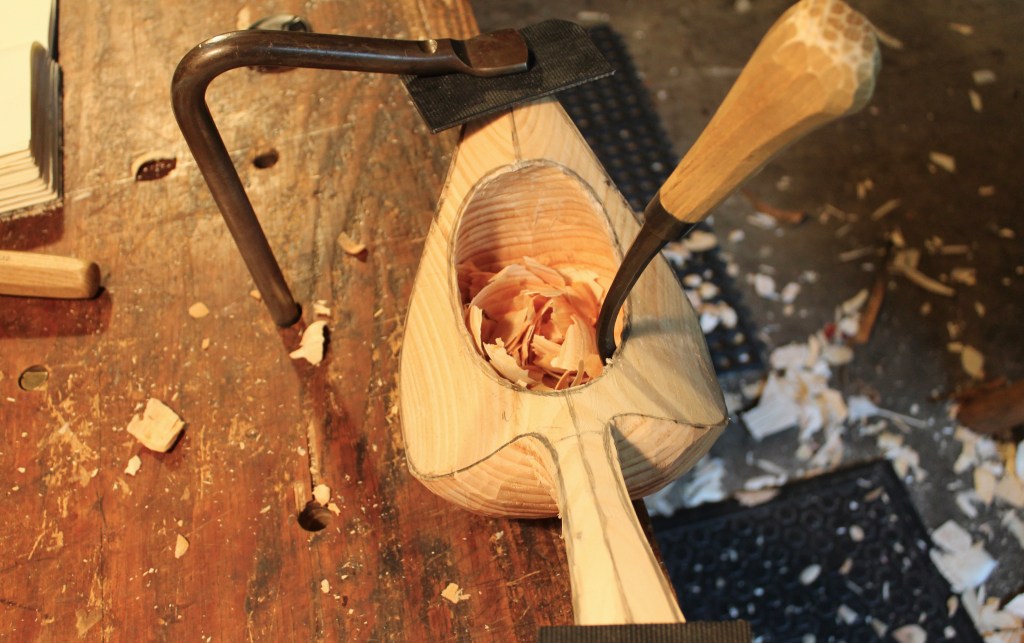
…finishing in the position above. But even the spoon bent gouges will only get so far.
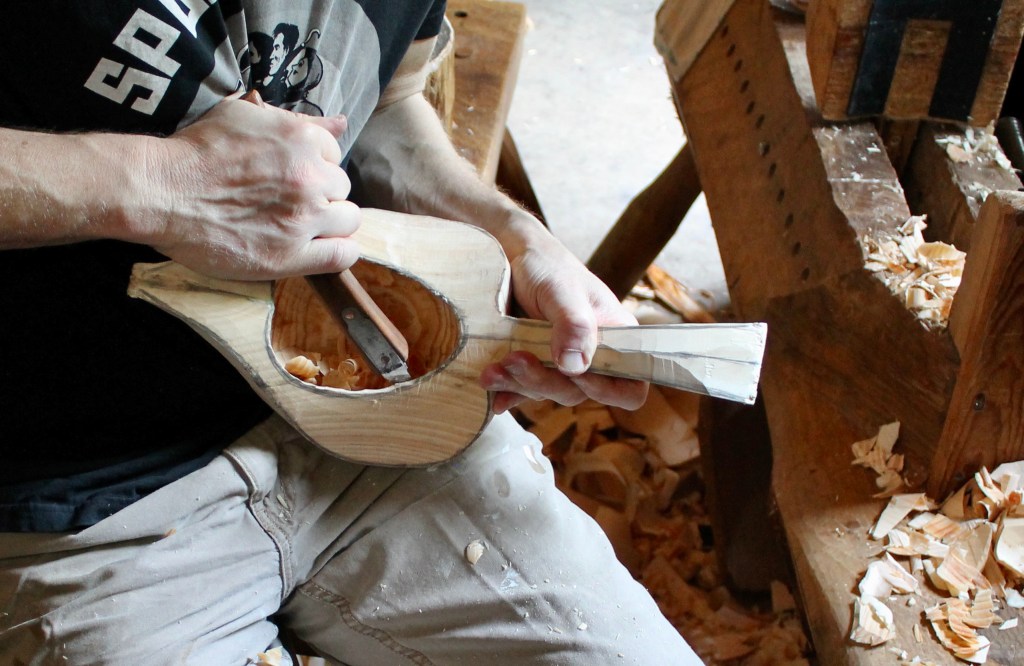
I was able to reach way back under with some creative manipulation of hook knives. Just a whole lot of fun problem solving and discovering new capabilities for tools and adapting techniques.
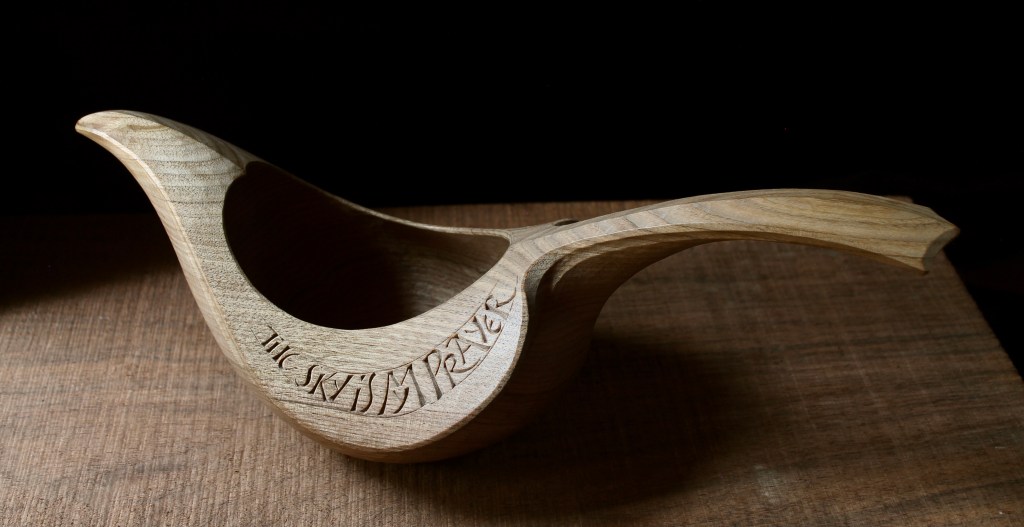
Here are a few more photos of the finished butternut bowl:
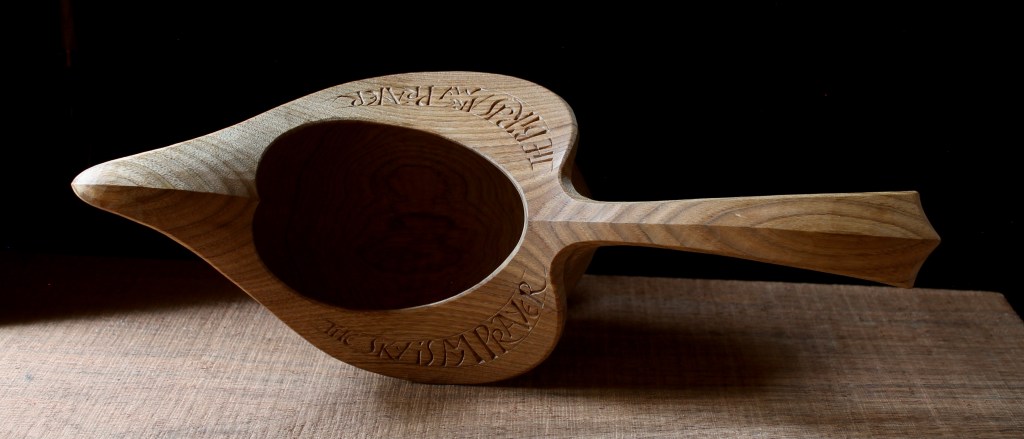
Centering the bowl withe the growth rings revealed a nice pattern on the top surface.
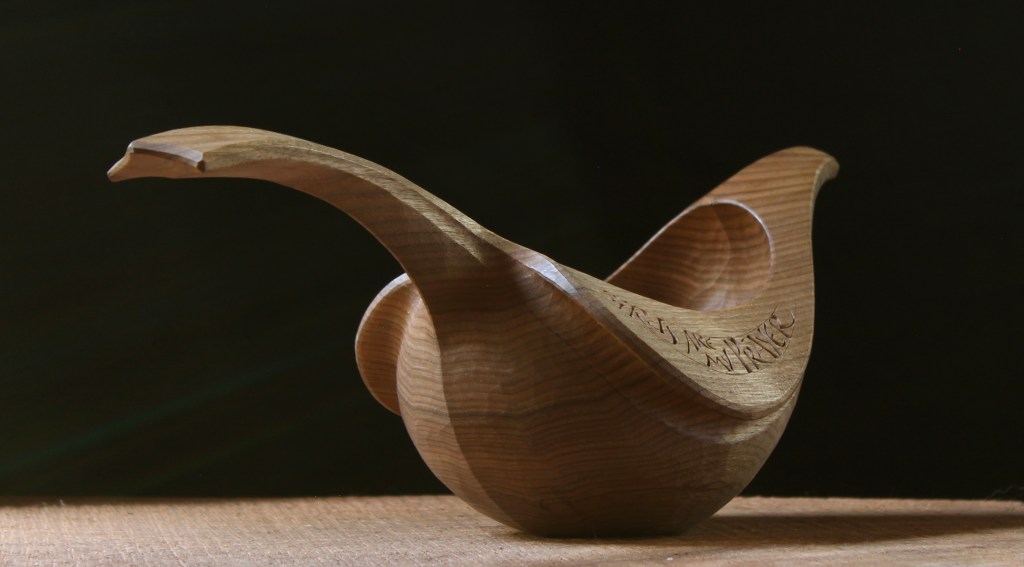
Undercutting the wings on the outside also contributed to keeping the walls of the bowl from being too thick. A bit of a keel where the tail rises lengthens the grain there. The tail can get thinner in the back half as it gets more in line with the fibers. All of the surfaces on this bowl were left from the edge of the tools. Overall length is about 16 inches (40cm).

Has anyone seen my apple?
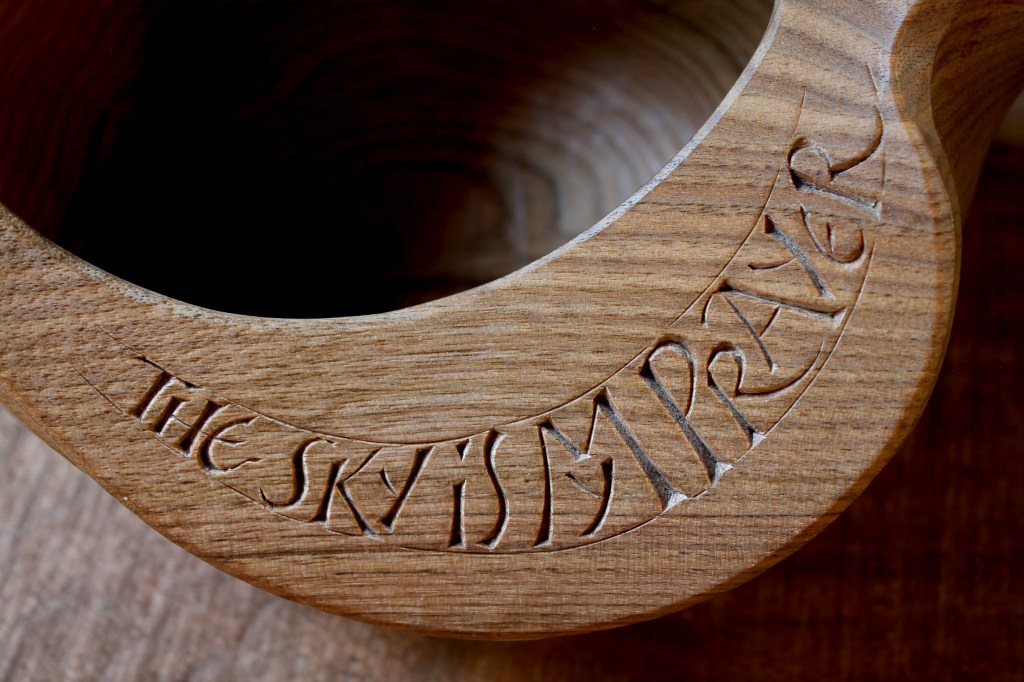
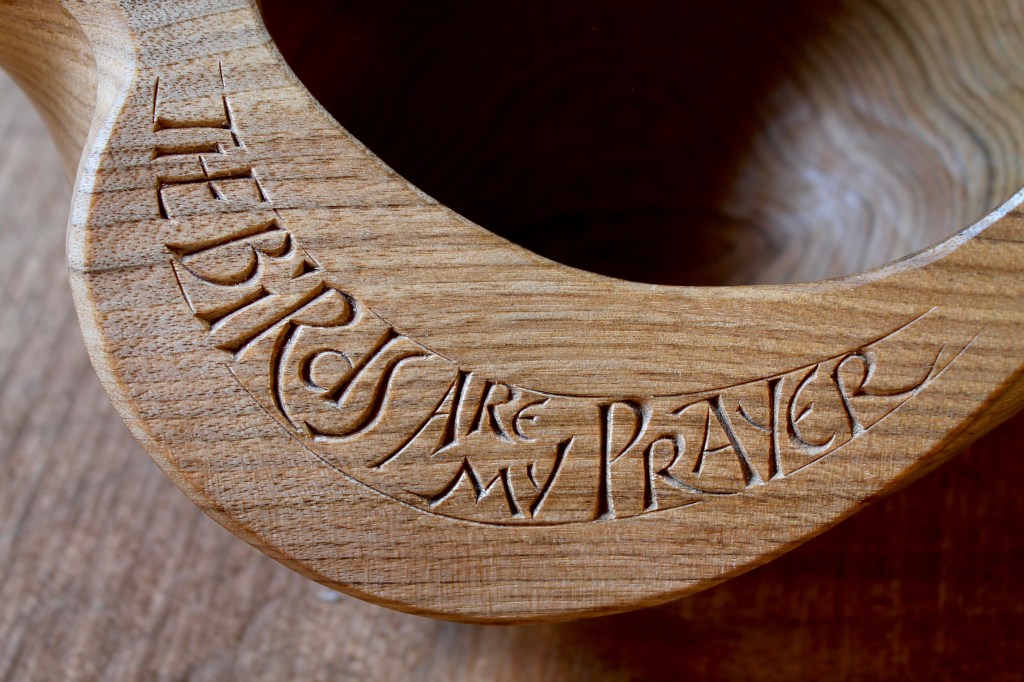
The recipient of this bowl appreciates the writing of Thomas Merton, so I cut an excerpt from Merton’s Thoughts in Solitude onto the wings.

Hi Dave: Fantastic, thanks for sharing how you proceed through your process a huge help for me! Peter Bion.
LikeLiked by 1 person
Hi Dave! Once again you created a new amazing figure. I admire your talent and ability to create a form that is so beautiful with simply looking curves. Jari Hirvonen, Finland
LikeLike
Thanks, Jari! Hyvää puunveistoa!
LikeLiked by 1 person
Hi Dave,
Beautiful work. Two observations: 1. I was immediately struck by the overhead image with apple. I could see a butler holding the tail and presenting the apple to a guest over his forearm. What a unique serving tray. 2. I also noticed a definite spade shape in the same image that I wasn’t expecting to see. It is so very interesting to see shapes inherent in nature’s design.
Thank you for sharing your work and providing a detailed explanation of process and design. I always learn from your writing.
LikeLike
Hi Wade. Sorry I had somehow overlooked your comment until now. Thanks very much for your thoughtful observations, I appreciate it.
LikeLike
Beautiful! I’ll have to give this type of bowl a shot one of these days. I really love the subtle finishing cuts. How is the chestnut bowl coming along?
LikeLike
I’ve started in on the dry carving now, Scott. Another post soon on the chestnut bowl. Thanks for asking.
LikeLike
Pingback: Odd Birds (and Other Winged Things) | David Fisher, Carving Explorations