

Several years ago, I wrote a post outlining my approach to keeping wood green, handling it during the carving process, then letting it dry and so on. As I was carving this bowl recently, I read back through that post. Turns out, not much has changed in the way I go about it.

For this one, I actually recorded the weight over a couple weeks. I usually don’t record the weight so extensively, and often I just go by feel, but it does show how the rate of moisture loss slows over time. There was a loss of about 14g per day over the first few days. A couple weeks later, the rate had slowed to about 2g per day.
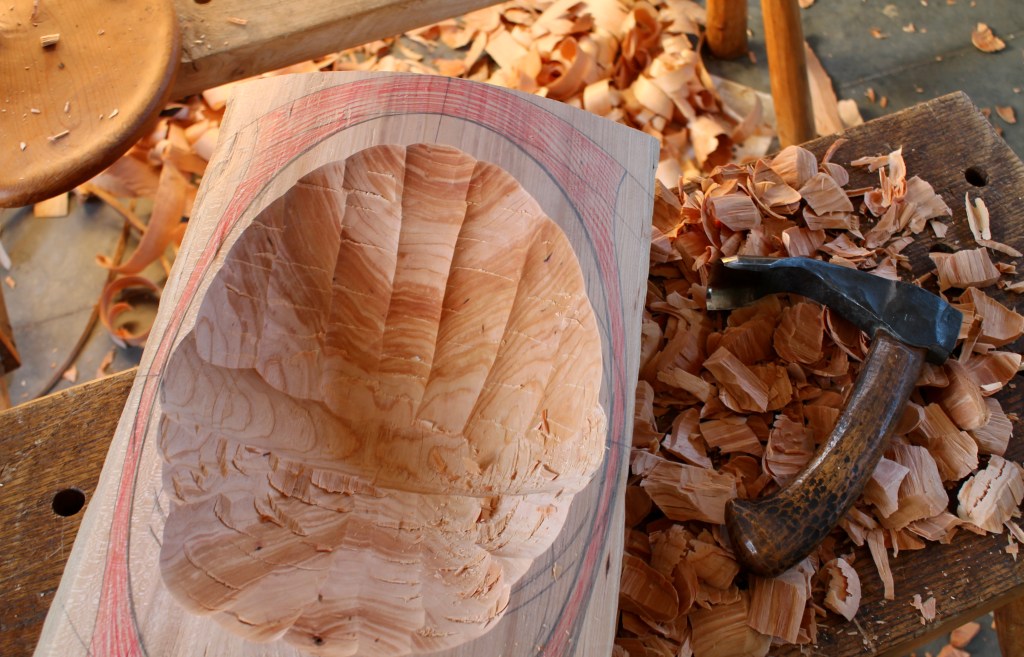
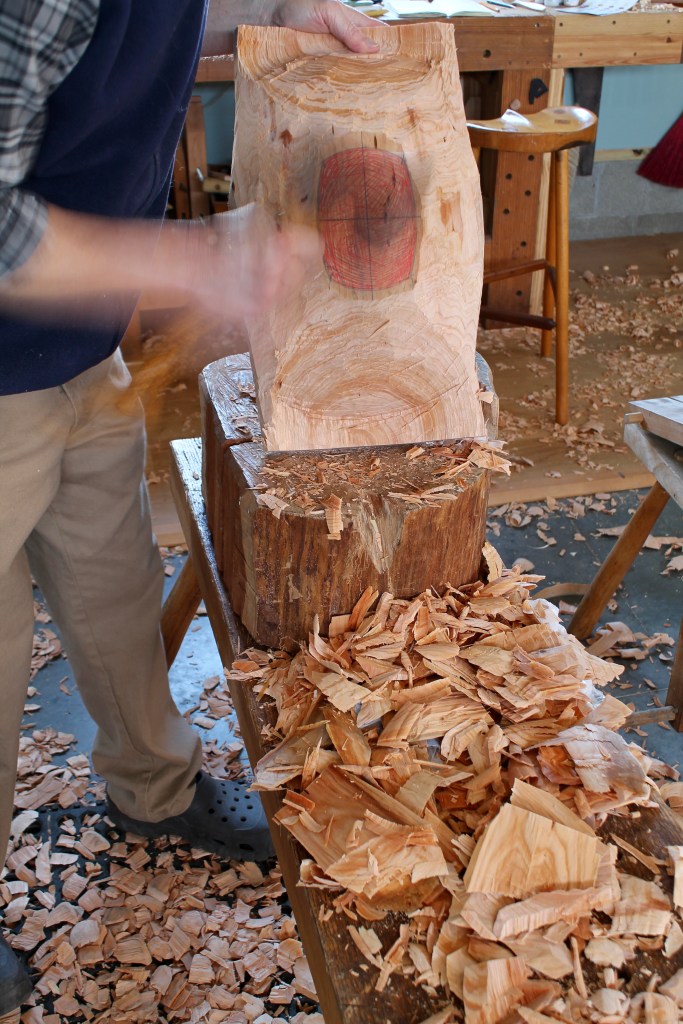
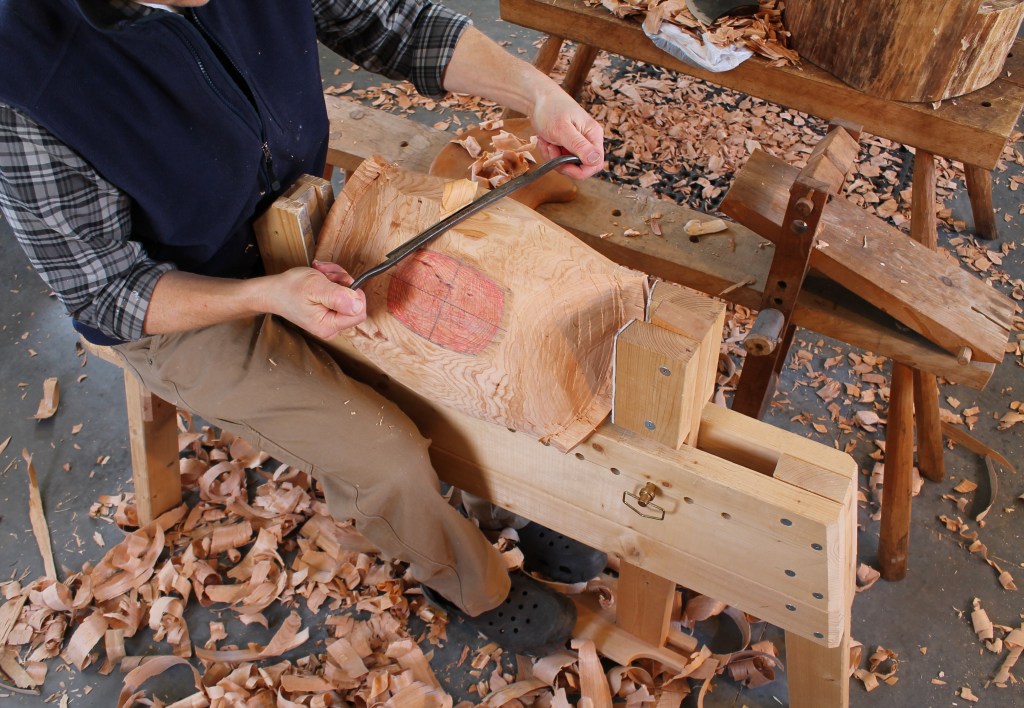
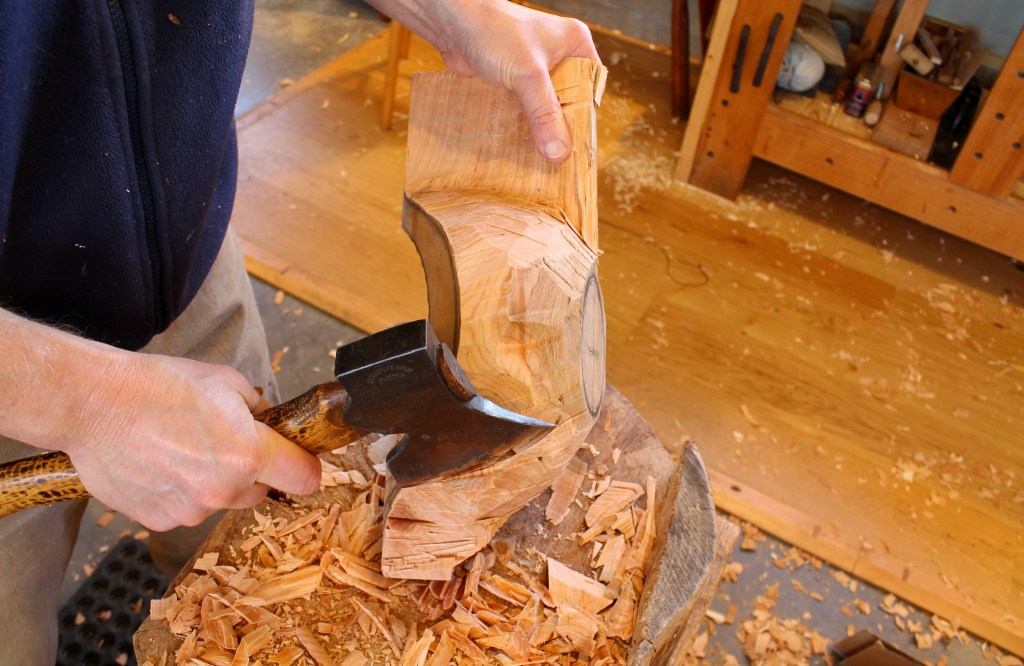
Backing up a bit, there are a few shots in the slideshow below, all during the green carving stage before drying.

While that one was drying, I started in on another green chunk of cherry to rough out a hen bowl. It had been awhile, so it was good to revisit the form.
And now that one’s under wraps. I think old bed sheets are about perfect to slow the drying. They’re thin enough to not impede the drying too much, and big enough to wrap in a few layers to slow things down more if necessary.

Hopefully we’ll see both of these bowls further along soon.

I like to place my green, roughed out bowls into two Kroger paper bags. I leave them in my garage. After one day I remove the bowl and place it into the outer bag that is somewhat damp. I now use a “new” Kroger bag as my second bag. I lay the very damp original inner bag off to the side to dry. I keep repeating this process for about a week and a half (I typically use a rotation of four bags). By this time I take the bag encased bowl into the house and repeat the process for another week and a half. I then will remove the bowl from the bags and allow it to dry in the house for a week or two. Then I begin my finish work. It has worked well for me especially when it comes to prevent the cracking of the wood.
Thank you for your beautiful work and your willingness to share your ideas and methods with us.
LikeLiked by 1 person
Greg, thanks for sharing your procedure. Makes perfect sense, especially the rotation of the bags.
LikeLike
Thank you for always excellent explanations. So I can learn a lot from you. Carving bowls out of greenwood is an activity which produces a lot of wet chips. What do you do with the chips? How do you store them? Do you dry the chips? If yes, how?
I would be glad to know something about your way of treating/handling the chips.
Best Regards from Germany
Bernd Grunwald
https://www.hobbyschnitzen.de/Schnitzerforum/thread/3613-saunal%C3%B6ffel/ Saunalöffel hobbyschnitzen.de
>
LikeLiked by 1 person
Bernd, I don’t usually bother to dry the chips except for those I plan to use for fire starting. Most of them get shoveled off the shop floor and taken directly outside for mulch around plants or spread onto trails. I suppose if I were in a city, I’d dry and bag them and get them to someone who could use them. Sometimes, I’ll save some of the chips and shavings of certain species (apple, hickory…) for friends who use them in their smokers.
Beautiful spoon, by the way. Thanks for your comment and questions.
LikeLike
Thank you, Dave, for your answer. In buckets the chips will not really dry. Therefore, my idea was to use 5 stackable folding boxes to store/dry the chips. The boxes are pervious to air. Placed on a skateboard they can be moved easily within my workshop. We don’t want to have the chips outside for mulch in our garden, hence they will be burned (in case of no other use).
I really appreciate your compliment concerning the sauna spoon. Thank you very much.
Kind regards Bernd
>
LikeLike
Hi David. I am new to carving and have been immensely inspired by your work and blog posts. I just finished working my way thru all of them. Thank you.
I have a question about dealing with green wood in desert climates. Last fall cut down a sour cherry tree that was killed by borers over the summer. It’s so dry here that I could see checks starting to form on the stump in less than an hour. I tried slathering on a couple of coats of water based latex house paint on the cut ends of pieces I wanted to work with immediately after cutting them, but that didn’t work. I can put freshly cut wood into plastic bags and that works, but what is the best way to carve a piece? When the wood is out of the bag and being carved, a lot of surface area is exposed to very dry air and checking soon follows.
LikeLiked by 1 person
All of them!? Wow — Thanks Dean.
That’s an interesting question. With your temperatures so high and the humidity so low, I’ll bet it’s a real concern. I’ll trade you some of our summer humidity! I guess, control what you can. Keep any breeze off of the bowl during the carving process, and put it back in the bag during any breaks, even if it’s only for a few minutes. Even here in Pennsylvania, I avoid carving a bowl outside on a windy, hot, sunny day. The wind makes a big impact. I wish I had a better solution to suggest for you. Maybe some folks who carve in a similar climate will have some suggestions. I’d be interested in hearing them too.
LikeLike
I’m carving now, but I used to turn green wood, often wet enough to sling water out as it spun in the lathe. I learned to rough turn it to thick wall, wrap it in one or two layers of newspaper, put the wrapped bowl in paper grocery bag, and the bag in a card board box, usually a Xerox box from work from reems of copier paper. I put a label on it with wood, date tree was downed, date turned. Depending on season, ambient temperatures, I learned to feel the boxes, and developed a sense for when to start removing layers of paper or bags. Usually in 4-6 weeks, I could remove the newspaper, put the bowl back in the paper bag, back in the box, mark the date for less paper. for another 4 or so weeks. Initially, the paper, bag and box acts like wick, drawing moisture out, but then acts as moist barrier, with a slow constant drying rate. They never had a crack or split, but often it warped, so I could now turn a dry bowl because the walls were thick enough to get to the final shape. About the chips, when dry, on a lathe they served as great burnishing.
LikeLiked by 1 person
Thanks for sharing that procedure, Arnie. That sense you developed is a key component. You’ve also hit upon one of the big differences with drying for turning and drying for carving. With a carved piece, the final surface carving can just go with the way the piece moved during drying, so there’s no need to leave much extra wall thickness as there is with a bowl that will be returned to the lathe for completion. That thinness also allows for somewhat faster drying without as much risk of cracks.
LikeLike
Pingback: Cherry Bowl Finished | David Fisher, Carving Explorations