
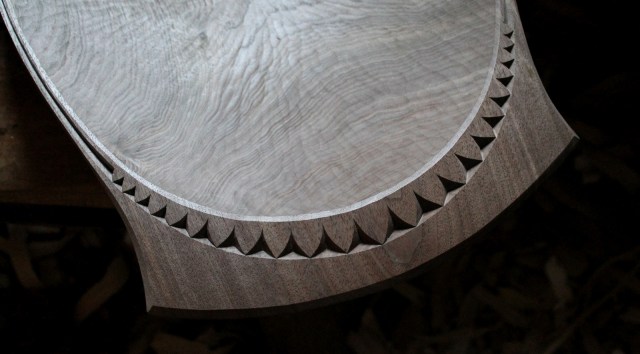
At least that’s the way I see a design like this — draping like a necklace around the rim. l like how the facets of the recesses catch the light and shadows in different ways. I’ve done several versions; one of them can be seen in the lead photo of my blog as a whole. That version is simpler to layout and cut thanks to it’s parallel border, smaller chips, and straight cuts (as compared to this variation that I carved again today with larger, curved recesses that gradually diminish in size).

 Careful slicing with a drawknife leaves the upper surface of the handles cut clean and very subtly faceted.
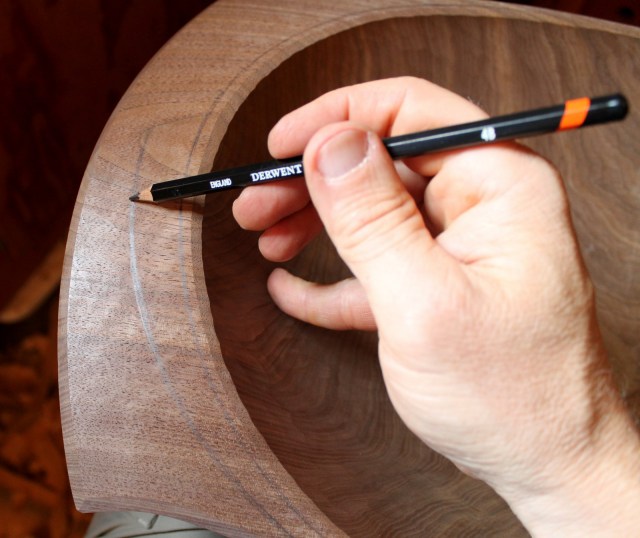
On these dry finished surfaces, I use a soft pencil (not water soluble), so that the wood is not indented and the graphite can be erased with a good non-abrasive eraser. I just sketch on the outline by eye, using my little finger as a sort of pivot point to help with control.
Recesses this large (about 3/4″ across) can’t be excavated in one chunk. I remove much of the bulk with a v-tool and chisel…
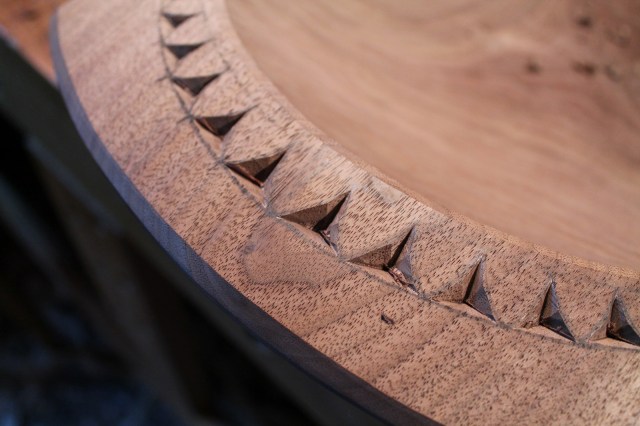
…then finish things off with careful curving slices of a skew chisel. (My little work light casts an odd yellowish hue.)
The long recesses along the sides start with a v-tool, but get cleaned up and trimmed with a knife. Take your time.

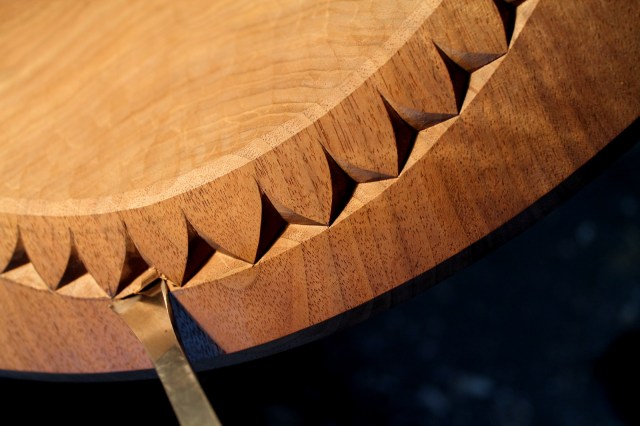
 The carving gouge provides some size perspective; roughly 24″ x 14″. Ready for oil.

its so nice how some detail can add so much to a bowl
LikeLiked by 1 person
David,
I truly appreciate your step-by-step instructions. The photography and your explanations give me the courage to attempt these techniques myself (one day).
LikeLiked by 1 person
the layout of the graduated “pearls ” of the necklace seems a bit daunting….any tips? Please.
LikeLike
I start by sketching on one quarter of the bowl (i.e. from the center of the handle to one corner). Trust your eye and sketch on the slight curves of recesses starting with the biggest. Keep in mind that each “gothic arch” is oriented perpendicular to the edge of the hollow at that point. Sounds complicated, but it is really intuitive. Don’t overthink it, and just let your eye and fingers do their thing. As you draw the curves alike as you proceed, the width of each section naturally decreases, making each section smaller overall. These are just guidelines. The only line that matters in the end is that made by the motion of the tool.
Once you are happy with the look of that one quarter, you can transfer the basic graduated widths to the other three quarters with a pair of dividers. These will guide the sketching on the other three quarters. You can also practice on paper until you feel comfortable.
Of course, this is just the way I go about it. You may come up with a completely different method that works for you.
LikeLike
Pingback: The Nimble Fishtail | David Fisher, Carving Explorations