
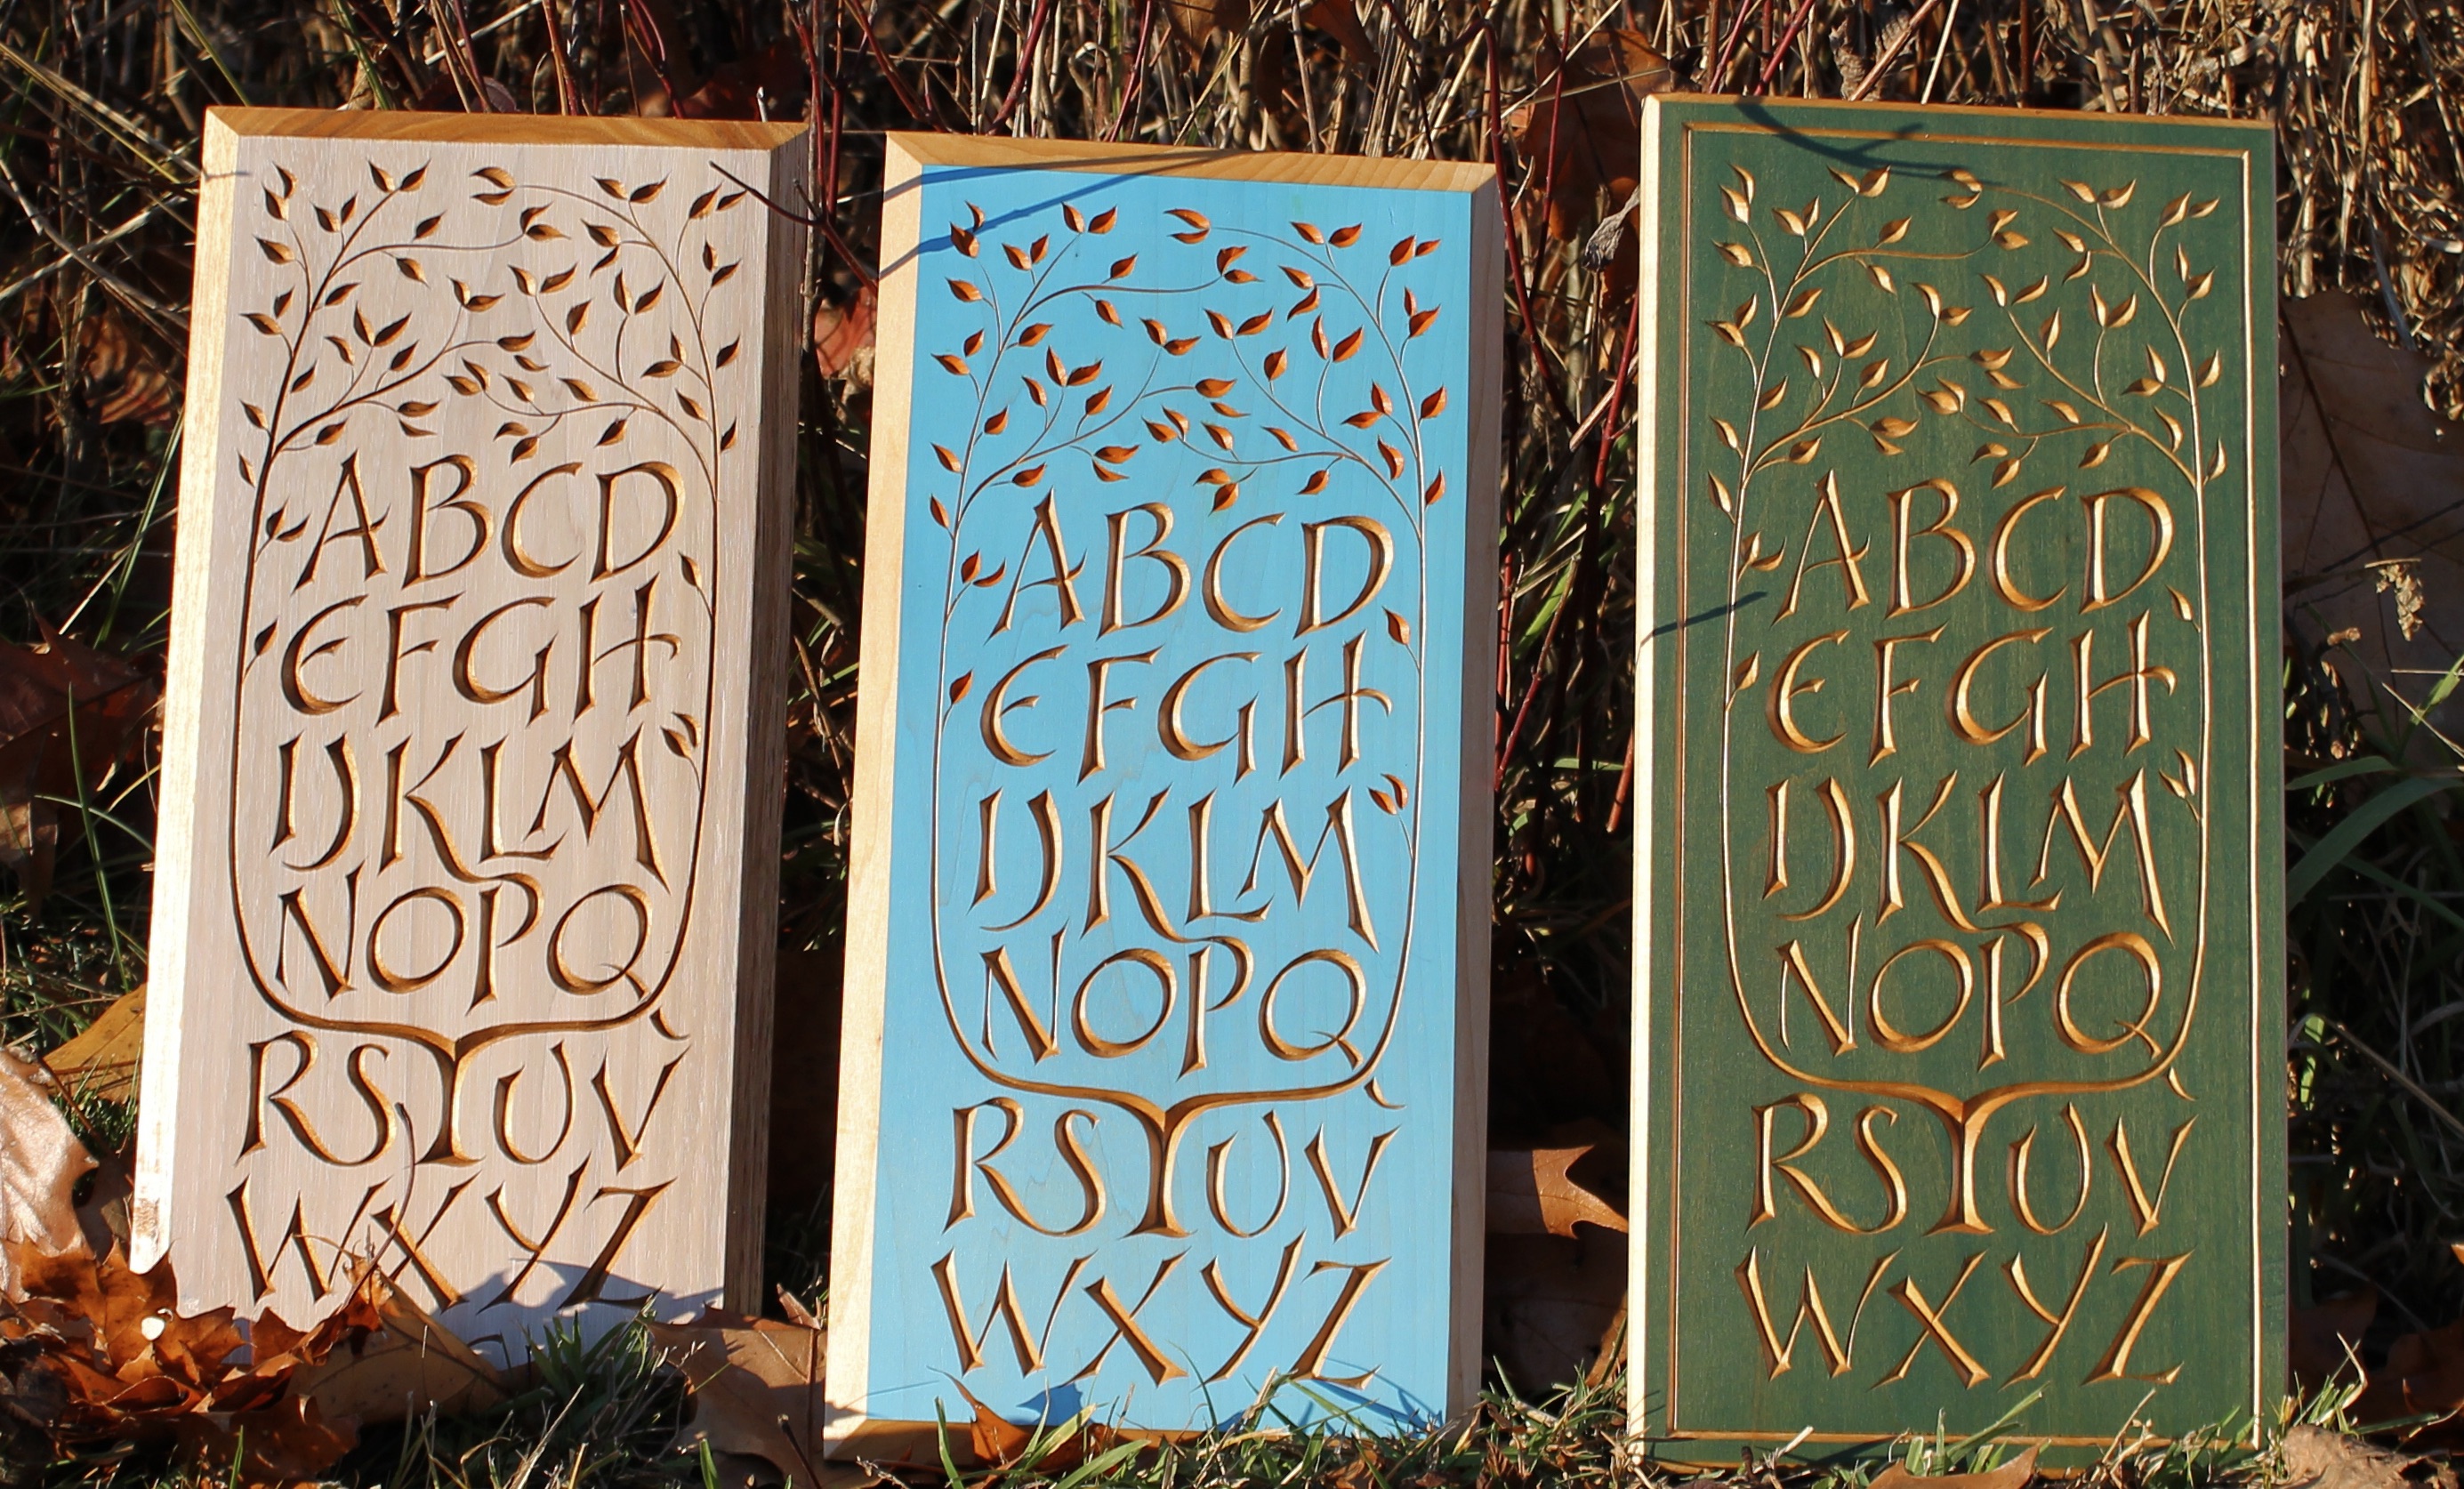
I’ve enjoyed carving several of these alphabet boards since I designed this “QRS-Tree-UV” pattern three years ago. I wrote about the design process in a blog post. I’ve finally taken the time to get things set up to make the pattern available for purchase. The design is versatile in that it can be scaled up or down, carved in different woods, combined with different color schemes or no color at all. Although it was designed with knife carving in mind, I suppose it could lend itself to different mediums such as paint or embroidery, or whatever comes to mind. Back tattoo?
At this scale, I prefer to carve the design in a relatively soft wood like basswood or butternut with a knife, but you can use whatever knife or carving methods you prefer. Basswood (a.k.a. linden or limewood) is widely available. I usually start by preparing a board roughly 14″ x 6 5/8″ x 3/8″ (35.7cm x 17cm x 1cm). Those dimensions can vary depending on your desired border area and thickness preference. One good online source that custom prepares quality basswood is Heinecke Wood Products.
The video below was recorded during Spoonfest 2019. I discuss knife letter carving with Barn the Spoon and then demonstrate cutting a letter. Every cut I use for the QRS-Tree-UV design is right there in this brief demonstration. It’s just a matter of applying these cuts to whatever shapes one wishes to carve, an A or a B or a character from the Klingon alphabet. It mainly comes down to practice and repetition to develop the skill, understanding of the material, and muscle memory. Whatever tool or method you are using, take your time and be patient with yourself. Aesthetically, the overall design is more important than flawless execution, so you can get away with poor cuts. I do!
In the slide show below (go through the images and captions), I present some general information about my approach to this design. There are also many posts available on my blog about letter carving (see the topic menu on the blog).
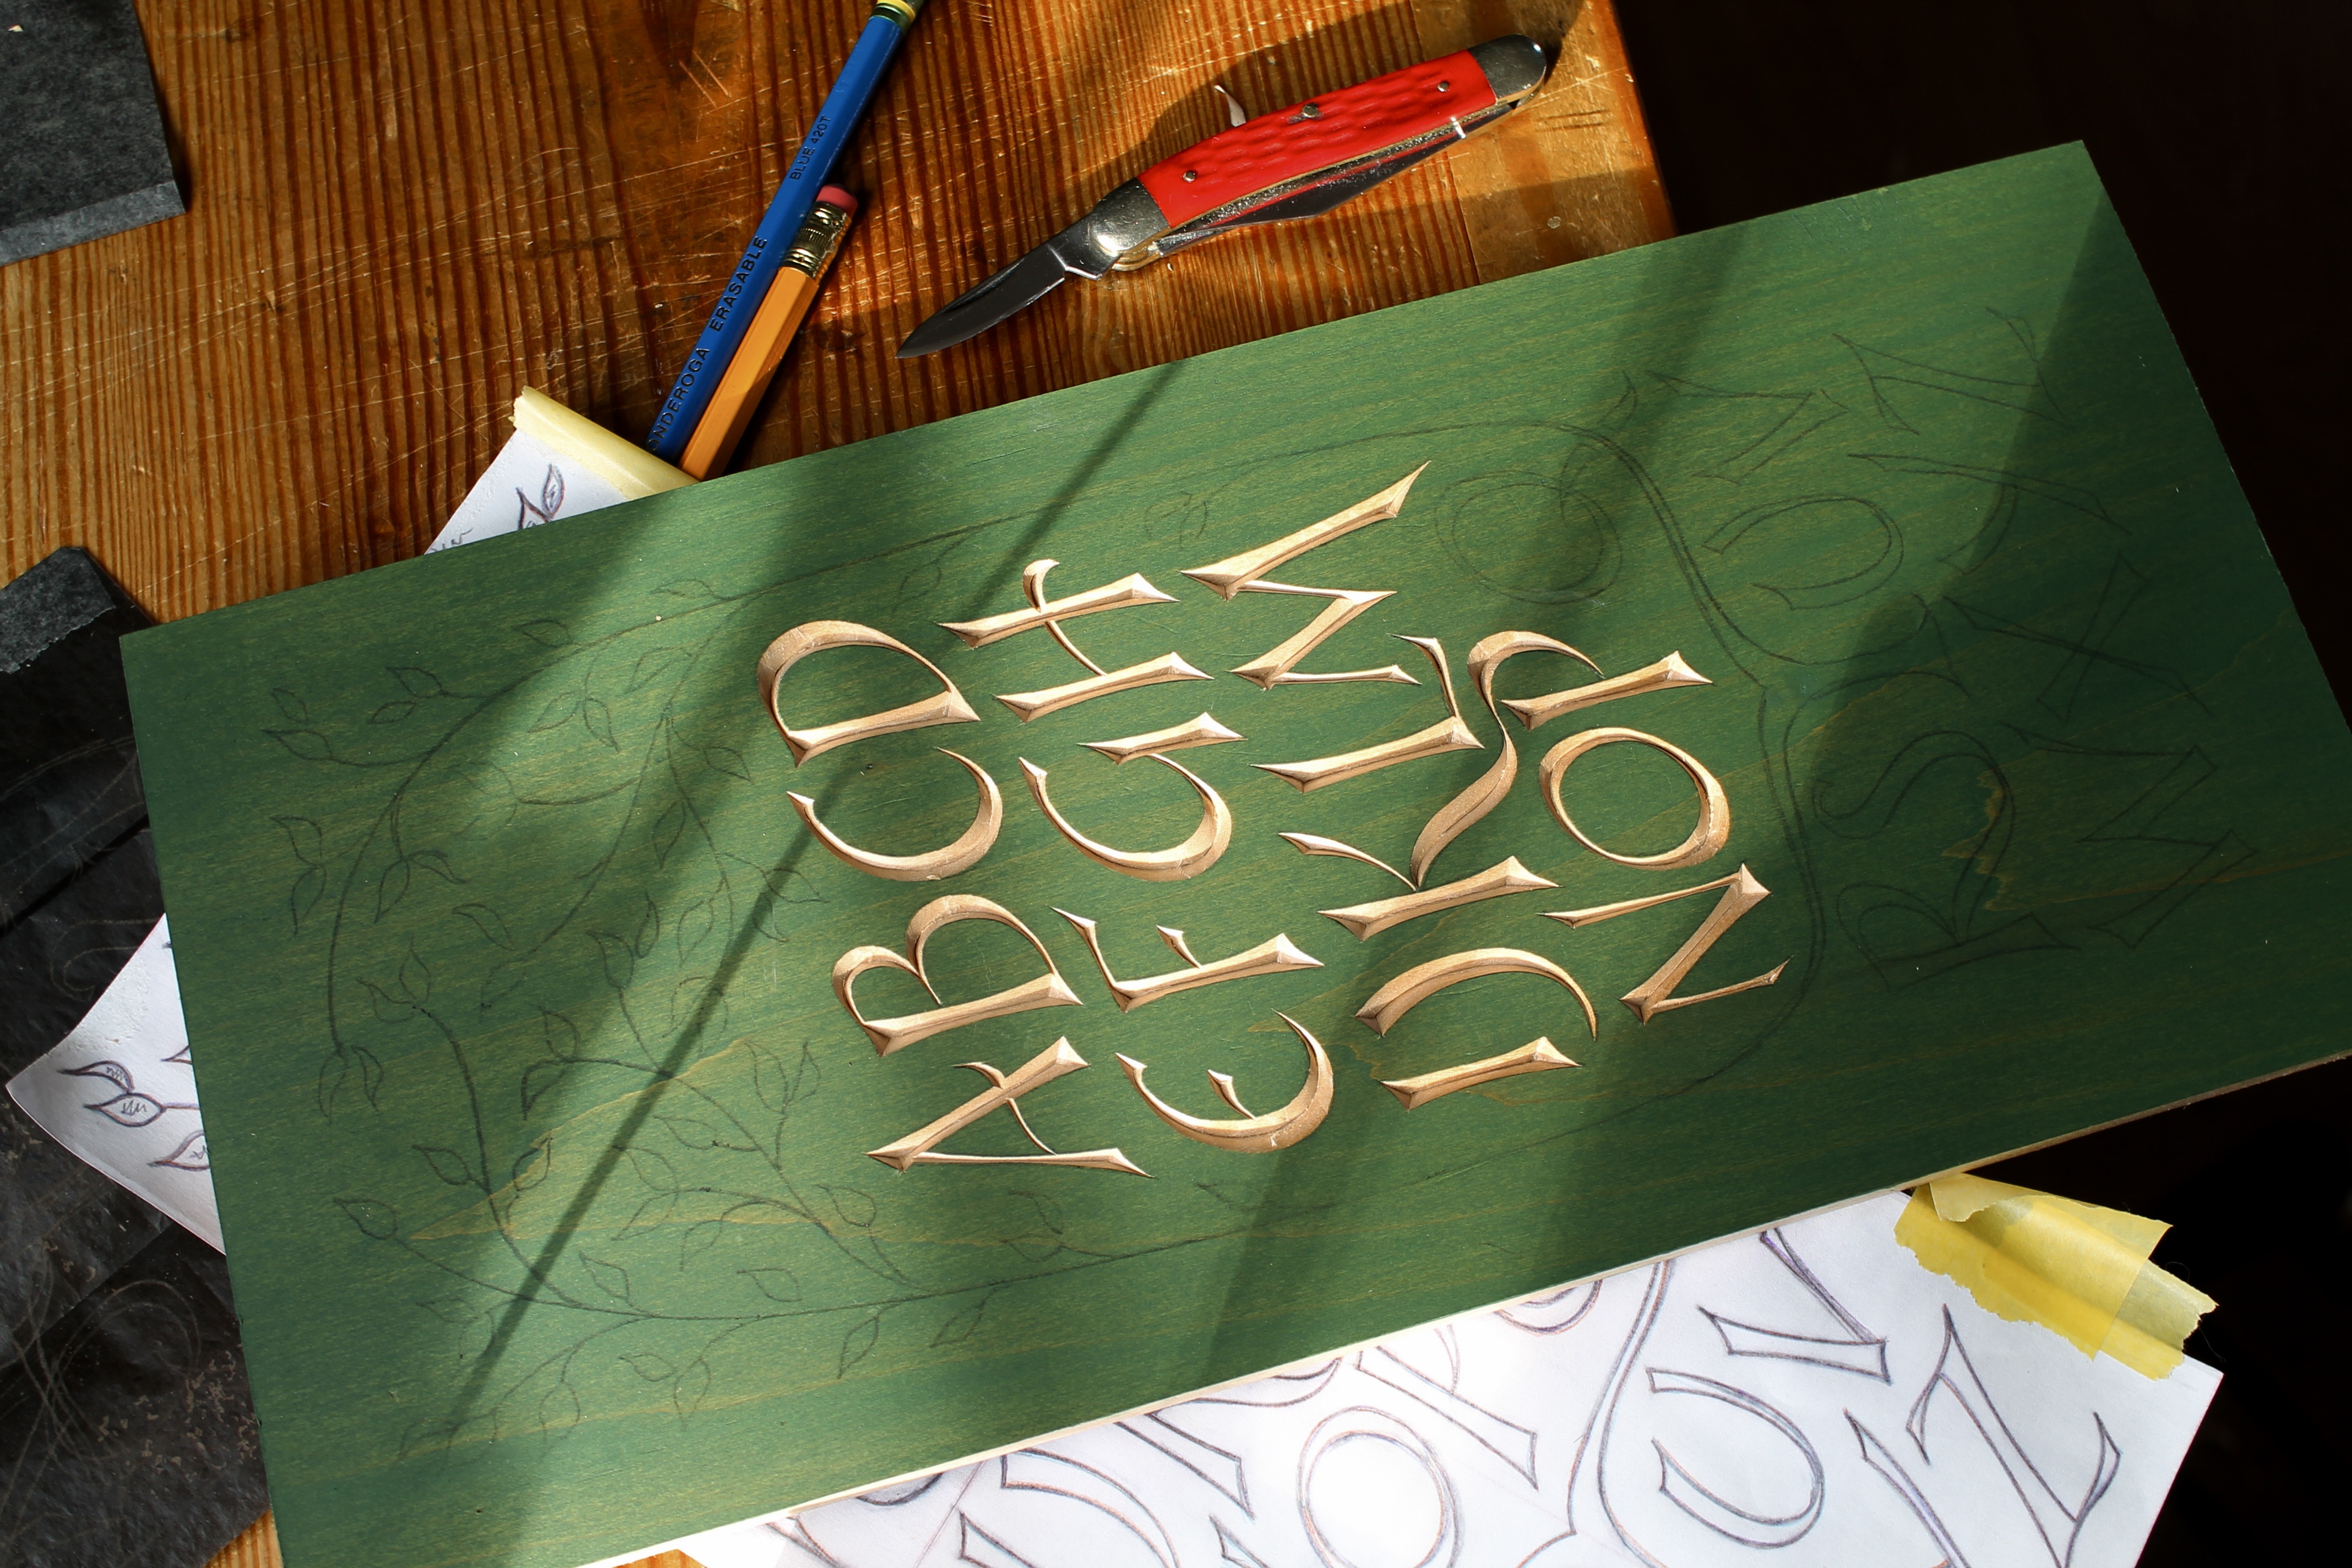
There are many possibilities for adding color to this design. Letters and/or leaves can be painted after carving, for example. One technique I’ve used a lot with this design is to color the surface of the wood before carving, then carve through it to reveal bare wood. Then again, no color at all is needed. Carving creates it’s own contrast as the surfaces that catch light and shadow. 
For the board above, I’ve thinned some artist oil paint from a tube by mixing in a little more pure linseed oil. I brush that onto the wood then wipe off all of the excess. It will take a few days to dry completely. Use water-based paint for faster drying. Various stains and inks will work too. Experiment and ry on a test piece first. 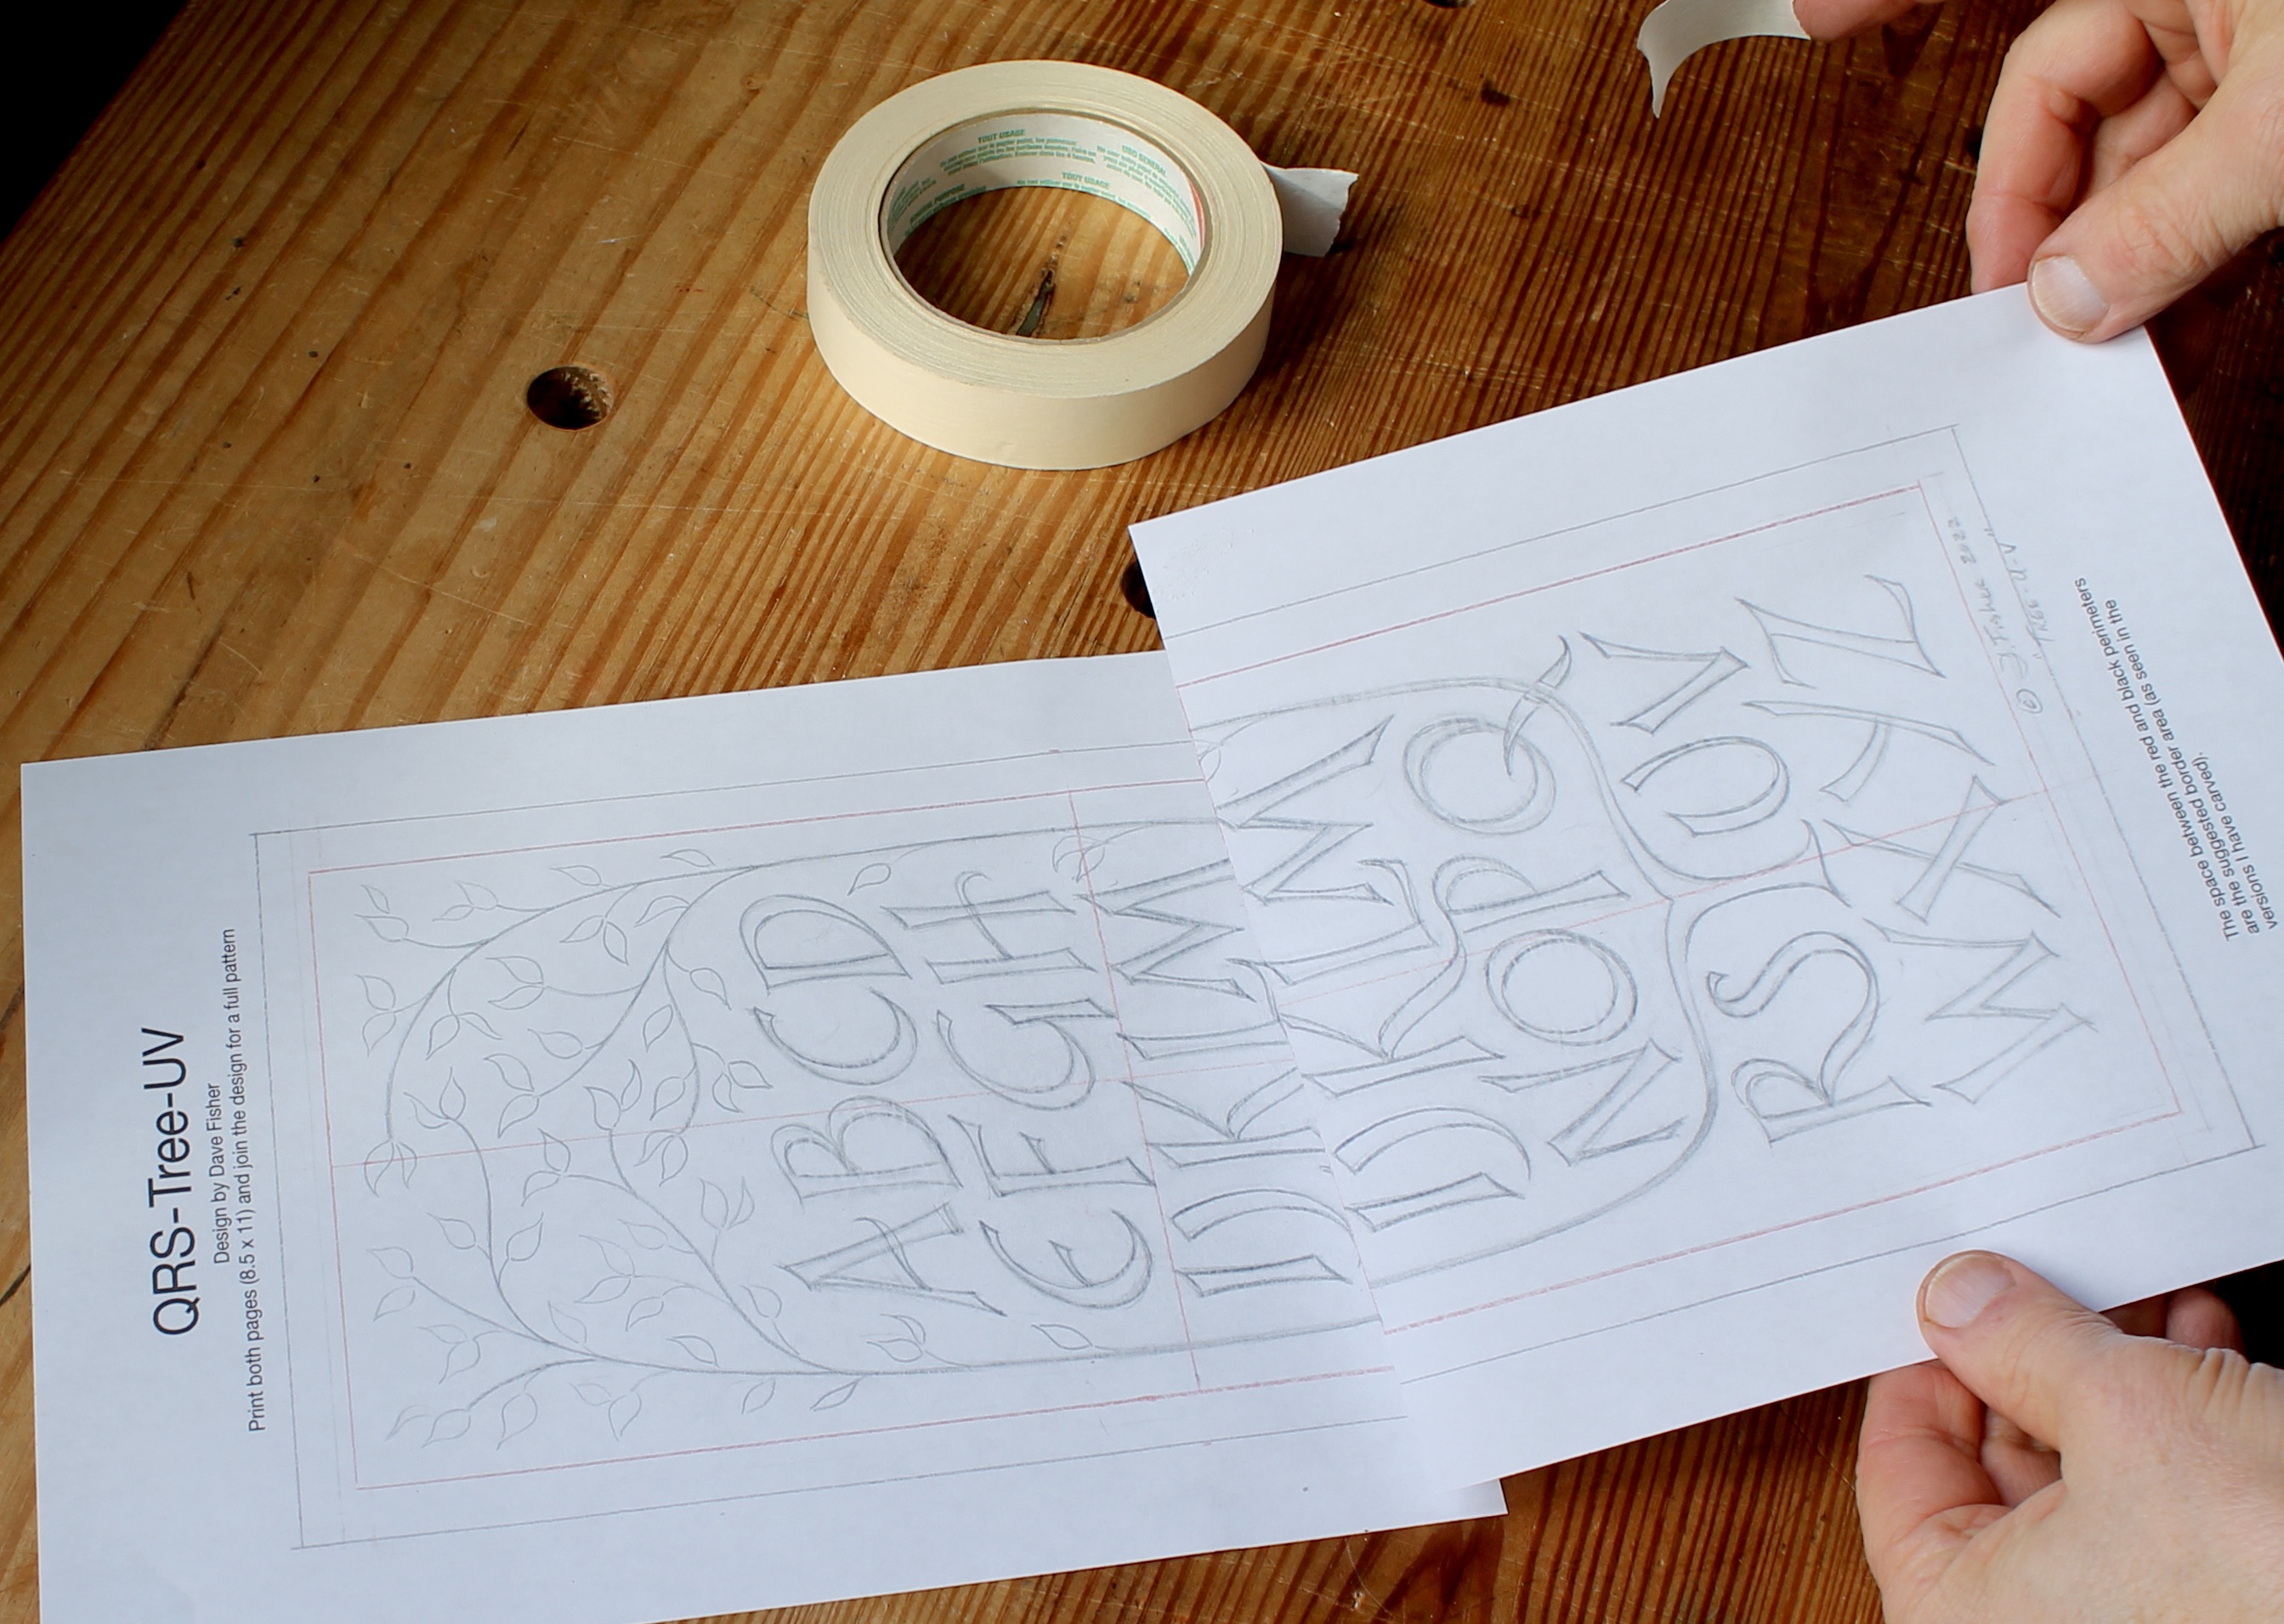
I have saved the design in two separate files. One is formatted to print on two sheets of regular 8.5 x 11 paper on a typical home printer. Print both sheets, trim one of them along the red center line and match up with the other sheet to create the complete pattern. The other file is formatted to print on one sheet of 11×17 paper at a print shop if you prefer. 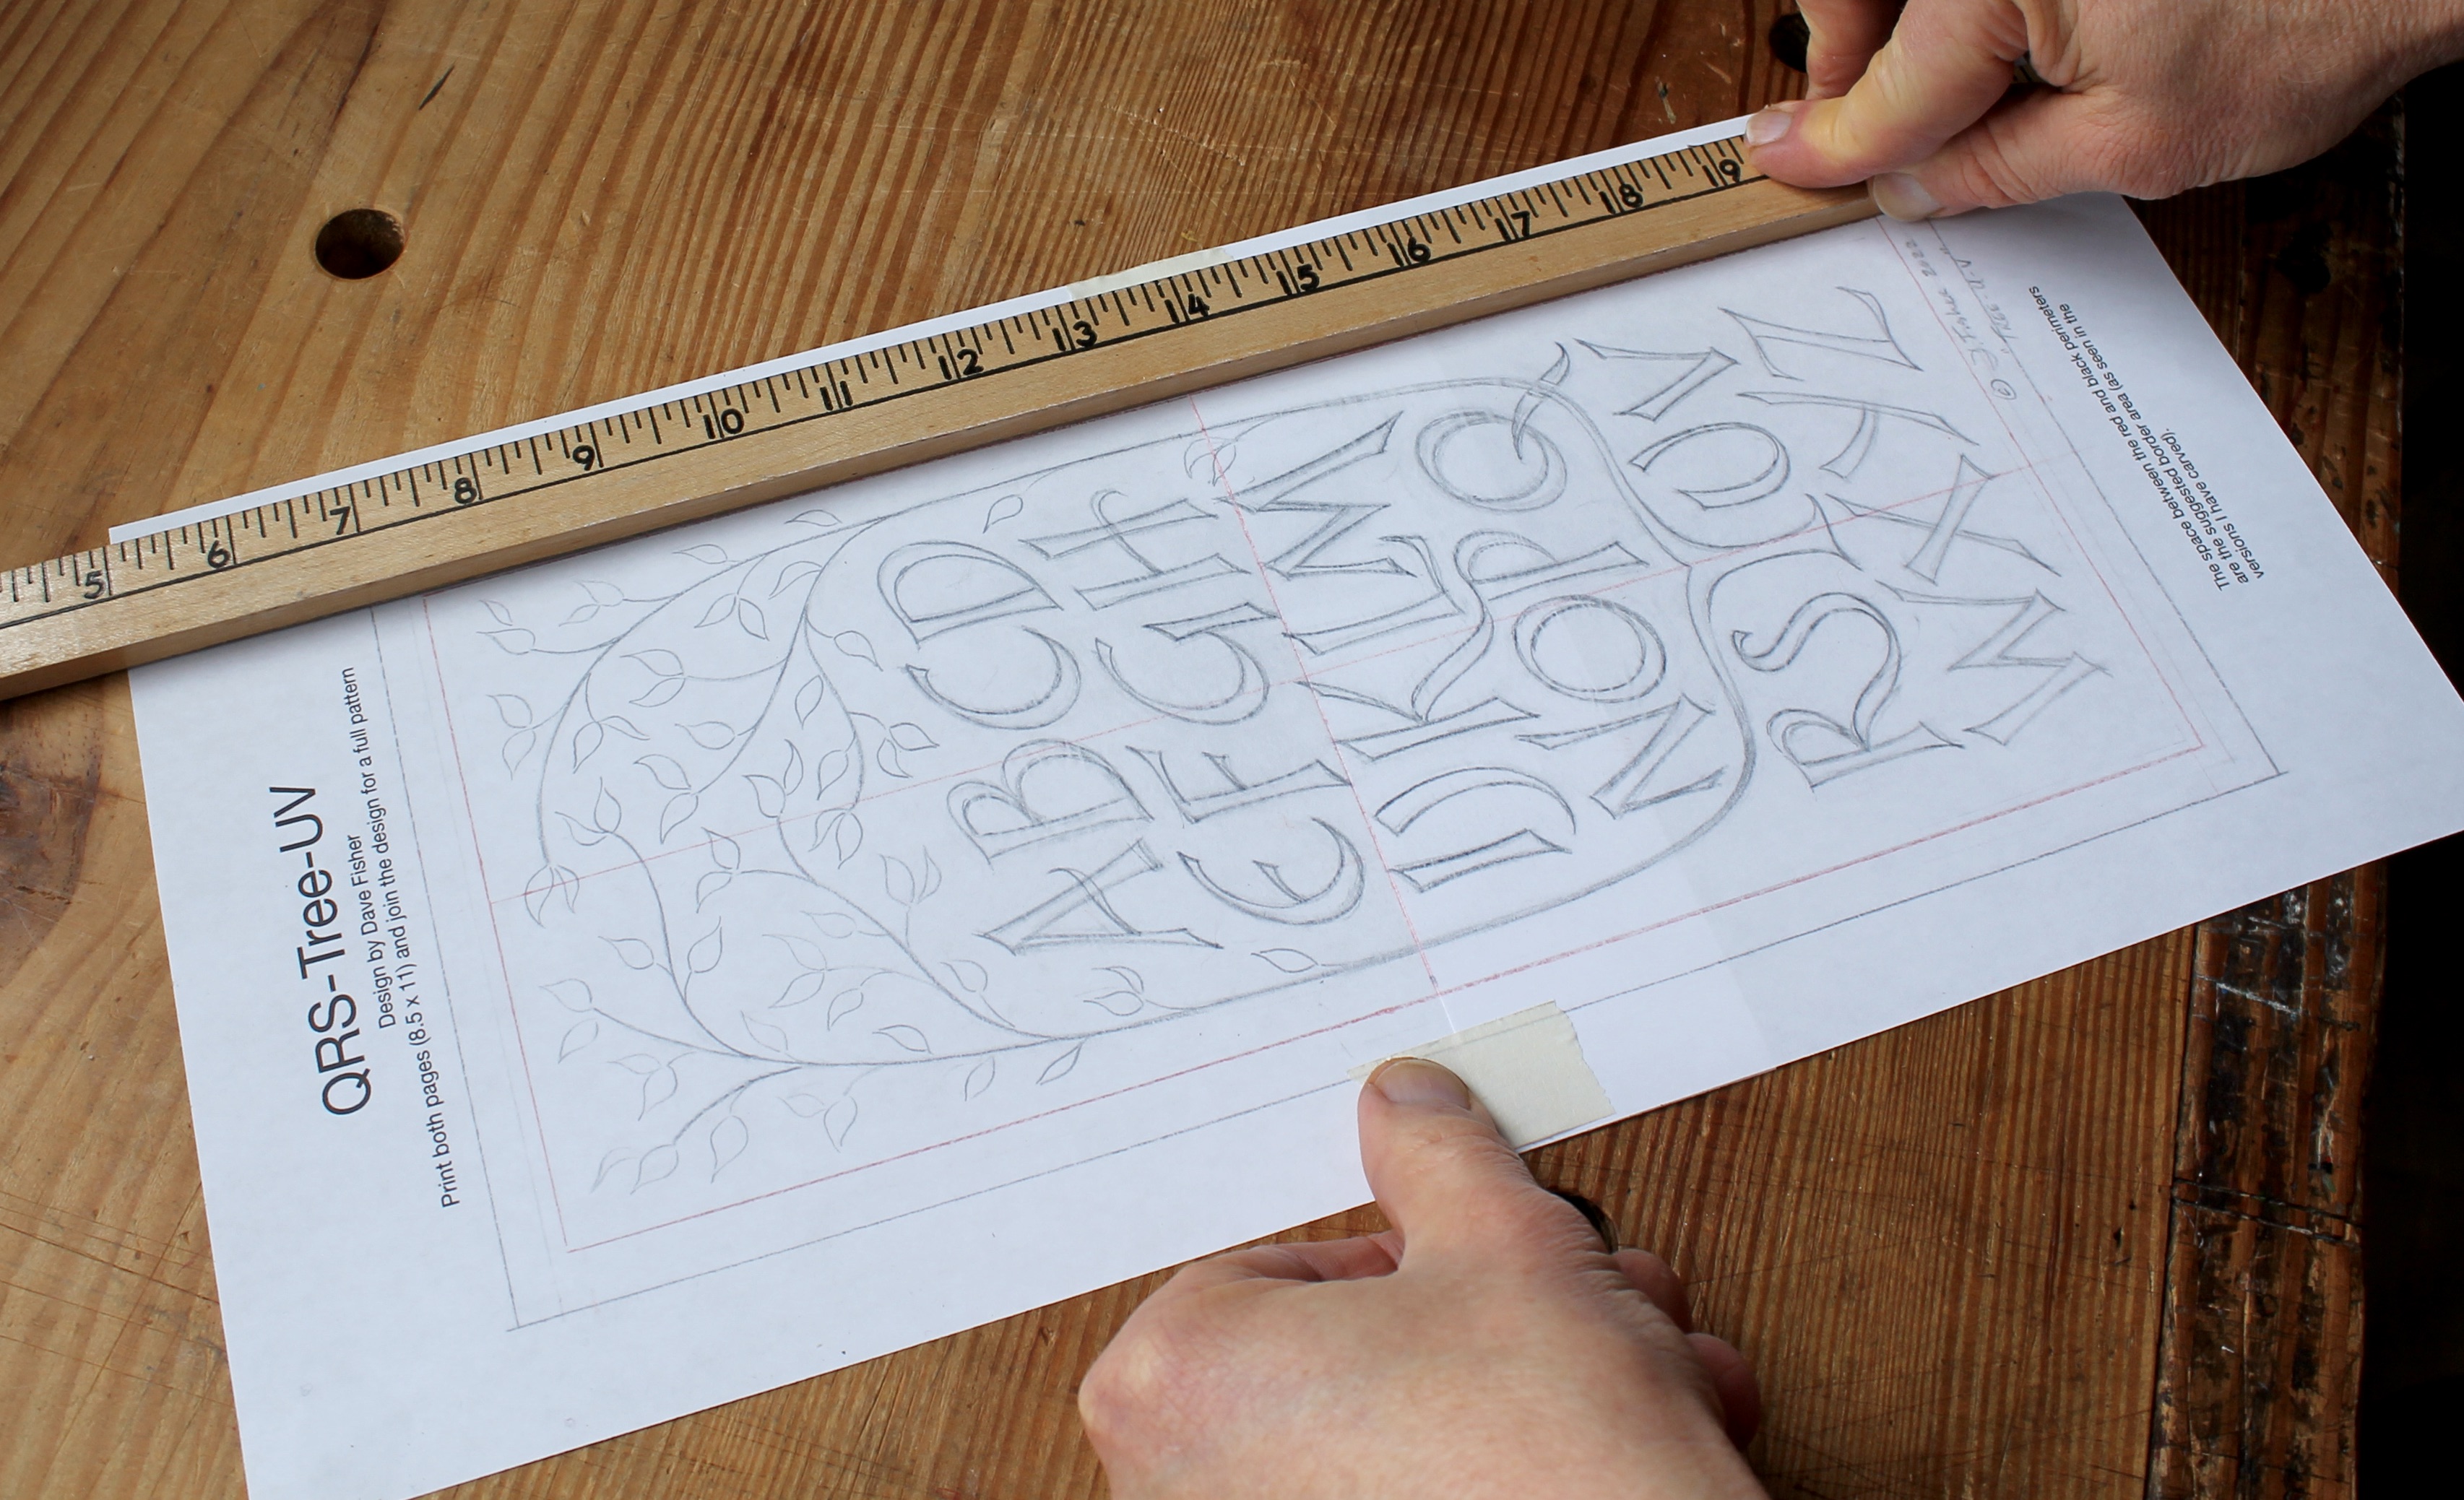
You can check alignment along a border line or center line with a straight edge to be sure. The file is a scan of my original design drawing sketched on tracing paper, so there are some remnants of erasures and such here and there. The thick pencil line should put you at ease. This does not require exact cutting precision. A little variation creates a sense of liveliness. 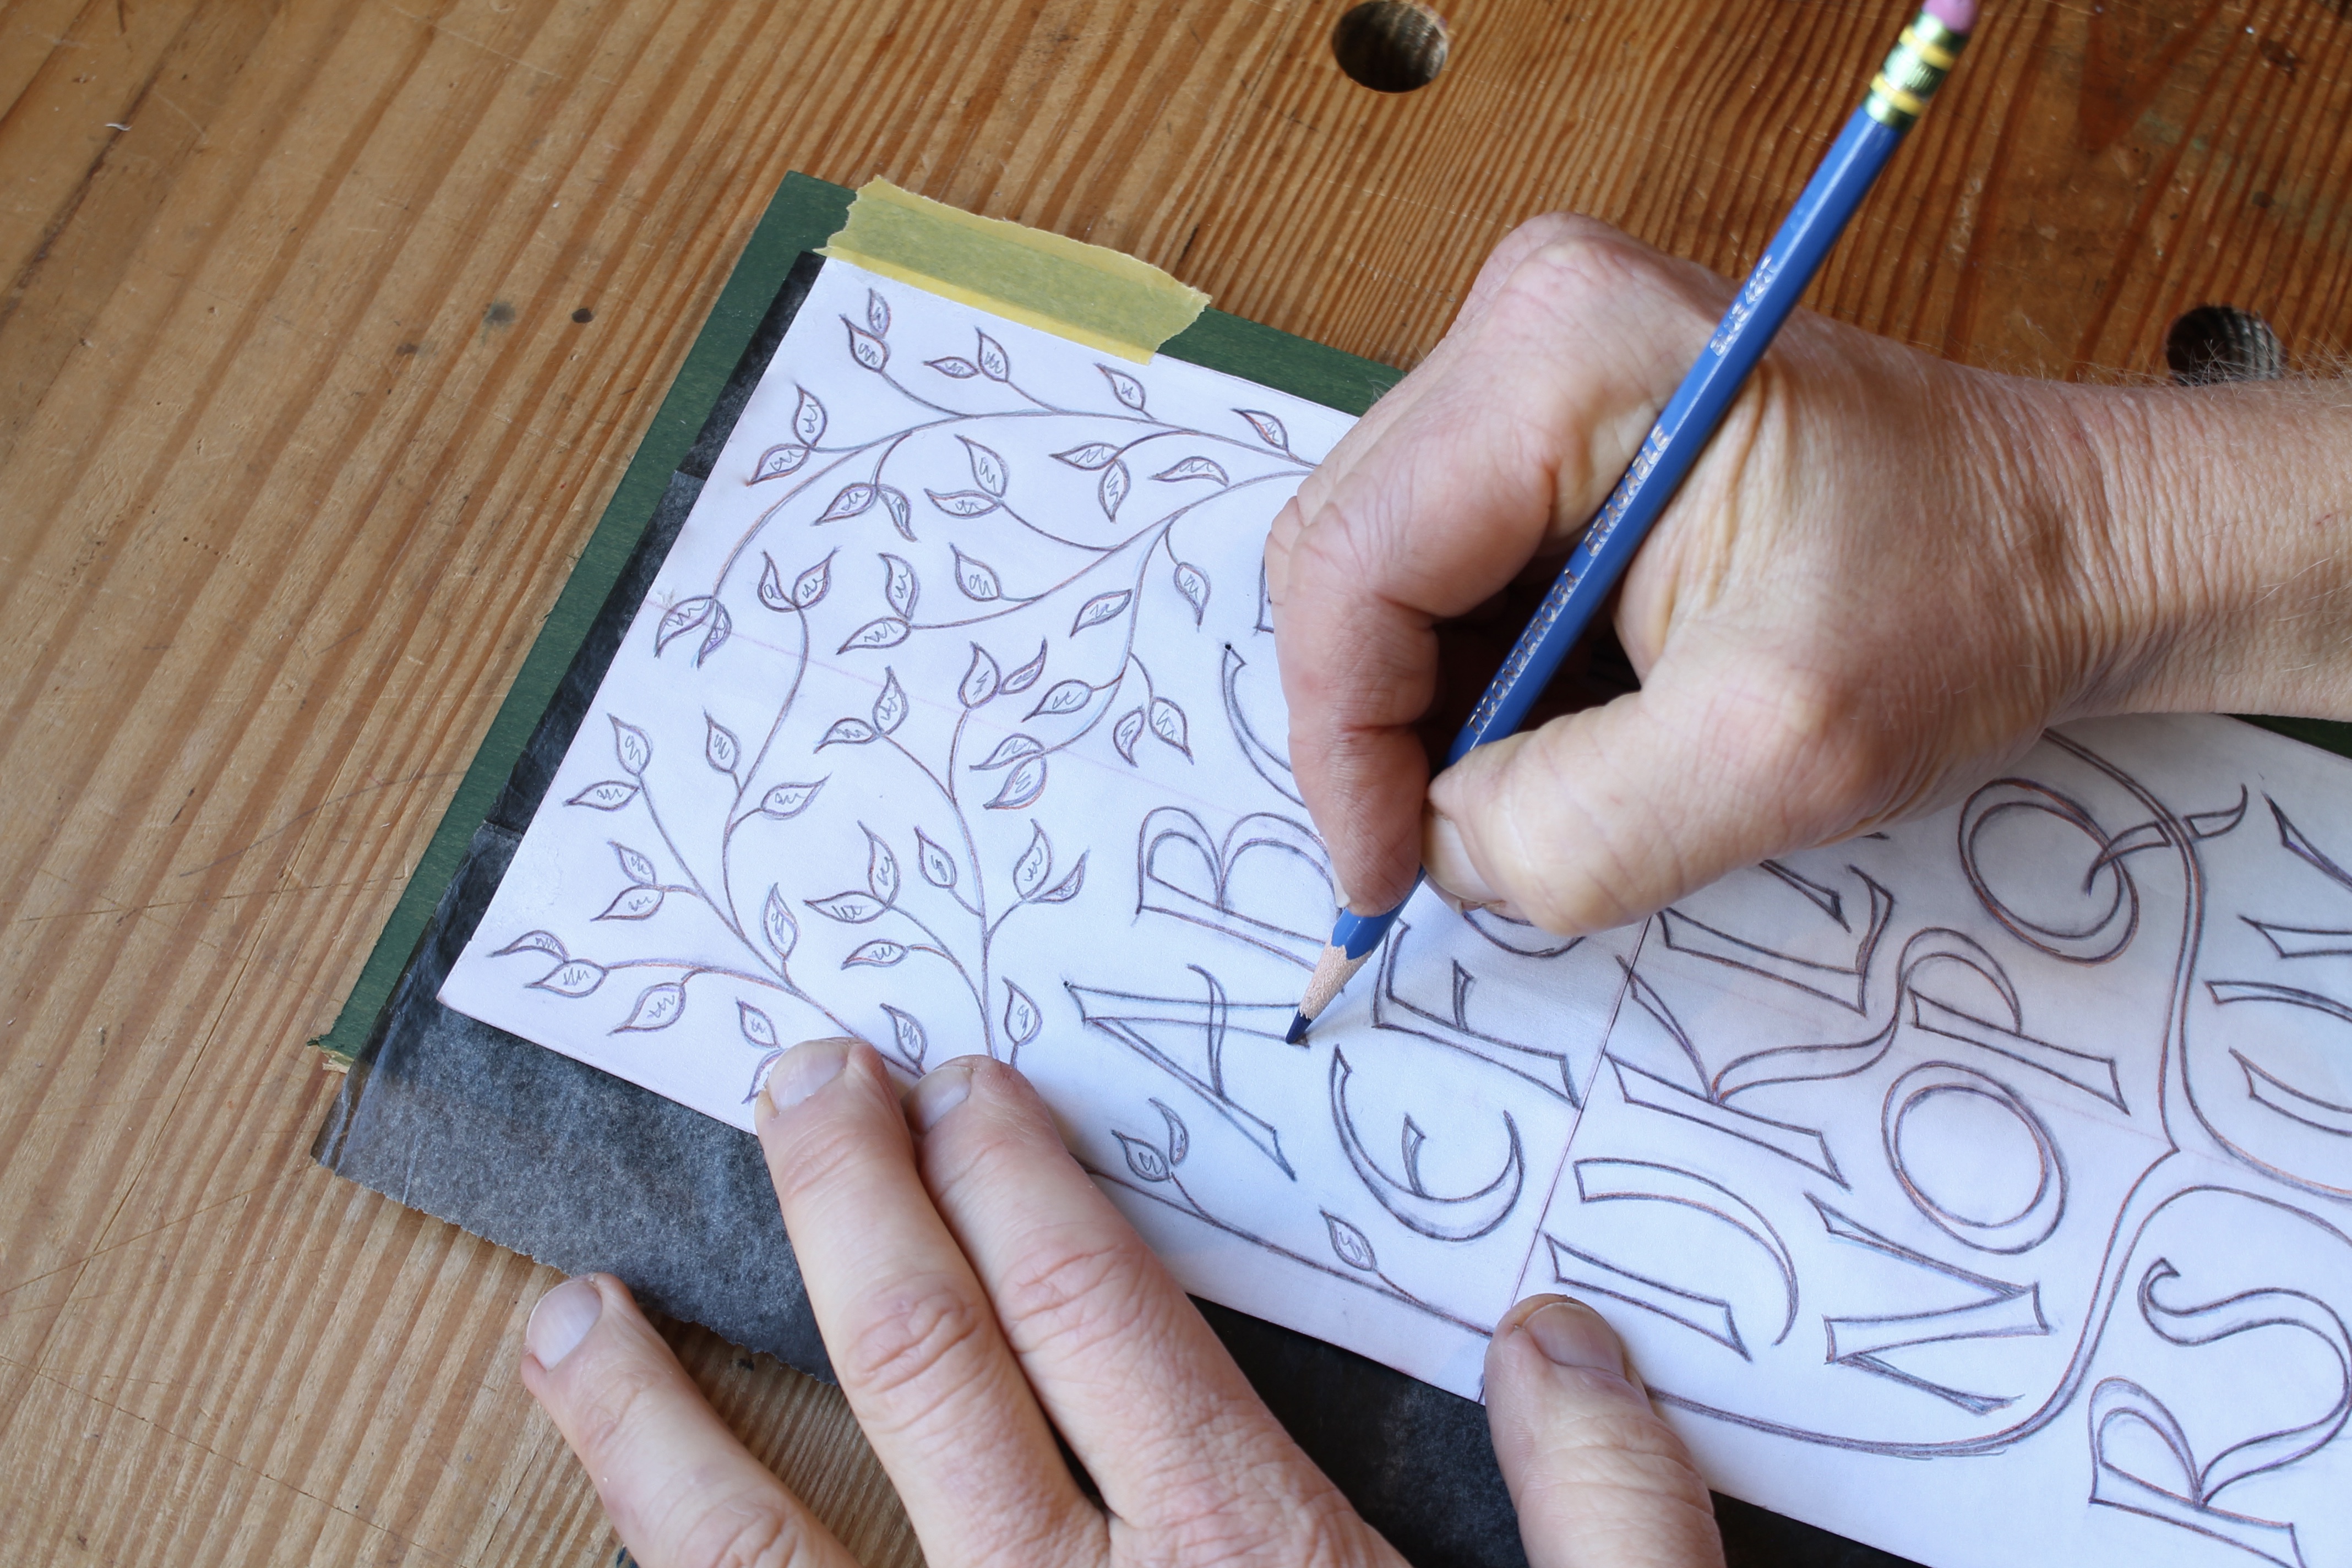
I typically transfer the pattern to the wood by hinging the paper to the wood with some tape and slipping some wax-free graphite paper underneath. Your pattern will print out with an indication of borders and more paper surrounding the pattern. The one in the photo has been cut down and darkened by a few transfers. There are other possible transfer methods. Experiment with what works best for you. Of course, you’ll be able to print it out as many times as you want and scale it larger or smaller if you wish. 
Then sit down with some light coming from your left (if you’re right-handed) and dig in! It’s just a piece of wood so relax. 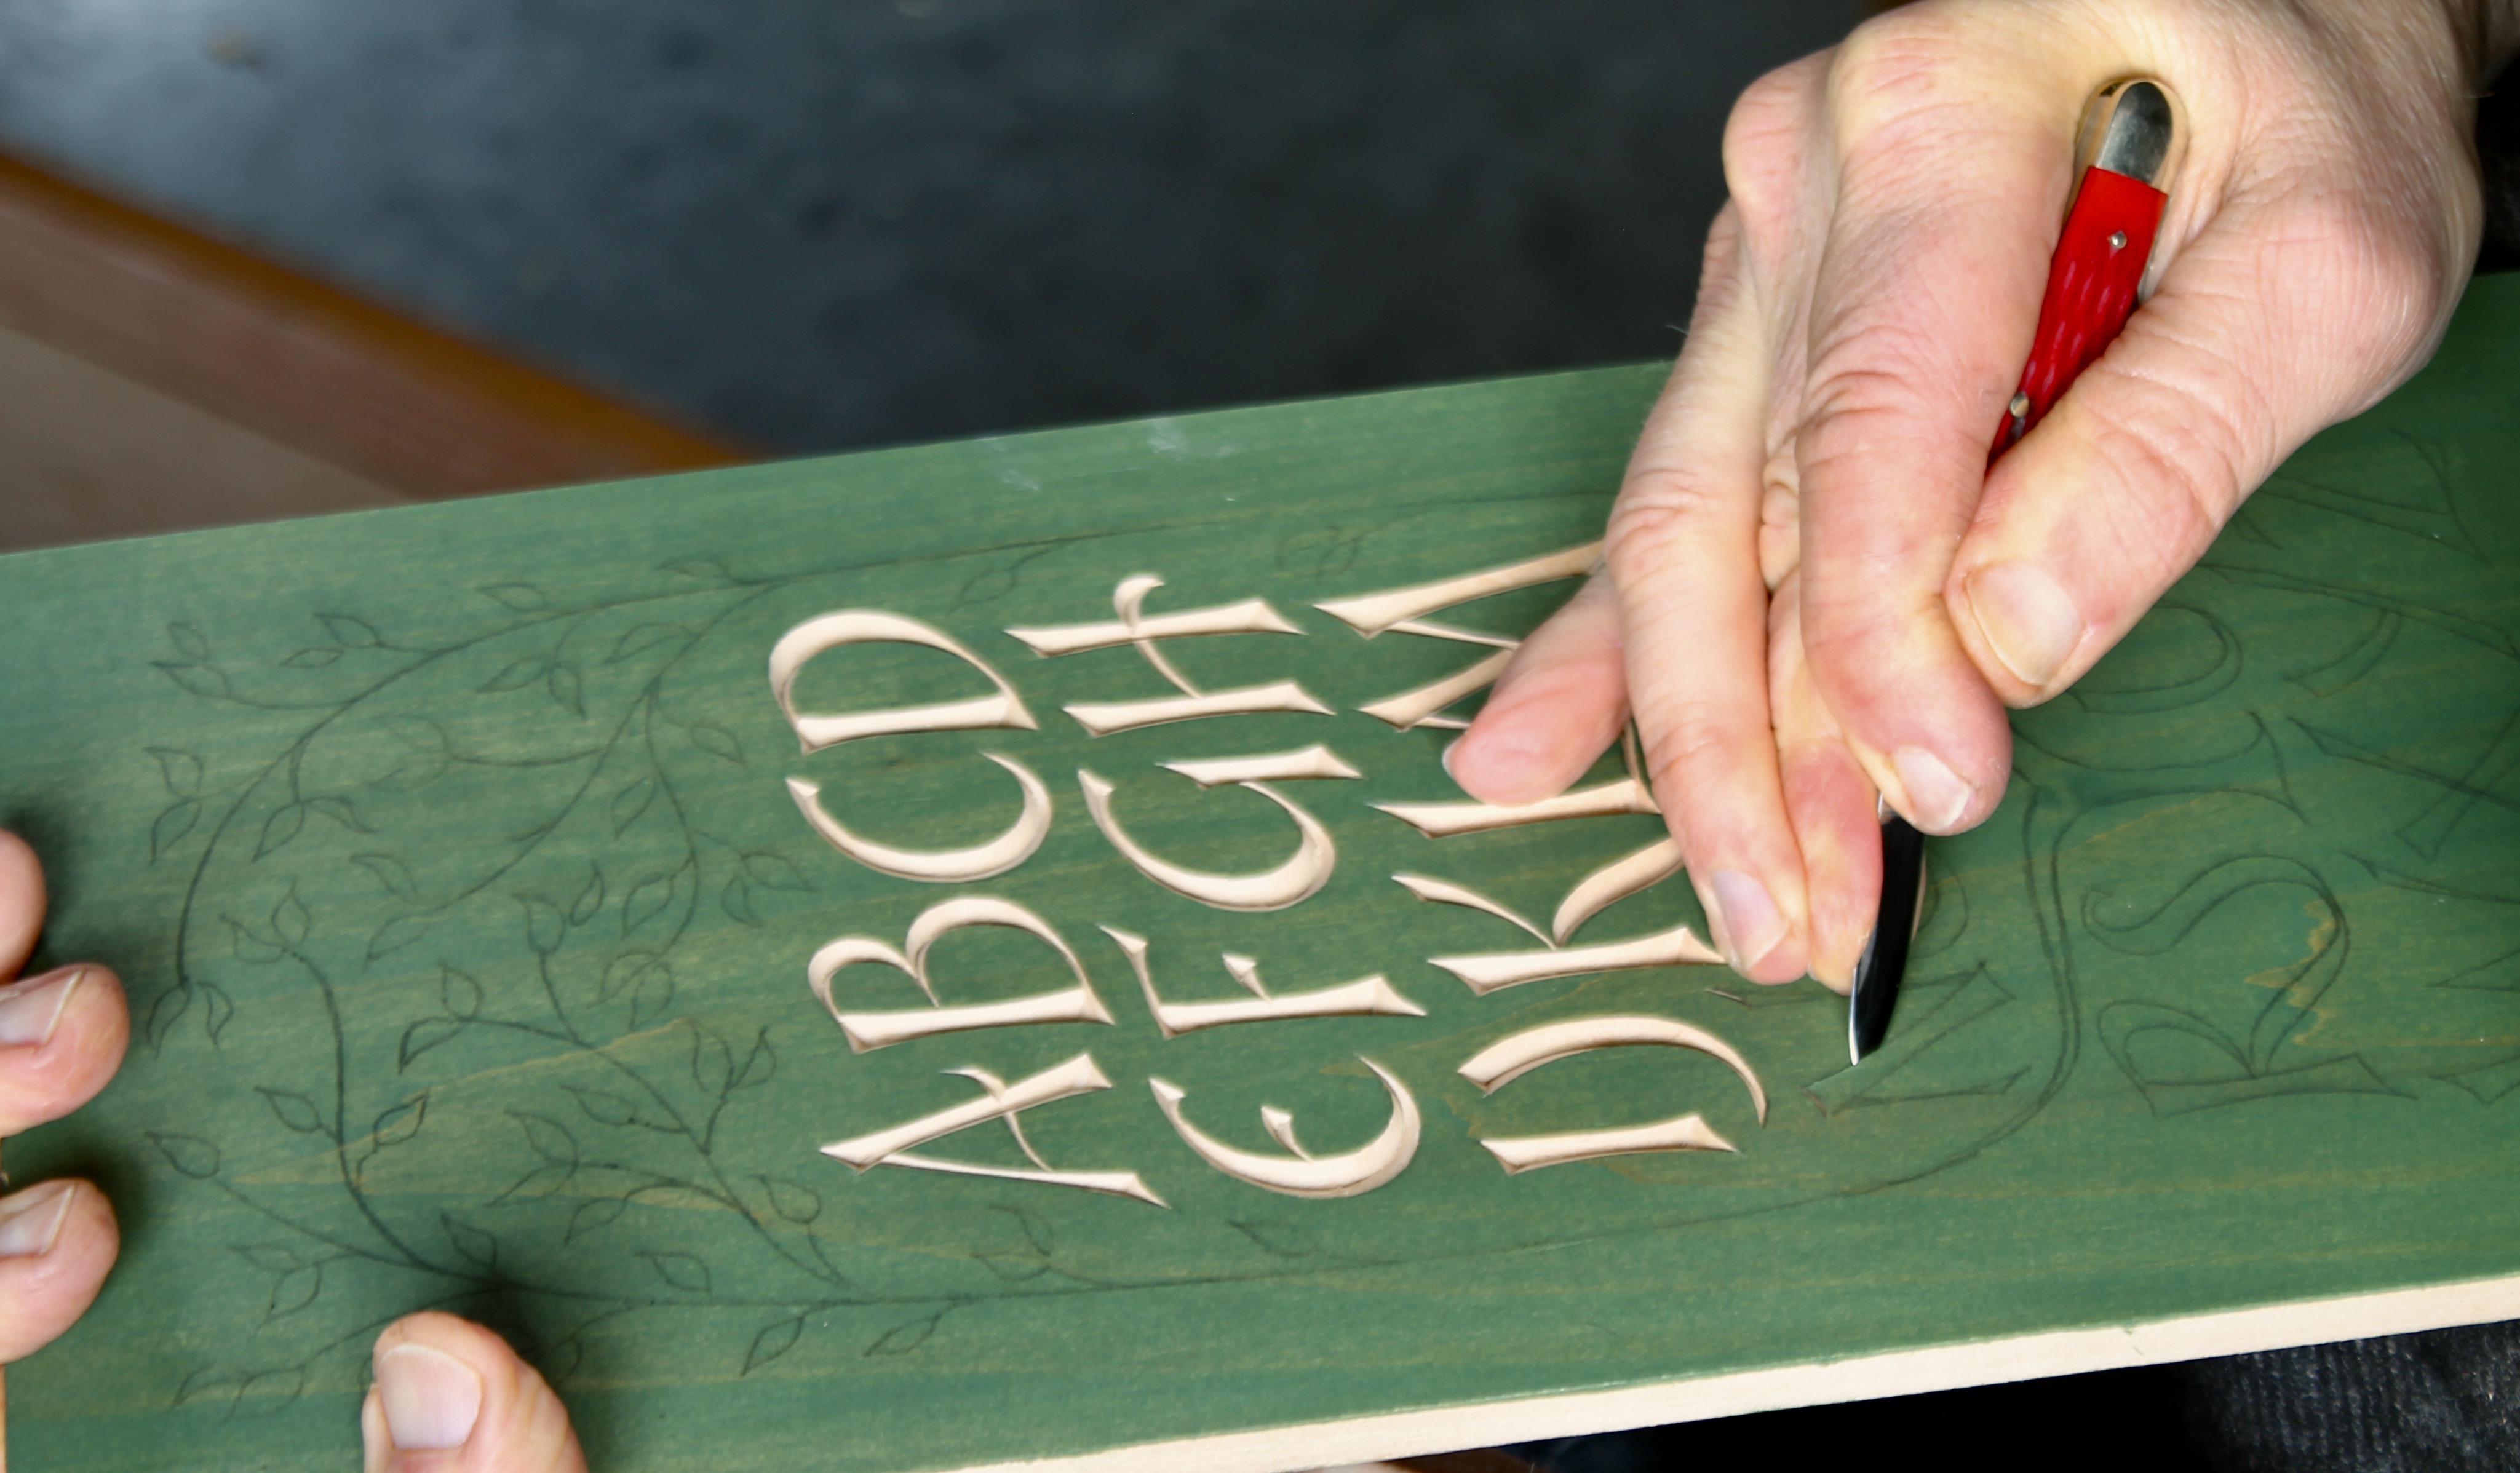
You can go in whatever order you want. I typically just start with A and go right through the alphabet. I’ll have some specific suggestions to accompany the pattern. 
Then I do the tree and branches. 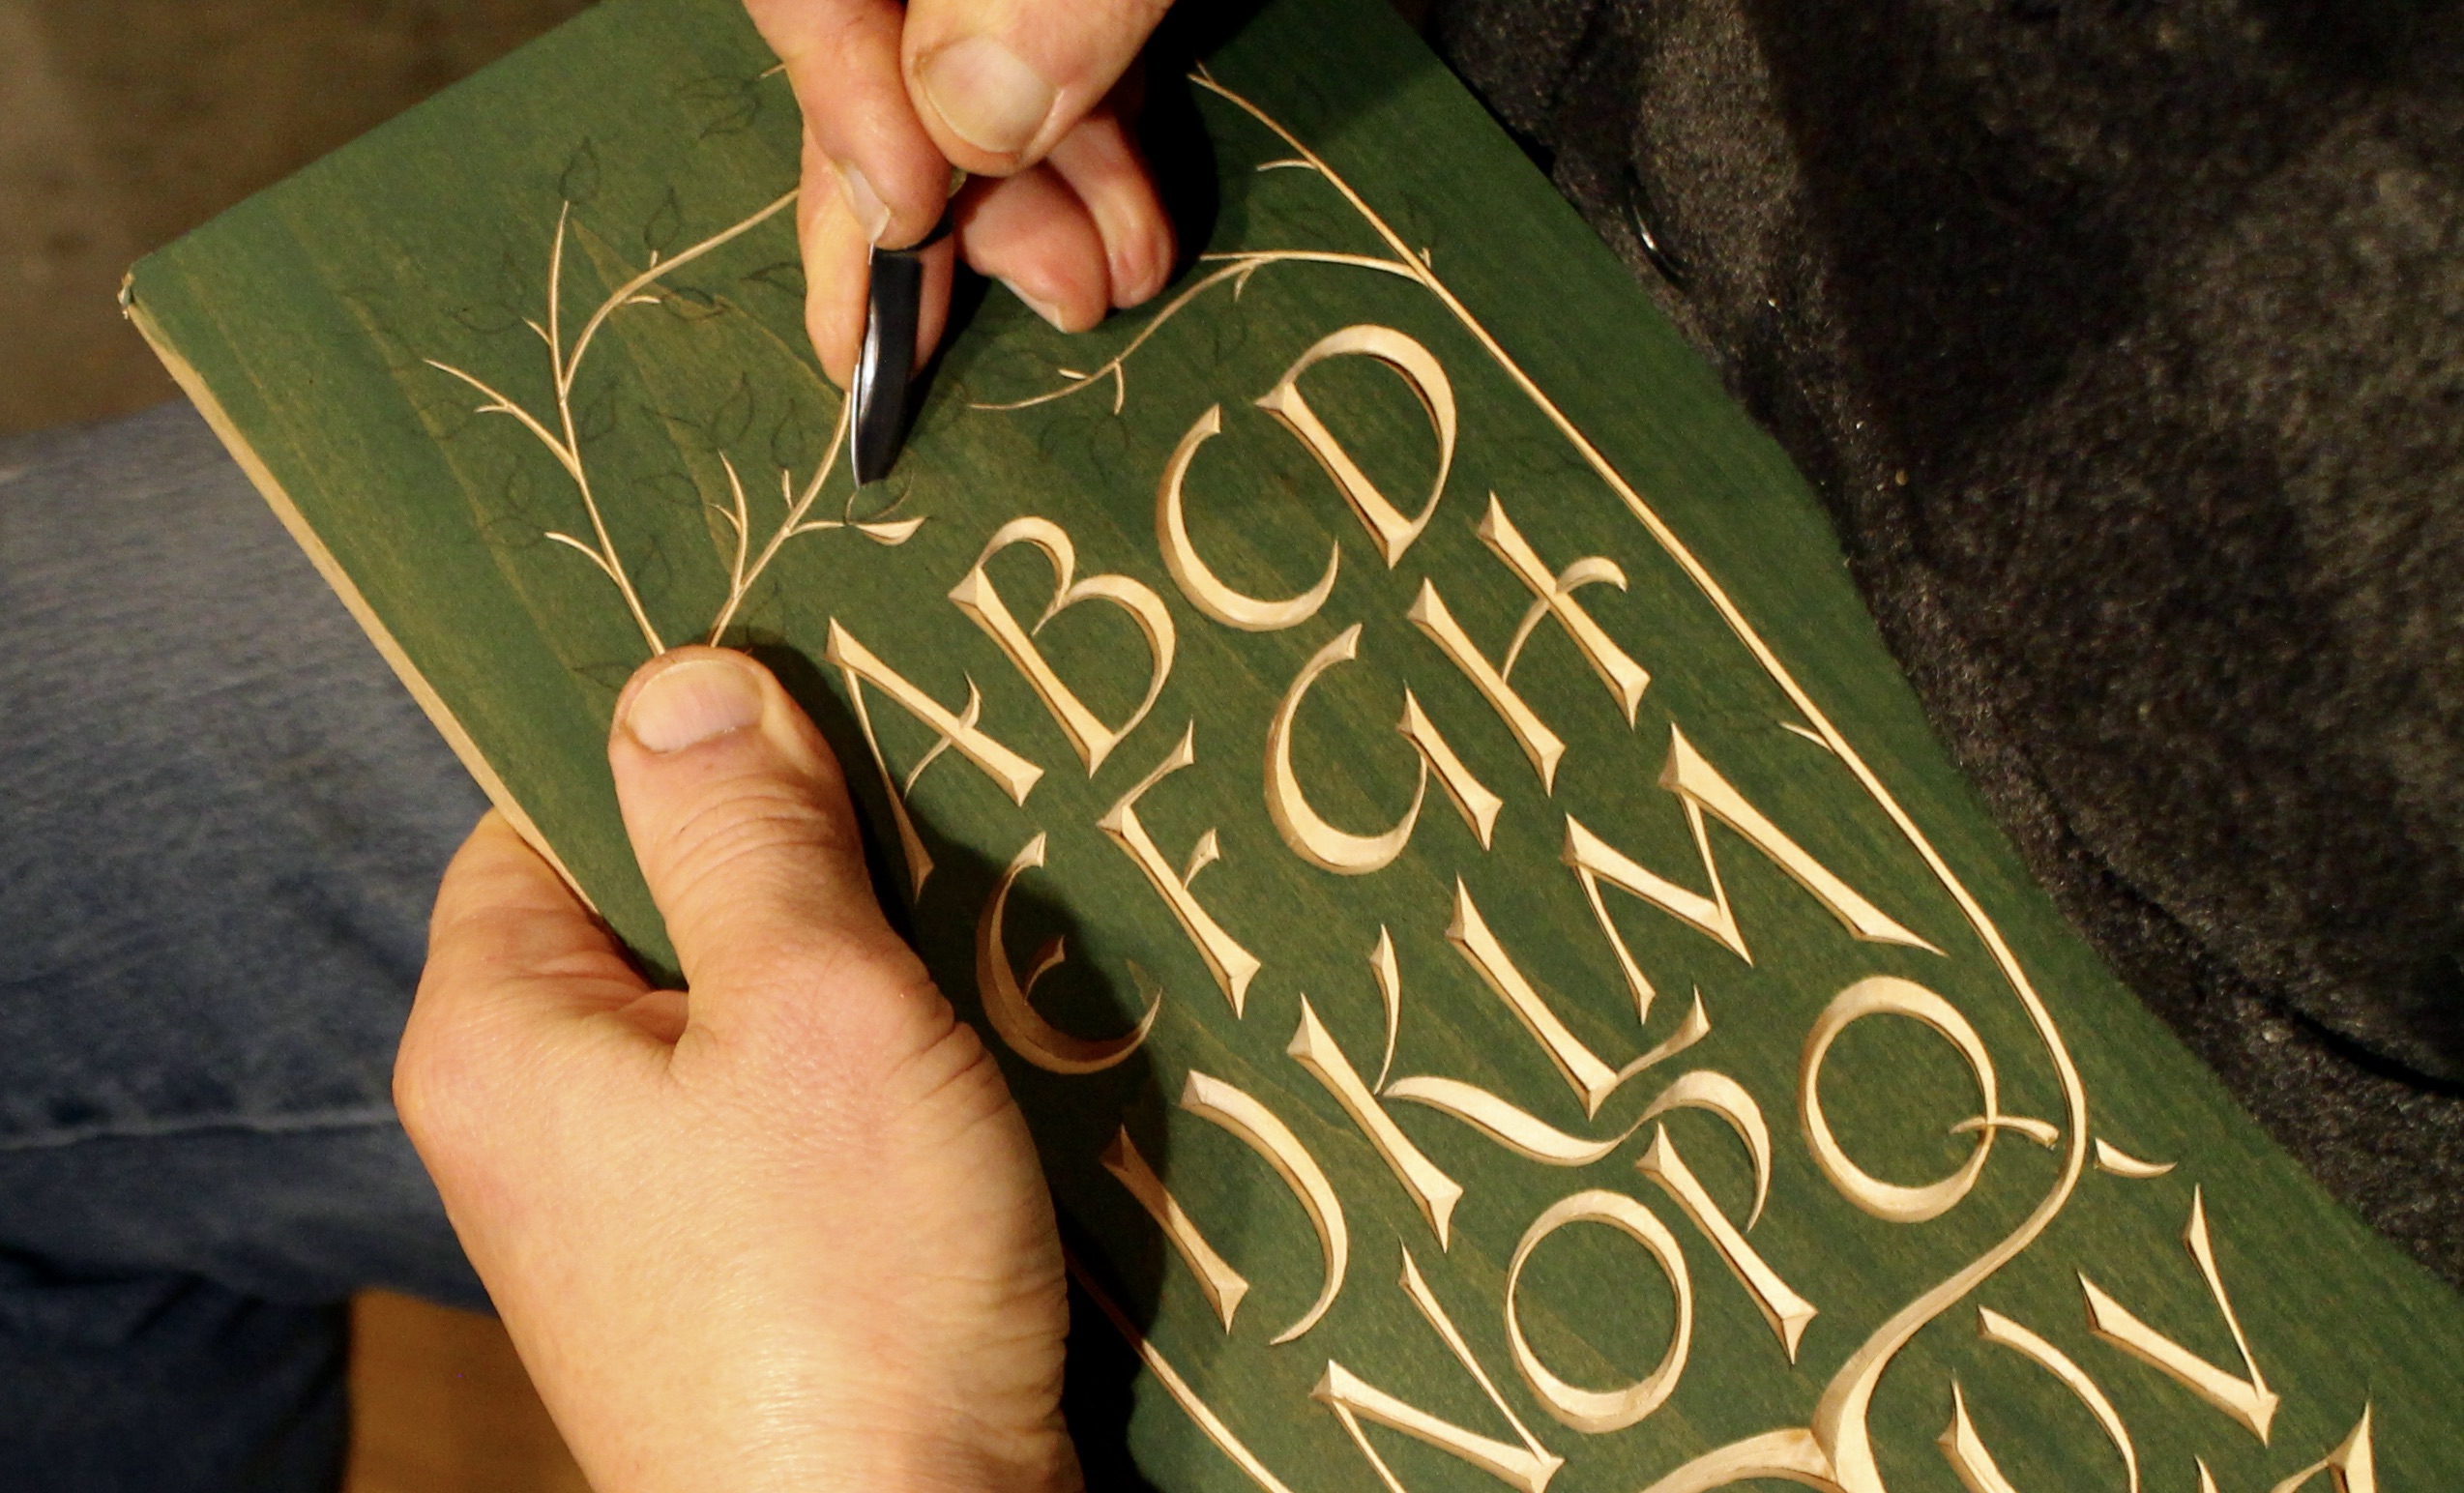
I finish the carving with the leaves, then use a block plane to form a beveled border. No finish is necessary at all, but an oil finish, or soft wax, or paste wax are all good options. Just test to be sure to test to make sure the product doesn’t lift the paint color. 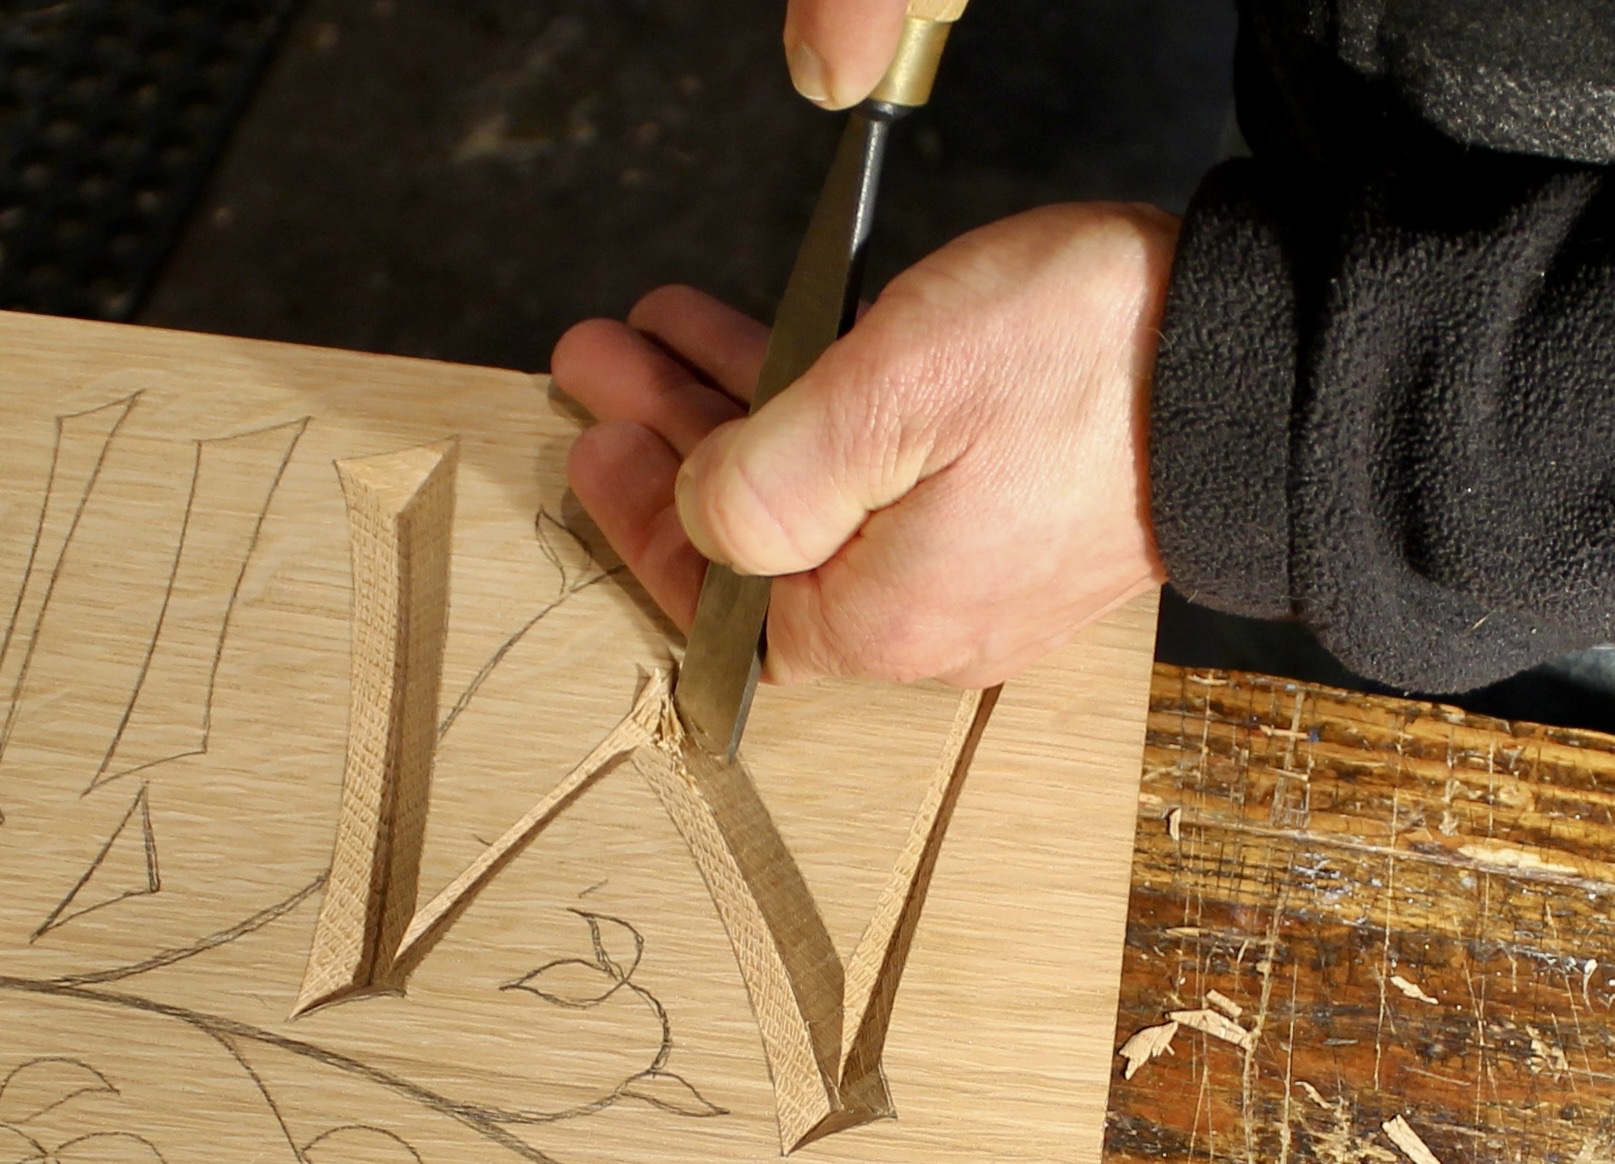
The tools and techniques that I use for letter carving vary depending on three factors: material, scale, and design. Above, I’m using a carving chisel to cut a large letter in white oak. The penknife stays in my pocket for work like this. 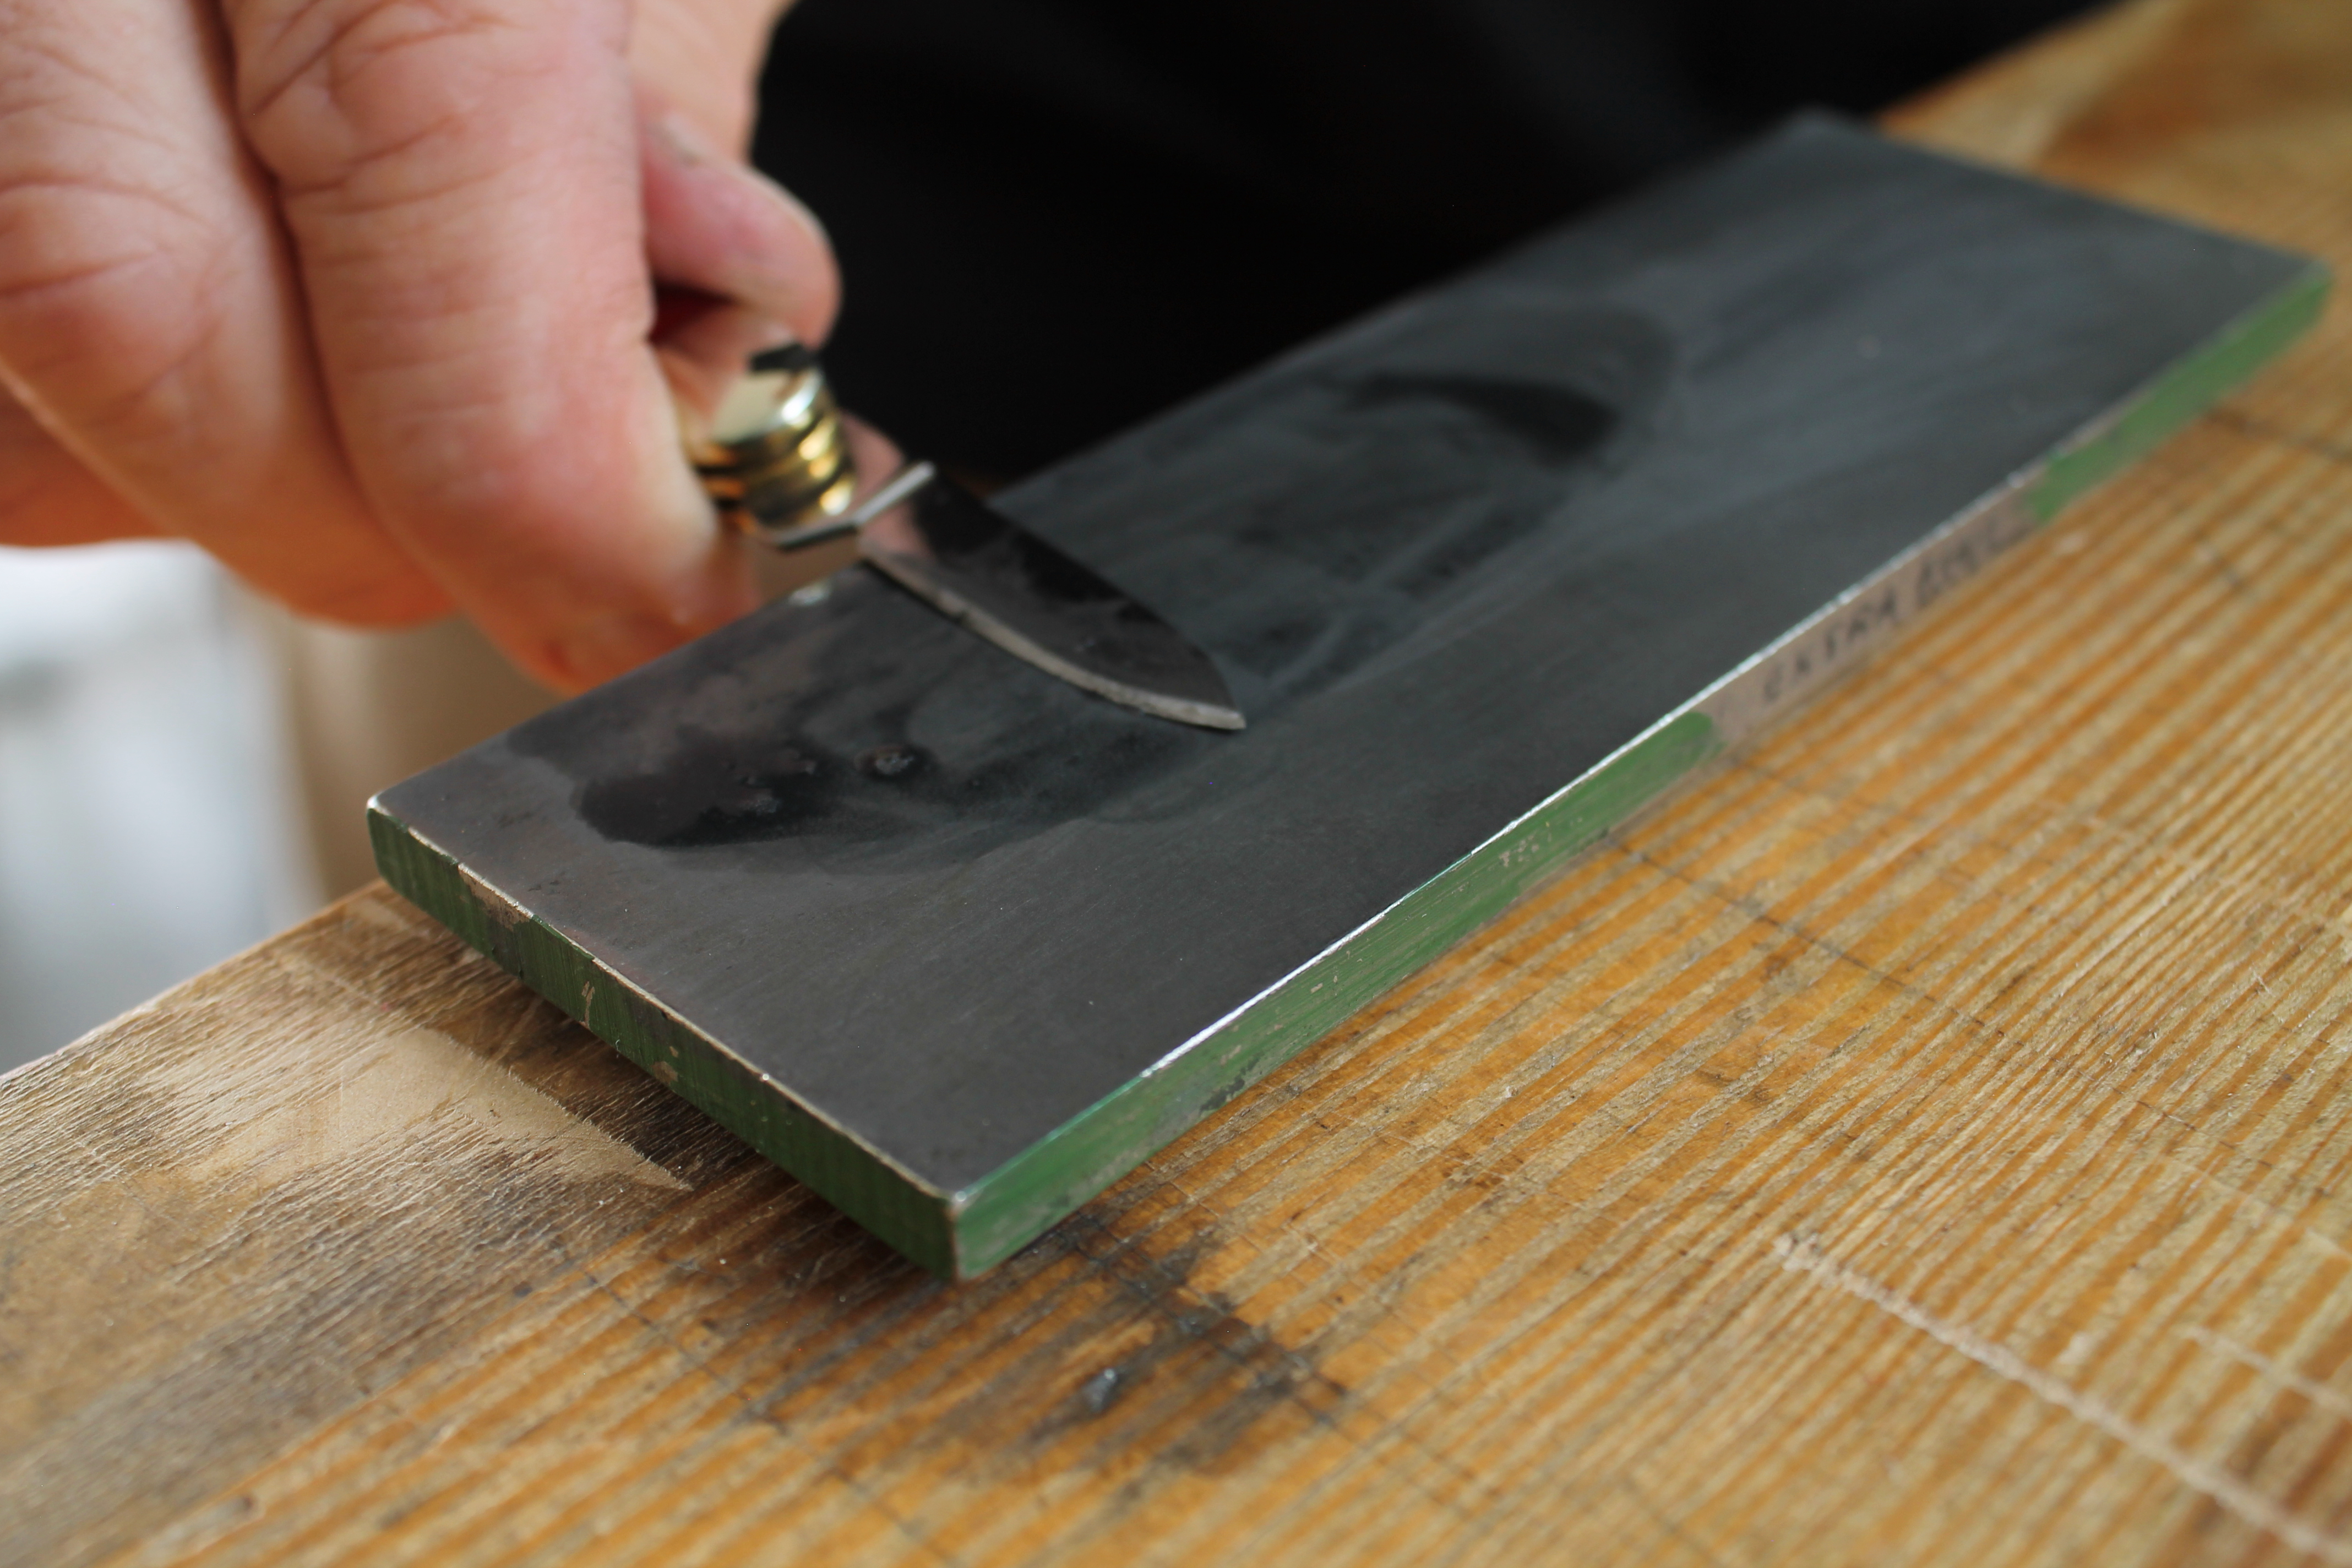
For this design I like to use a -sharp- knife. Along with the pattern, I’ll go through my process of sharpening the blade I use.
When you purchase, the following will appear below the purchase button:
- PDFs of the full-size pattern/design for viewing and/or downloading to your device. One file is formatted for printing full size on two sheets of paper at home, the other for one sheet at a print shop.
- Some detail photos of my finished QRS-Tree-UV boards accompanied by some tips and suggestions for certain elements.
- A slideshow and illustration showing my approach for shaping and sharpening my knife.
- Information about the specific knife that I use, just in case you’re interested.
Purchase:
This is a one time payment of $20. Once you’ve paid, you can access the materials here anytime and download the pattern to your device. If you don’t have a WordPress account, you will be prompted to create one when you pay, which simply means providing an email and setting a password. That account will allow you to log in.
