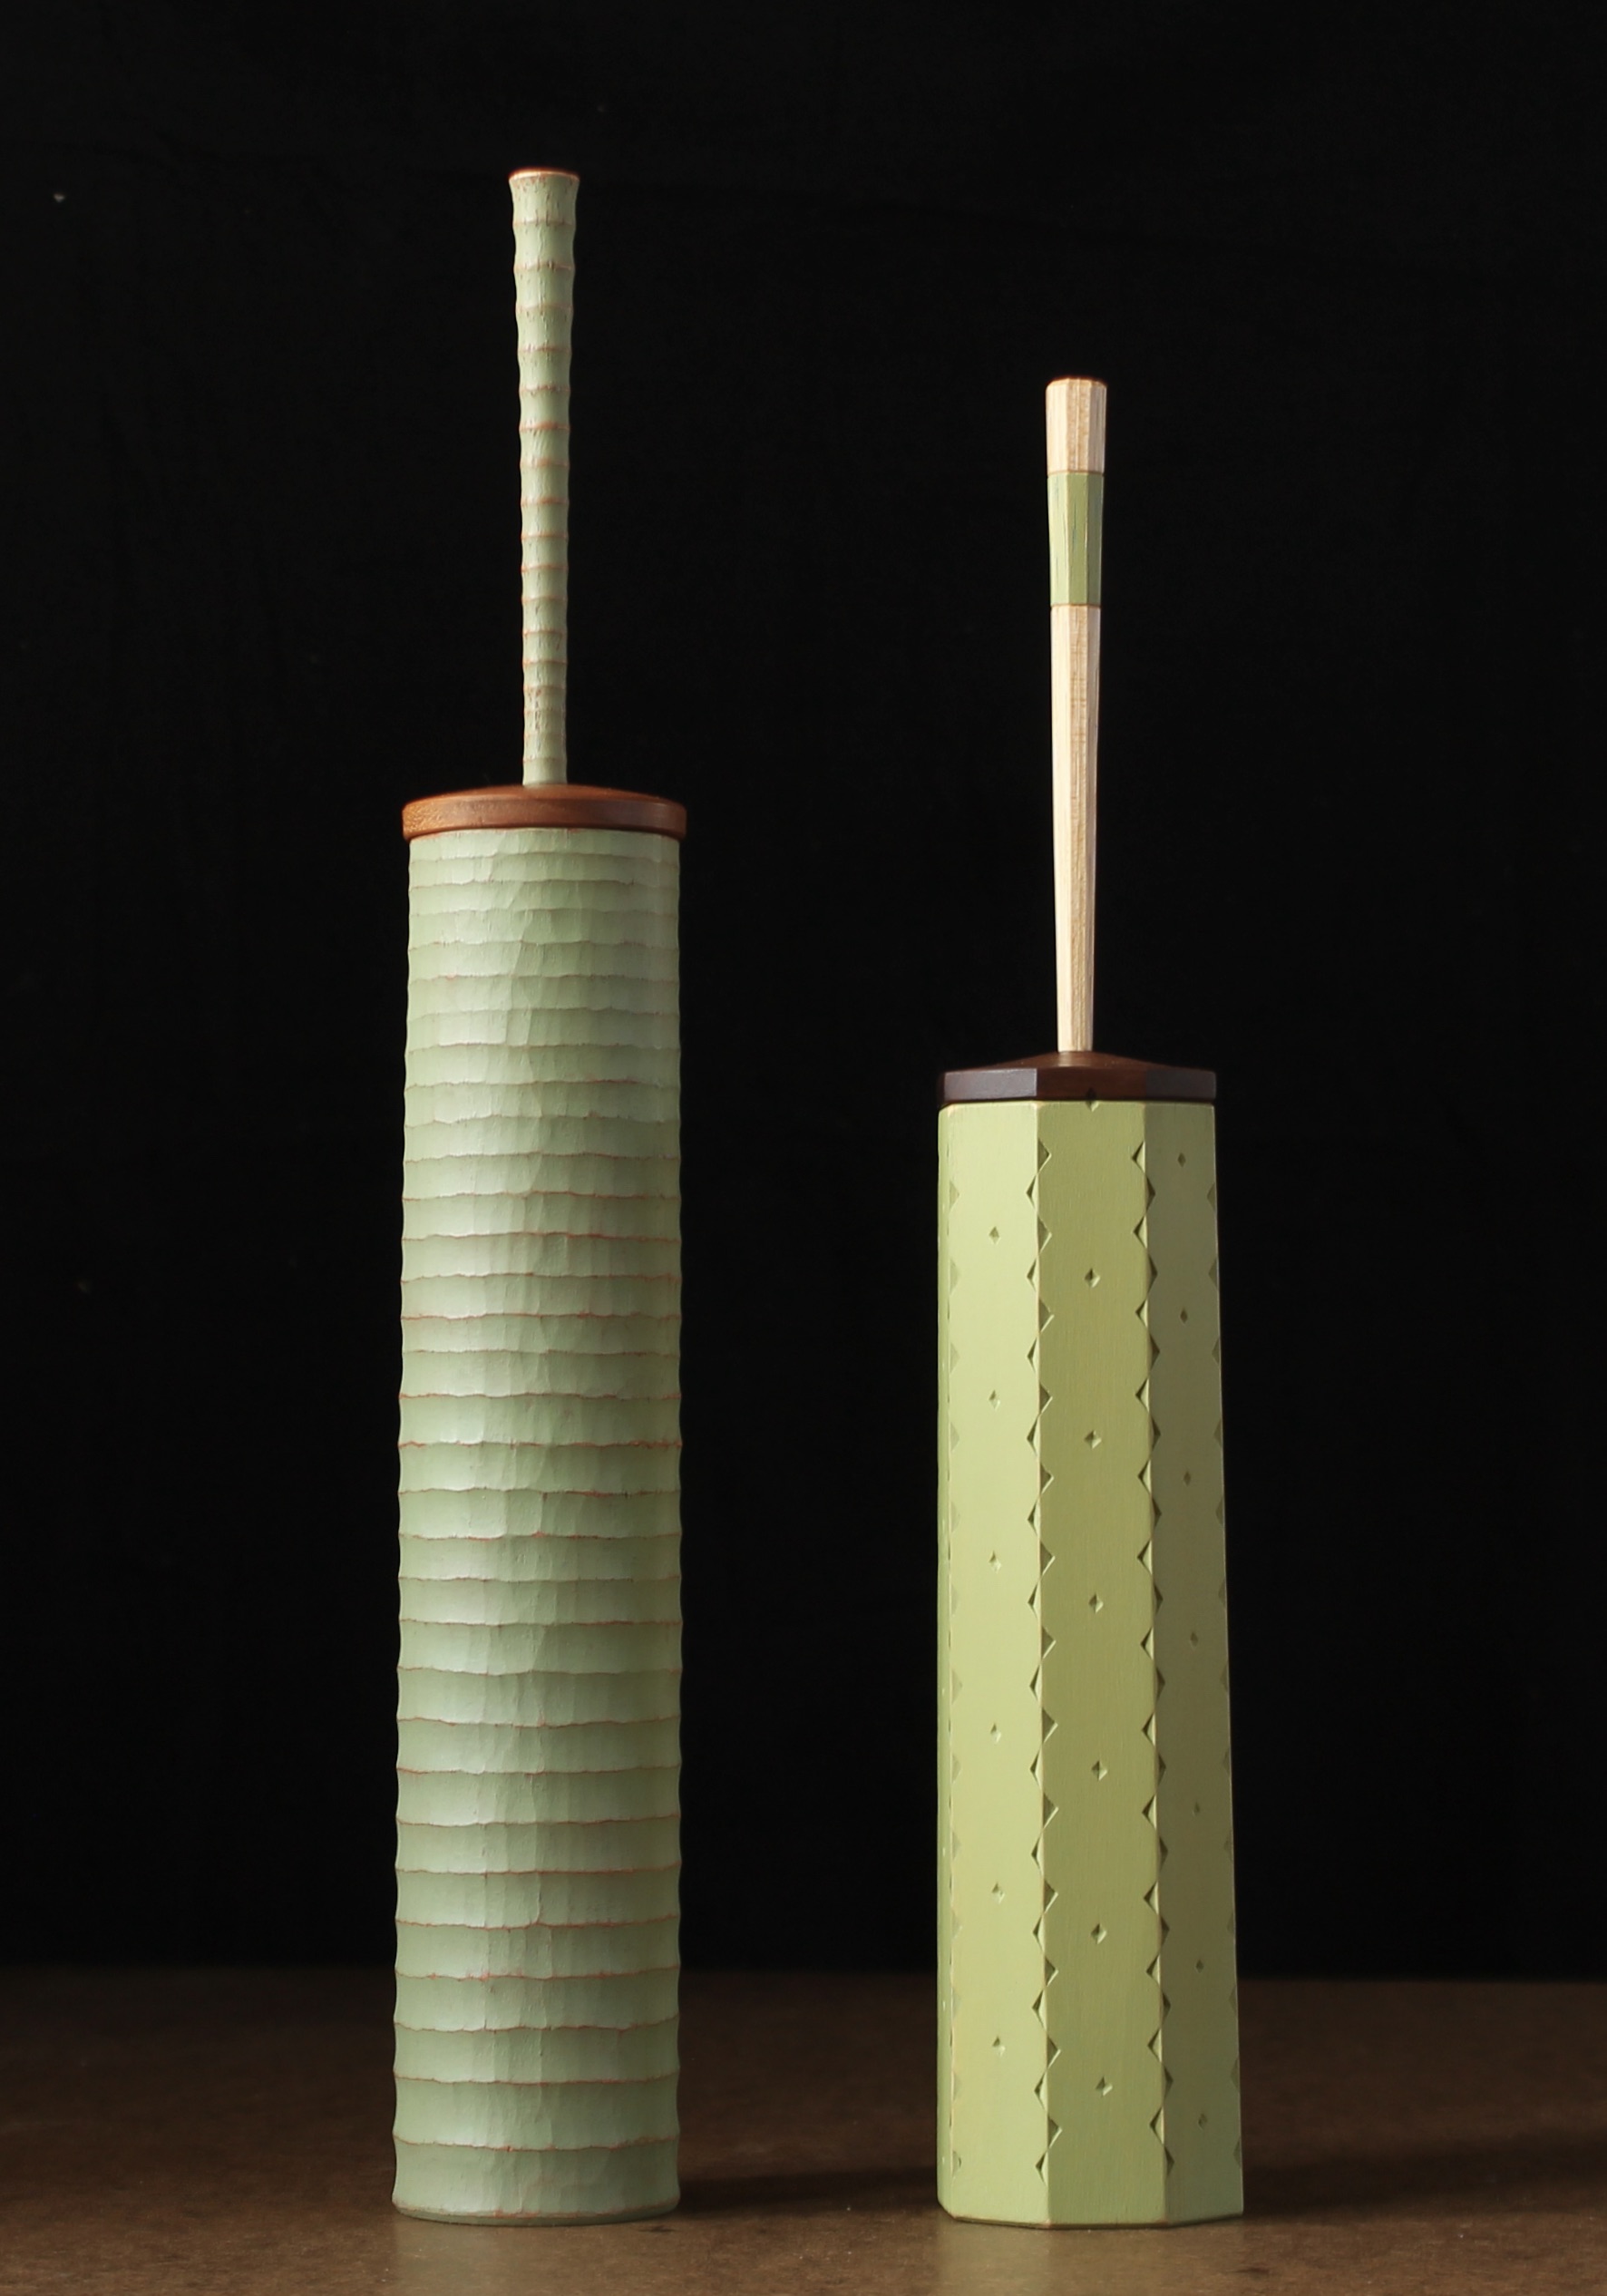
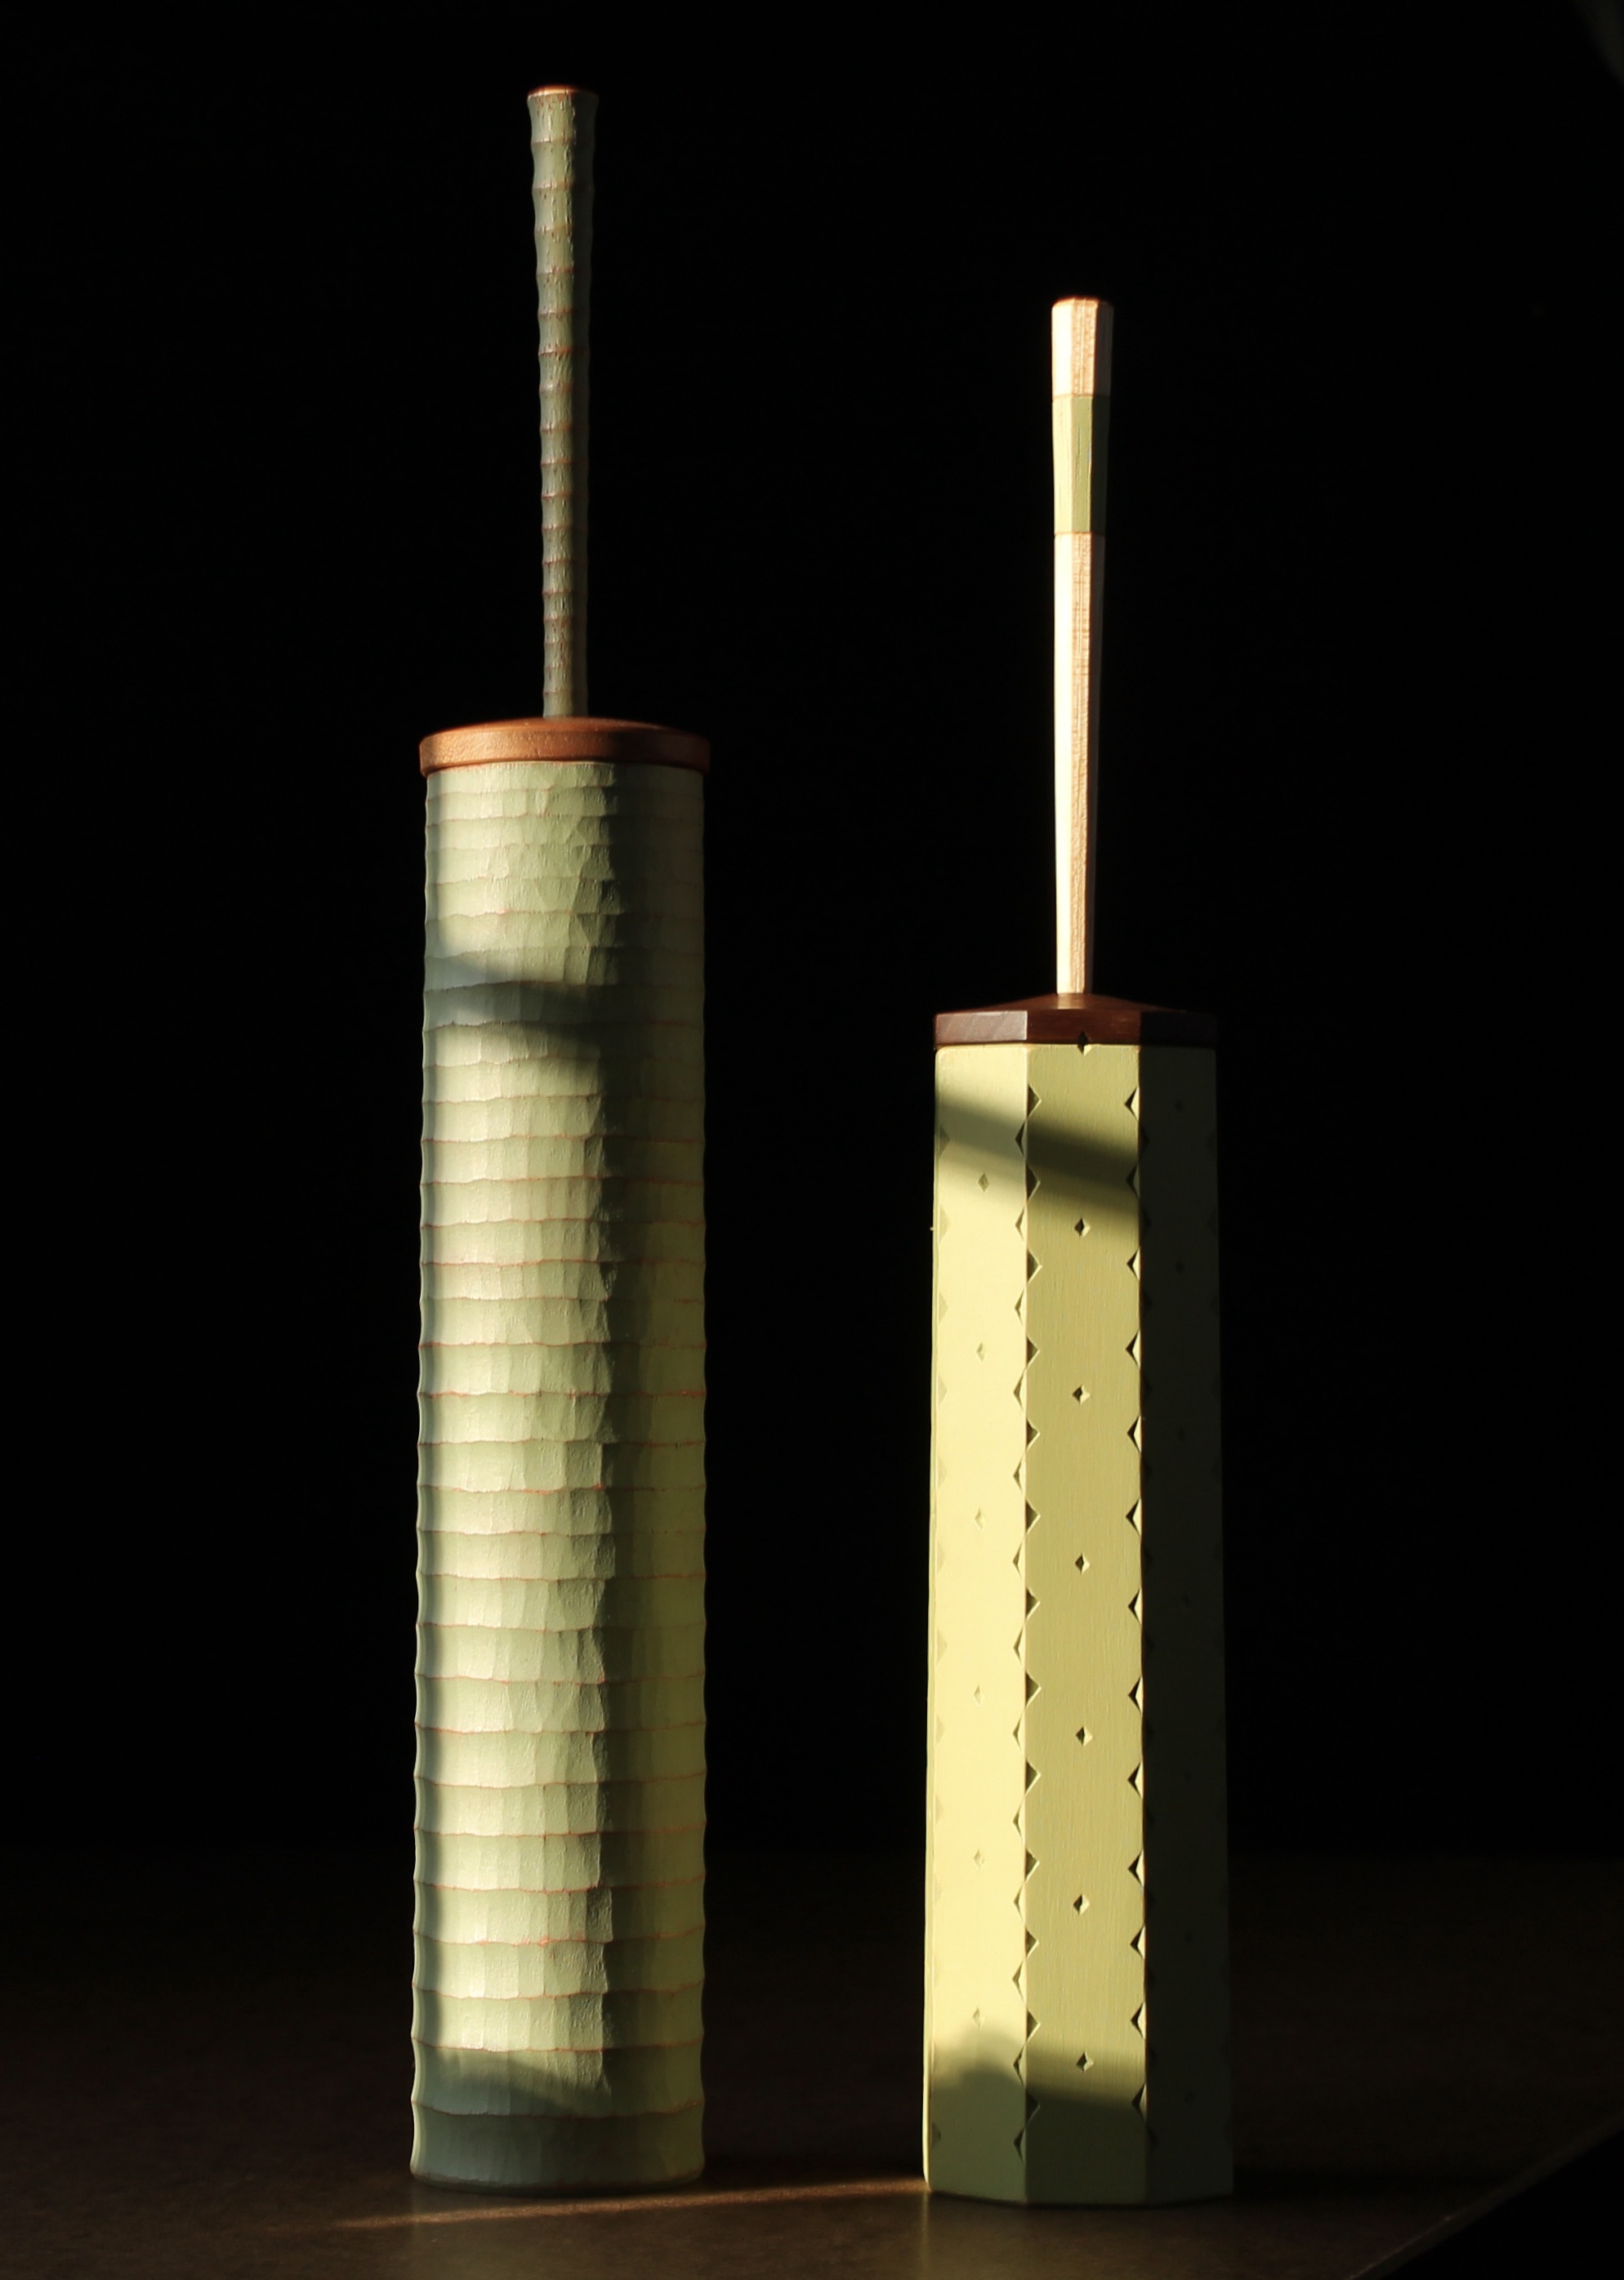
I’ve just finished two tall shrink pots. Each represents an experiment with texture and pattern, respectively, and I plan on making a small example of each to take along to my classes at Pete Galbert’s later this year. Meanwhile, both of these are available for purchase now. More photos and information are below.
Both of these began with the boring of a 2″ hole through a green log. The video segment above, recorded back in July, shows me boring with a T-handle auger in black birch. This is the log the taller of these shrink pots came from.
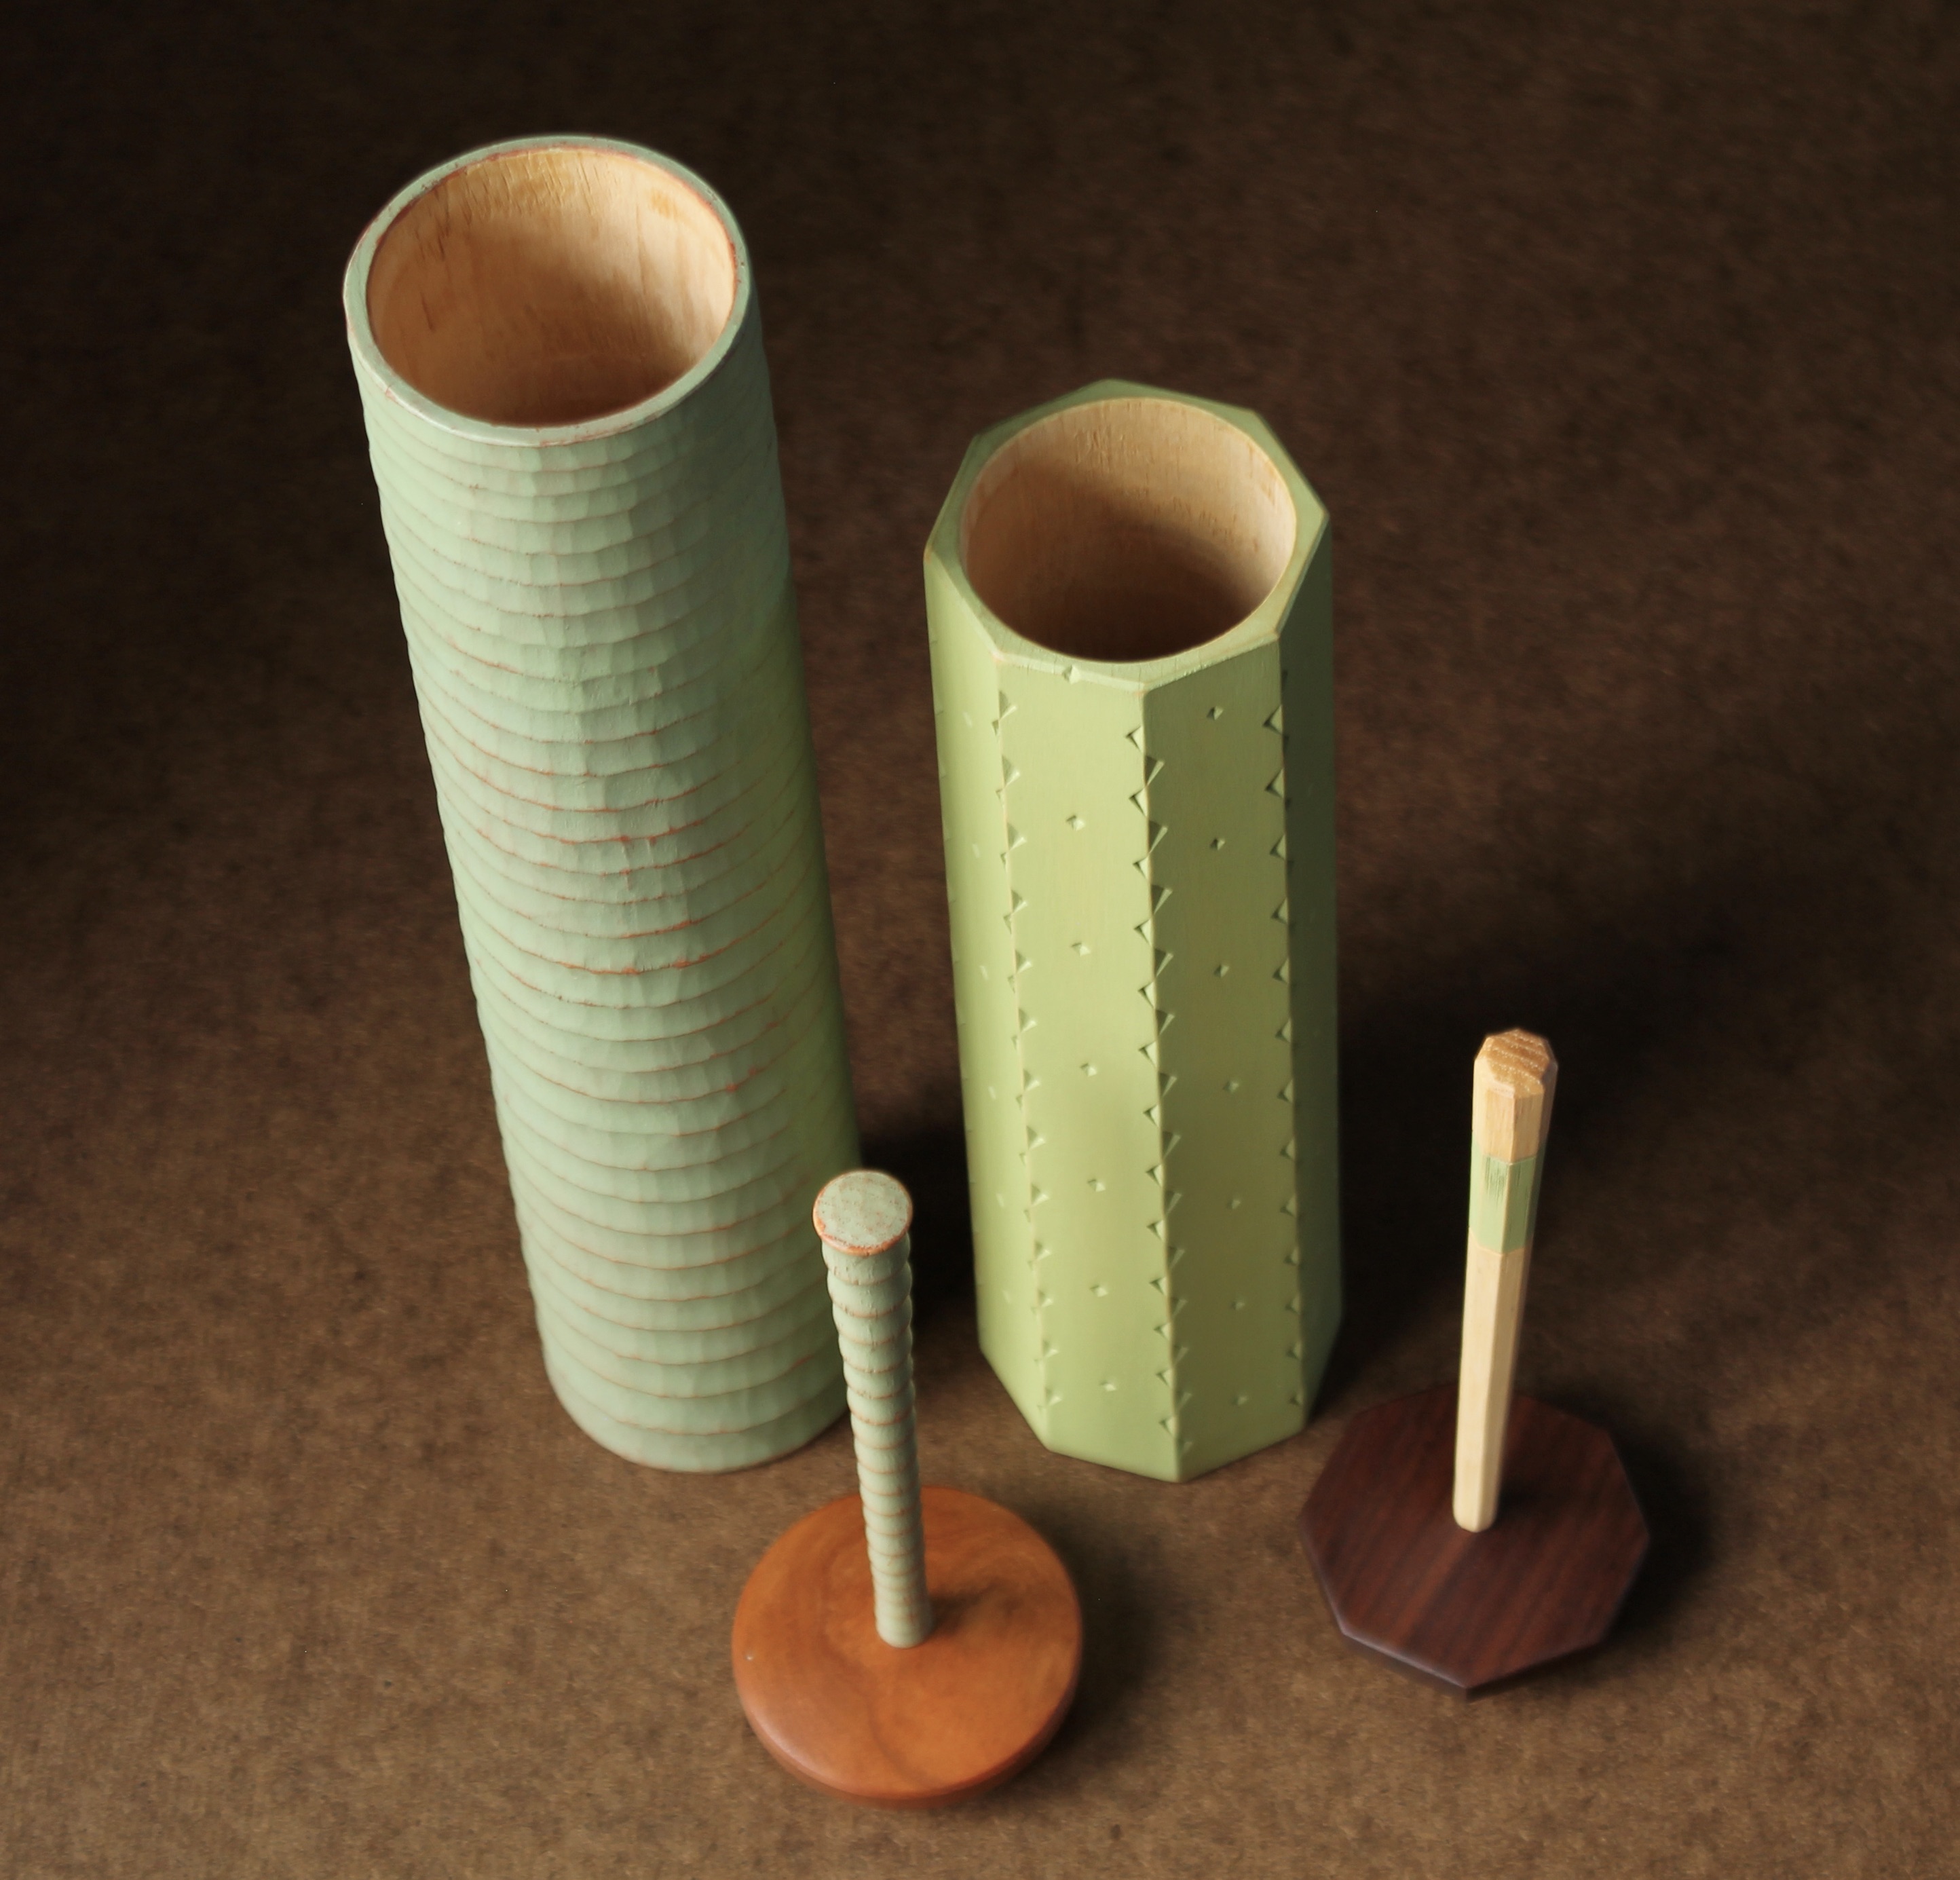
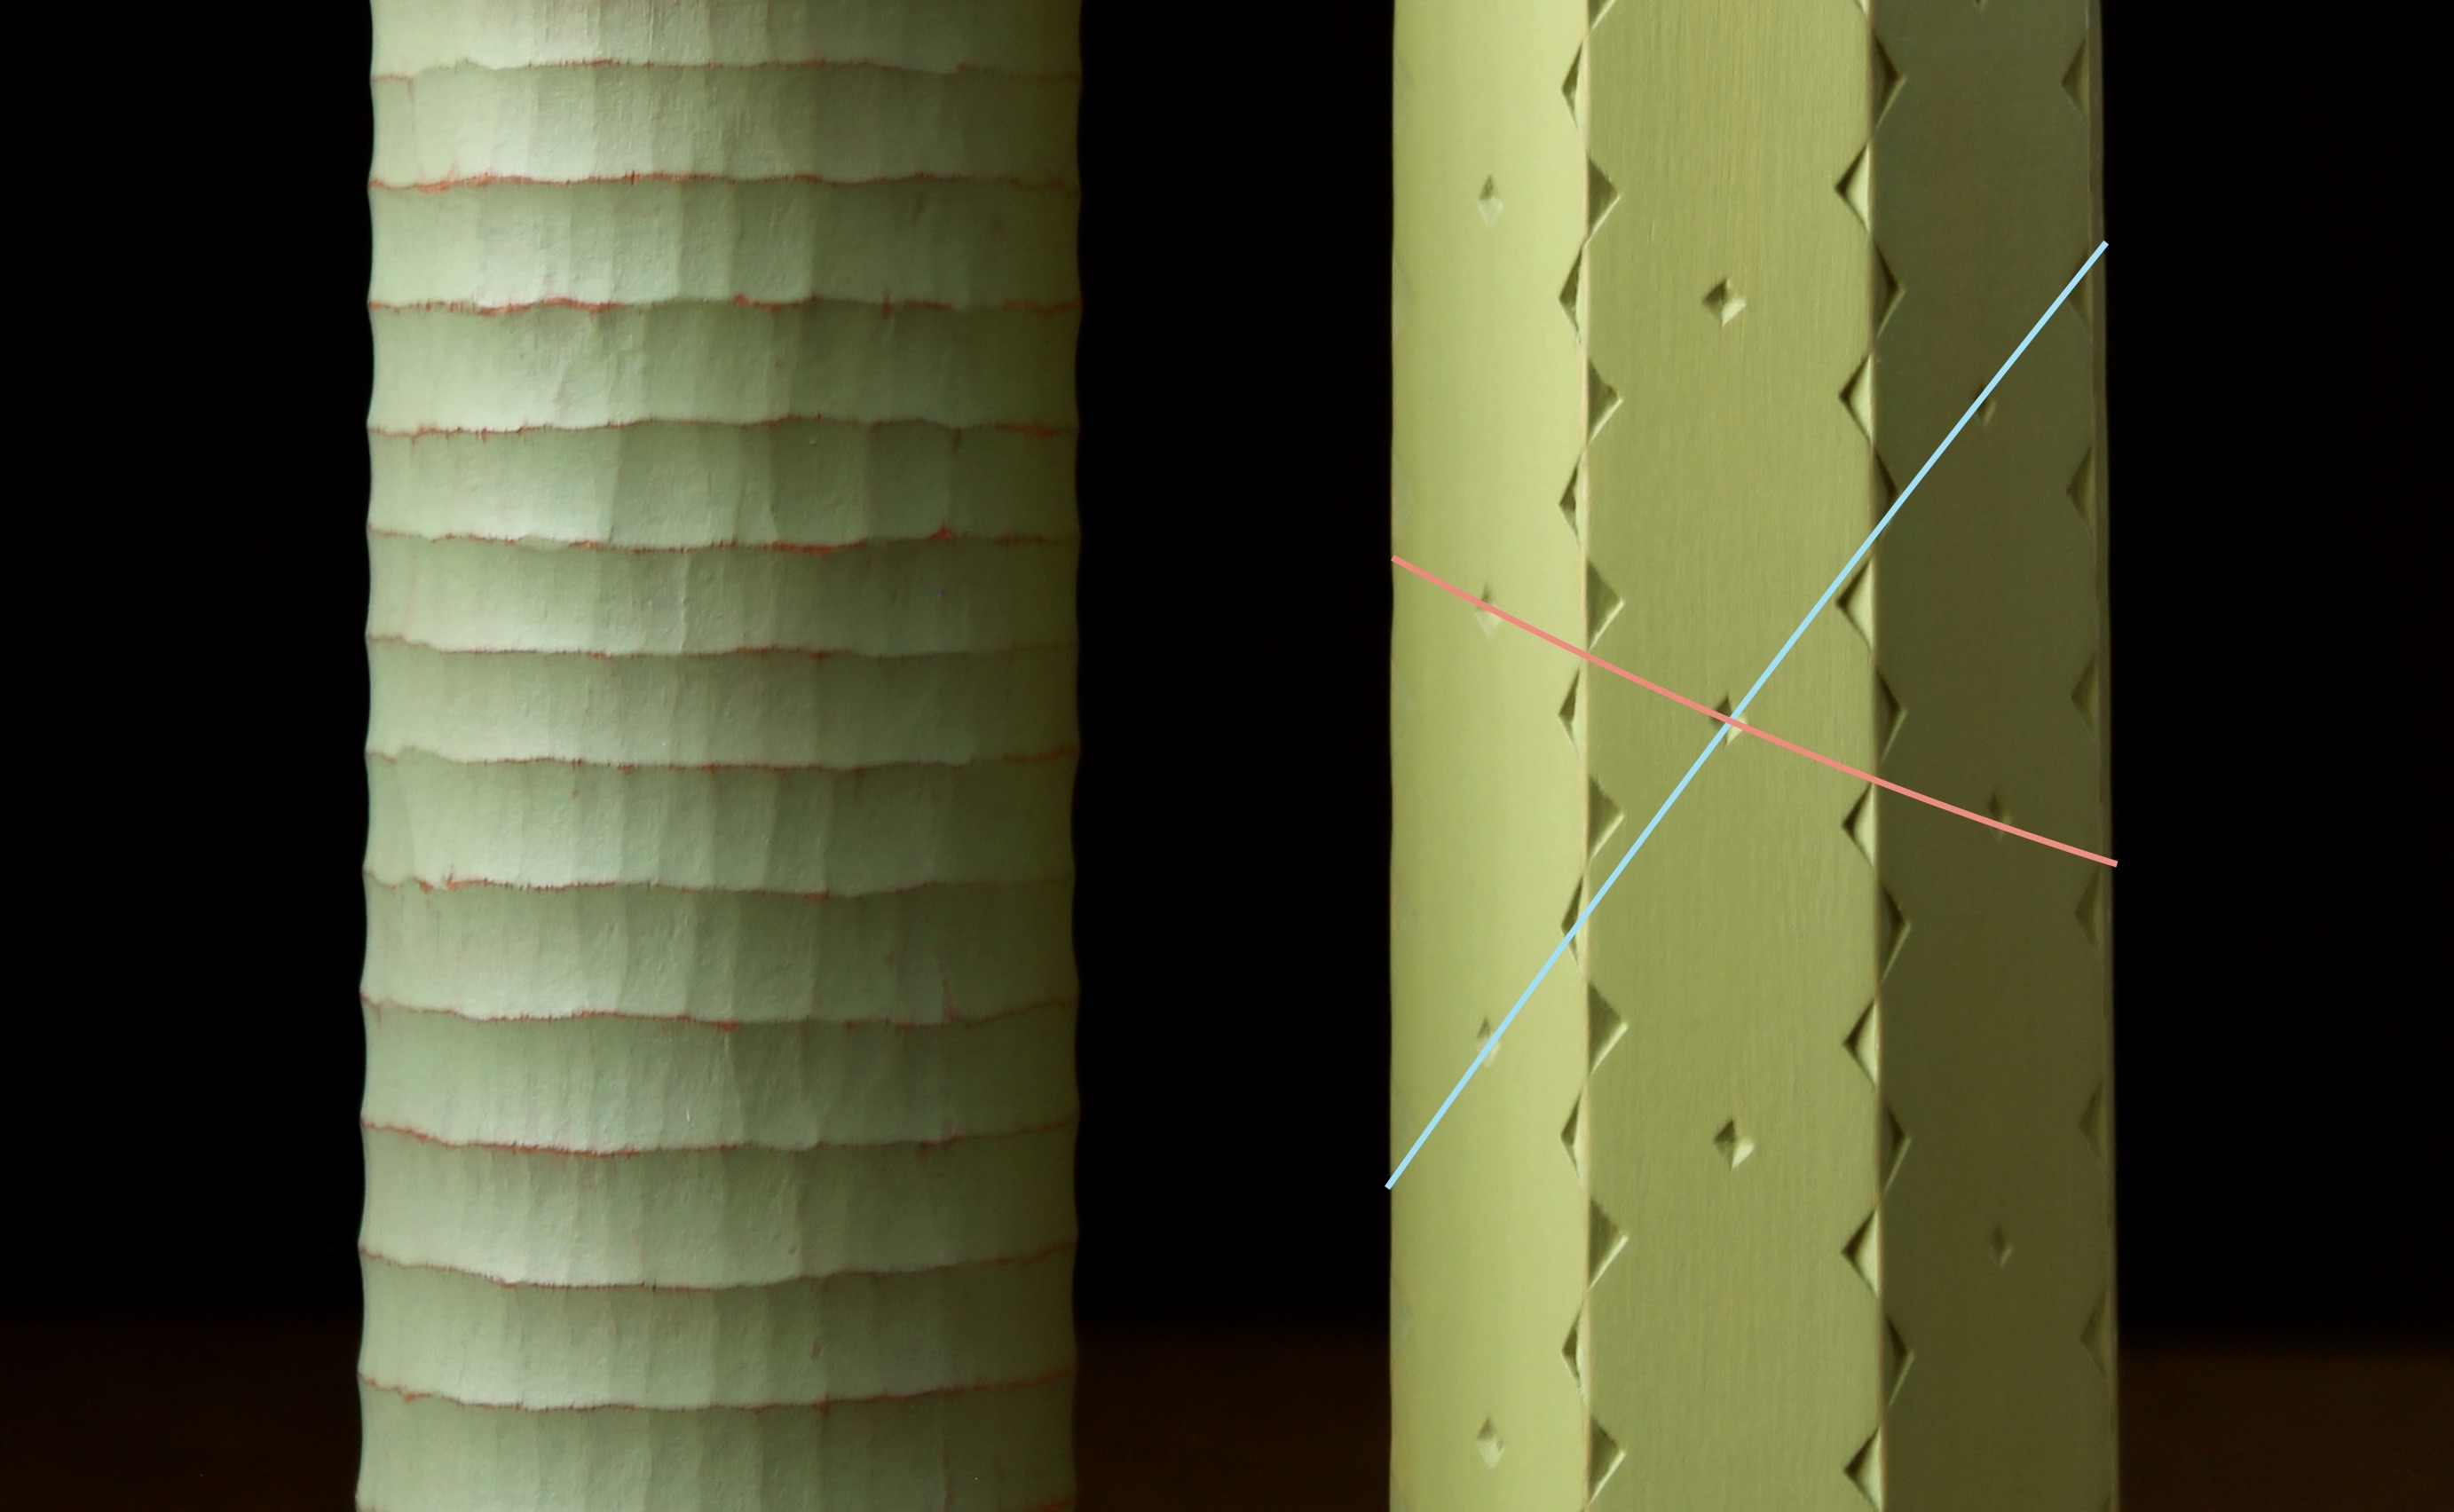
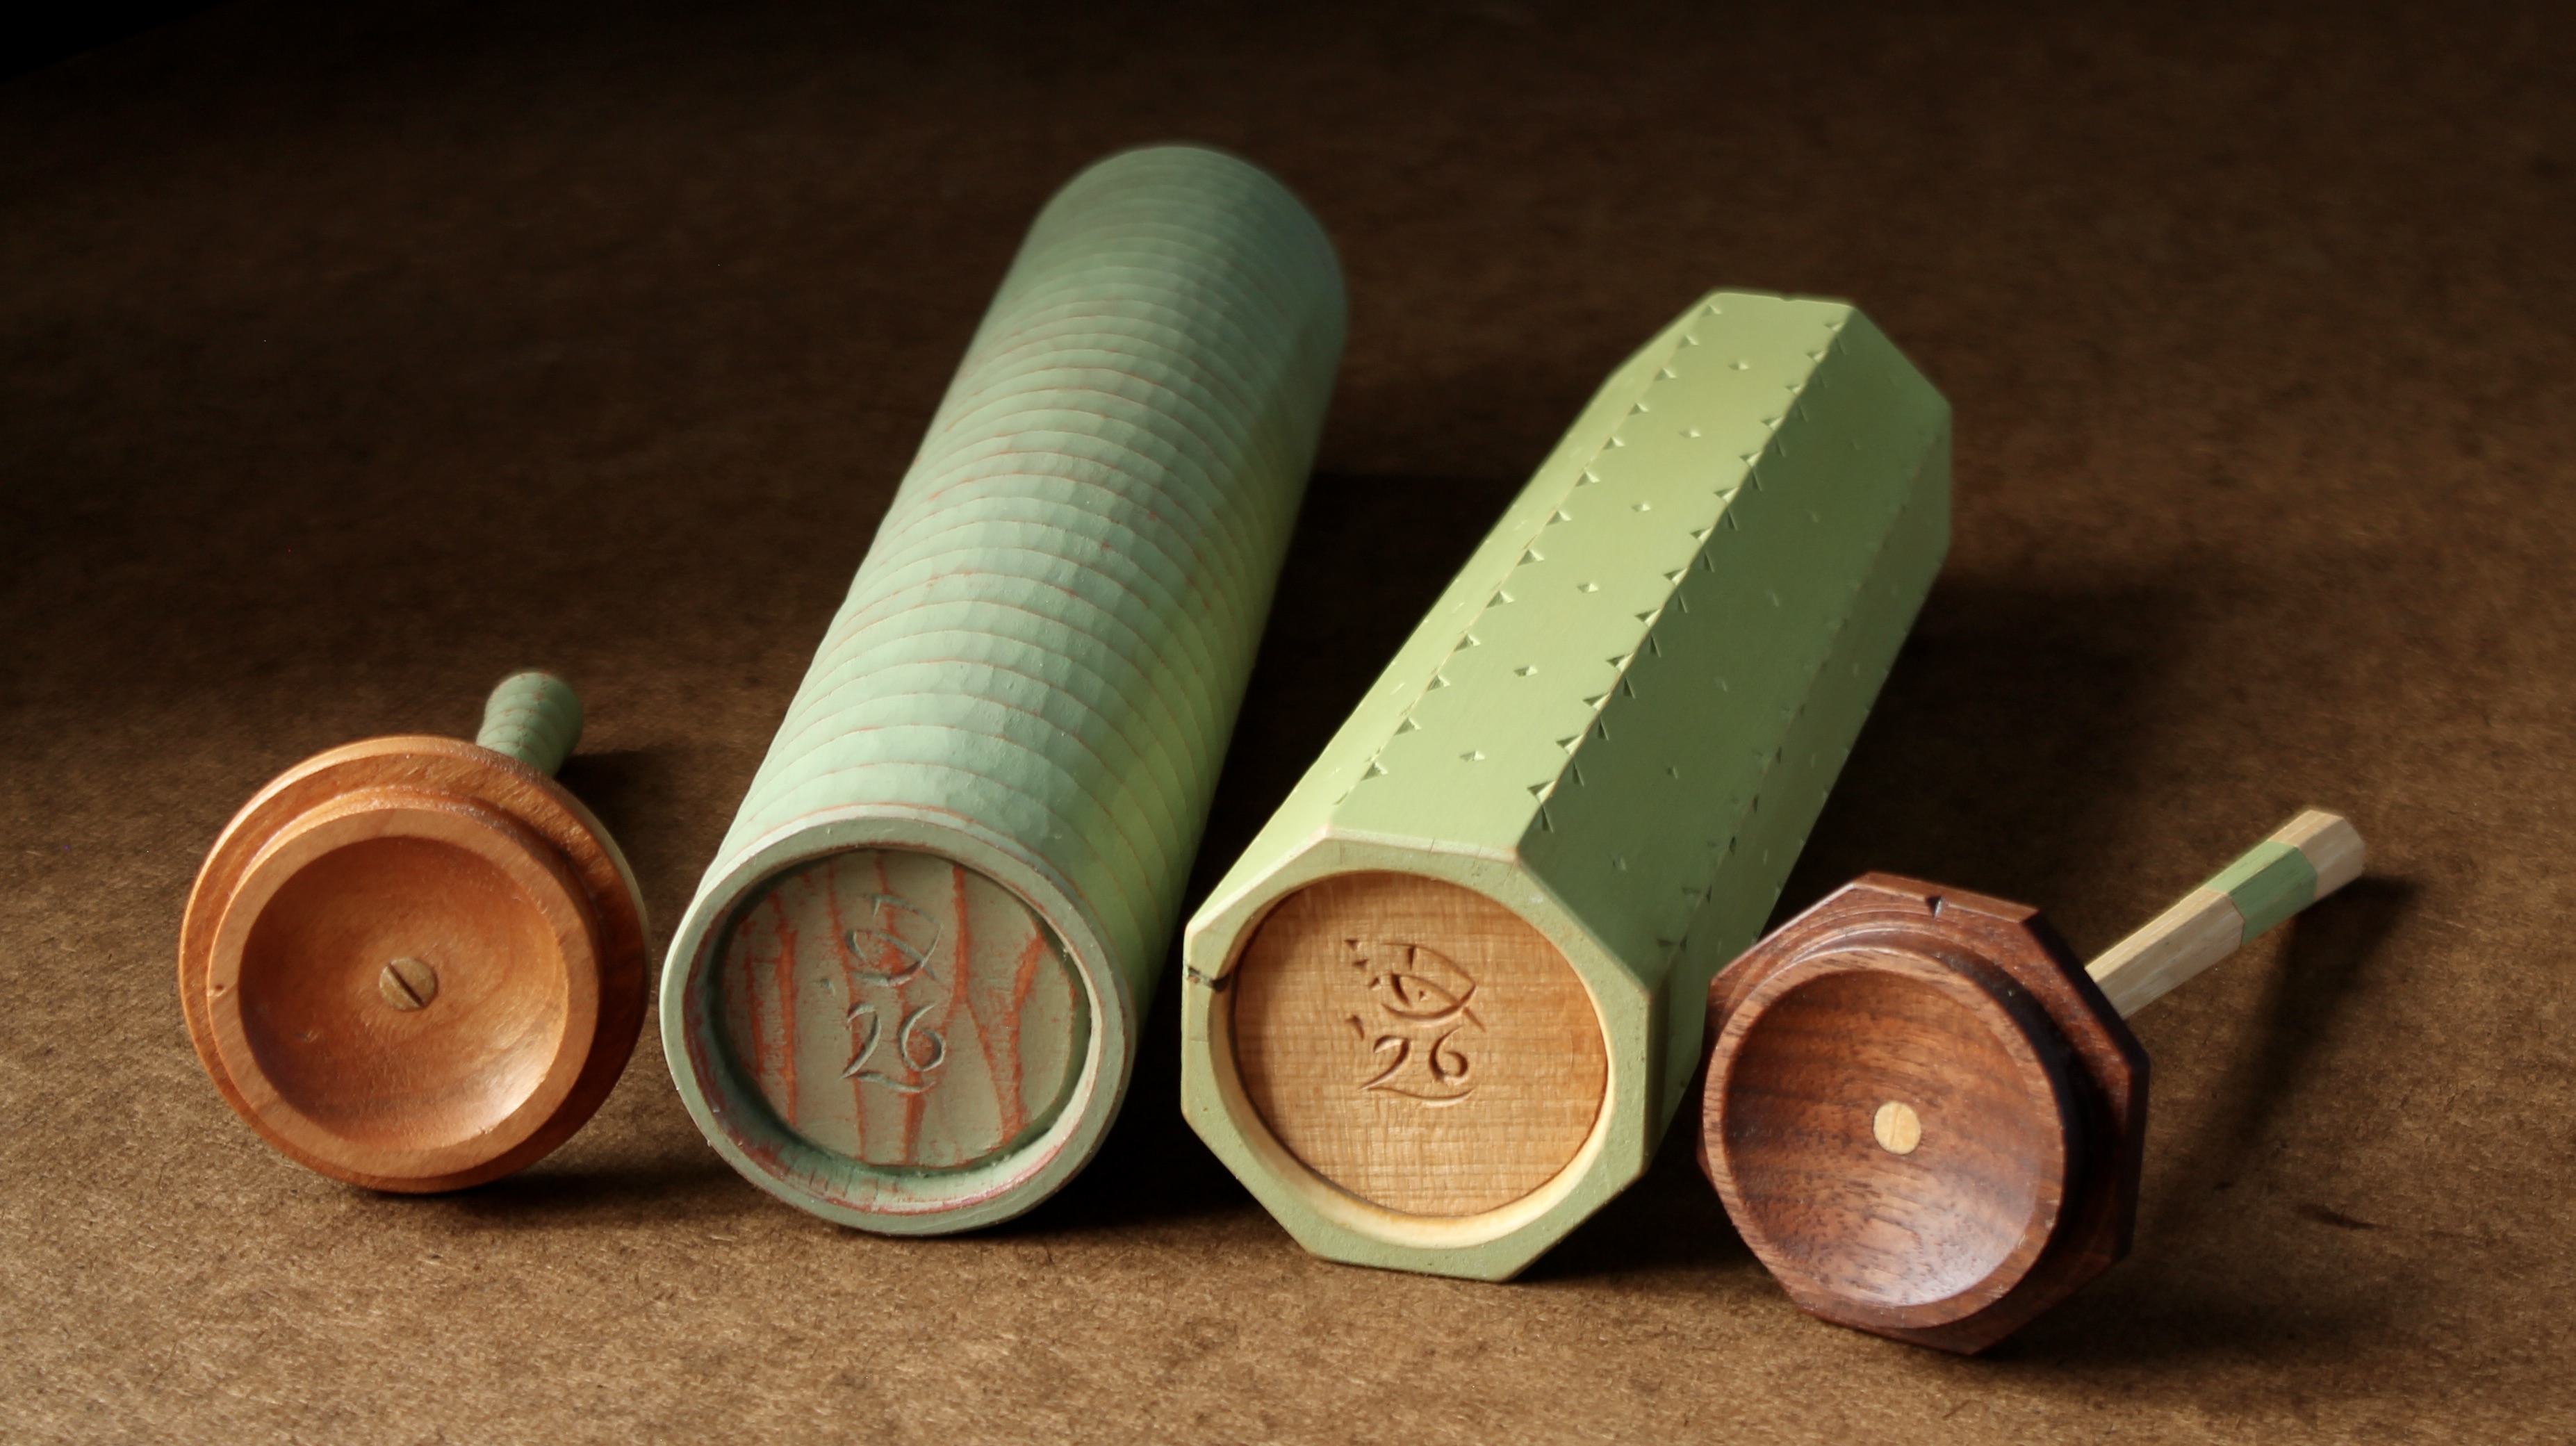
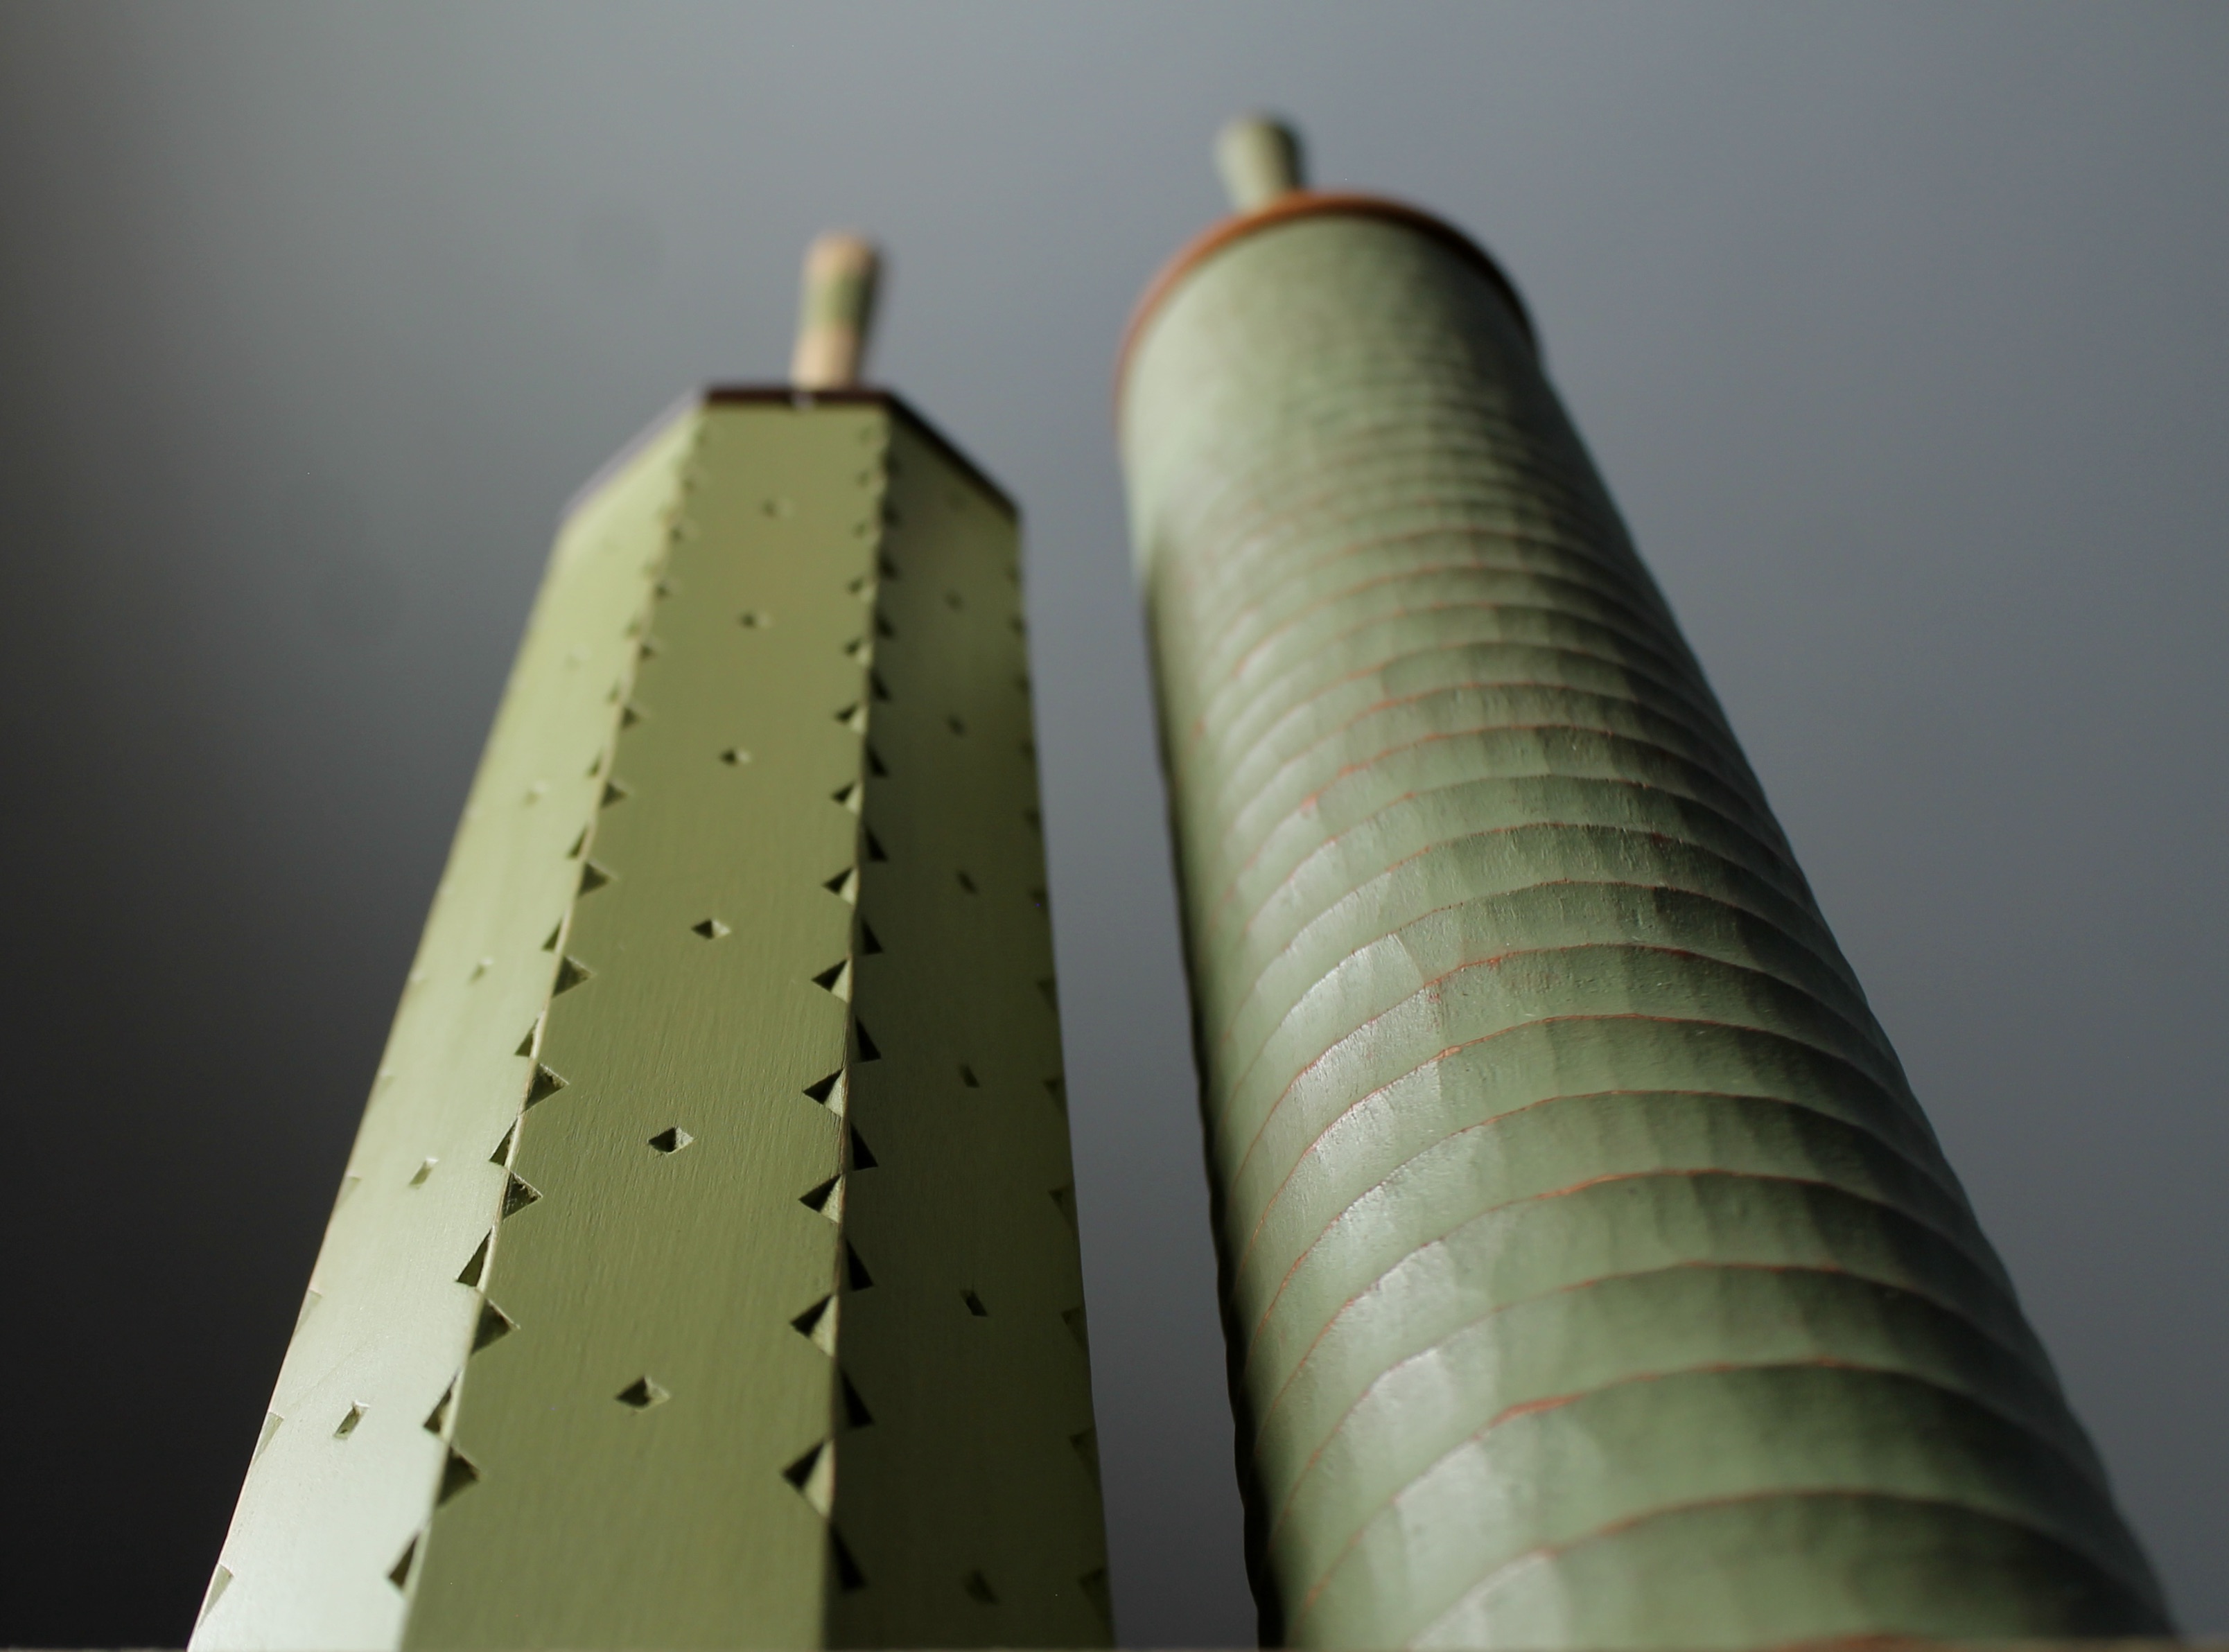
After boring out the centers, shaving down the exteriors roughly round with a drawknife, and fitting the bottoms, I let them dry and shrink. Then they sat around for several months. Blank canvases. The one on the left is black birch. I worked around the exterior walls, across the grain, with a gouge to create textured parallel graduated bands (wider at the bottom of the pot, narrower at the top).
For the one on the right, red maple, I shaved and planed to create an octagonal exterior, then decided to add a chip-carved pattern. I sketched right on the walls, playing around with ideas. After I carved the pattern along each of the eight ridges, the possibility of the four-sided chips (like dots) in between struck me. They line up to create a shallow spiral around the pot and a steep spiral in the opposite direction.
Both are painted with milk paint from Real Milk Paint Co. (RMP finishes) and topcoated with Viking Purified Linseed Oil Wax. I was out of any greens, so both of the colors resulted from mixing blues and yellows from the sample packets I had on hand. The one on the left has an undercoat of a mix of paprika and persimmon. There were plenty of small test pieces.
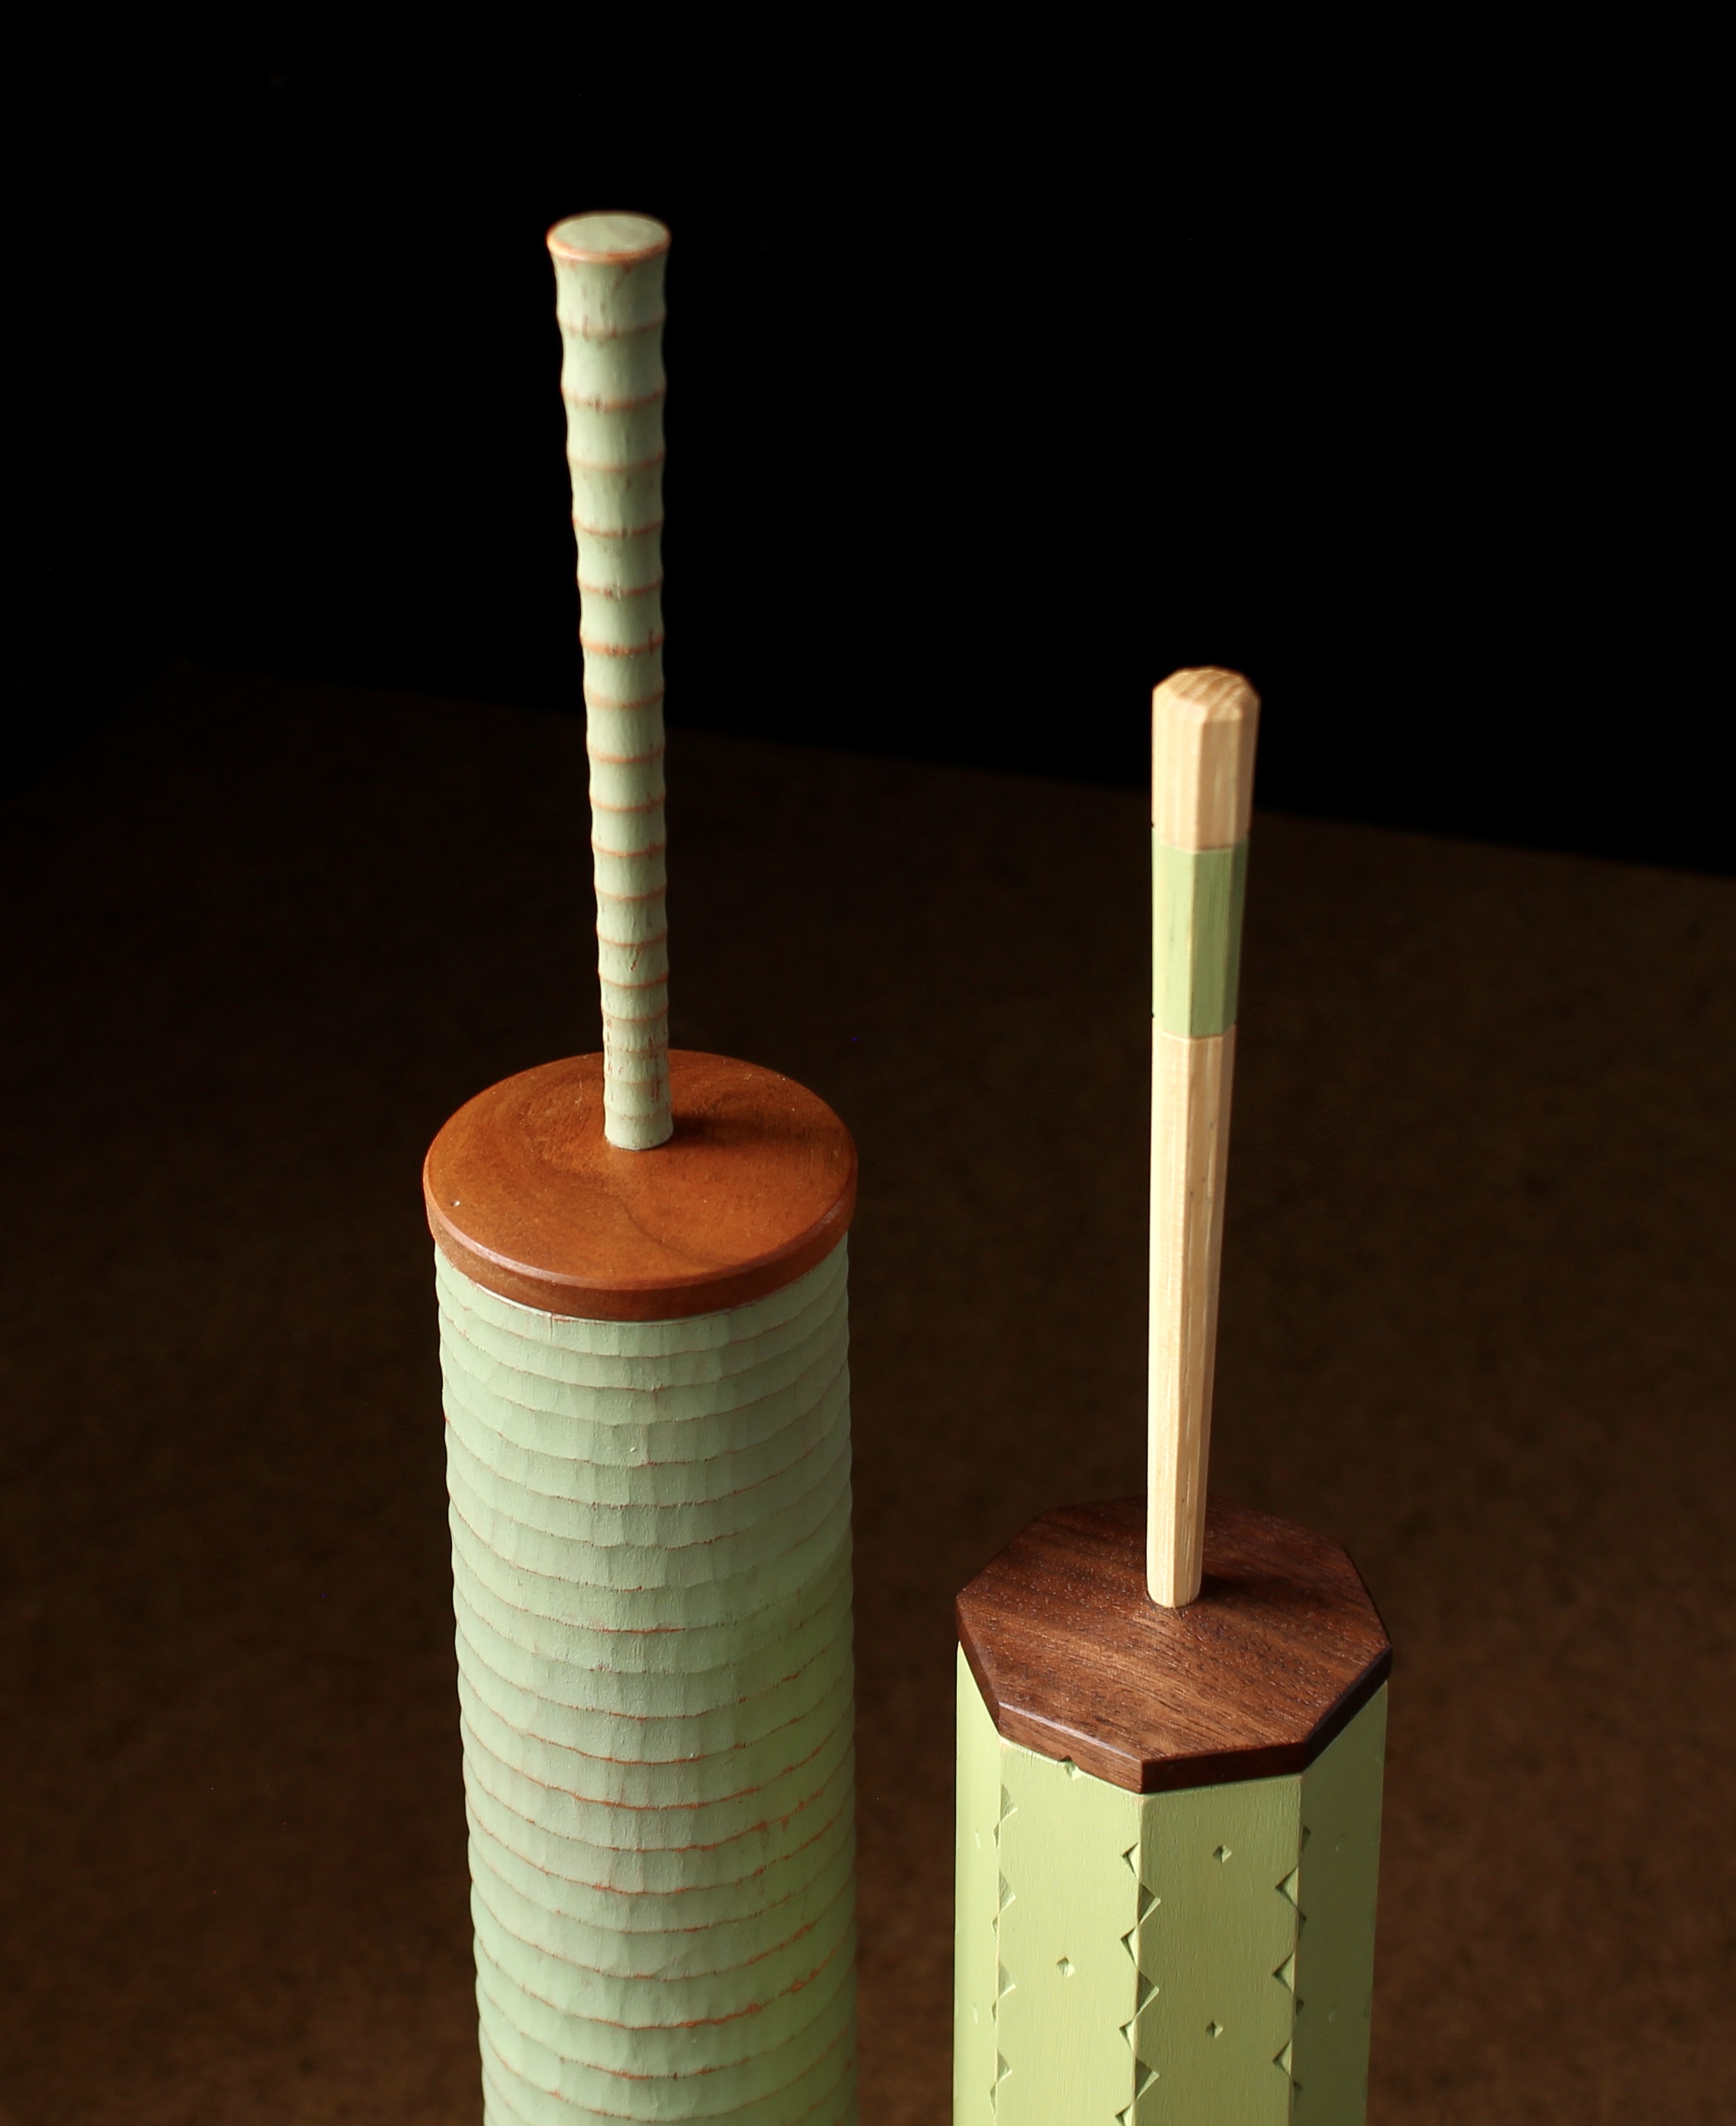
The lids are cherry and walnut, respectively, and both finials are from riven hickory, for strength in their slenderness.
As I mentioned, both are available for purchase. Ready for storing your dry spaghetti, paint brushes, pick-up-sticks… If you’re interested, please email me at dandkfish@gmail.com. Thanks!
Left (carved rings): Black birch, cherry, hickory, milk paint. 16 3/4″ tall (11 1/2″ without the finial) x 2 3/8″ wide. $475 includes shipping. SOLD
Right (chip carved): Red maple, black walnut, hickory, milk paint. 15″ tall (9 1/4″ without the finial) x 2 3/8″ wide. $475 includes shipping. SOLD

Ingenious and artistic, as always!
LikeLiked by 2 people
these are really fabulous–great start to the New Year–
LikeLiked by 2 people
Very very nice pots, and I really like how you’ve taken the photographs. Thanks for the inspiration.
LikeLiked by 1 person
Absolutely marvellous ! – this has stimulated me to have a go at some artistic shrink pots this year utilizing my David Fisher bowl horse.
LikeLiked by 1 person
Thanks! The bowl horse does work great for holding shrink pots. have fun!
LikeLike
These are really fantastic Dave! I am curious how you ended up finishing the insides? Is the surface straight from the auger or have you managed to somehow clean them up with something? I’ve used augers for long skinny pots before, but the surface left is never great.
LikeLiked by 1 person
I’m usually able to leave the insides of “shrink tubes” straight from the auger. Usually the surface left from the auger is pretty clean. If some stringy fibers are sticking out in there, you can slice them off with a slender gouge when green or, when dry, roll up a medium/coarse sheet of sandpaper and stick it down the tube. Let it open up inside and it will expand against the walls of the tube, then you can move it back and forth a bit to smooth up the interior. Straight from the auger, the smoothness depends on how sharp and true the auger is, as well as the wood species, fiber straightness…
I have a few posts specific to shrink tubes. Here’s one: https://davidffisher.com/2016/06/07/shrink-tubes/
LikeLike
As usual – gorgeous work, Dave. I’d be curious to see more of your process for making/fitting a lid.
LikeLike
Thanks, Roberto. I’ll plan on doing a post about that as I finish some more shrink pots. There are all sorts of lid possibilities, including sliding lids. I usually go with a rabbeted lid that fits snugly, like those on these pots, but there are lots of options for making them. Regardless, the lid is made and fitted after the pot has dried completely. With truly round pots, such as these, lids can be turned on a lathe, which was the case with these two lids. Usually, round pot or otherwise, I carve the lid then form the rabbet from the one solid piece by carving it, or by gluing a separate (smaller) piece beneath the lid. More, with images, in an upcoming post sometime.
LikeLiked by 1 person