

When I finished carving this walnut tray/bowl last week, I had no particular plans for the foot. As I looked at the broad canvas of walnut wood, an idea came to mind for a representation of forest trees rooted along the sapwood-heartwood border. Below is a brief slideshow of how I went about it.
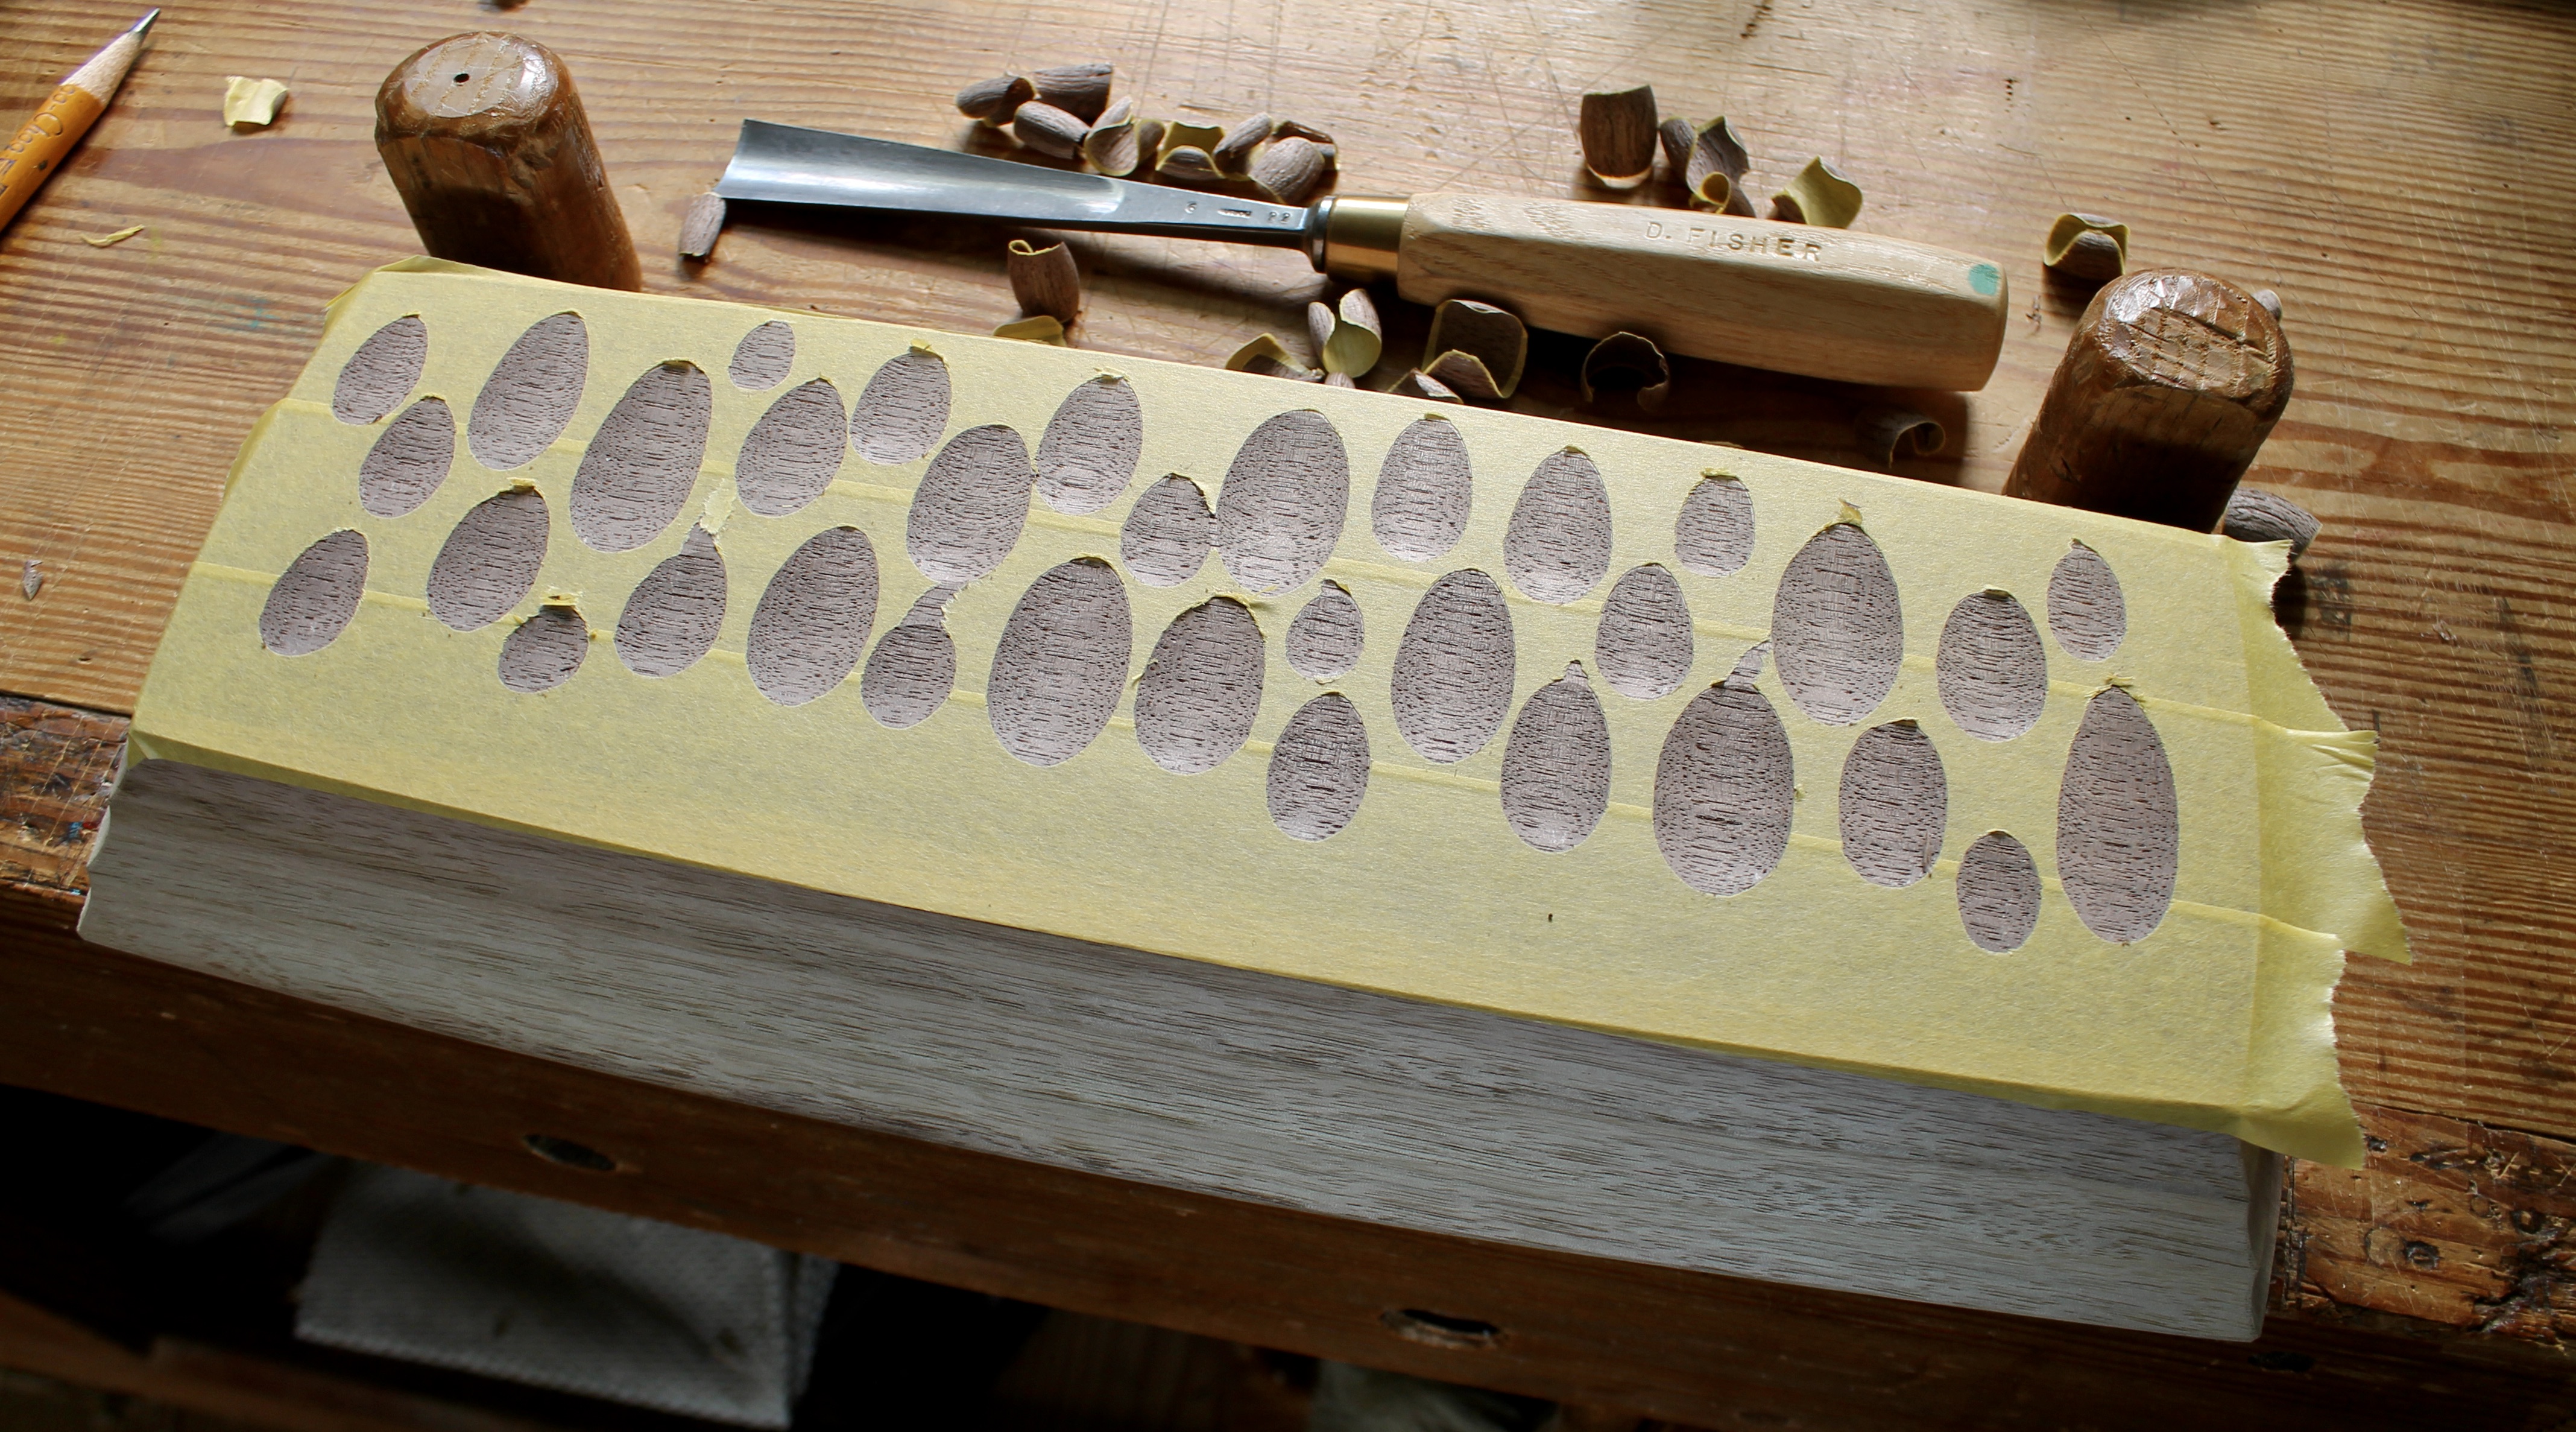
Single gouge cuts through the tape. The tape may lift a little at the exit sometimes, but that’s not a problem. 
Painting the gouge cuts with milk paint. I used four different shades of green. I just played around mixing some blues and yellows (and some touches of other colors) from various sample packets. 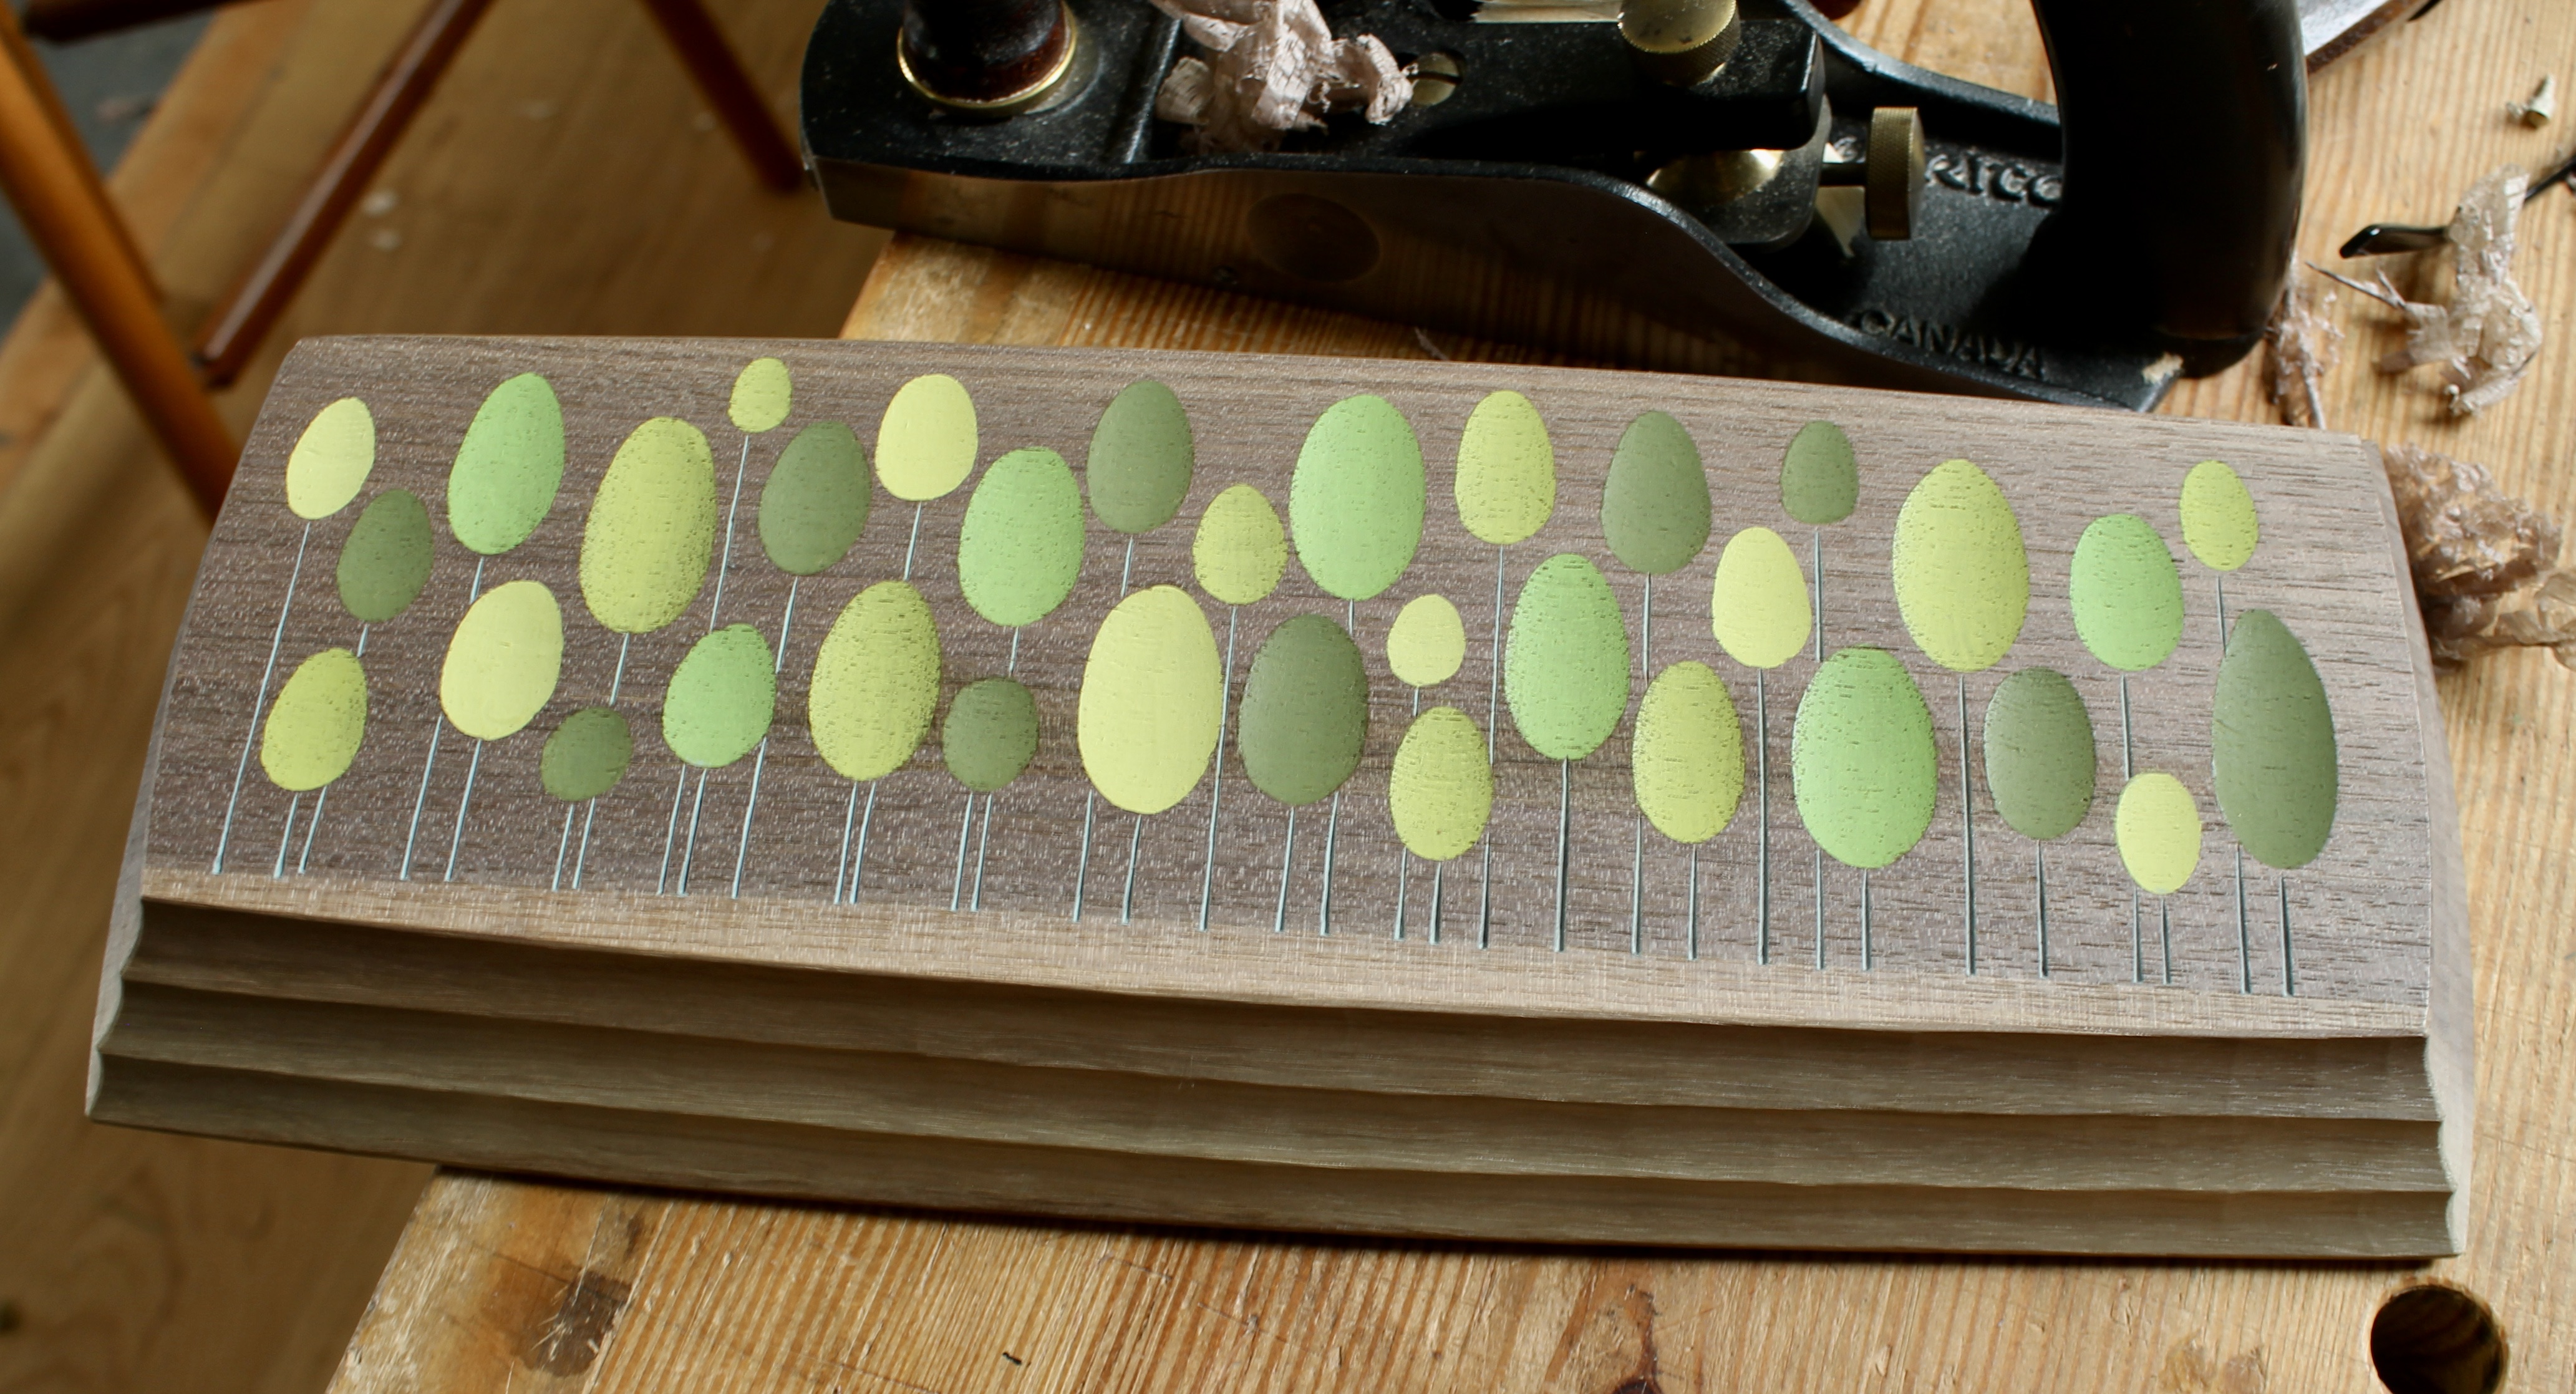
After carving the trunks and painting them, the tape is removed and the surface cleaned up with very light cuts from a plane. 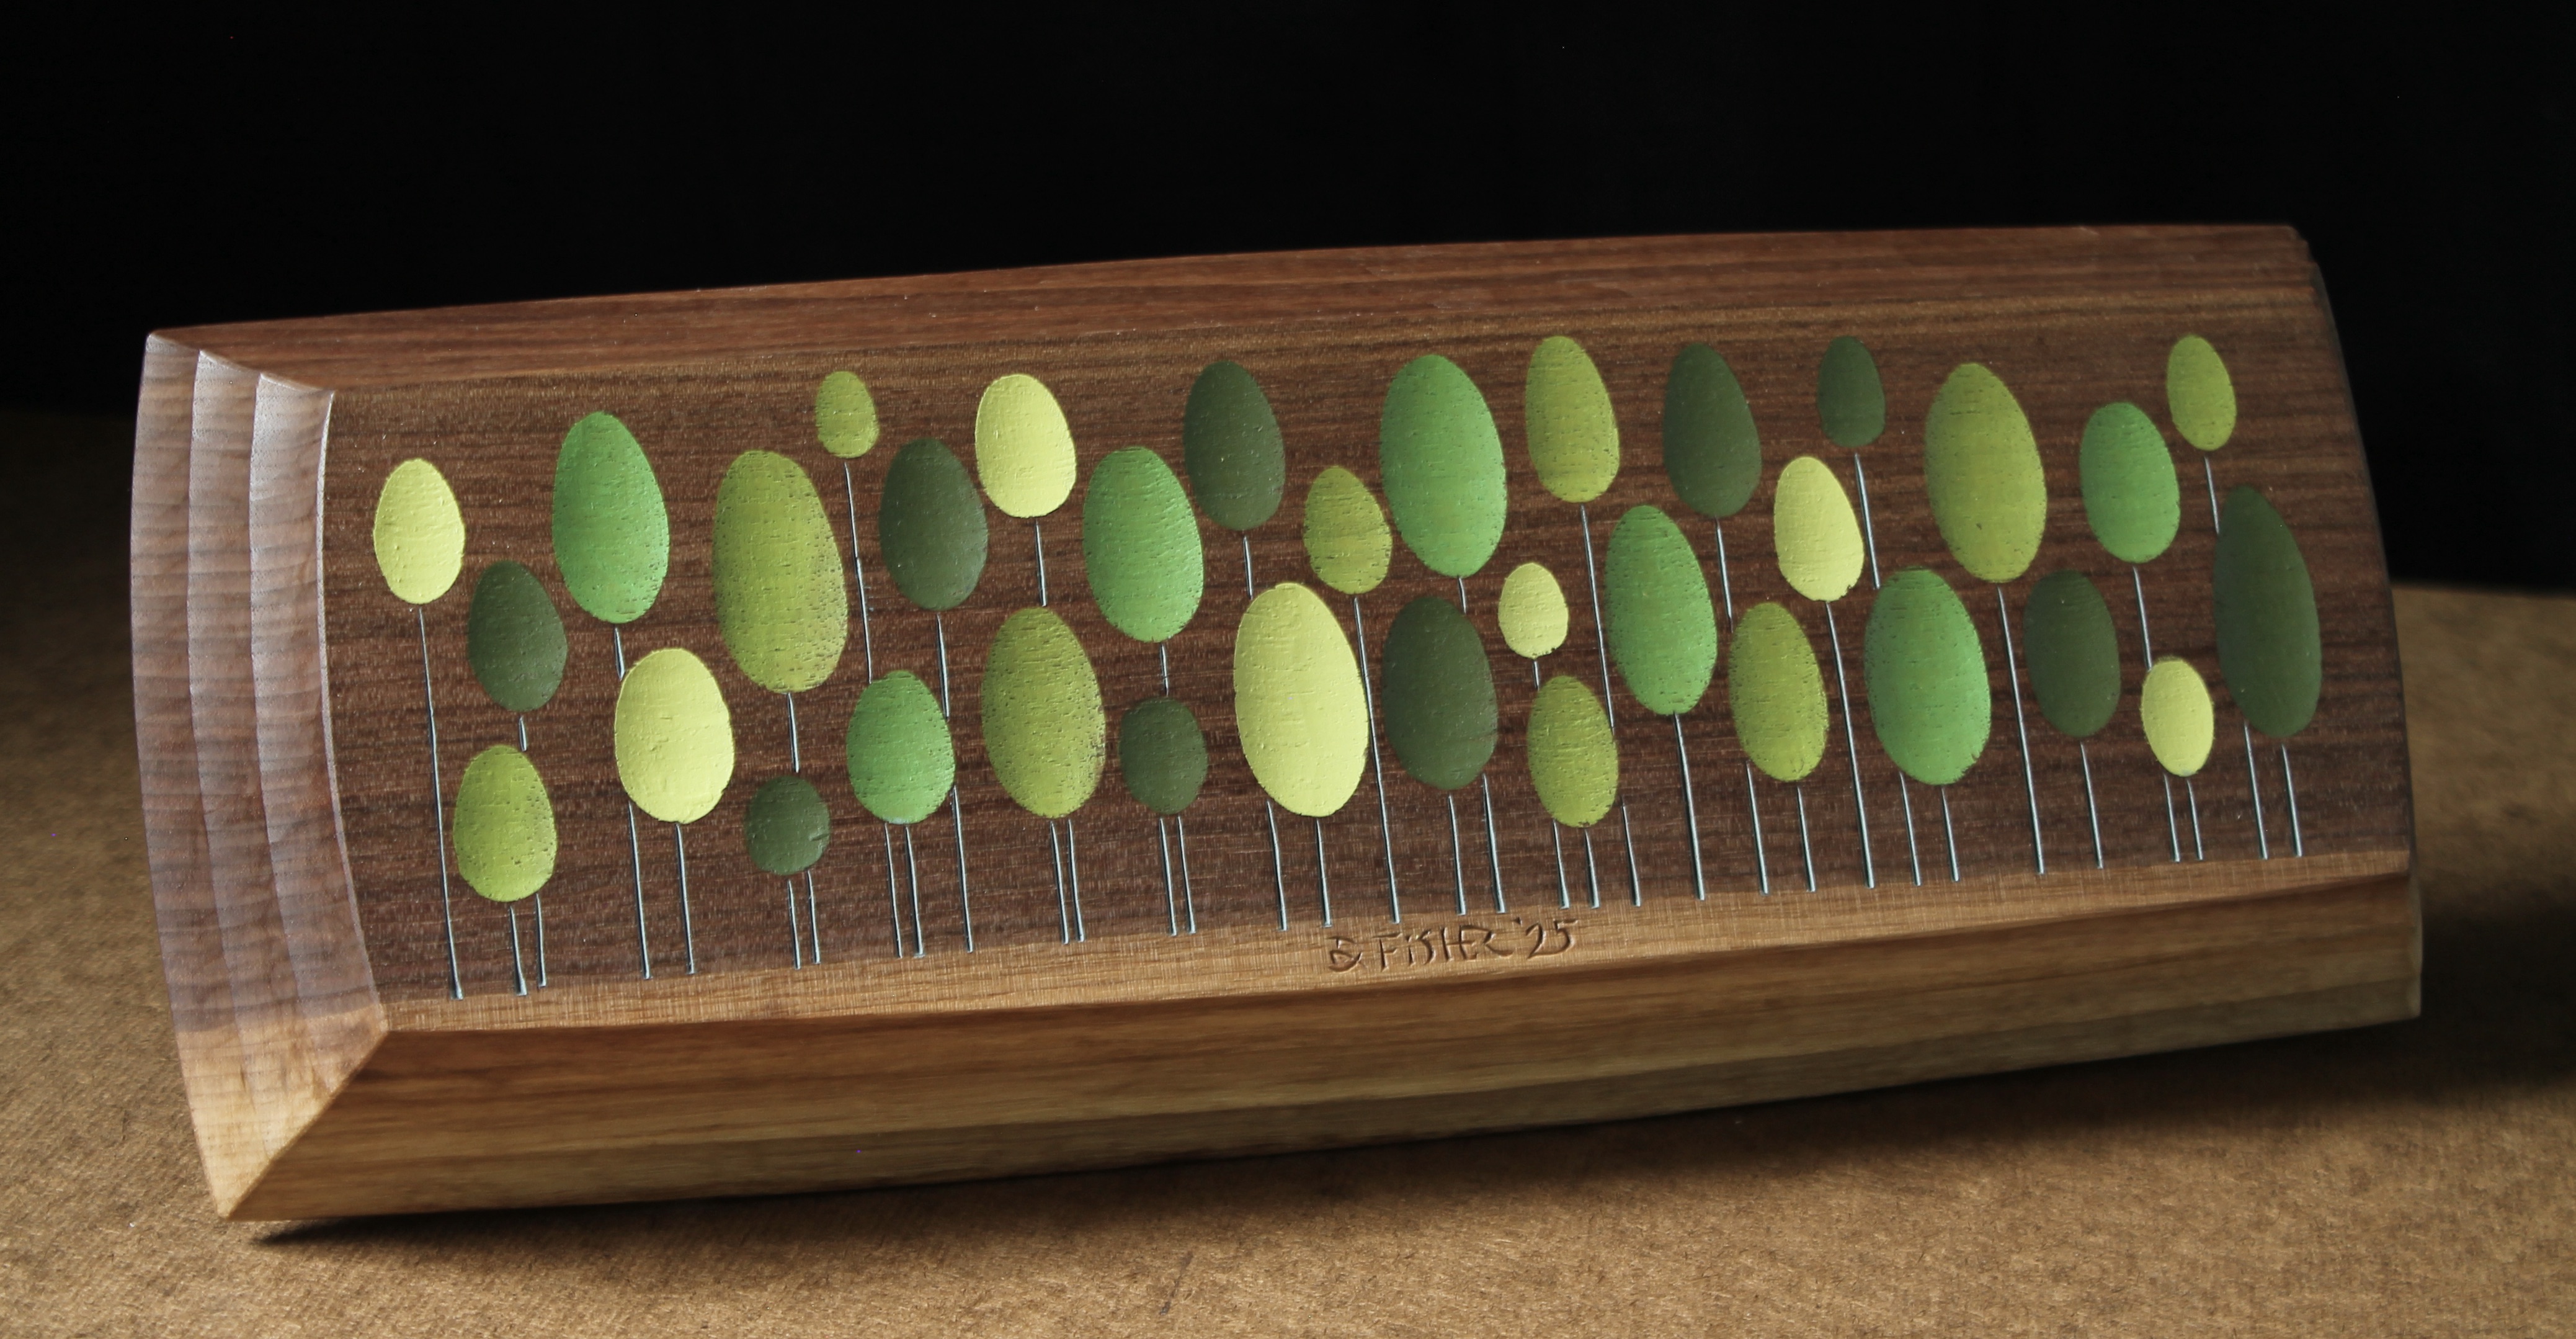
The oil deepens the color of the paint and surrounding wood.
I may be able to skip the tape for a wood species without open pores. I’ll have to experiment and play around with this pattern some more.
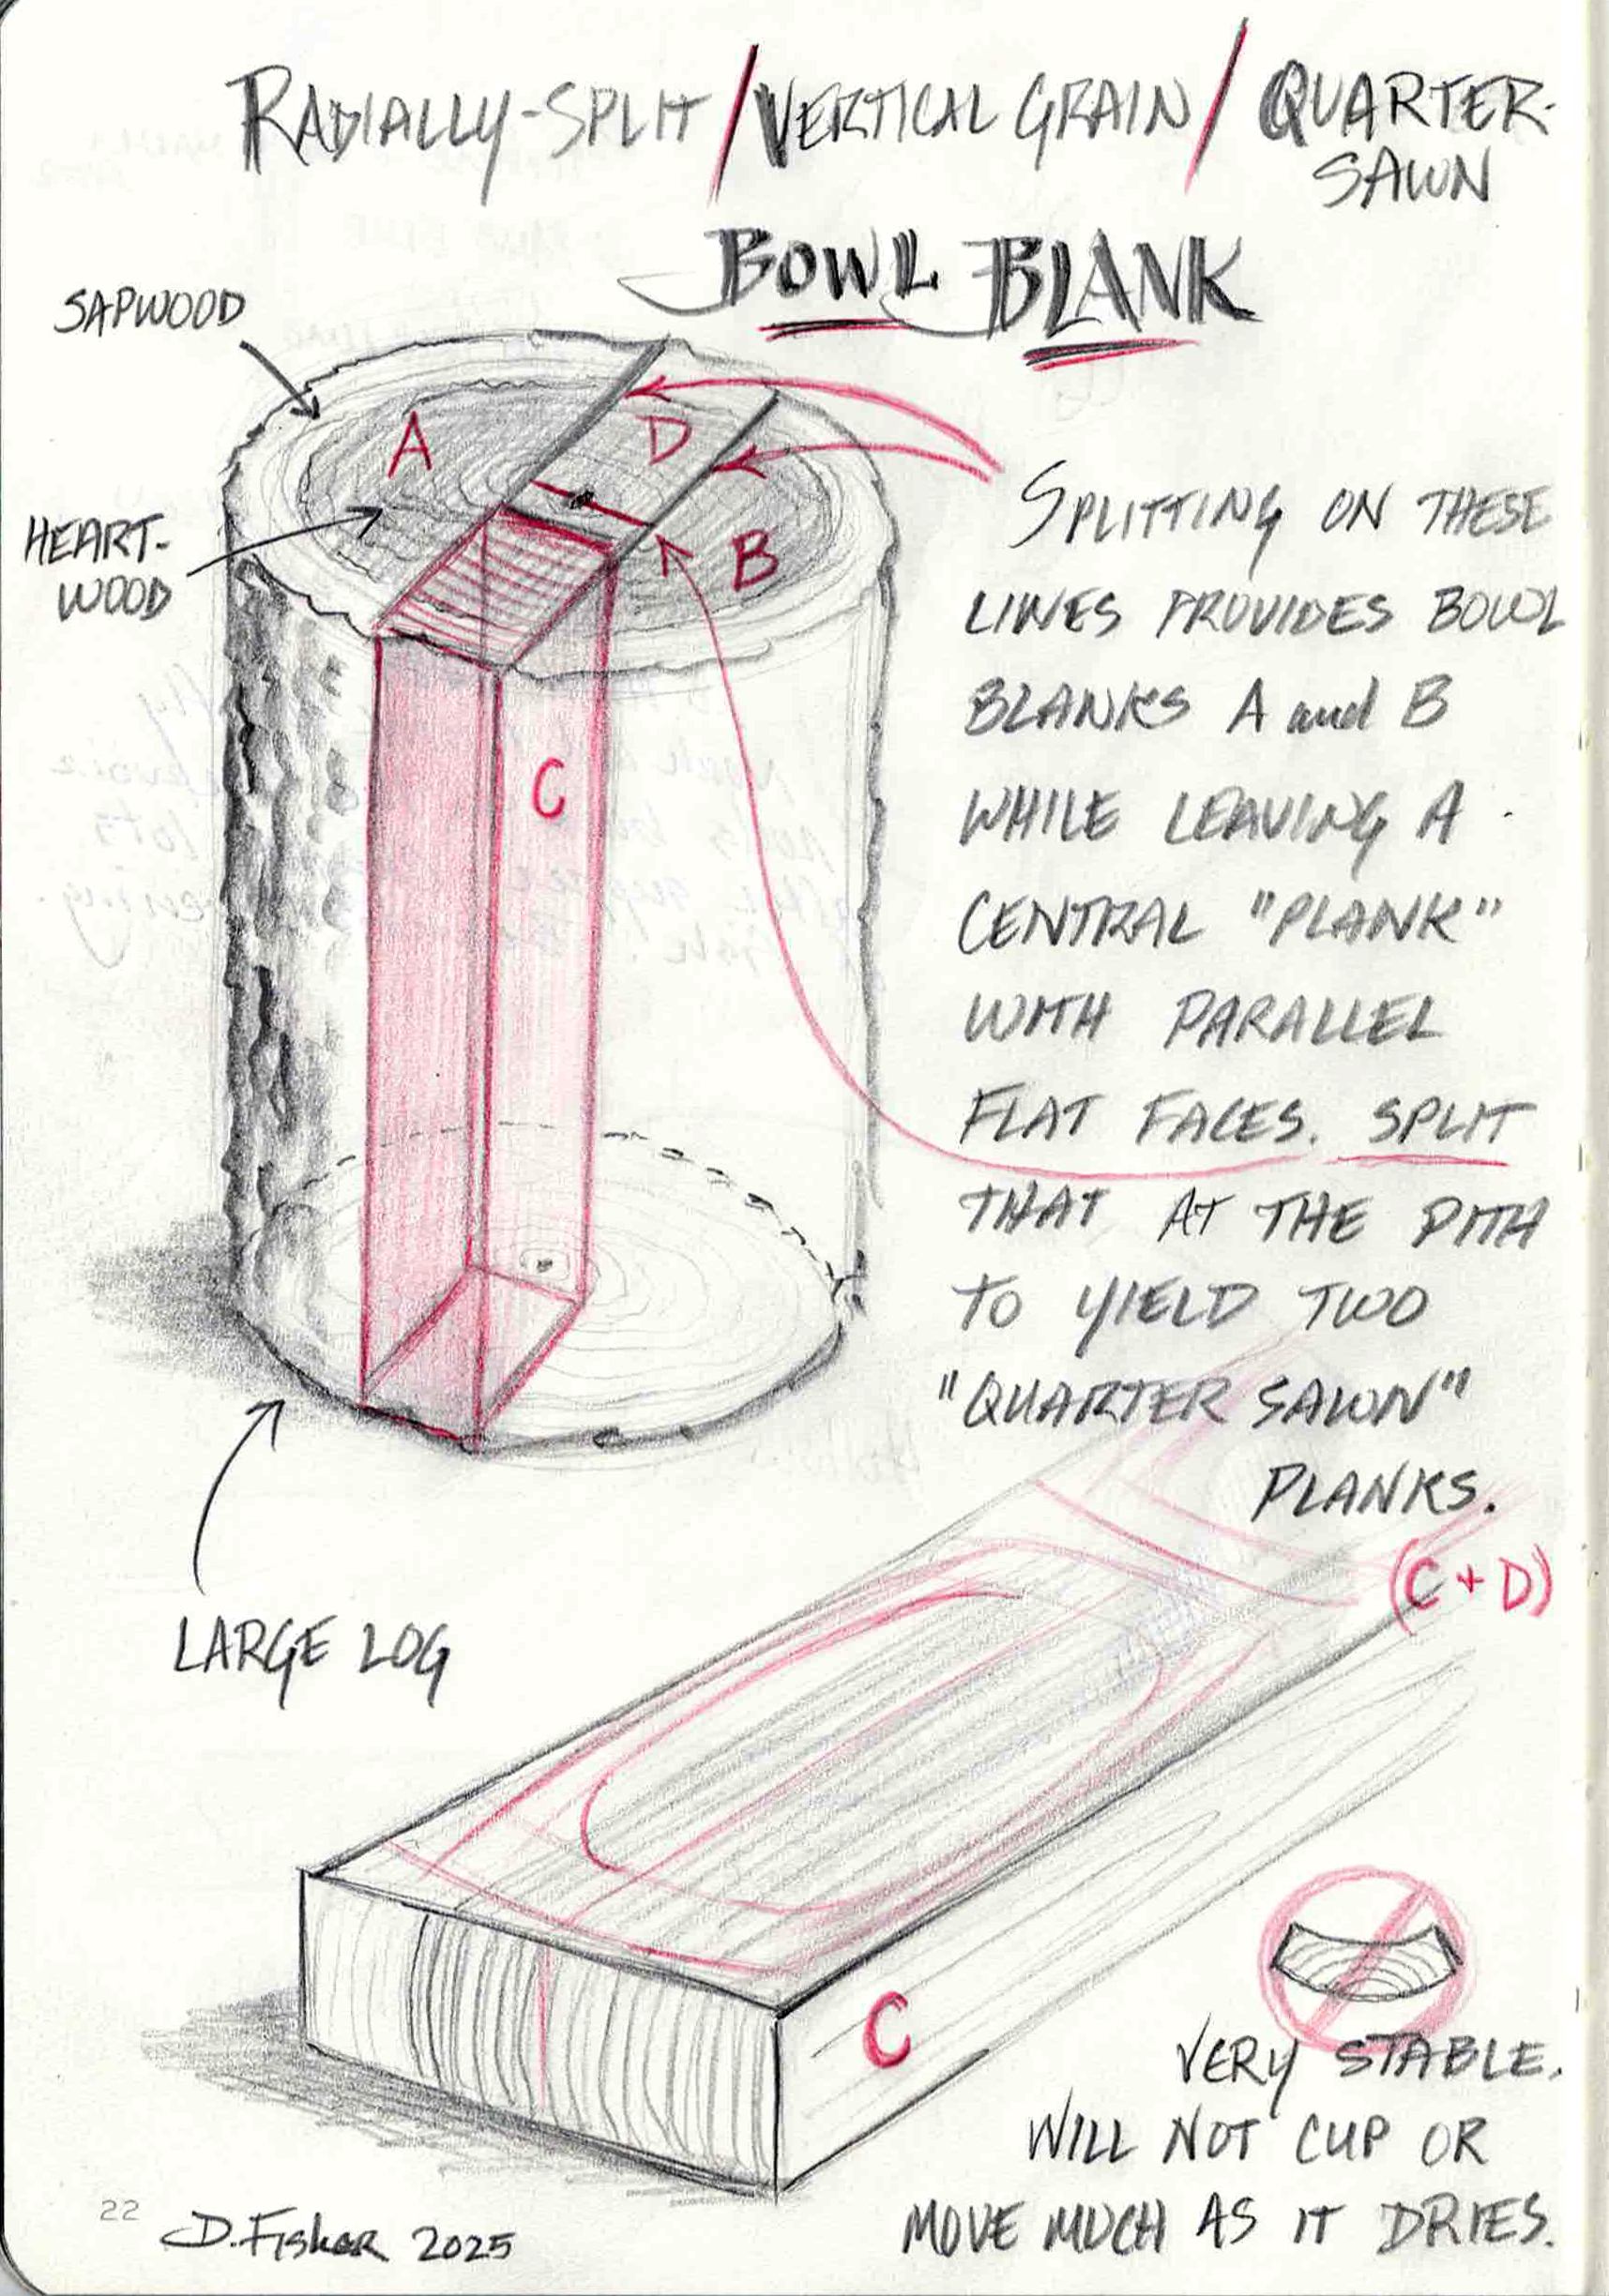
As for the tray/bowl itself, I roughed it out months ago from a piece (like blanks C and D in the sketch above) that I split from a walnut log. The blank was 2″ thick, so this design could also be made from a 2″ x 6″ plank of any lumber species. The layout of the top and the foot is the same sort of procedure that is used for the other bowl-from-a-plank designs, using compass and drawing bow.

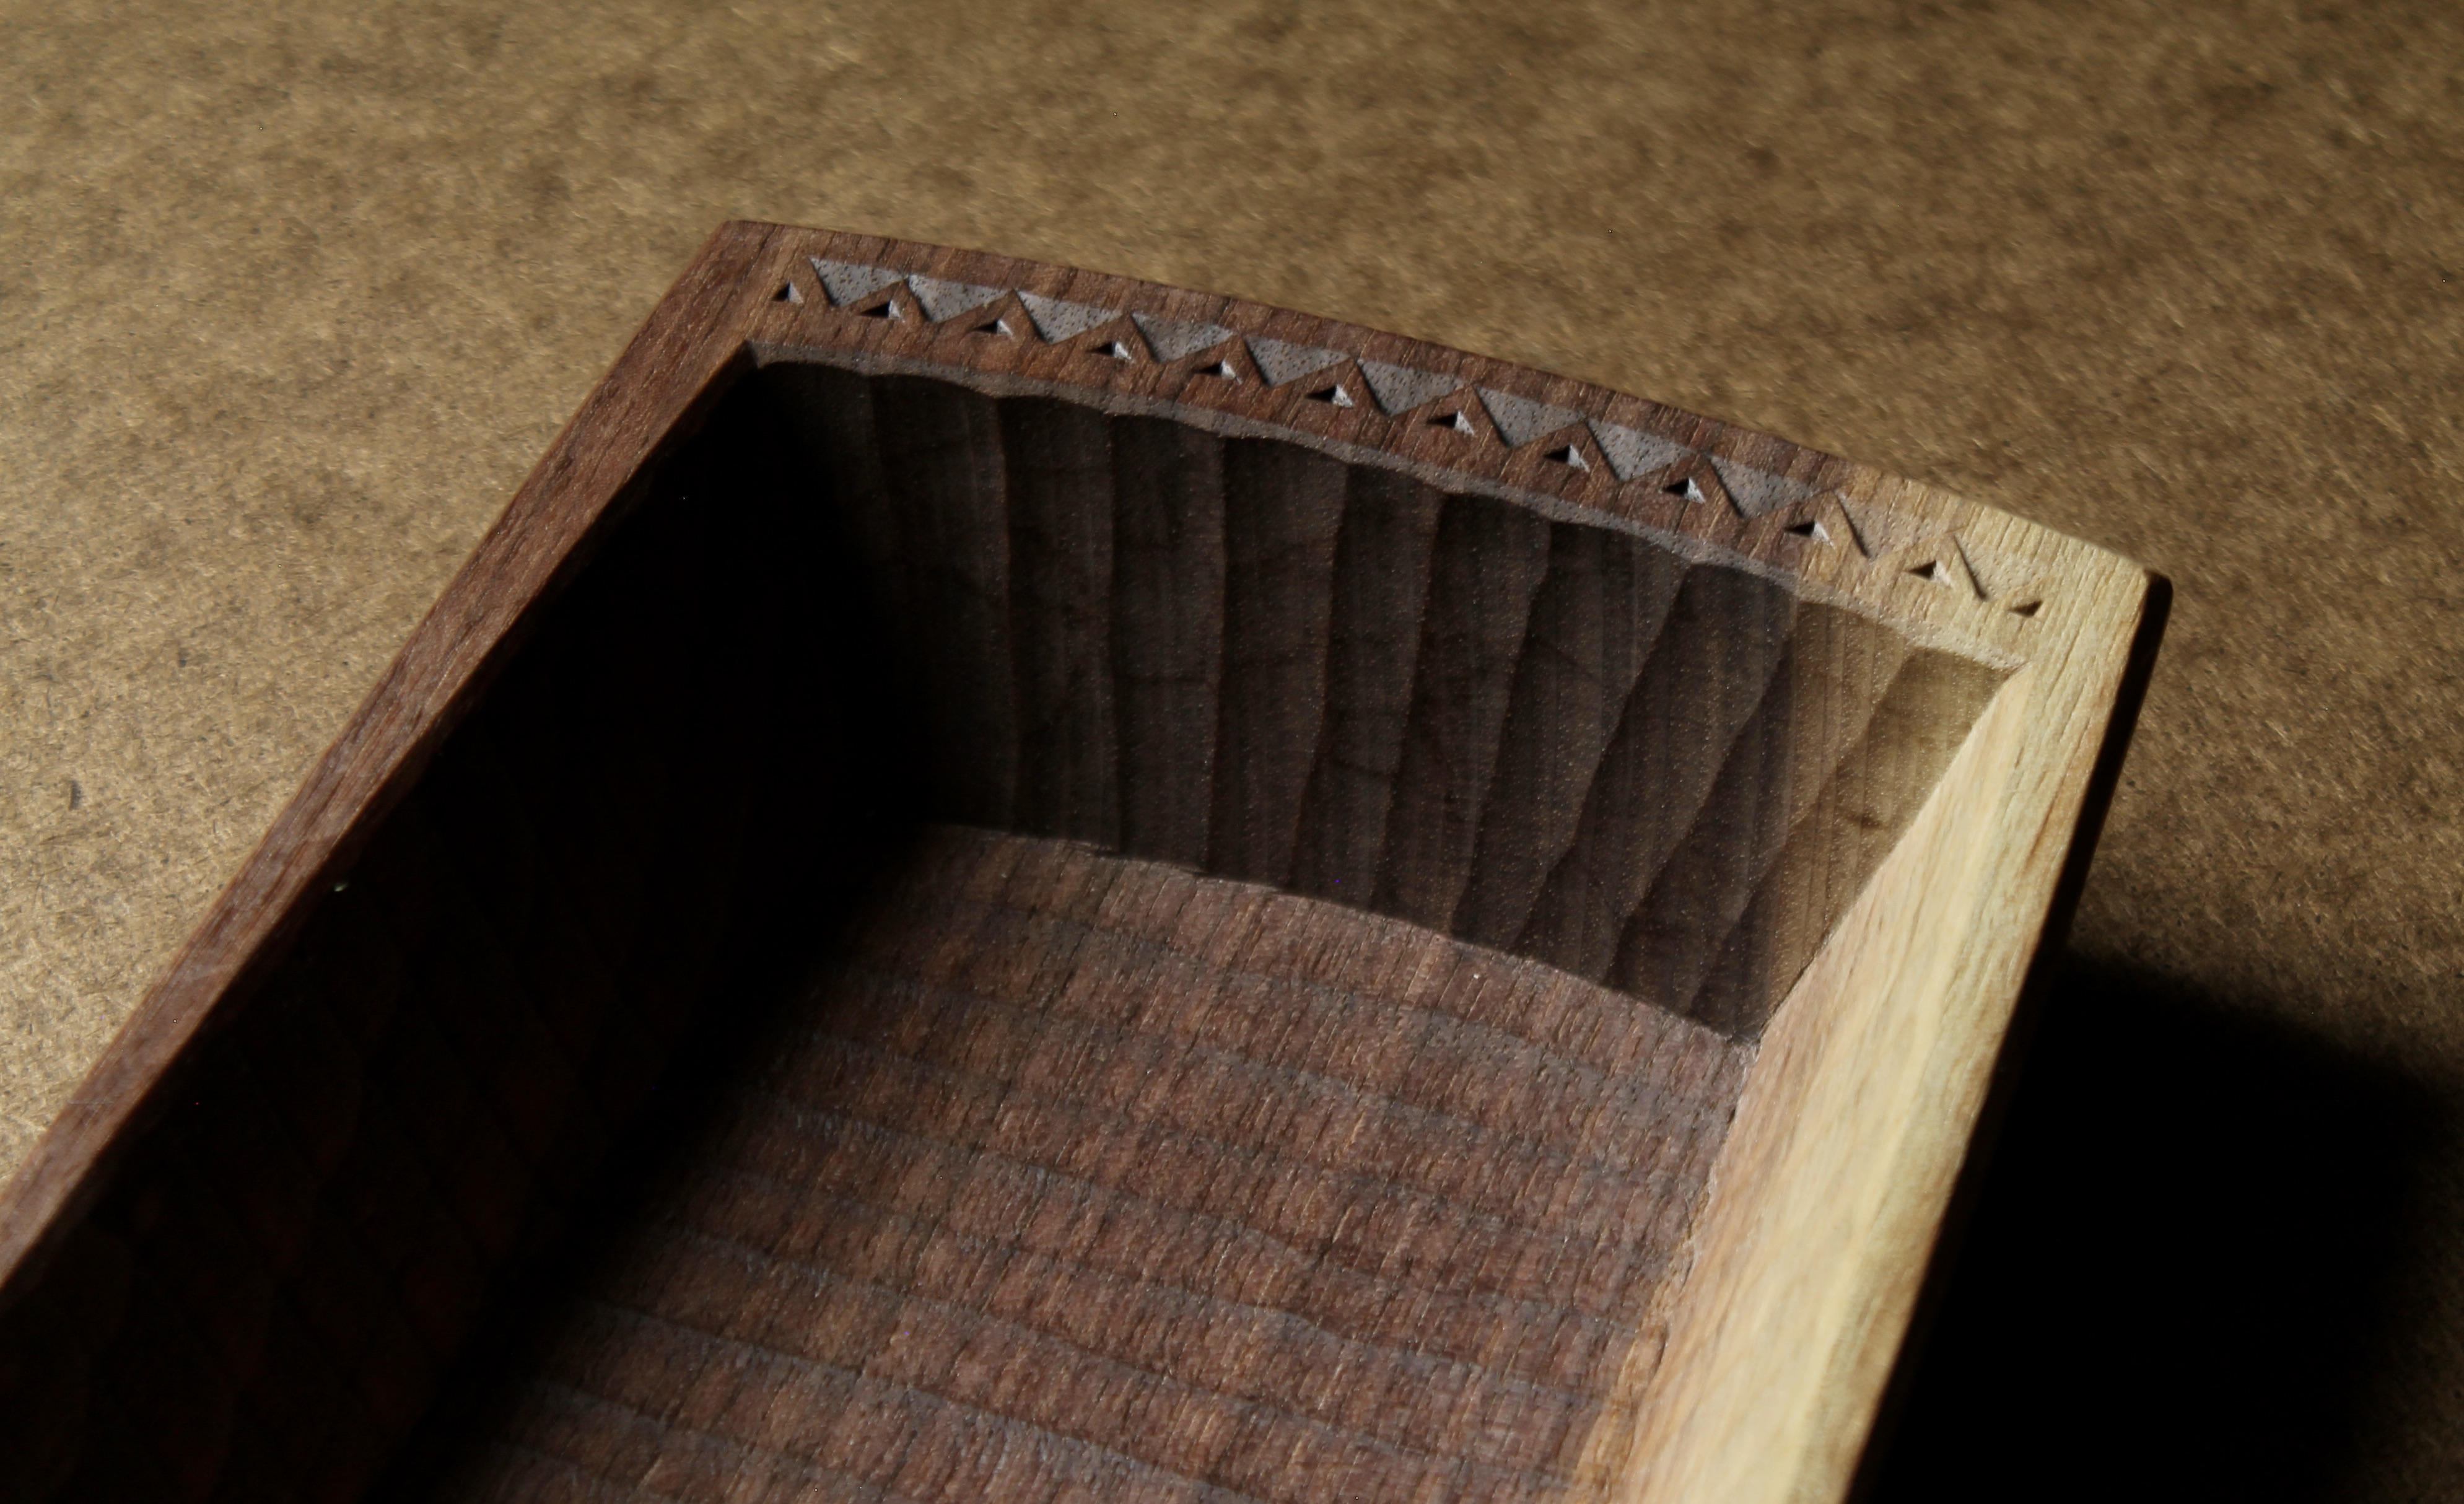
Instead of rounding the corners during the layout of the hollow, I left them sharp. The bottom of the hollow is flat(ish) and the the side and end walls angle down to meet it. I worked the gouge in generally parallel rows. For the bottom, I worked from the middle toward the side walls.
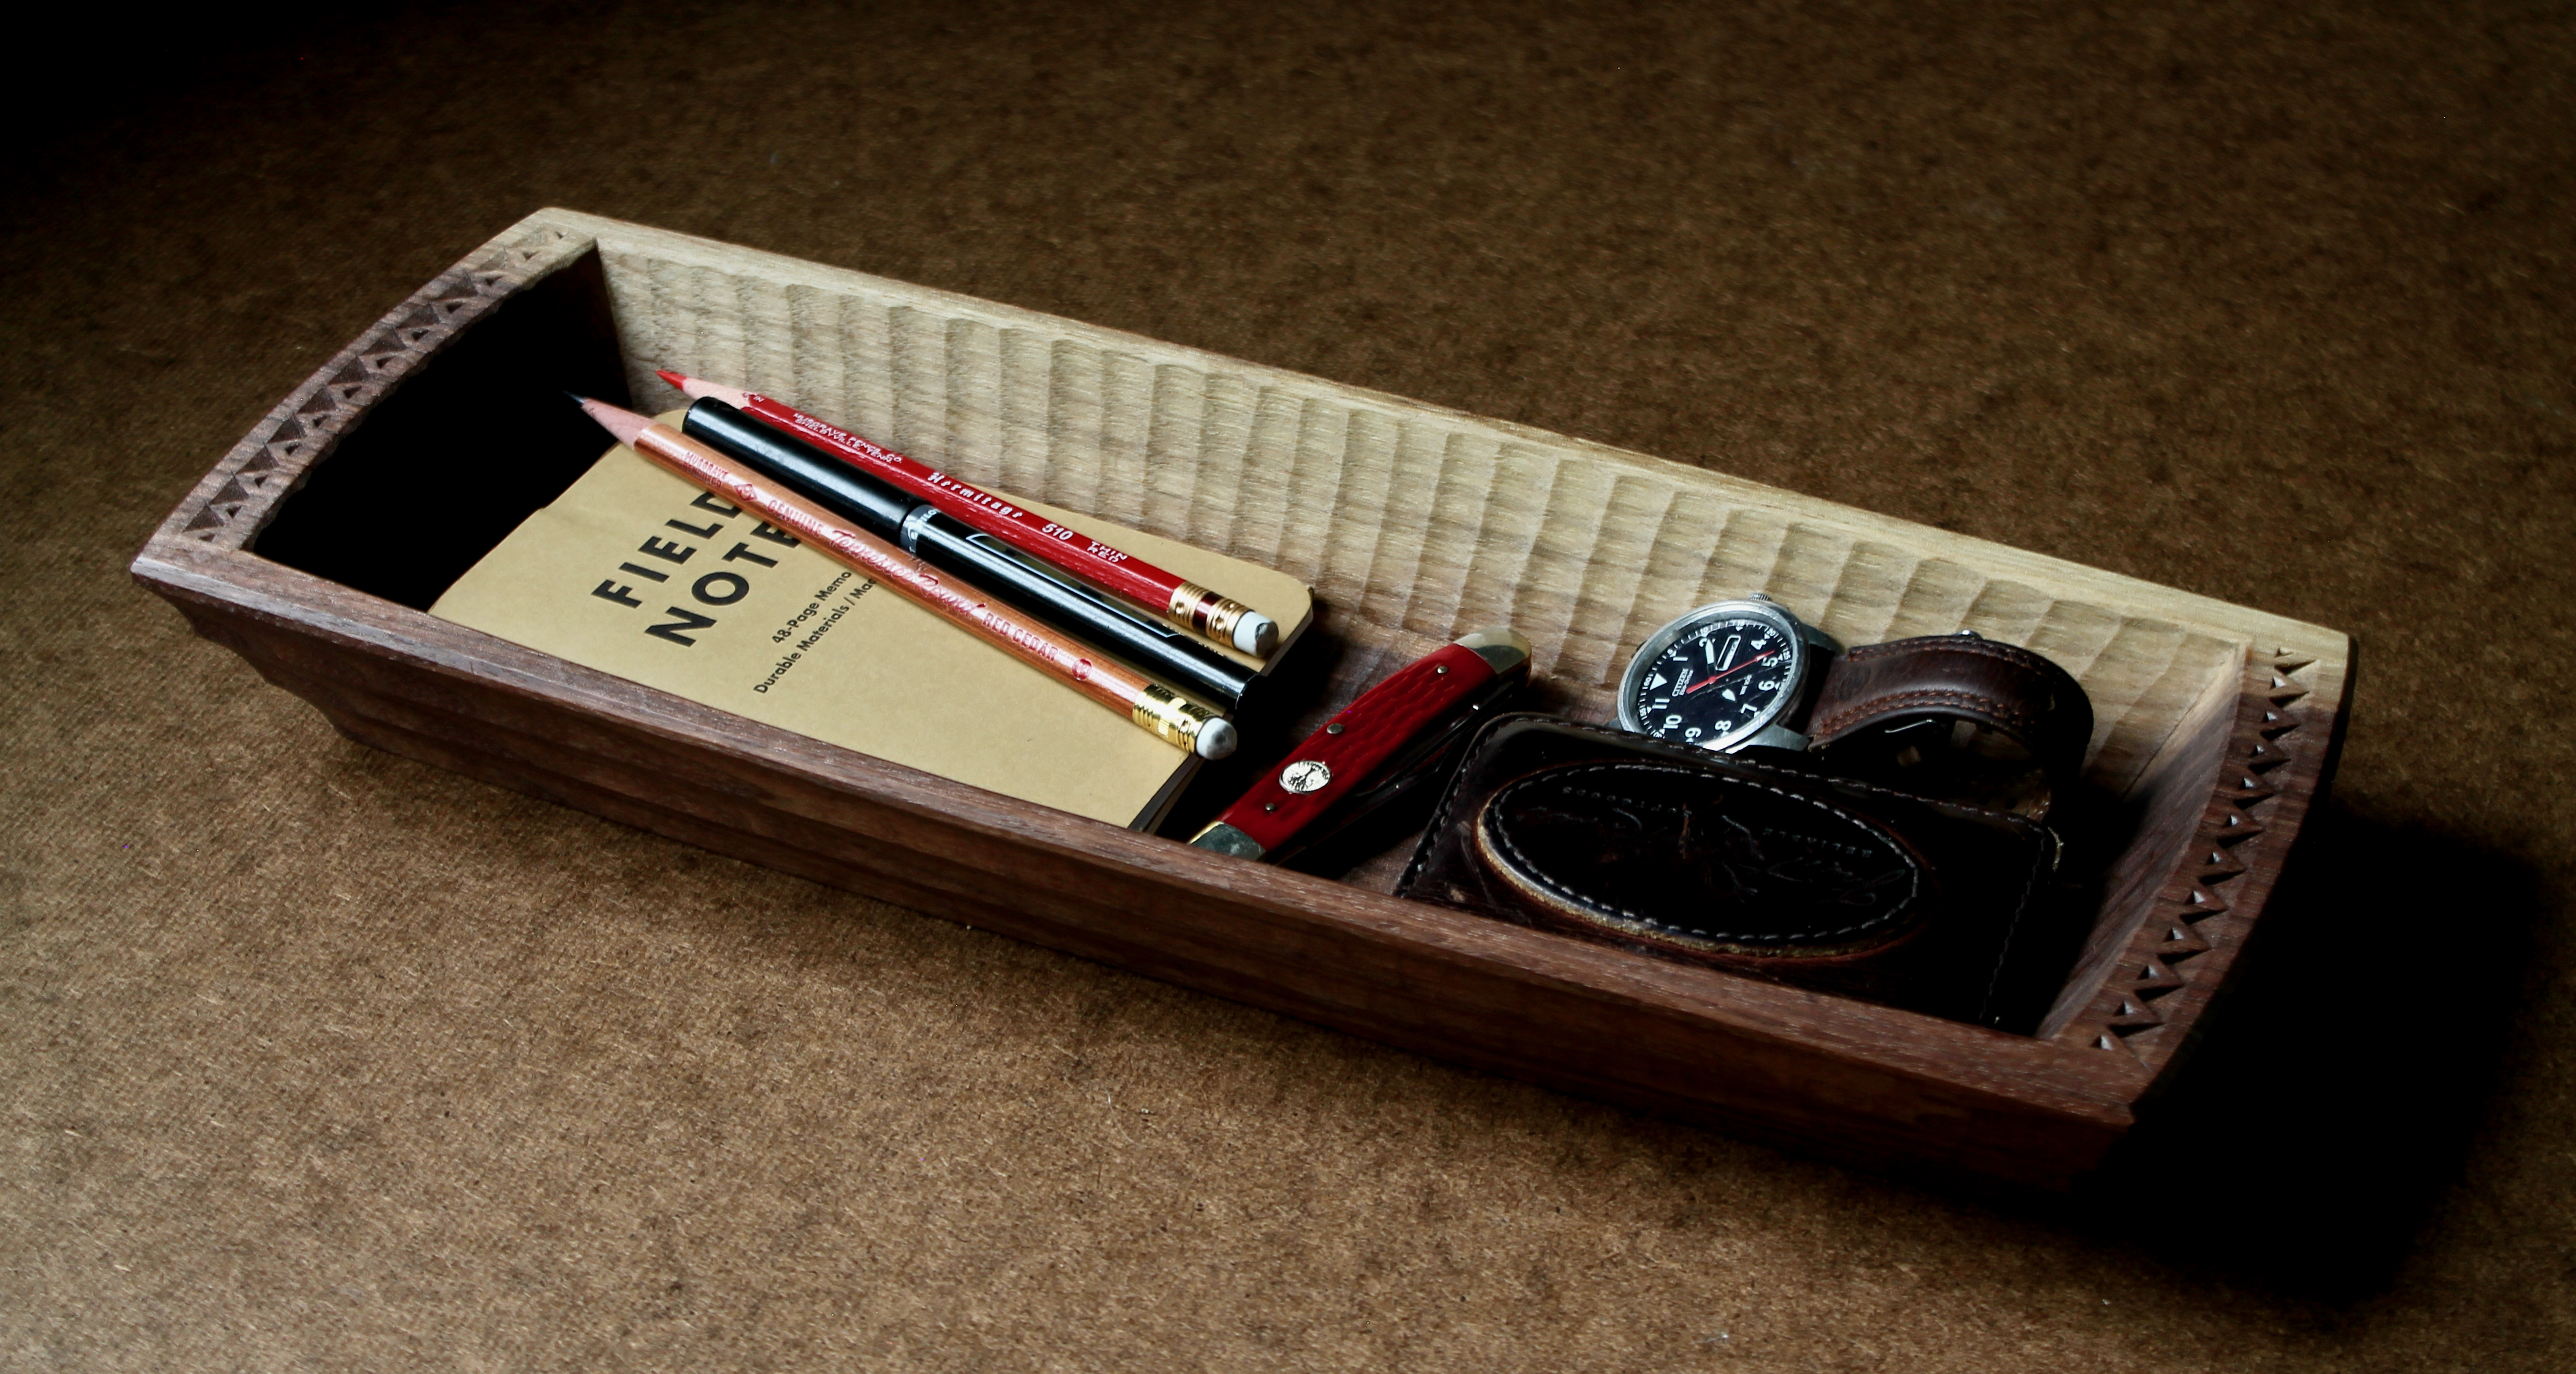
The flat bottom is ideal for uses not typical for a bowl.
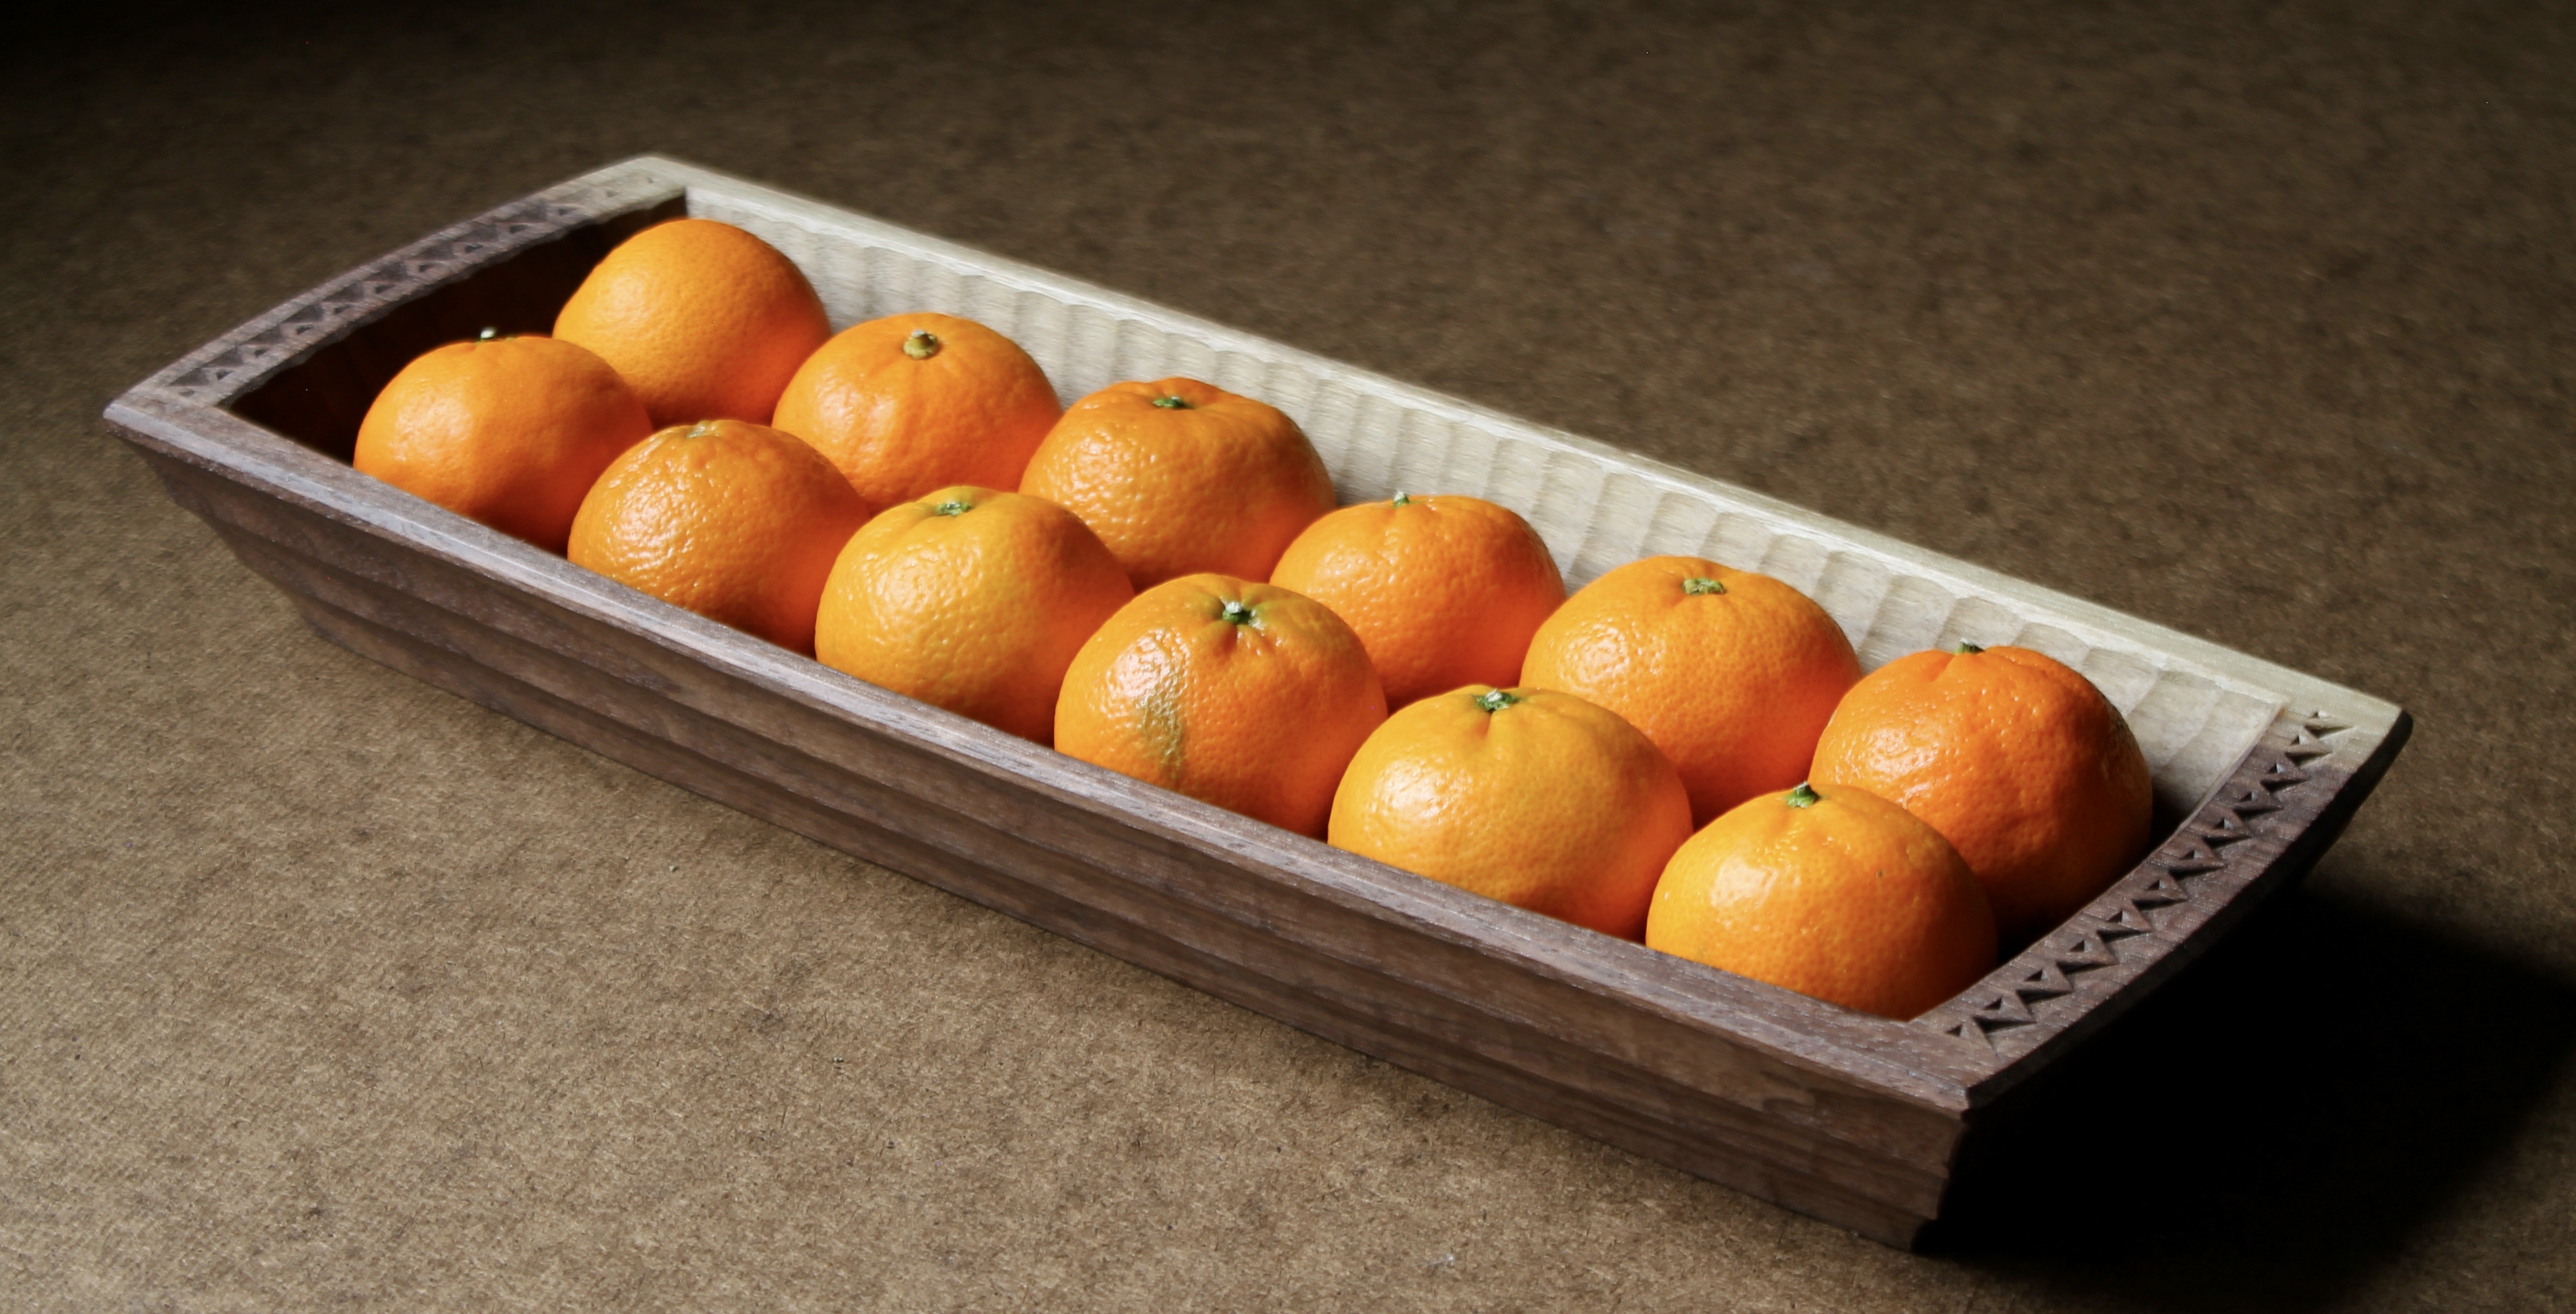
Or it can still do typical bowl duty.

The outer walls were carved with a gouge in three parallel rows. There’s a subtle texture left from the gouge cuts.
This one is available for purchase SOLD. It is 14 3/4″ long, 5 3/4″ wide, and just under 2″ high. If you’re interested, email me at dandkfish@gmail.com. Thank you.
I’ll end with a little reminder about another bowl, this bird bowl below:
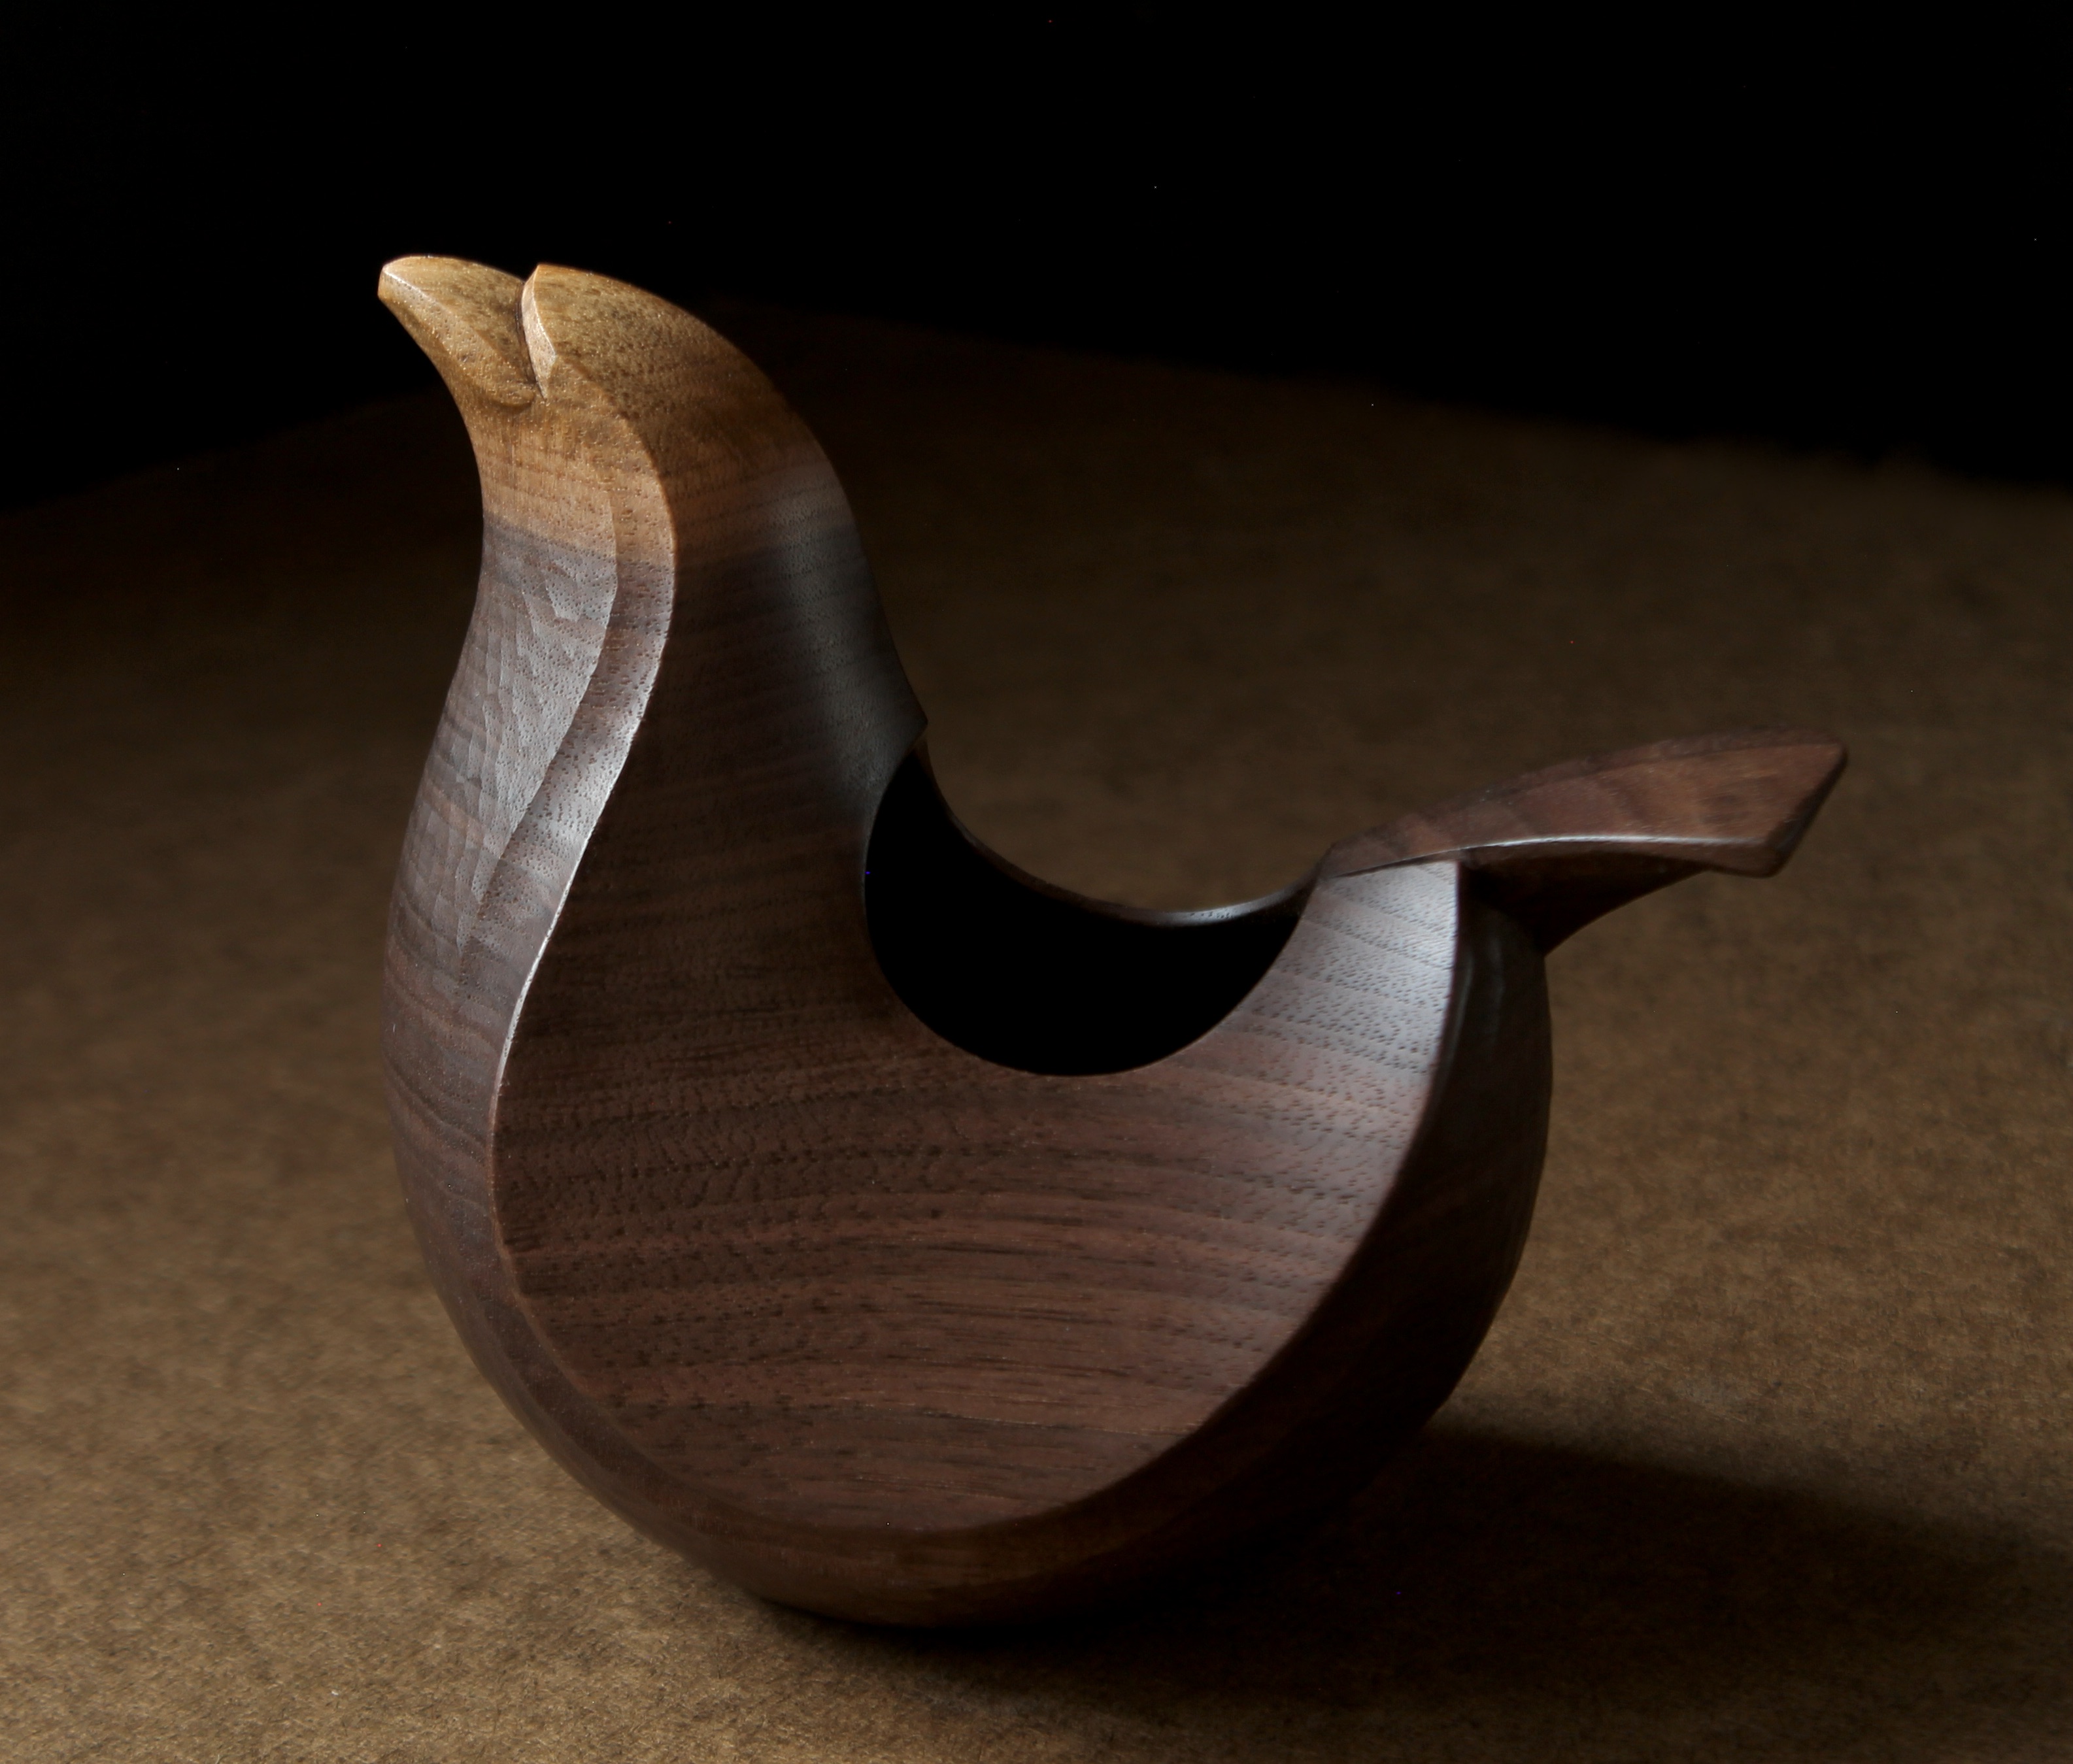
It, along with works from 47 other people from 11 countries was on display in St. Paul, Minnesota at The AAW Gallery of Wood Art. All 48 pieces (individually) will now be auctioned. Bids will be accepted online beginning today at 5pm and on through the live auction event on June 14 at the AAW Symposium in St. Paul, Minnesota. Here is the link to the online auction. I wrote a blog post about this bird in early March.

Love those big rectangular bowls, they look great… From a plank?! I’ll have to try that :). The diagram showing where your blanks C & D come from in the trunk-round is interesting and useful, thank you for sharing that :).
A couple of years ago I tried reducing a round to a big rectangular block, for possible use as a bowl blank or other woodwork projects. But it dried out while I was occupied elsewhere 😦 . So I have now reduced it for possible use elsewhere ( or firewood 😦 ).
Love the tree pattern too. Very arty/crafty (” not uncrafty” as Jogge Sunqvist might put it? 🙂 ).
LikeLiked by 1 person
Love this design, especially the quirky trees on the bottom!
LikeLiked by 1 person
Thanks, Wes. It was great fun.
LikeLike
great fun
LikeLiked by 1 person
I just have to say that the shading on the log sketch is really nice! The depiction of Heartwood/sapwood, as well as the bark… It’s really the details that set your work apart.
LikeLiked by 1 person
Thank you. It’s a joy to do.
LikeLike
The synthesis of skill, technique, artistry and whimsy just make this an utter joy to see! And I second speedilygarden:s praise of your log splitting sketch. It teaches a great deal.
LikeLiked by 1 person
hi David. I’ve been following your work for seven or eight years I guess. I really enjoy the look of them. I know you’ve been carving for a long time. How long do you think it took you to reach a level where you started to think the bowls started to look decent? Of a lot of things I’d like to carve for the house, such as balls, spoons, etc.. Just curious if you have an estimate of how many hours it took before you started the feel as if your stuff was decent, not perfect. For example, I felt that after about 500 hours of traditional woodworking, the furniture I built started to look pretty respectable. Sure, there were some gaps in the dovetails, but they weren’t horrendous.Thanks, Joe.
LikeLiked by 1 person
Joe, I appreciate your question but I’ve never been good at keeping track of hours or progress. I just carved so much because I loved doing it and there is such a thrill in seeing something come into existence. So I kept carving, the hours whizzed by, and the results gradually got better over time naturally as I played. I was generally aware of personal progress and the broadening and deepening of my understanding. There wasn’t a particular time or project (at least not that I remember right now) that made me feel that I had achieved certain level of mastery. I still have no clue about that.
I wish I had a better and more specific answer for you. Thanks for checking in over the years. Happy carving!
LikeLike
Wow! ”rooted in the sapwood”, amazing piece Dave
LikeLiked by 1 person
Geez, Dave, once I turned the bowl over to see the base I’d be reluctant to turn it right-side up again – love the tree design and ‘use’ of the sapwood.
A couple of quick questions though – 1) what did you use for the paint and is the shading seen in the trees simply a shadow from the lighting or achieved through subsequent paint layers, and 2) the gouge cuts appear to be cross-grain (correct?) and are the trees achieved with a single pass as indicated on the slideshow, or achieved with multiple cuts?
As always, your work is always inspirational and a joy to see and your generosity in sharing is so appreciated. Thank you.
LikeLiked by 1 person
Steve, I’m glad you brought up the paint. I realized I hadn’t mentioned that in the slideshow, but I’ve updated that now. I used milk paint. I like buying the sample bundles that both of the major milk paint companies offer. I didn’t happen to have greens on hand, so I just made four different custom mixes from various combinations of mainly blues and yellows.
Yes, the appearance of shading is simply the effect of shadows. Each tree oval is a solid color, no shading.
Yes, the gouge cuts are across the grain. Most of the trees were cut with one committed pass of the gouge. Maybe a few of the larger ones in two or three passes. Either way, I wanted the final surface to be cut completely with one last cut. You could use different gouge sweeps, but I think I used a #6.
LikeLike
I love the way the gouge lines flow together between bottom and sides of this bowl. Were any of the gouges used sharpened differently to allow for a cleaner meeting in the corners?
LikeLiked by 1 person
If you wanted to line up the gouge cuts on the walls with those on the bottom exactly, especially if you use a steep gouge, then a slightly bullnosed edge would help to cut the junction crisply. But with a relatively shallow gouge, it’s not necessary. And I didn’t go to any effort to line up the gouge cuts of the walls and bottom. They’re not lined up and it still works out well.
LikeLike
Thanks Dave – that makes it seem a little more approachable 🙂
LikeLiked by 1 person