

In thirty years of teaching, I’ve learned (and sometimes failed to remember) the value of preparation beforehand and flexibility once things get started. I’ve been doing a lot of preparation for my upcoming class. Materials, logistics, and many other things. Much of it involves thinking through processes in detail with the student point-of-view in mind. Here are three brief thoughts about gouges that have run through my head lately.
- Honing methods.
Back in May, Pete Galbert posted a video to his blog showing a method for honing gouges that he first learned from Steve Brown. It involves running a screw through a board, clamping the board upright in a vice, and registering the dimple at the back of the gouge handle on the point of the screw. You then swing the gouge from that pivot point while rocking the bevel on the stone.
I’m used to honing my gouges freehand, like I show in this post. I tried out the screw method and it works pretty slick. I like its simplicity. But I’m a little clumsy and the gouge kept slipping off of the screw point when I’d get the gouge moving quickly. So, a little spin-off idea struck me (and it has probably struck many others before) and I gave it a try.
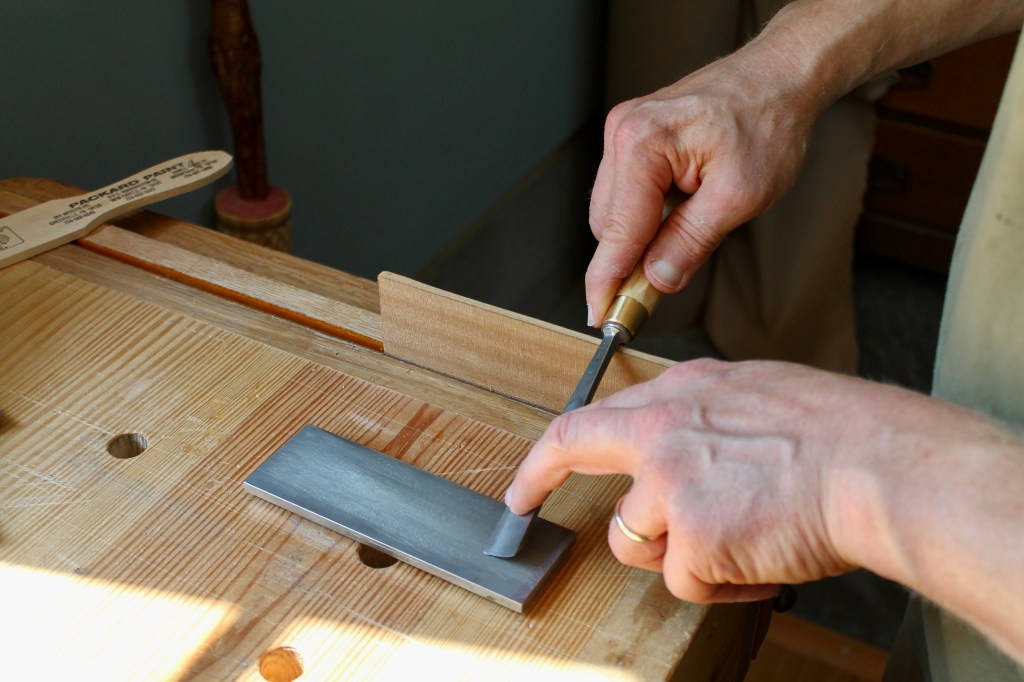
I took a thin scrap of wood and clamped it in my vise so that the upper edge was parallel to the benchtop at the appropriate height to put the bevel flat on the stone. I could have used a thicker board and tapered the edge. With the bolster registered against the edge of the board, I slide the gouge back and forth along the board and stone while rocking the gouge from corner to corner to cover the entire bevel. This mimics the same motion I use when freehand sharpening but assures a consistent honing angle.
In the top photo, I’m at the end of the stroke with the left corner of the gouge in contact.

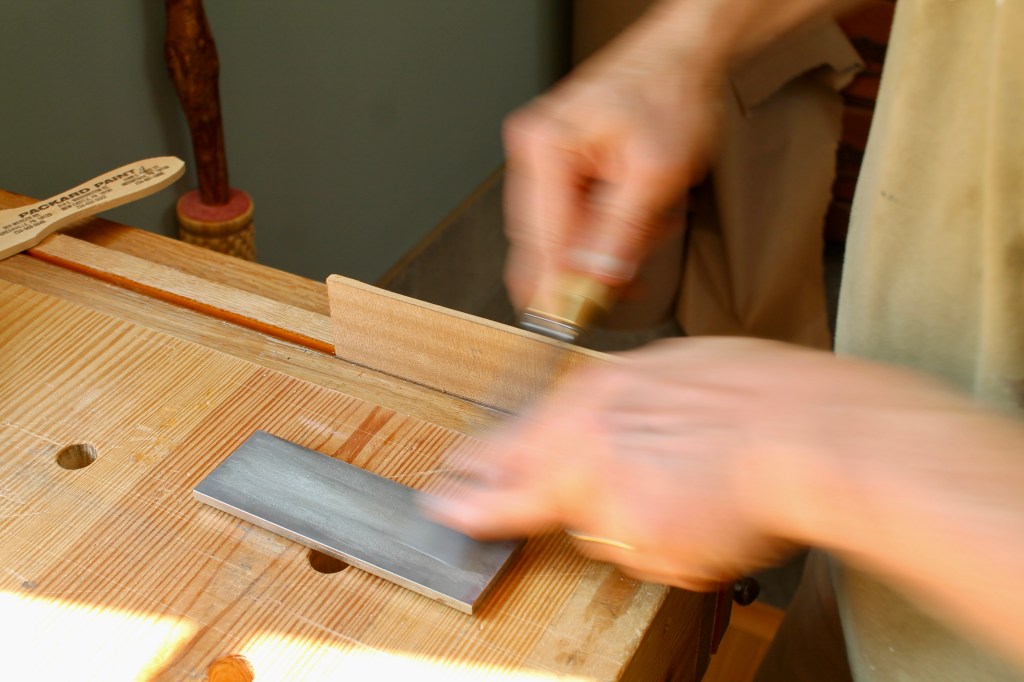
Then I slide back along the stone as I gradually rotate the tool.
Above, I’m at the opposite end of the stroke with the right corner of the gouge on the stone.
The motion becomes automatic and you can get moving.

It works. Now on to a finer stone. If it’s the same height, just interchange the stones. If not, shim the thinner stone up on a magazine or whatever.
You can reposition the stone however you’d like to use different parts of the surface.

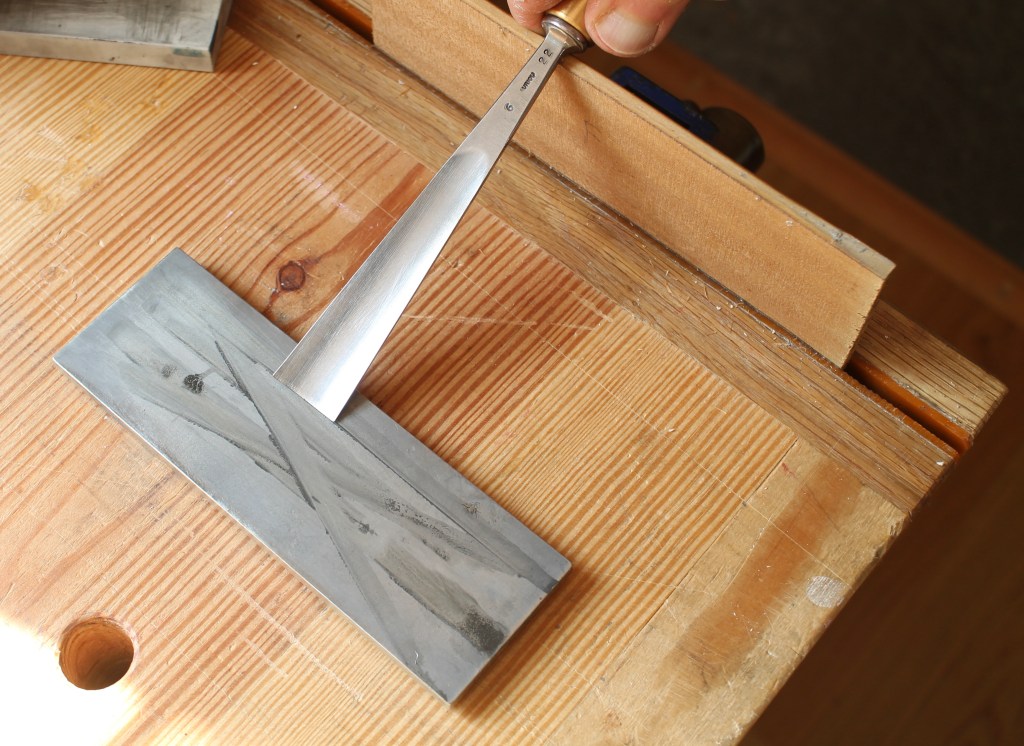
Here I’m honing a vintage spoon-bent carving chisel with the same method. No sweep at all to the edge, so I just held it flat while sliding it, like a chisel. Due to the configuration of the tool, I’ve raised the board up. Notice the series of parallel lines I marked on the board to aid registration in the vise.

2. Gouge Versatility.
I’ve made a couple more Bowls-from-Planks and took more careful notes on the details of each procedure. One variation I experimented with is to carve flutes under the handles. The two gouges you see on top of the bowls are the gouges I recommend as a starter pair if someone wants to get into bowl carving. They are both long-bent gouges, #5/25mm on the left, and #8/30mm on the right. Brand differences and slight variations in width and curvature are absolutely fine, of course.
Normally, I’d carve flutes in a situation like this with maybe a #5/16-18mm. Using the full width of a #8 would make the ridges between the flutes too sharp and fragile. But, in the traditional system of sweep numbering, the sweep number is relative to the width of the gouge. So by using a small portion of a wider gouge, you effectively get a narrower gouge of a lower sweep. I wrote about this in a different circumstance here, along with photos to better explain. With that in mind, the #8/30 performed well on the flutes.

3. Intermediate size tools.
I’ve been making samples of carving patterns that can easily be cut with knife or gouge on bowl rims, sides, or handles. For gouge fingernail chip cuts, I like #8 sweeps. The two smaller tools above are #8/4mm and #8/7mm, respectively. Notice they have a “D” (diminutive? dinky?) on the handle as well. This indicates they are a little shorter than full-size carving tools, although they have the exact same edge profile and steel. Pfeil calls them “intermediate size,” but some other brands have a similar offering. The gouge at the top is a full length tool, for comparison. Anyway, the point is that the intermediate tools have lower prices than their longer kin and perform just as well, certainly for work like this. In fact, they can be much more nimble. Here are links to some at Woodcraft and Chipping Away and Woodworker Specialties.

Thanks for sharing this sharpening tip, Dave. It is simple and I like simple, particularly when it comes to sharpening.
LikeLiked by 1 person
I feel the exact same way. So much so, I showed this to the instructor I take wood carving from one night a week. He plans to share it with his students moving forward. Thanks David. What other little gems have you learned or heard of that are similar? A good portion of why i read blogs (beyond the fact I have an abnormal love of woodworking) is to get tips just like this. It really is a golden nugget here.
LikeLiked by 1 person
Glad to hear that it was helpful, Joe. Thanks for letting me know.
LikeLike
I hope it works well for you, Drew. Happy carving!
LikeLike
Hi Dave,
I compliment you on your preparation for in-person teaching. During the years when I taught, I forced myself to be able to articulate, in advance, in detail, and to myself, every step of my spoon making process. This not only led to better class presentations but caused me to carefully examine my procedures, in some cases leading to improvements. I’m sure your classes will be masterful, just like your carving, and I congratulate the people who have chosen to attend.
LikeLiked by 1 person
Thanks, Barry. Good to know I’m in good company.
LikeLike
Dave,
<
div>I
LikeLike
Wonderful tip David, thank you. I am going to try it today. Great.
Cheers,
Michael.
LikeLiked by 1 person
Good luck with it, Mike. Thanks.
LikeLike
What an elegantly simple solution to sharpening gouges! Congratulations and thank you for sharing it with us. I am an engineer and have seen many complicated solutions and a few elegantly simple solutions. The elegantly simple ones put a smile on my face.
LikeLike
Dave, your gouge honing method is brilliant, and timely. I’d recently received a Hirsch 10mm gouge that looked like the factory bevel was ground by a monkey. A few moments with a light touch on the bench grinder solved that issue, and then I used your board in the bench vise (a few swipes of parafin wax on the edge of the board really lets the gouge glide nicely) with my water stones to turn it into a properly dressed bevel with a surgical edge on it. Thanks so much for posting this.
LikeLiked by 1 person
Glad to hear it worked so well. And thanks for the paraffin wax idea!
LikeLike
Pingback: Souped-Up Sharpening Shelf | David Fisher, Carving Explorations
Ericthomas@charter.netSent from my iPad
LikeLike