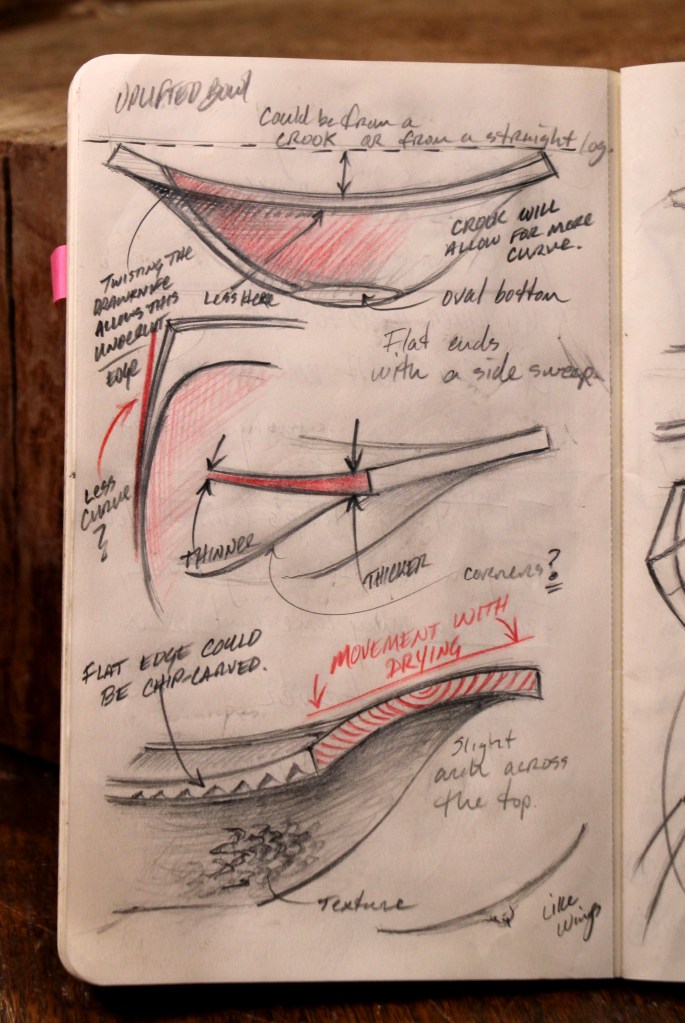
I began sketching an idea on this page of my notebook last September, then added a bit here and there since then. Nothing revolutionary, just some thoughts on a design with rising ends and an underside that goes from convex to concave all around. This concavity defines the lower edge of the tapering band just below the rim. Sketches like this serve to help sort out my thoughts and remind me of what I was thinking later on.
There’s a note on the upper-left that reads “Twisting the drawknife allows this undercut edge.” That description is clear as mud, but it worked out once I had a chance to carve one of these bowls. I took a few photos of the drawknife in action and they captured a lot of skewing and slicing.
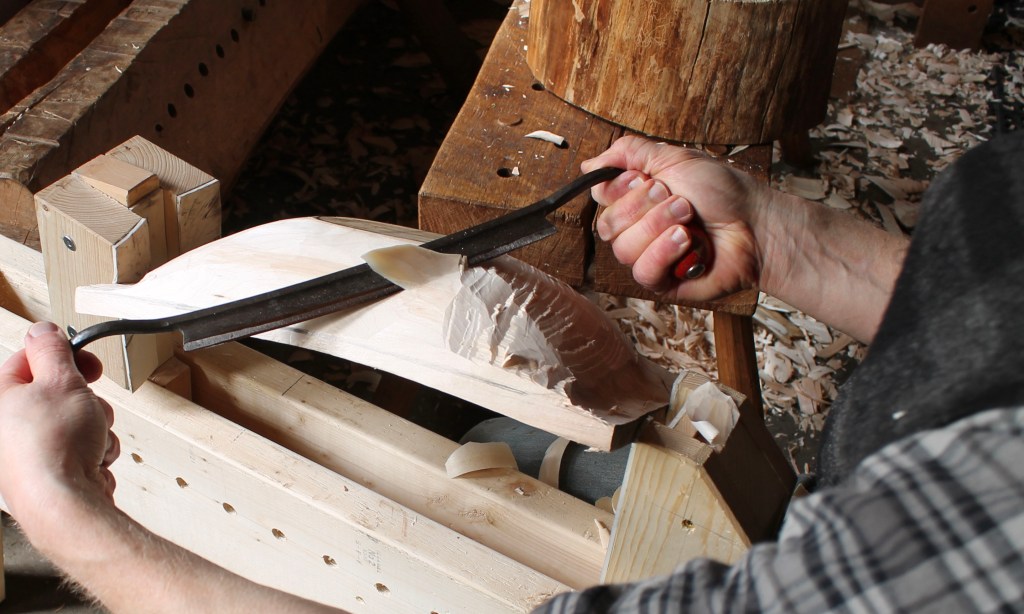
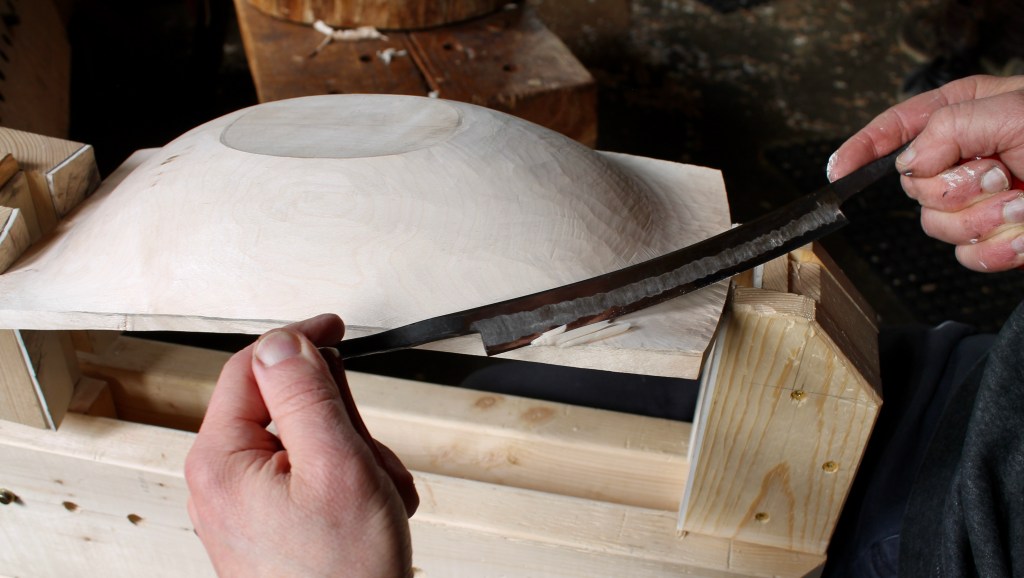
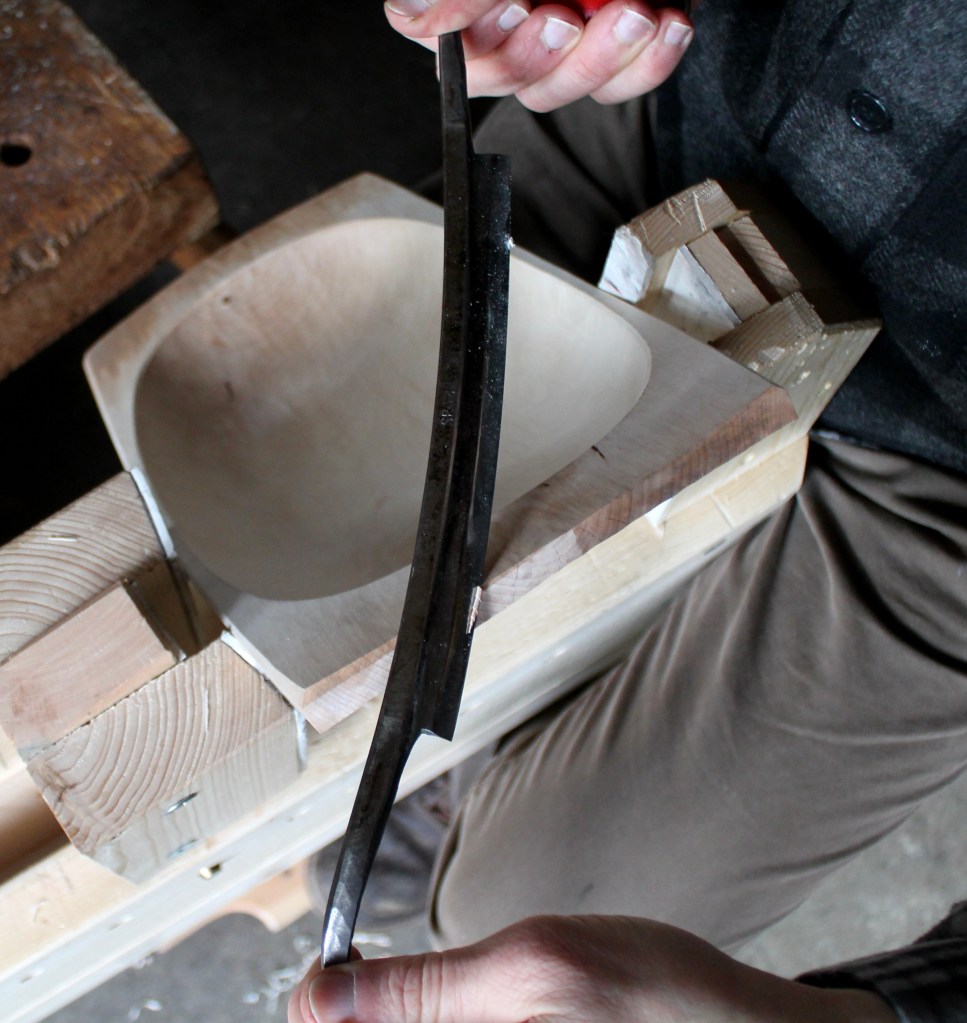
Above, I’m using a drawknife to hog away material after the axe work on the exterior. Notice the drawknife is skewed a bit for a more effective slicing cut.
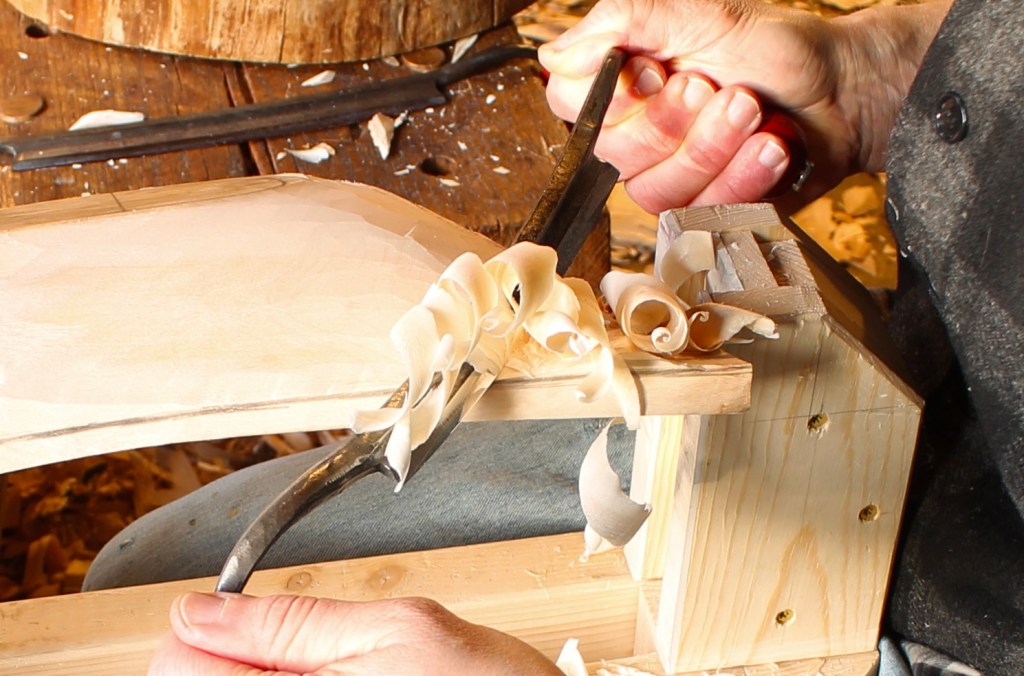
In this area under the corner of the handle, I needed to remove a lot of material. I used a series of short repeated cuts while sliding the edge to the right to create a slicing cut. I keep my right elbow and forearm tight to my body for control and to “put on the brakes”, so to speak. It’s so pleasant to carve with a drawknife like this, especially when the wood is green.
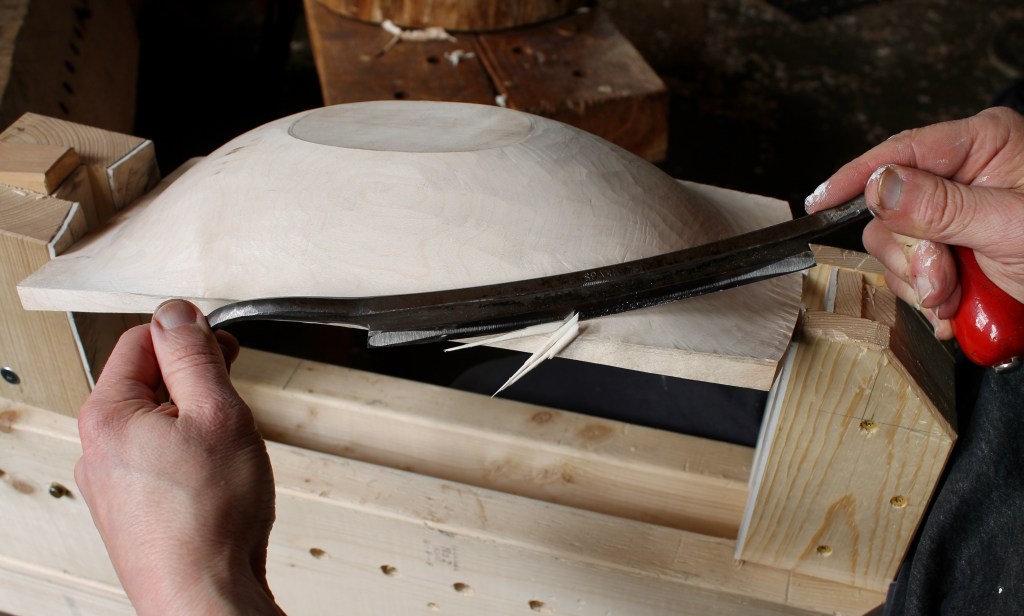
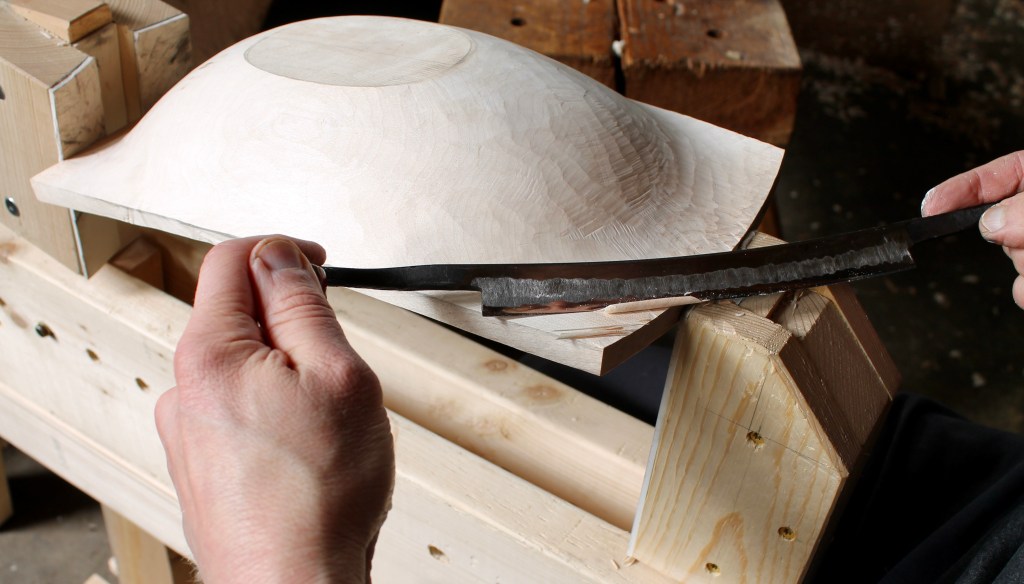
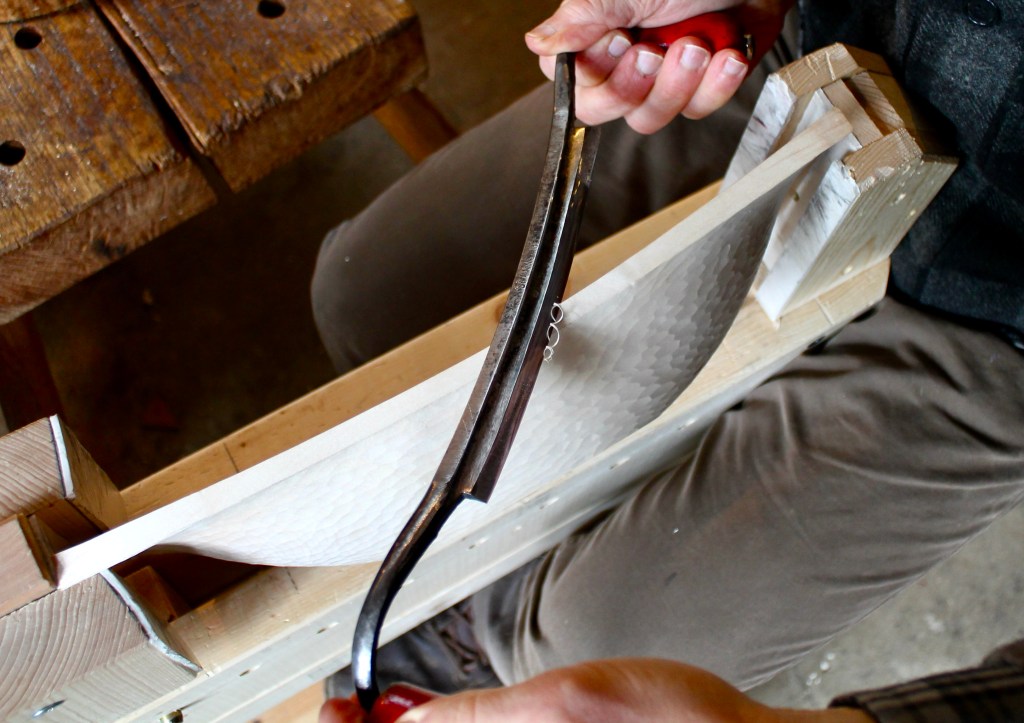
After the bowl was dry, I planed the bottom flat, then used a spokeshave to fair the convex portion closer to the foot. I transitioned into the concave portion down to the rim with the drawknife. The spiraling form of the curls results from the skewed slicing cut. The drawkife is moving toward me (the right side of the photo) as my right hand also pivots toward the rim.
As I proceed toward the corner, the hollow gets a little tighter, so I’ve flipped the knife over to work bevel-down.
I was able to work through most of the hollow under the handle as well, right out over the edge.

As the bowl dried, handles were drawn up into a gentle arch. Light passes with the drawknife shapes the curve a bit and leaves a new, clean, surface. I’m working toward the hollow in order to go with the grain of this piece.
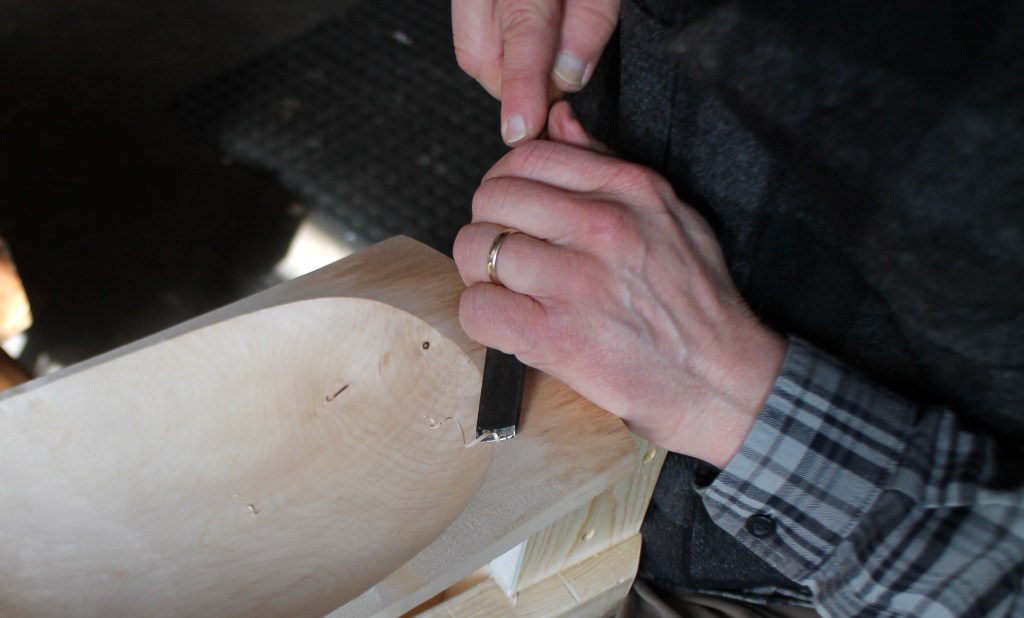
With just about all else done, I move on to the chamfering of sharp edges. These chamfers are not only practical, they create faces that catch light and shadow to define the shapes. I use different tools to make them, depending on the situation. Could be a sloyd knife, spokeshave, drawknife….here I’m using a flat carving chisel, riding the bevel as I move forward around the curve of the hollow.
I’ll stop about halfway across or wherever I feel the grain begin to reverse on me.
Above, I’m back to the drawknife, cutting the chamfer in the end grain of the handle. I skew the cutting edge to push the fibers towards the supporting wood beneath them.

The chamfer on the outer edge tapers from wider at the end to narrower at the middle. The drawknife allows full visibility to judge the depth of cut.
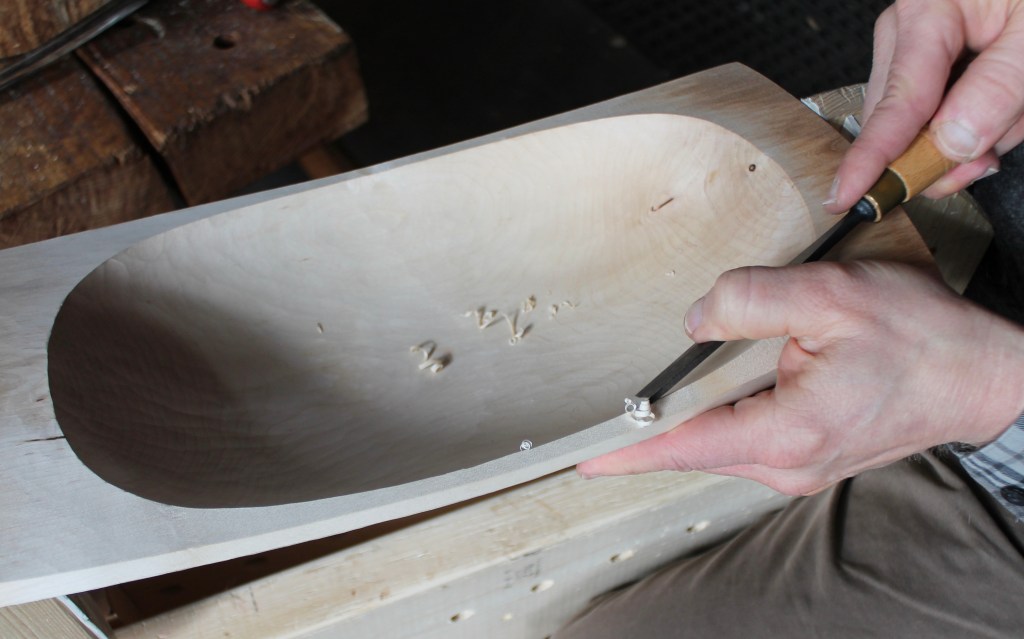
With the bowl flipped up more, you can catch a bit of the carved surface texture (from a gouge) on the underside of the bowl. Also the sweep of the top on this attempt is much more subtle than the original sketch. It would have been ready for oil, but I’m trying something a bit different with this one. It may not work out. We’ll see. There’s always more logs!

Dave is that one of the DR Barton drawknives you were talking about some time ago, i haven’t had time to tune mine up.
LikeLike
No, it’s an old one made by Spannsage in W. Germany. There’s more about it this post and comments: https://davidffisher.com/2022/06/08/drawknife-thoughts/
LikeLike
like your idea for texture–“like wings”–notebook drawings and notes are neat. And the instructions as always are informative and complete.
LikeLiked by 1 person
Thanks, Marie.
LikeLike
Very nice shots and “dialog” explaining the various cuts you’re doing. It’s a good teaching tool. I noticed the white rubber liner on your horse. How is it holding up and is the CA glue still holding well?
Looking forward to the completion of the bowl!
LikeLike
Holding up great so far, Skip; the rubber and the bond with the glue.
LikeLike
THANKS for the tutorial Dave!
A bowl I roughed out too many months ago awaits final shaping and this tutorial is the perfect refresher for when I get ’round tuit.
LikeLiked by 1 person
Love those round tuits, Bob! I remember my grandfather showed me one when I was a kid.
LikeLike
I have several draw knives including my father’s little old Tyzack (laminated Sheffield steel), an old Marples and an old I. Sorby. But ironically my favourite is a big, 12″ blade, and American made ( James Swan?) drawknife that unlike the others seems to work best bevel-down, that way it can remove a lot or a little; bought it secondhand in England. One of favorite tools. :). Dad’s little Tyzack is great on smaller stuff, holds a sharp edge very well. 🙂
LikeLiked by 1 person
Pingback: Bright Bowl | David Fisher, Carving Explorations