


A sea of creamy chips from roughing out some maple bowls. Where is that apprentice with a shovel?
A week or two ago, a friend had a red maple (Acer rubrum) tree down, and I was happy to help him cut it up and rescue a few chunks for bowls. The creamy white wood might represent a great opportunity to incorporate some color. I’ve been roughing out a couple bowls for drying, including this one that will have wide side panels that will serve as a canvas for decorative carving. I think I first saw bowls like these in a VHS video I bought from Country Workshops years ago. It features then 82 year old Bengt Lidstrom carving bowls in Sweden in 1998. If you haven’t seen it, grab a chair; you’ll love it. Drew has put it onto youtube and here is the link. My methods differ from Bengt, and some may prefer some of his ways. There’s much to learn by viewing the video carefully.
Bengt lays out his side panels around the 20 minute mark of the video. Sometimes I completely freehand them, but for these, I used a compass to help assure symmetry. I snapped a few shots showing the process.
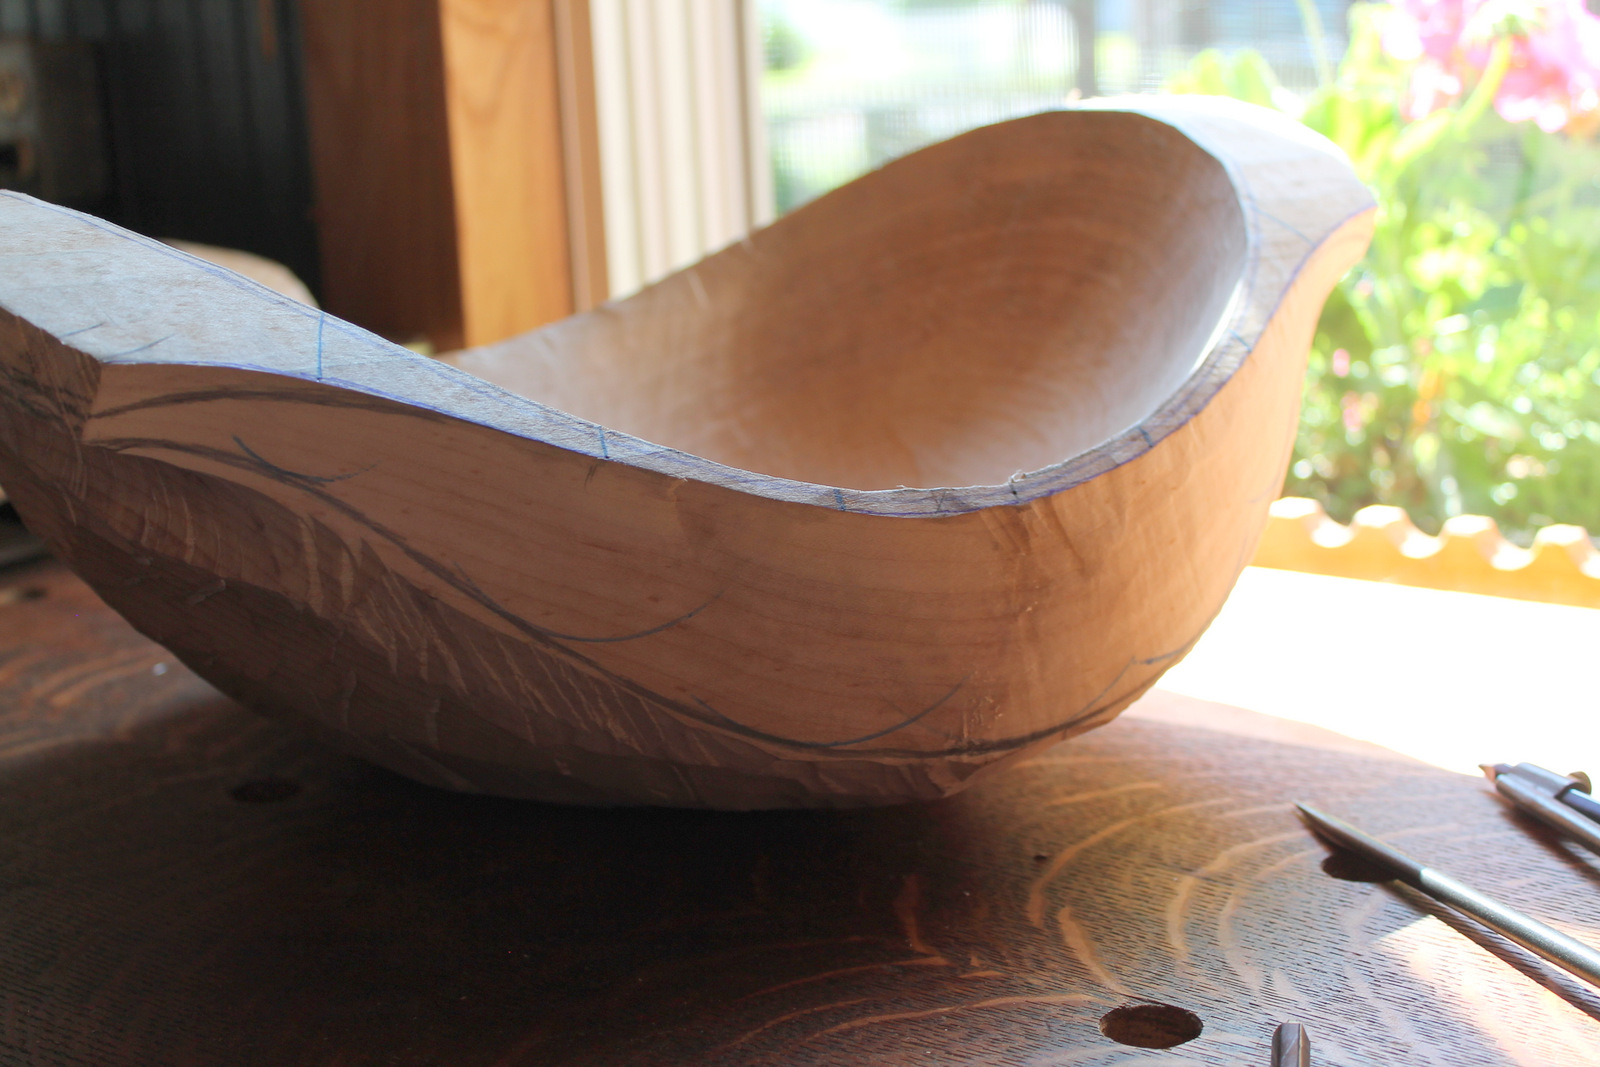
After hollowing the inside, and roughly hewing the surface of the side panels, I hewed away a lot of material from the underside of the bowl. After refining the surface of the side panels a bit more with a drawknife and spokeshave, it was time to draw the exact outline of the side panels before continuing to sculpt the exterior of the bowl.

Sketch a pleasing curve freehand. Trust your eye and think big movements. Don’t fiddle with your fingertips.
Most of the upper edge of the side panel is already formed by its junction with the rim of the bowl, so I just extended that curving line to the ends of the handles, representing how the handles will curve downward at the end once wood is removed above the line. Still working freehand, I sketched on a pleasing curved line, representing the bottom of the side panel. The drawn pencil lines can be seen on the right half of the bowl in this photo.
Using the compass, I made a series of marks along the rim of the bowl, swinging the compass to both sides of center. I made four, but it could be more or less. There’s no need to measure anything, just pick a few spots.

Making arbitrary reference marks along the rim of the bowl.
Referencing the lines that I drew freehand, I set the compass to the depth of the drawn line from each of my (blue) reference points along the rim.

Referencing the depth of the drawn line from the points on the rim.
With each new setting, I transferred these depths to each of the other three (yet undrawn) quadrants. This creates a series of marks that serve as guideposts for drawing the remaining quadrants of the side panels.
Transfer the depths to the undrawn quadrants. I’m marking now on the opposite side of the bowl.
Picking up my pencil again, I connected the furthest points of the blue arcs in a pleasing line that closely matches the one I drew freehand. The end point is at the lower corner of the handle. Now I’m ready to further sculpt the exterior of the bowl, stopping at the new lines.
Connect the outer portions of the little arcs in a curve.
This idea can be adapted in a variety of ways. I shot a simple video explaining this process that might make things more clear:
And I see that there is still a chance to carve bowls with Follansbee in Maine next weekend…

Another great video showing a simple, but essential layout technique. Is there anything you can’t do with a Compass?
Thanks,
J.
LikeLike
Pingback: Side Panel Carving | David Fisher, Carving Explorations
Pingback: Small Side Panel Cherry Bowl | David Fisher, Carving Explorations