

My latest bowl, this boat-inspired piece, came from a Chinese chestnut (Castanea mollissima) tree that grew a couple miles from my home. In the photo, it is riding on waves of walnut bark on the wood stack. I’ve got more photos, including some of the process, below.
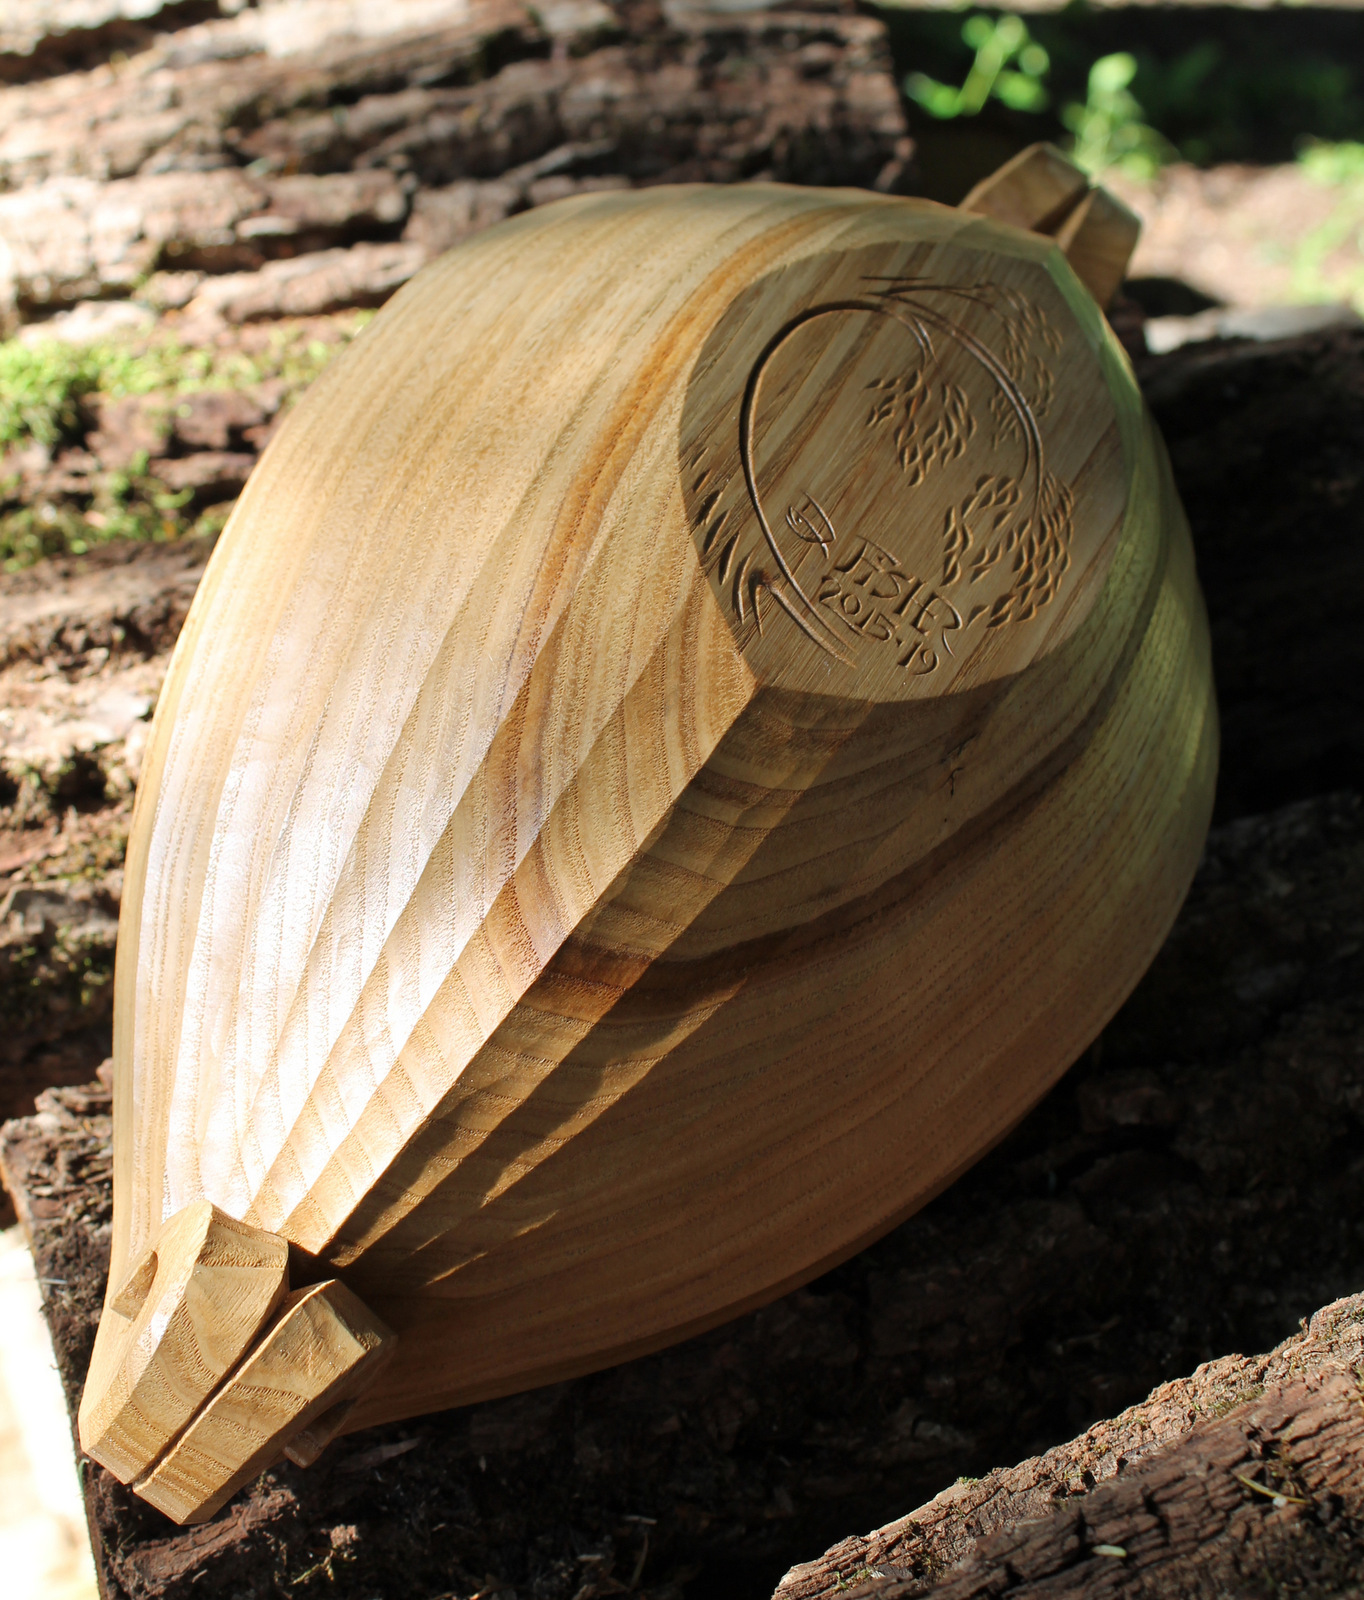
The carved flutes terminate beneath the volutes.

16 3/4 inches long, 8 inches wide, and 4 1/2 inches high; a foot shorter than my most recent big walnut bowl, but it can still hold its own.

This chestnut tree had a lovely dark growth ring that stands out. Counting back the rings on the log, it was 1992. Weather historians?

Bon Voyage
I’ve posted to the available page at my website. For those interested in the carving process, I did remember to take a few shots along the way…
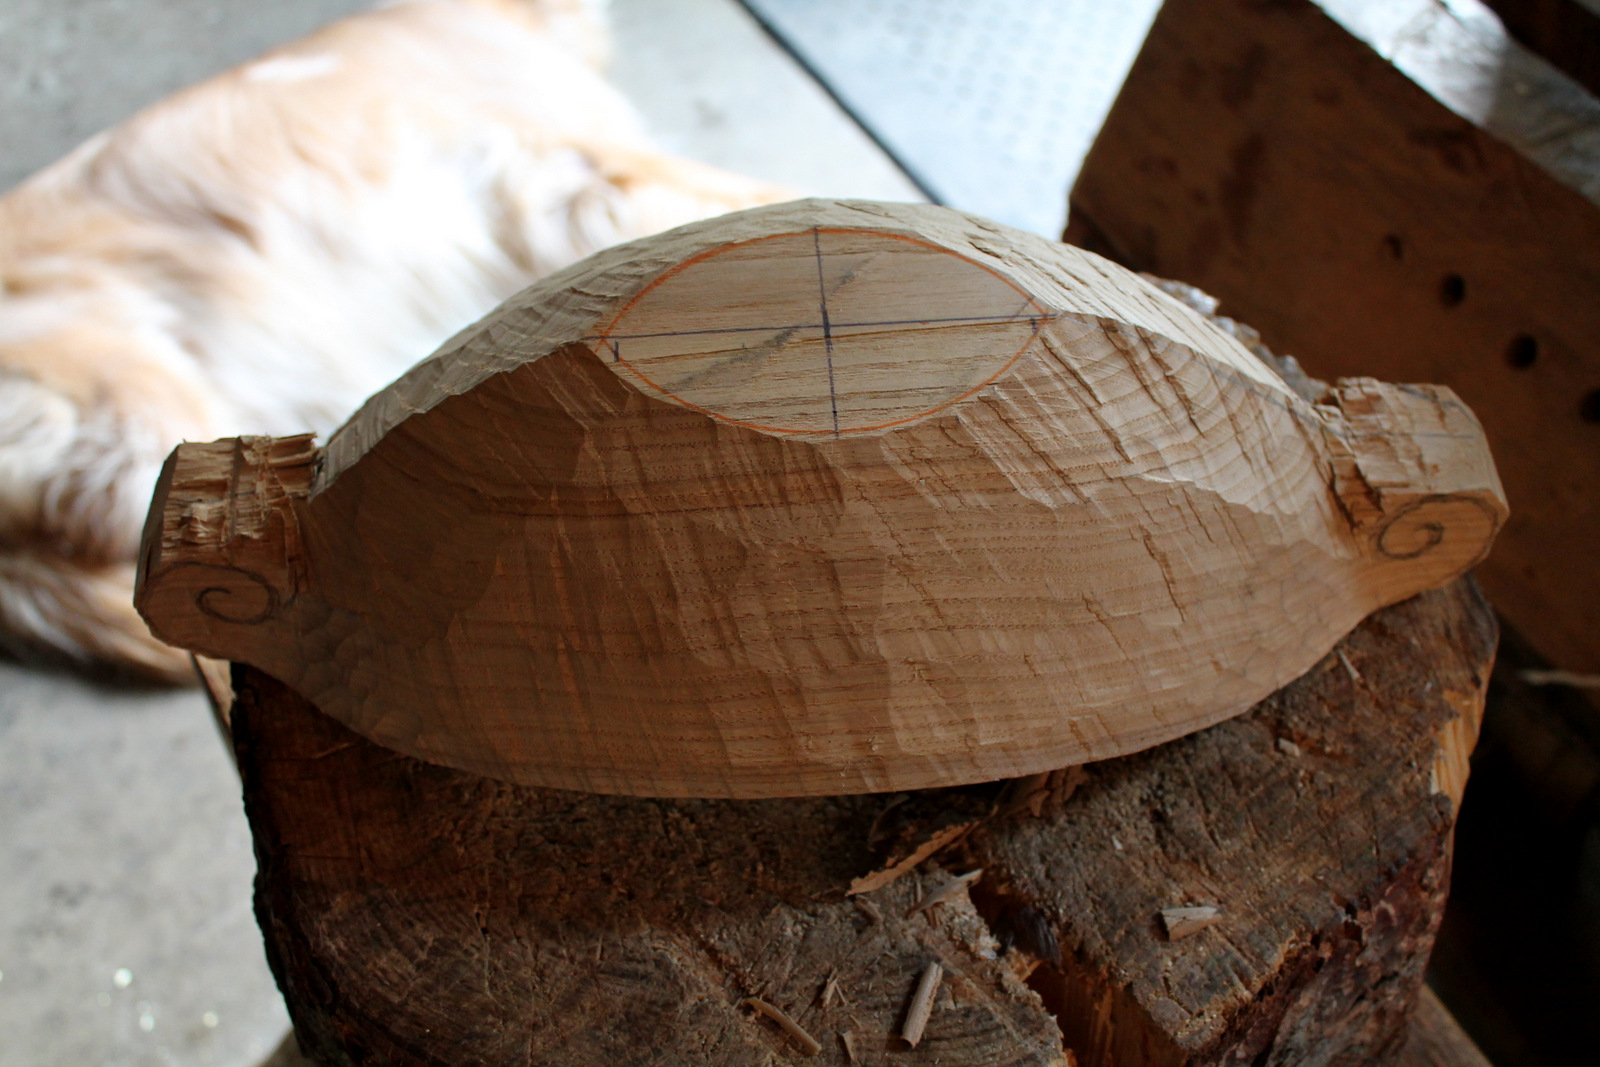
At the chopping block, after the axe work. The volutes have been sketched, but the lines will be carved away and redrawn as the work progresses.

At the bowl horse. I was using a drawknife to establish the plane that continues along the sides of the volutes.

The vise also came in handy.

For carving the outer flutes (a painstaking process), it took some creative arranging of pegs, holdfasts, even T-shirts.

A really nice one again Dave!
LikeLike
Thanks Frederik. By the way, for those interested in comparing carving axes, Frederik had a great post recently on his blog: https://frischesholz.wordpress.com/2015/06/22/das-werkzeug-schnitzbeil/ It is in German, but the photos are great. I copy and paste the text into Google Translate and although the translation is not smooth, it is good enough to get the idea.
LikeLike
Another fantastic bowl. Thanks for posting, Dave.
I can’t help but wonder if you’ve ever given any thought to making a violin…
Best, Scott
LikeLike
I think that would be fascinating. What a thrill it must be to hear music coming from an instrument that one has made. You must have experienced that many times, Scott.
LikeLike
I somehow find it even more thrilling to hear music coming from an instrument made by another that, having fallen into disrepair and consequently mute, somehow found its way to my bench. I find that work a real privilege and one for which I am always grateful. The conversation between the instrument, its maker and me, the restorer, is always enlightening… and humbling.
LikeLike
Nice.
I’m not sure about your location, but was Hurricane Andrew in 1992?
LikeLike
I was far removed from much impact here in western Pennsylvania. We did get some rain from Andrew, but nothing too severe as I recall. Good idea, though.
LikeLike
Beautiful!!
How was the chestnut to carve? I’d love to see more of a close up on that vise picturing the bowl with the side facing up.
LikeLike
Thanks, Paul. The chestnut wasn’t bad. Like most woods, it carves easily when green. Since it has a lot of tannins like its oak relatives, it can take on some blueish black marks from reaction with the iron in the tools, but that seems to be mainly before the wood is dry. After drying it was a hardness similar to cherry I’d say. Takes a nice polish right from the tools.
I don’t know if you’ve noticed, but when you click on a photograph, it will bring up an enlarged version. Then if you click that photograph, it will bring the image up even closer. In that photo you can still see some of my layout lines. As far as layout goes, it is basically a football shape for the line of the interior or hollow. The exterior lines mirror those, but taper away to a wide protrusion on each end to be left for the volutes. Until the drying is done, the areas for the volutes are just block-like protrusions. Not really any shaping at all. Carving the volutes themselves was one of the toughest challenges considering the deep undercutting and need to maintain symmetry between the two ends of the bowl.
LikeLike
Oh, and the vise is just a 7 inch woodworker’s vise, but I attached a 21 inch oak jaw to it that extends far off to one side. It has worked great that way for years. provides a lot of interference-free clamping area.
LikeLike
Wow! Those close ups are nice. It will be awhile before I am ready to try that on my bowls. Also, I found your blog on sandbags has two great pictures of your vise. I have an old Rockler that looks similar to what you are using. So far I am using 2 x 4s, or 2 x 6s and clamping the bowl length wise at angles to work on the sides. Your version of the vise looks like it would be helpful.
LikeLike
good!!!
always beautiful.
and….
is chestnut proper for bowl arving or other greenwood working??
LikeLike
Thank you! Green woodworking covers a broad spectrum, so just about every species of tree has some potential use or strength. The large pores within chestnut make it less than ideal for a cereal or salad bowl, but would serve very well for a fruit bowl or for many other uses.
LikeLiked by 1 person
thank you very much!
LikeLike
Wow, the flutes are spectacular…
LikeLike
Very Nice Indeed David, thanks for sharing. I for one am most interested to learn the methods you use to lay out the details for the flutes and the relief – top of bowl at the handles on this bowl, also the details found on the sides – some of your other bowls
LikeLike
Rick — I will try to explain in more detail in a future post, but the flute layout is largely freehand after making a few reference marks. Basically, I start by using dividers to mark out equal divisions along a line from the center to the rim. This procedure can be repeated closer to the ends (thus providing more dots to connect). Of course there are subtle variations in the surfaces, so ultimately it is a matter of sketching on guidelines in pencil (representing the raised edge between flutes) that look “right” and pleasing to the eye. This can take some time, but better to work through it with pencil. It also helps to view the drawn lines from various angles to make sure the flow nicely regardless of viewpoint. I’m not sure I’m clear on the second part of the question, but if you are referring to the triangular recesses, they were sketched on by eye following the contours of the bowl.
LikeLike
good!!!
always beautiful.
and….
is chestnut proper for bowl arving or other greenwood working??
LikeLike
Pingback: Carving American Chestnut | David Fisher, Carving Explorations