
Mankind is not a circle with a single center but an ellipse with two focal points of which facts are one and ideas the other. –Victor Hugo
An ellipse is an endlessly adaptable shape that is beautiful and easy to lay out. It is one form that I often come back to, even though I draw many other types of outlines for bowl hollows. You can’t go wrong with an ellipse.
There are many ways to lay out an ellipse, featuring all sorts of devices. This one is simple and effective. It allows you to form the perfect size ellipse for the log before you. You decide whatever length and width you want the ellipse to be, and that ellipse will be formed with no guesswork. Plus, it works on rounded surfaces (like the top of a bowl done “upside down” style).
This is the method I use in this video , but I’ve broken down and explained the steps more clearly in the photo sequence below. I am demonstrating on a pine board, but imagine the surface is the top of your bowl blank.
It all starts with compasses. These are essential and versatile layout tools, not just for this type of work. For bowl layout, I always use the ones that can hold a pencil. In Peter Follansbee’s historical furniture work, he uses pencil-less compasses, sometimes called dividers. Here is one of his blog posts referencing the historical use of the compass.

The two compasses on the left are from Lee Valley Tools. For larger bowls, they come in very handy. The other two are yard sale finds.

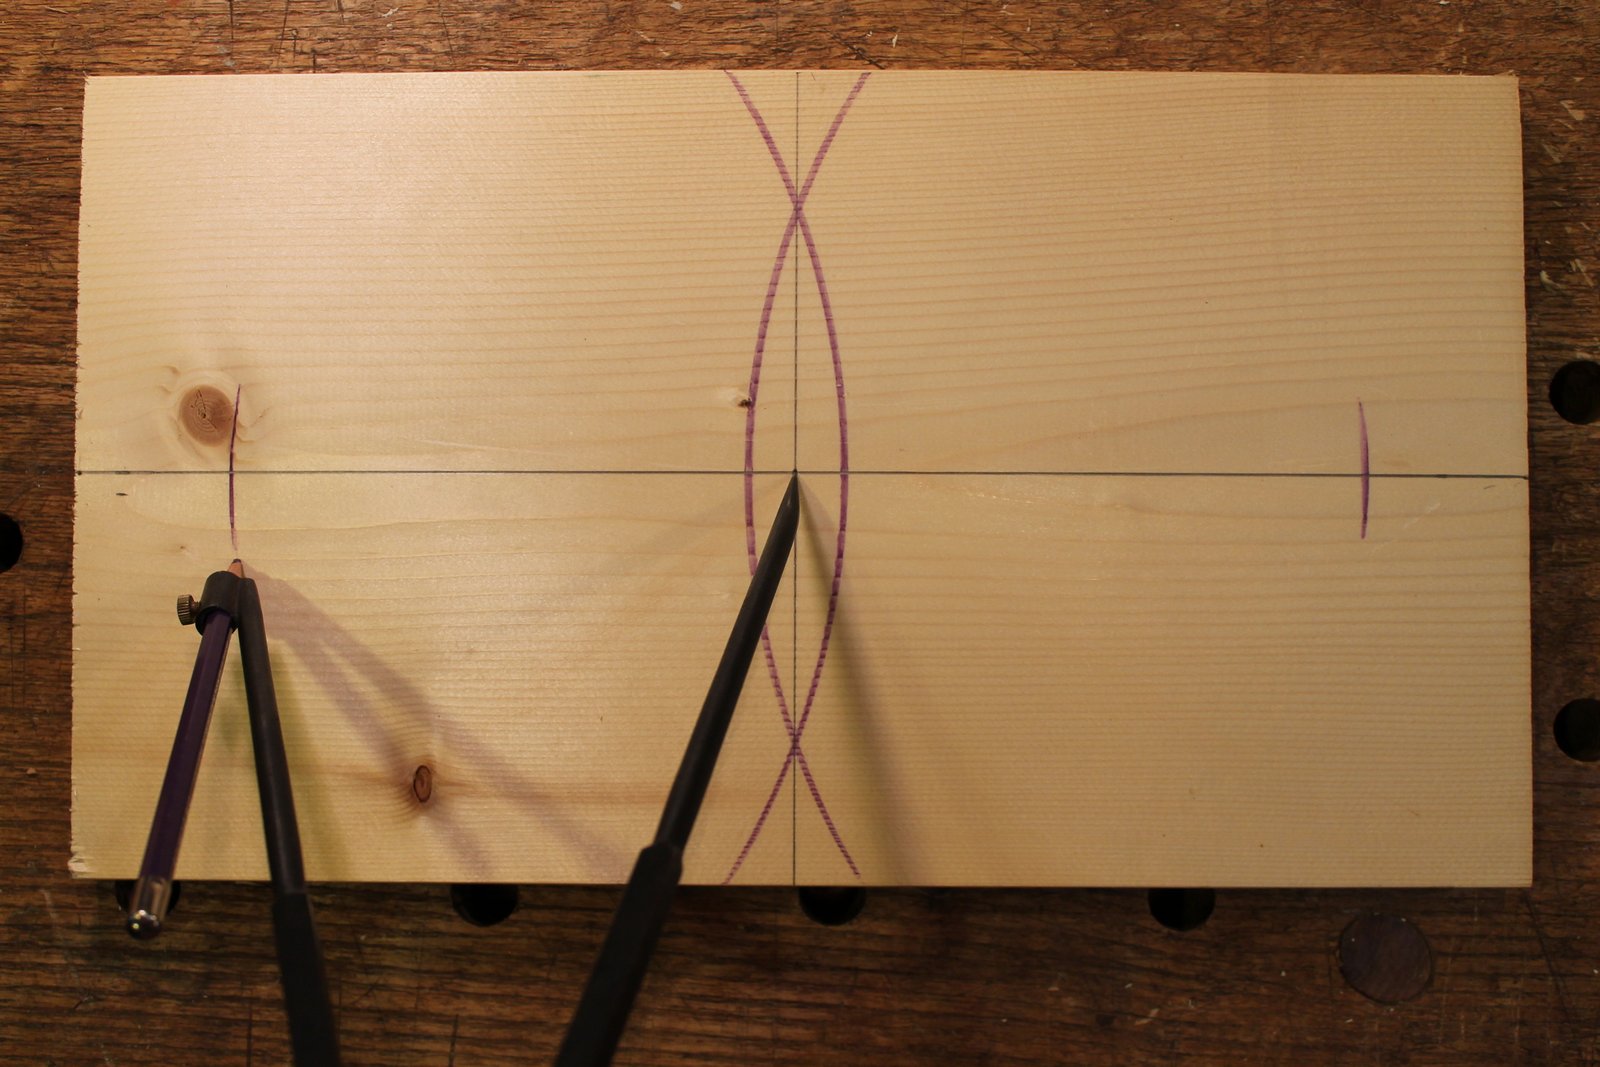
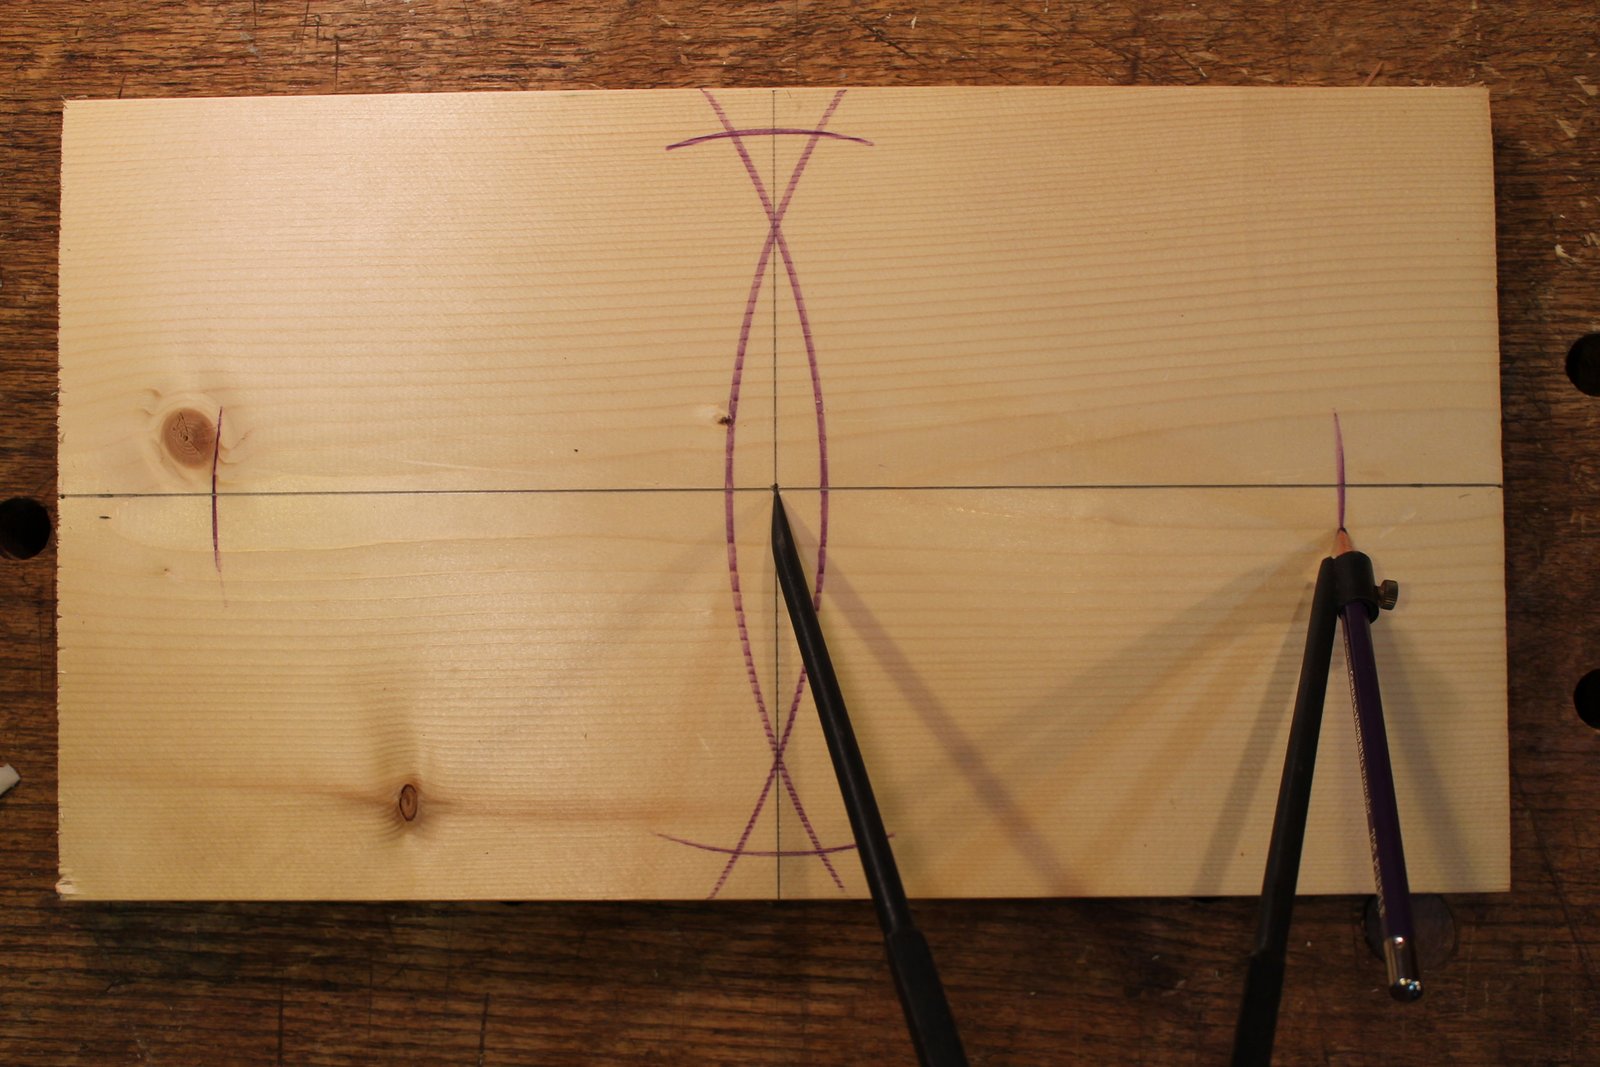
Draw a lengthwise center line from end to end. Place the point of the compass just inside the end of the log at one end of the line. Open the compass a little beyond what looks to be the center and strike an arc. Repeat from the other end.

With a ruler (a flexible ruler if working on a rounded surface) strike a line through the intersections of the arcs. The line formed is not only centered, but also perpendicular to the lengthwise center line.
Decide (up to you, the designer) how long you would like the hollow portion of the bowl to be (i.e. how much left on the ends for handles). With the point of the compass in the center, strike a mark at that distance to both sides. They are equidistant from the center.

Decide how wide you would like the hollow to be, and repeat the procedure in the previous step, this time for width.
Set the compass back to one half the length. (Or I guess you could reverse the last two procedures if you prefer.)

Keep that compass setting (one half of the length), place the point of the compass where the width mark intersects the vertical center line, and strike an arc at the two spots it crosses the horizontal center line. Repeat from the opposite side if you want to be sure.

Drive a small brad in at at outward angle at the two focal points you have located.

Wrap a string around the nails to form a triangle with its apex at the widest point of the ellipse. Form a simple overhand knot…

…then secure it like this.

By tugging on the strings here and there, you can adjust the knot to end up with things just right.

Place a pencil within the ring of string, and, with a little outward pressure, let it guide you to form a beautiful ellipse.

Now you have an ellipse that is just the right length and width.

These are two books that include practical exercises for using compasses to generate all sorts of shapes and lines, plus lots of related ideas. By Hand and Eye is full of all sorts of design ideas — published by Lost Art Press.
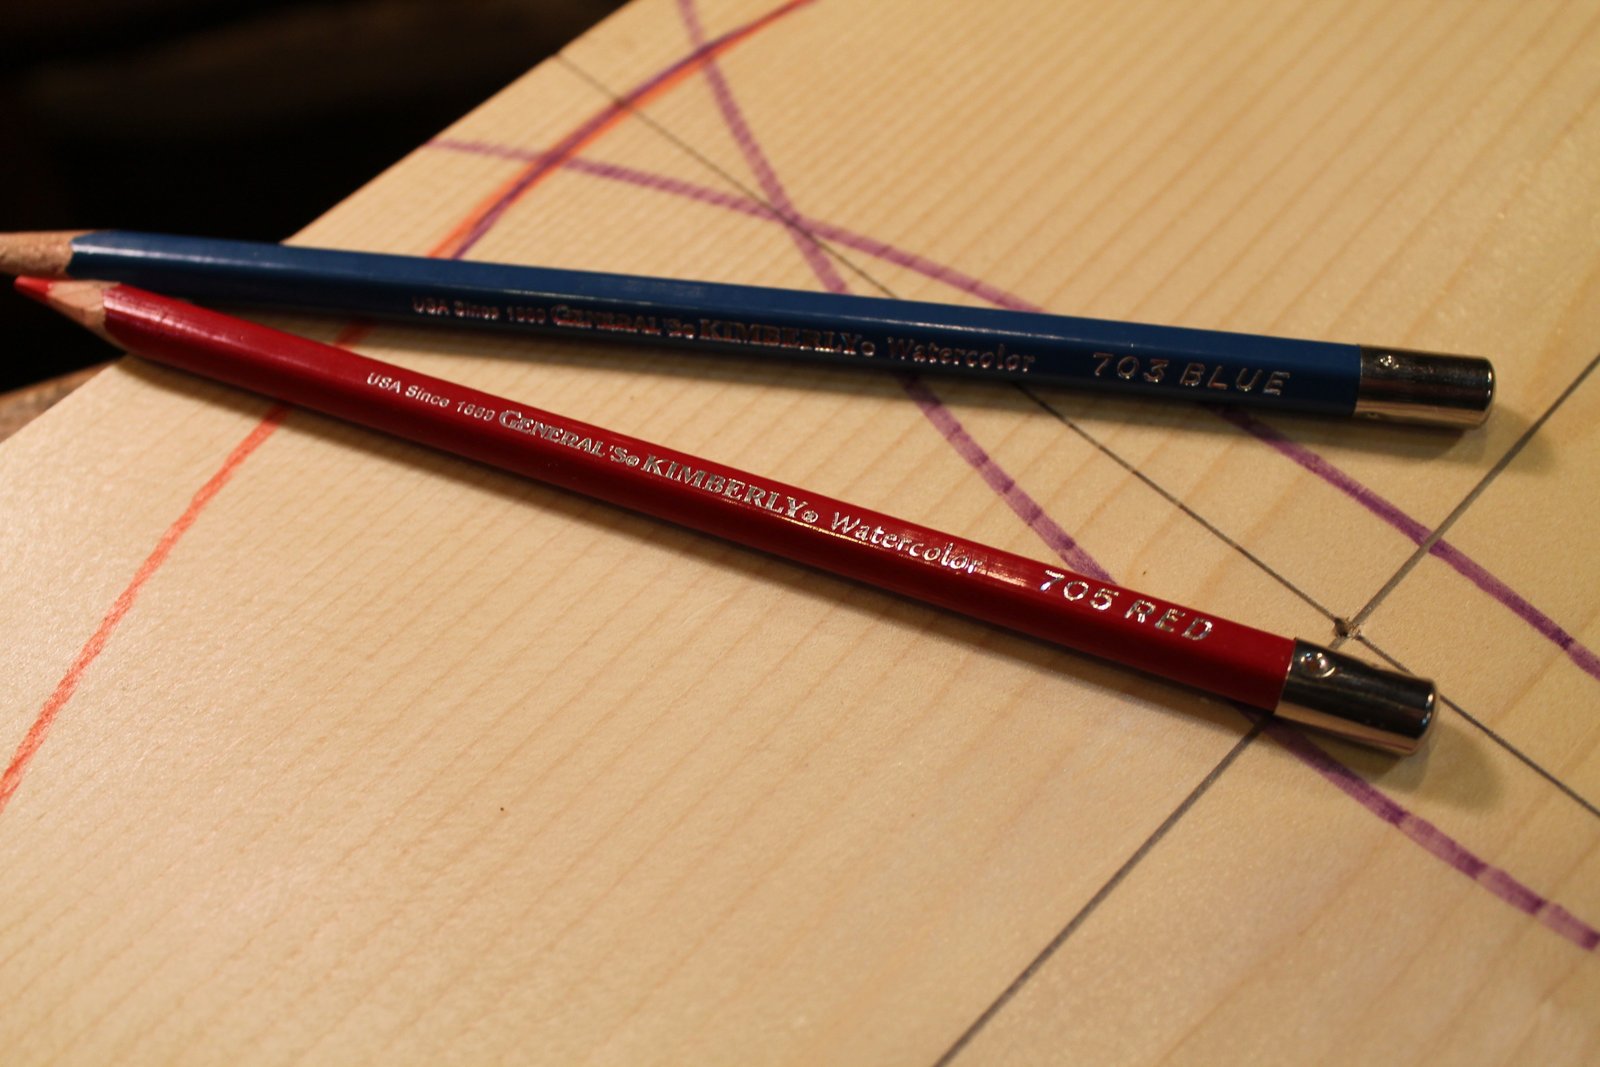
My sample board was dry, but normally I am working with green (wet) wood. I find that watercolor pencils are excellent for marking on it. There is no need to purchase the more expensive brands.

That is very helpful, Dave. It fills in the details missing on your video, which I wondered about. It is also helpful to people like me as we are starting out into this kind of carving to hear you say, ‘up to you’ when you talk about length and width. I’d wondered if there was some kind of magic ratio. Good to get a sense of your own artistic flexibility, even if you do bring as well some kind of ‘classical proportions’ to the task, as per George Walker. I also hadn’t seen that way of tying the knot on the string before. Much better than what I was fumbling with. Thanks again!
LikeLike
Thanks, Geoff. Good to know. And I wish I knew more about knots. I’ve always admired the skill and knowledge that some have for tying just the right knot for any situation. My technique is usually to keep tying another overhand knot on top of the others until nothing moves!
I think much of this work relies on staying flexible enough to consider what a particular piece of tree has to offer rather than imposing a design idea or exact ratio upon it. Each piece of nature brings it’s own ideas. That said, within those parameters, there are still many design possibilities for each piece. I guess that is the part that is up to us, and certain choices may end up more pleasing to the eye than others.
George Walker’s work, it seems to me, is all about encouraging folks to not be afraid to use their own designers eye, rather than relying on predetermined plans. He suggests trying out certain proportions (rather than following a rule of a certain one) until your eye says, “yes” — or maybe, “I hope.” Play around with the compass. draw an exterior curve, then draw over it. Well, you get the idea. I hope I haven’t misrepresented George’s thoughts.
LikeLike
Camper’s & backpackers, any worth their salt anyway, use a taut-line hitch for the guy lines sat secure the tents and tarps etc. Kind of like a variation on a Prusik, It’s a very easy and adjustable “knot”. Makes adjusting your string to just the right size very easy and you can then just leave it tied that way and use it over and over for practically any size variation.
LikeLiked by 1 person
Just used this on a bark side up layout. Worked like a charm. With just a little knowledge, the complex becomes simple, and amazing. Thanks for sharing.
LikeLike
Thanks Dave for this excellent tip. How do you go about laying out the ellipse on the bottom without leaving those brad marks?
LikeLike
Good question, Marco. My preferred method is to create the appropriate ellipse on a piece of heavy card stock or similar material. (I just tap the two nails through the card stock into a scrap board). This will include the x and y axes drawn on there. Cut out the ellipse with scissors and line up the axes on the template with the horizontal and vertical center lines on the bottom of the bowl blank and trace the ellipse. I keep these ellipse patterns in a drawer just in case one might be the appropriate dimensions on a future bowl.
LikeLike