Maple Spoons

Like many places, we have a lot of maple trees around here. Such wonderful trees for shade, syrup, or playing with the samaras, or “propellors.” And the wood is ideal for spoons. I seemed to be on a lucky roll for finding good maple crooks and carved a group of spoons, each one different in response to the character of the piece of wood. I’ll list them below, going left to right in the photo above. If you’re interested, please email me at dandkfish@gmail.com. Prices include shipping.

#1: 12 1/2″ x 3 1/2″. This large serving spoon came from a nice big crook, so I utilized all I could. The bowl is 3 1/2″ wide, so, in spite of the suggestion carved into the handle, this is not an eating spoon. $230 includes shipping. SOLD

#2: 12″ x 2 5/8″. A good all-around spoon in the kitchen. Stir, cook, serve. Chip-carved handle. Probably from red maple, which is a little yellower than the rest when oiled. $140 includes shipping. SOLD

#3: 13 1/4″ x 2 1/2″. This one had a tight dark knot that I was able to position in the center of the handle. A little deeper bowl and longer than #2. NFS

#4: 13 1/2″ x 2″. This spatula is thin and nimble, but very strong. The balance worked out so that it rests naturally in such a way that the blade stays off the table. A lucky feature that might keep the counter clean. Chip-carved handle. $130 includes shipping. SOLD

#5: 13 1/2″ x 2 1/4″. This long multi-tasker had a little perfectly round knot in the bowl. On a whim, when the spoon was finished, I added the smile with a wood-burning tool. $150 includes shipping. SOLD

Posted in spoons, trees | Tagged , , | 5 Comments

Greenwood Fest Registration

About a month ago, I wrote a brief post about plans for the Plymouth Craft Greenwood Fest.  While specific scheduling for sessions is ongoing (and I still need to decide upon the focus areas for my demonstrations and instruction), the busy folks at Plymouth Craft have announced that registration will open up this Friday at 9:00 a.m.  Read more about it here at their website.  There’s more information under the Greenwood Fest 2016 tab, including the wonderful woodsy location, Pinewoods Camp.  I can smell the pines already.

Posted in classes, events, green woodworking | Tagged , | Leave a comment

Start Where You Stand


Plane sketch C_NEW

Do not wait; the time will never be “just right.”  Start where you stand, and work with whatever tools you may have at your command, and better tools will be found as you go along.”

— George Herbert, “Jacula Prudentum” 1651


Posted in quotes and excerpts, sketch, tools | Tagged , | 10 Comments

Folkstreams

A visit to the Folkstreams website can provide a person with some healthy perspective.  It is a rich collection of films of varying length on a wide spectrum of traditions, including handcrafts.  There’s much more to see, but to begin with I’d recommend these:

The Last Shovel Maker

The Pirogue Maker

Alex Stewart: Cooper

Ben’s Mill: Making a Sled

Final Marks: The Art of the Carved Letter

They are enlightening, inspiring, and thought-provoking.  Even better than the Alex Stewart film is the Book Alex Stewart: Portrait of a Pioneer by John Rice Irwin.  It was recommended to me a few years ago by a friend.  It is a special book.

Posted in books, video | Tagged | 3 Comments

Contentment

Old Man Carving Sketch_NEWTwo old men, radiating contentment… Their trade seemed to have been a refuge for them. Perhaps their serenity came from making things that gave pleasure to others.  Or making things they knew would outlast them, give them a little power over the grave.  Leaving behind physical evidence that they had lived and were creative agents in the world.  Maybe it was that they had spent a lifetime swimming in a sea of harmonious form, that this had osmosed into them, and then as the years went on it began phosphorescing out in a cloud of benign tranquility.  Or was it something in the activity of woodcarving itself that gave them, at last, their moral radiance?

— David Esterly, The Lost Carving: A Journey to the Heart of Making,   Viking 2012

Also by David Esterly:  Grinling Gibbons & the Art of Carving, V&A 1998


Posted in carving, quotes and excerpts, sketch | Tagged , , , | 3 Comments

Do You have an Outie or an Innie?

Illustration, Adze Bevels_NEW

I have some general information on tool selection at my website, but I’d like to focus more specifically on the adze in this post.  It is probably the single most expensive tool used for this work, so it pays to choose wisely. After all, your grandchildren might be using it someday.  I only know two adzes well, but they’ve taught me some things about adze design.

SAM_0667

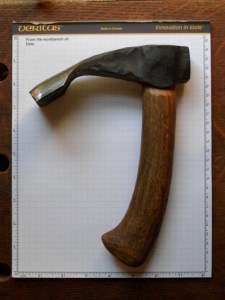
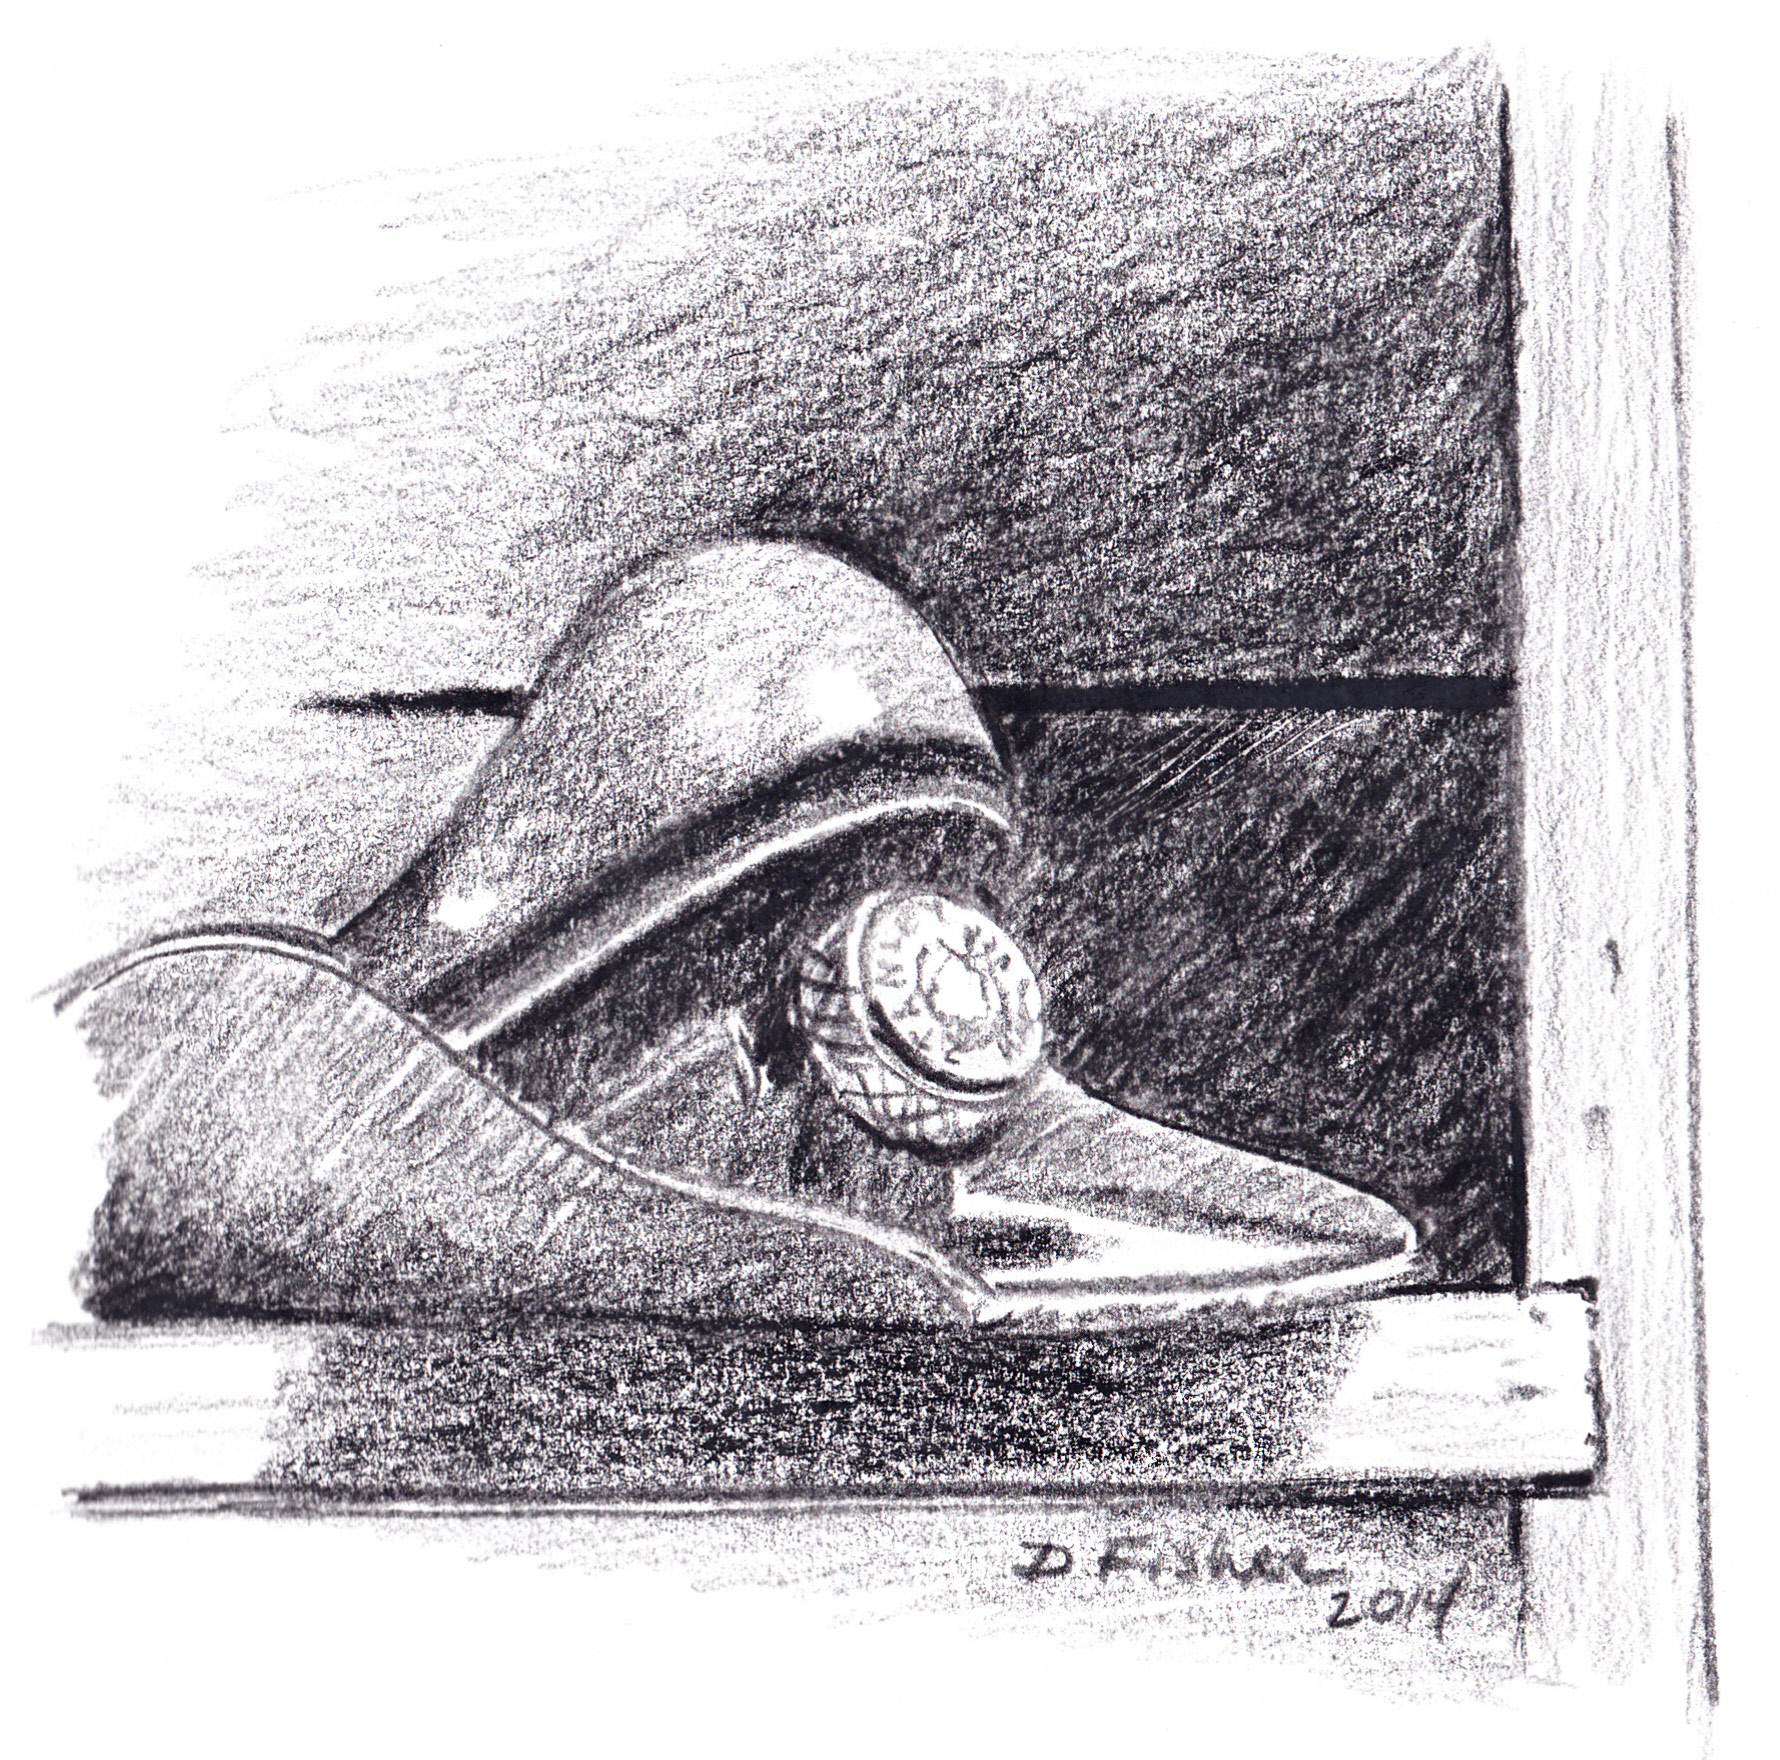
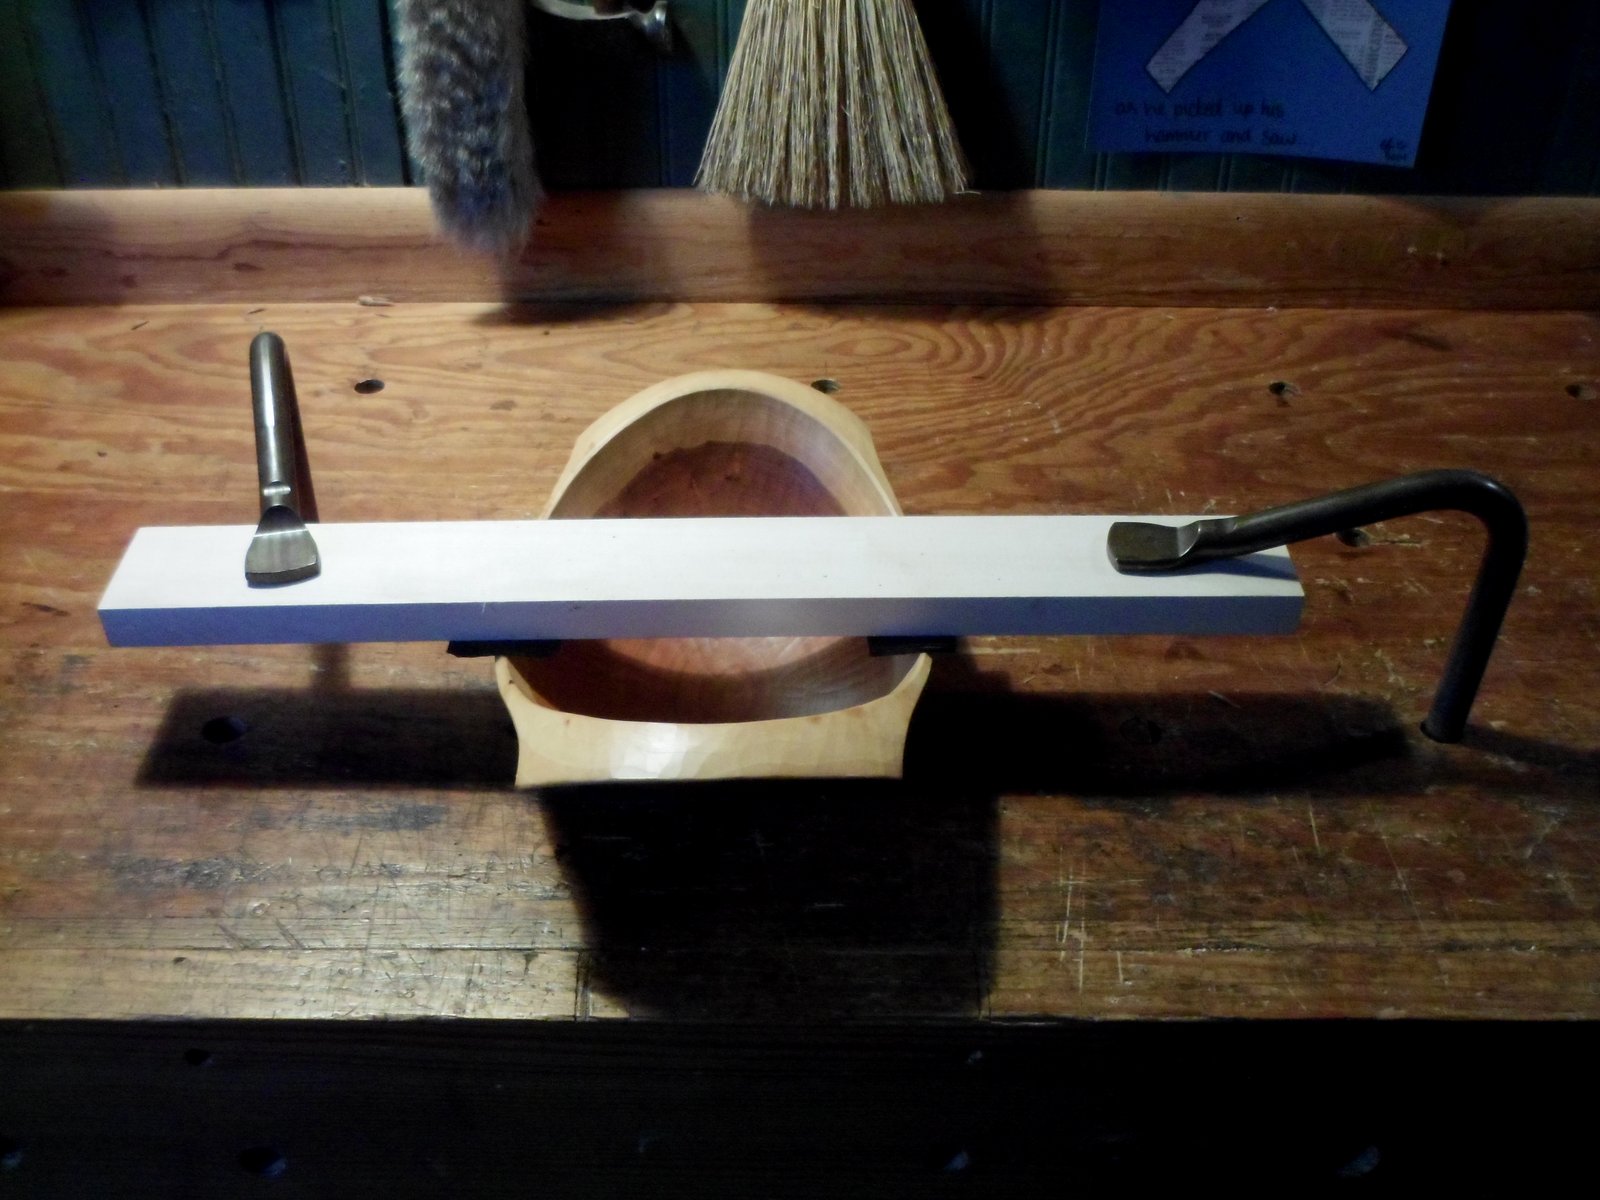
My Hans Karlsson Adze head with custom handle

SAM_0672

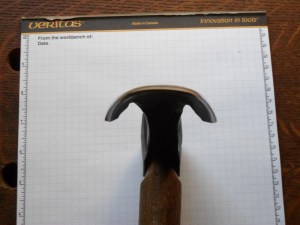
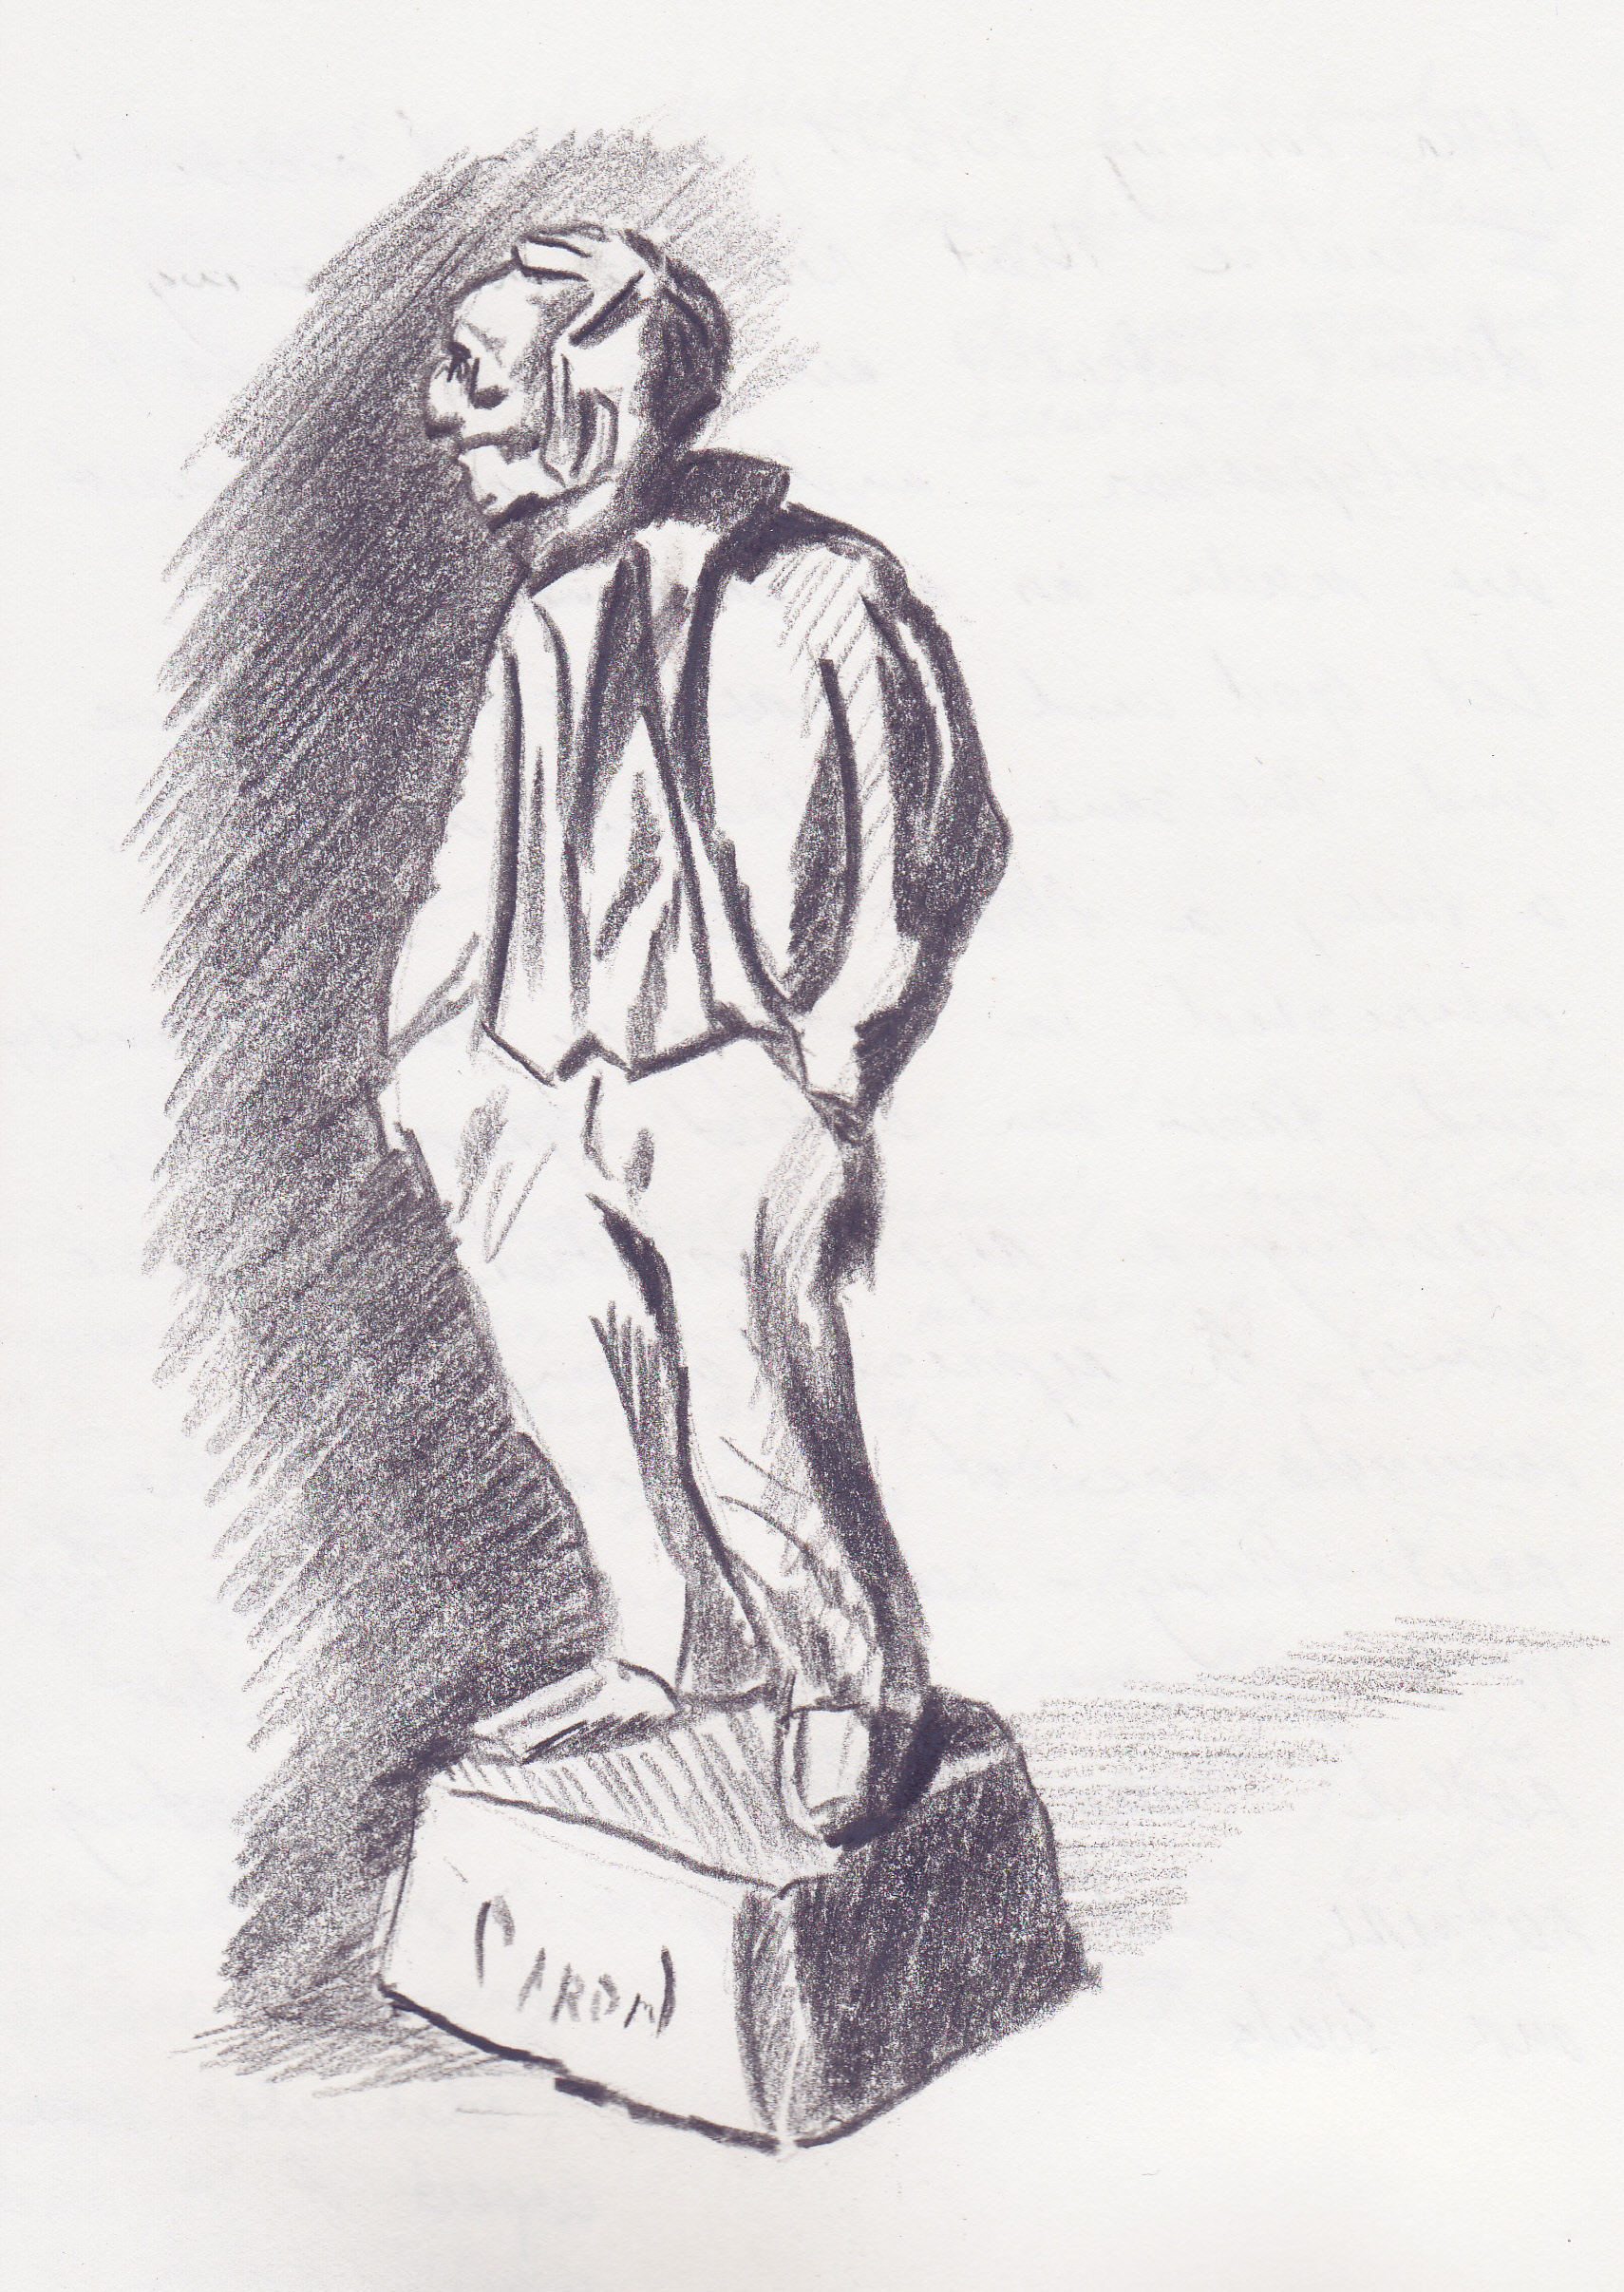
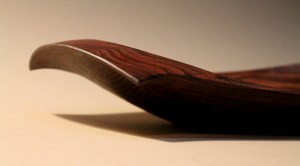
Edge-on view of my Hans Karlsson adze

I’ll start by showing some photos of the adze I use the majority of the time.  The adze head is made by Hans Karlsson in Sweden.  The Karlsson’s have a small family forge in Sweden that makes excellent tools.  They are designed well, with much consideration for how they will be used.  Mine was purchased years ago through Drew Langsner’s online Country Workshops store.  It is marked H-161 there.  As far as I can tell, it is the same one available from these suppliers based in the U.K.: Woodsmith and  Woodland Craft Supplies.  They have other adzes there of various sizes made by HK and other good makers.

My HK adze arrived sharp and ready to go (except for the lack of a handle, but that was my choice).  It has an outer bevel that is maybe declined eight to ten degrees from the line of the head.  A shorter inner bevel strengthens the edge by making the total edge angle around thirty degrees.  It enters the wood easily and the weight of the tool propels the edge through.  The steel holds an edge under heavy blows, and sharpens easily.  All I have done through many sharpening is to maintain it as it came.

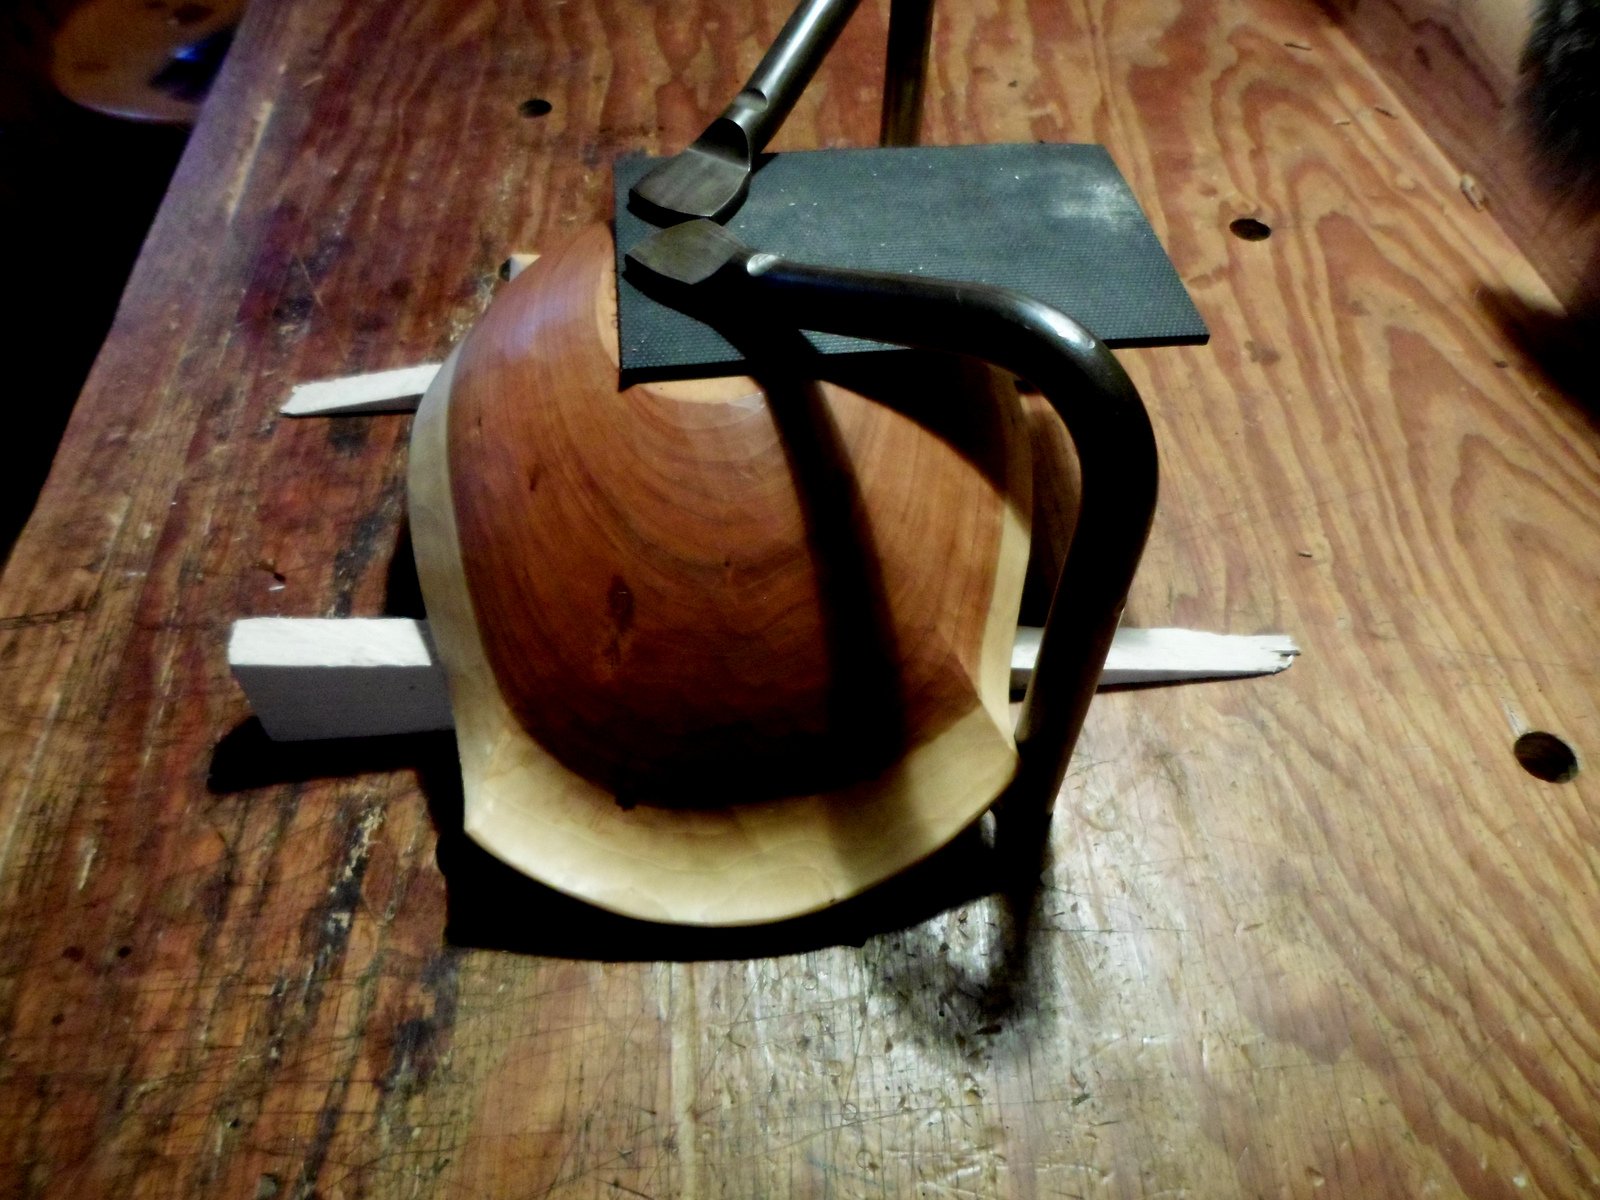
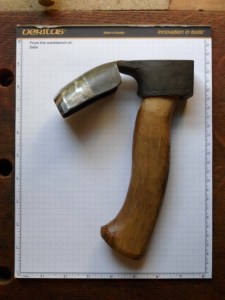
My other adze is a good example of how much work will be involved if you buy something poorly designed for bowl carving (even if the product description says “perfect for making bowls”).  Before I had any idea what to buy, I purchased this adze made by Pfeil Swiss Made.  Their carving gouges are excellent, but they missed the mark on the design of this tool.

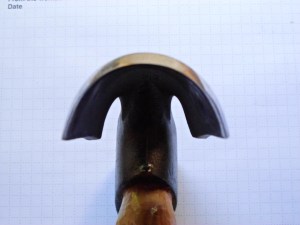
The handle is poorly designed in relation to the geometry of the head, and there is no outside bevel at all.  It lacks the concentrated weight of the HK that helps propel the edge through the wood.  It doesn’t arrive very sharp. In spite of all that, it will indeed remove wood from the hollow of a bowl; I carved some bowls with it.  It took lots of tweaking to get it to work better.

After grinding away a lot of steel (carefully avoiding overheating) and adding a new handle, I now have a nice little adze perfect for tight hollows due to a combination of three factors:  a tight sweep of the edge, a tight curve along the top of the adze, and a pronounced outer bevel (now).  I guess you could say it has a tighter turning radius than the HK, but the HK provides a much smoother ride.

SAM_0669SAM_0670

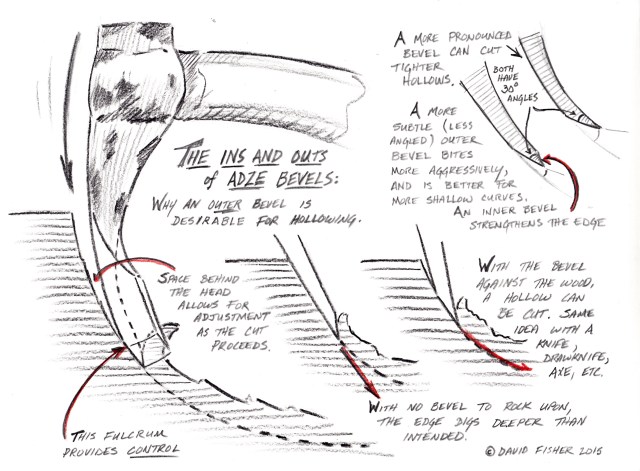
There may be some uses for which an adze with an outer bevel is undesirable.  For hollowing bowls, you want some degree of outer bevel.  I hope my drawing at the top offers some explanation as to why.  Another way to think about it is like this: an adze is like a carving gouge on a stick.  When used for carving work, gouges have outer bevels.  They provide the carver with the freedom to control the course of the tool and come into, and out of, a hollow.

For bowl carving, outies are the best.

One last thought.  If you can’t afford a good adze, but you want to start bowl carving, consider buying a gouge instead.  Better to buy a good gouge than a bad adze.  You’ll still need that gouge after you save enough for a good adze anyway.  You can hog away wood pretty quickly with a large gouge and a mallet.  I’d suggest something like a #8 sweep bent gouge (long bent) 25-35 mm wide.  It might also be a good option if you don’t feel safe swinging an adze.

Posted in adze, tools | Tagged , , , | 55 Comments

Workbench and Photo Studio in One


IMG_4105

When it comes to photography, I have no idea what I’m doing.  But then my goal is not to create amazing photographs, but rather to simply take a photograph that captures the true sense of a piece;  I want the bowl in the photograph to look like the real bowl.  Sounds simple.

This  can be difficult to do with sculptural pieces.  With so many potential viewpoints, which ones best define a piece?  Plus, much of the character can only be revealed by moving over the surface with one’s hands.  Photos come up short there.

My approach is pretty simple (and I don’t even know how to complicate it).  I never use the flash.  Especially for curving forms like this, the form of a piece is revealed in a photograph by the contrast between shadow and light.  The flash wipes them out. Sometimes I’ll take some shots by placing a piece near a window, using natural light. Most of the time, I go to the setup you see in the top photo.

The typical procedure:  Clear all the tools and chips off of the workbench.  Run upstairs to get the piece of grayish/brown mat board (purchased in the framing supply section of a craft shop) stored behind the dresser.  Push the back up against two nails in the wall above the workbench and hold the front with a small brad hammered into the workbench.  Turn off the glaring overhead lights in the shop which leaves the wall sconce over the bench (a bit to the side of the “stage”).  No fancy bulb, just a regular incandescent. Hold the camera steady on auto mode and take some shots; some will look okay.

National Geographic has not called for my advice.

I shot some photos of a recently finished walnut bowl tonight.  I included the apple for a sense of scale.  This is a shallower bowl than usual, but it still allows room for some dimension and interesting curves.  I’ve just posted it on the website, too.

IMG_4104 IMG_4092IMG_4095IMG_4093

Posted in bowls, photography, walnut | Tagged , , | 5 Comments

Burl

IMG_3932Once in a long while, I will encounter an interesting and usable burl on a fallen tree or branch.  They say that burls result from stress usually in the form of some infestation or injury.  The result is a wart of convoluted grain that can be quite unusual, beautiful, and tough.

I have encountered enough of them to know that it is a bad idea to remove one from a tree or fell a tree just to get one.  Not just because of concern for the tree, but also because burls often hold disappointing surprises.  There are often voids, bark inclusions, and other issues that can render it unusable for what one had in mind.  But once in awhile, I’ll find one that is ready to be rescued, and I can see what it offers.

I carved the kuksa in the photo from such a piece.  I usually change my tactics when it comes to burl.  While the burl is still green, I carve as usual with axe, adze, knife, and gouges.  I leave a lot of extra material before the drying stage, because I find that burl likes to twist and turn in unpredictable ways as it dries.  After it is completely dry, I turn largely to a rasp to refine the shape.  The dry burl has a hard and brittle texture that cuts well under the rasp but not under the knife.

IMG_3925I use card scrapers, some curved, to refine further, then finish up with fine sandpaper. That is very unusual for me, as I prefer to leave my pieces straight from the cutting edge.   But for this burl, finishing with abrasives made sense.  The kuksa is 5.5 inches long, 3.5 inches wide, and 1.5 inches high.

Who knows how long it will be until I work with another burl.  If you want to see the work of a burl virtuoso, check out the work of Norm Sartorius.  You might also enjoy this video on the efforts of Norm and others to honor the work of Emil Milan.

Although the burl kuksa is already spoken for, I actually have been catching up and working on some things, some of which I hope to post for sale within a couple weeks.  I’ll post some info here when I do.

IMG_3896

One last thing: my last post focused on holding with holdfasts when working with gouges, but for many tasks I prefer hands and a knife.  I use a knife at some point on everything I make.

Below, I am making a slicing cut by pulling the knife along the underside of the handle of a crab apple bowl.  Great for controlled concave cuts.

IMG_3898IMG_3899

Posted in burl, cherry | Tagged , , | 6 Comments

Hold Fast!

cartoon 2014 I hate it when that happens_NEW

So you’ve sandwiched the bowl between extended bench dogs and you’re making the final paring cuts when an unfortunate series of events occurs, all within a split second.  The end on which you are working goes down suddenly, the gouge makes a nasty divot, and the other end of the bowl shoots up at an arc into your face.  Yeah, I hate it when that happens.

You need holdfasts.  Not in the early stages, but rather near the end when doing any final gouge work.  In the beginning, I don’t use any holding devices at all, other than the hand that is not holding the axe or adze.  I usually use the bowl horse for refining the shape of the outside.  But for final gouge work on the interior, under handles, and more, holdfasts live up to their name.

I’ve shown some typical arrangements in the photos below, but a little creativity can lead to many other solutions as well.  The bowl in the photos is a relatively small one we’ve been using in the house, but the same principles will work with bowls of different sizes and shapes.

SAM_2032

Here are the holdfasts I use.  Others work well too.  The inner ones are by Gramercy at Tools for Working Wood.  The outer ones, I made using a campfire, a double-action hand pump as a bellows, and some 5/8″ steel bar.  They look like crap, but they work well.  The angle is about 85 degrees.  The holes in my bench are 3/4″ diameter, and the bench top is three inches thick.  They work well for me in benches of 2 and 4 inch thickness too, so use whatever slab of wood you’ve got and bore some holes in it.

The other key component is some material to add friction between the bench and bowl  and the holdfasts and bowl.  You could try leather, old rubber floor mats, inner tube, etc.  I like this rubber belting material I found at Tractor Supply.  It is sold in various lengths and widths, can be cut, is very tough, and has great grip.  Great for lining vice jaws too, but it can sometimes leave some black smudges on lighter woods.

Old sailors referred to a well secured line as being “held fast”.  So now you too have a reason to get “HOLD FAST” tattooed to your fingers, just like a sailor.  You can show folks the bowl scar on your forehead as you tell them of your woodworking adventures.

Unseen is the rubber mat under the bowl.

Unseen is the rubber mat under the bowl.

SAM_2035

Softwood wedges keep the bowl from tipping.

Softwood wedges keep the bowl from tipping.

The upright of the holdfast itself can keep the bowl from sliding.

The upright of the holdfast itself can keep the bowl from sliding.

Posted in cartoons, holding | Tagged , | 15 Comments

Mellowing

Cherry sapwood on bowls of varying age

Cherry sapwood on bowls of varying age 

As we make our official transition into another calendar year, maybe it is an appropriate time to think about mellowing.  It is reassuring to know that many things in life sweeten and become more beautiful with time.  Wood can be one of them.

I primarily work with green wood, so I can’t discount the advantages of freshness and newness.  The crisp smell and coolness of a just-split green log are wonderful sensations, and the wood is a joy to work. But the journey of a newly finished piece has only just begun.

I saw this clearly as I finished a small goose-inspired bowl this week.  Some woods, such as cherry and walnut, feature a distinct color difference between the sapwood and the heartwood.  I sometimes use sapwood as a design element or, in the case of the goose bowl, because the branch is nearly all sapwood.  At first, the color difference is quite sharp, but over time, things mellow.

The other two bowls in the photo have been part of our household; both cherry also.  The one in the background was made about a year ago.  The heartwood has deepened in color and the sapwood has begun to become more subtle.  The smaller bird bowl in the lower right was made in 2009.  The sapwood has taken on a rich brown tone, more in harmony with the heartwood.

Storing (aging) logs for some months before use, can help to mellow the wood, making it less brash and more relaxed.  At least it seems that way.  I like to think of it sort of like a ripening process.  It is not necessary, and for decay-prone species it may mean rotten wood.  But if you haven’t gotten to that log yet, it might be good news.  I have also noticed that the sapwood takes on a hint of color similar to the heartwood if in storage long enough.  Keep the moisture in the log, though.

Happy mellow new year!


Posted in bowls, carving, cherry | Tagged , | 9 Comments