

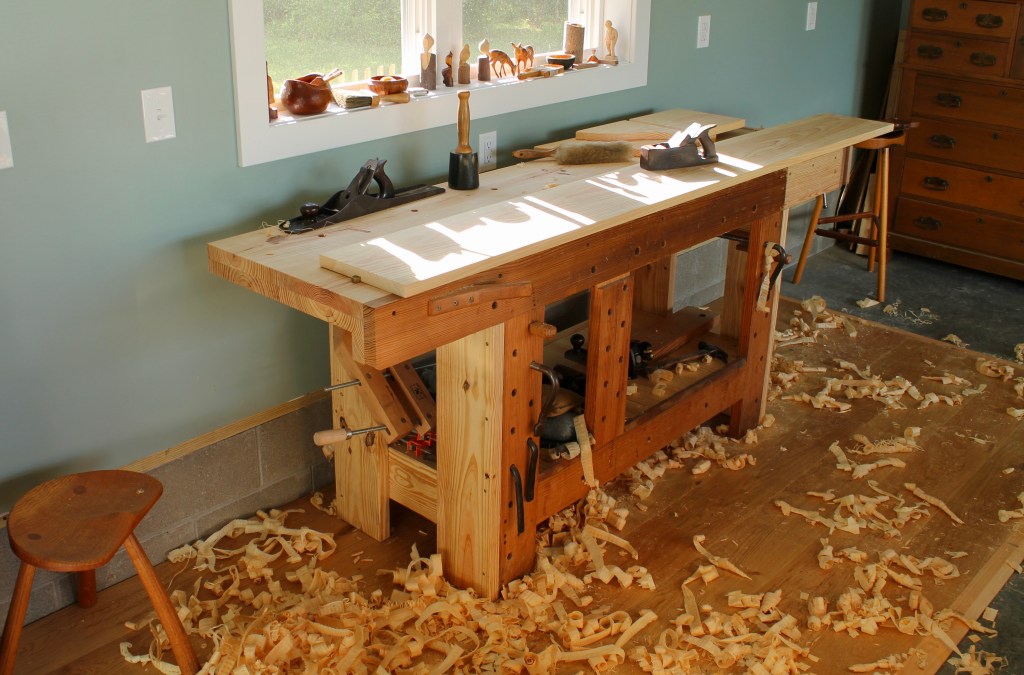
Building two matching shelf units to hang on either side of a central window in the garage/workshop was the first real testing ground for the new workbench. It works, and so do the shelves. I wanted them to hold a full load of books with no sagging. The lower ledger board flat against the wall supports the length of the shelf above and also provides a surface for hanging tools (more on that eventually). It, and the narrower ledger above, also provide anchor points for plenty of strong screws to connect the shelves to the wall framing behind the drywall. The top shelf can hold all sorts of things, including books.

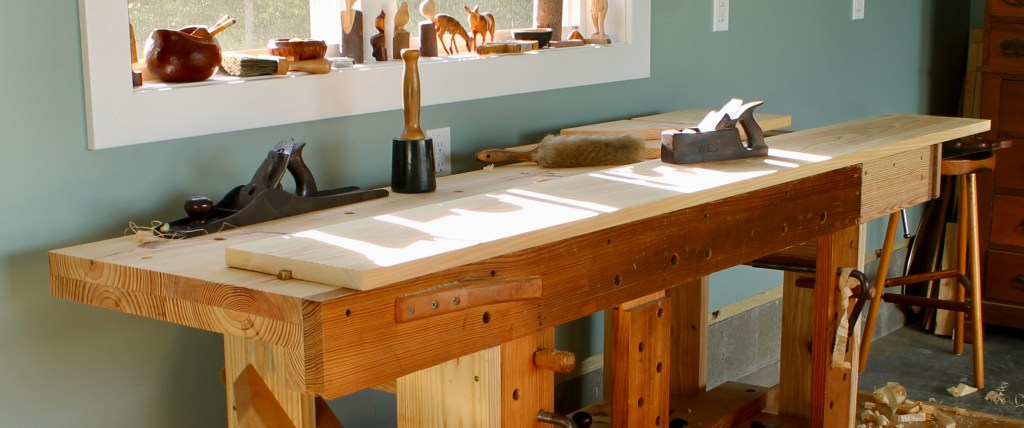
The lower ledger boards were 3/4″ (19mm) thick 1 x 12 pine boards from the home center. But the rest of the material was white pine from a local sawyer. They were much beefier, finishing out after planing to 1 1/16″ (27mm) thick. This made for much stiffer shelves. Above you can see the simple setup for edge-planing an 8-foot board. (That is just a single board; the color difference is just from light exposure in storage.) A couple holdfasts and the crochet at the end held the board right where I needed it, even with pressure on the free end.
For the surface, I just put a bench dog in the far dog hole as a stop and set the board on the bench top.
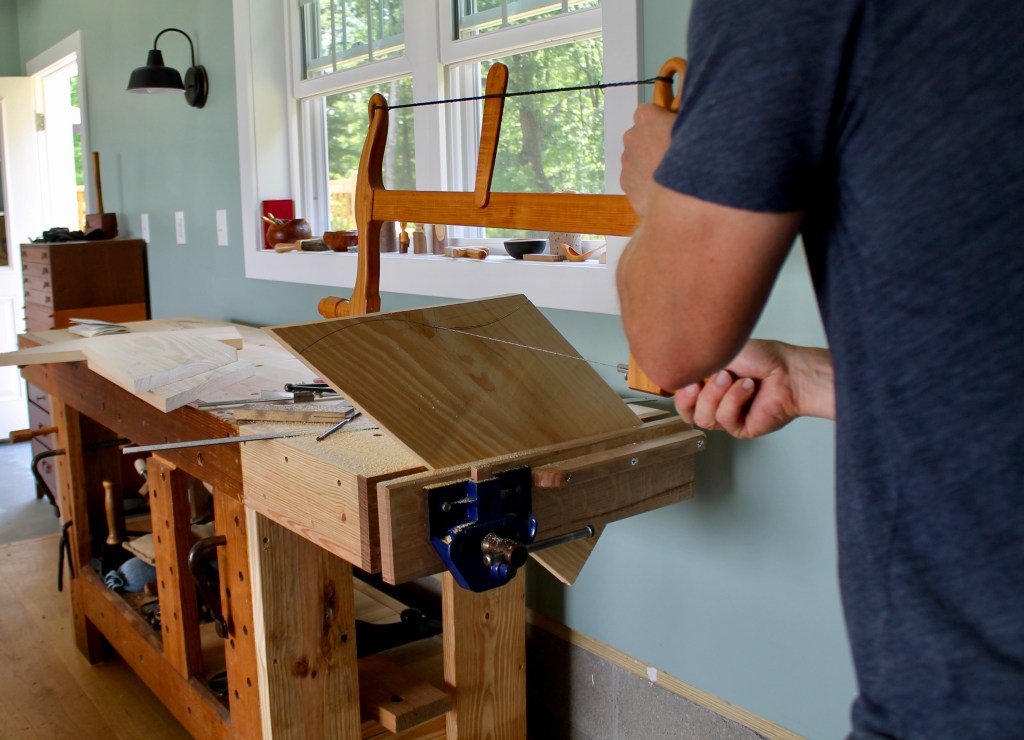
To saw the curved profile of the vertical shelf supports, I put the boards in the end vise. The stability of the length of the bench resists any movement from the motion of the bowsaw. You could, alternatively, extend the board over the edge of the bench top, secure it with holdfasts, and saw vertically.

To clean up the curves, I positioned the boards like you see above. With the direction of force toward the end of the bench, the leg of the near holdfast prevents any rotation of the board.

I looked all over for which box contained my spokeshaves, but I couldn’t find them. Turned out to be a blessing, because the drawknife worked well and was great fun.
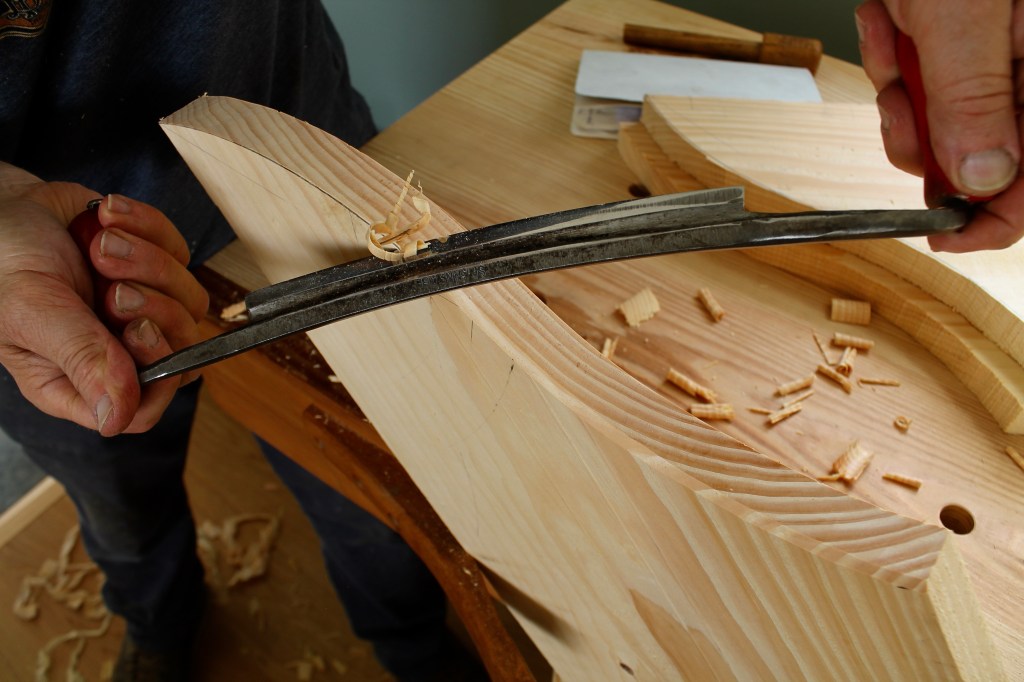
I also used the drawknife to cut a chamfer along both edges of the curve.

Two dogs held the boards for face planing in one direction…

and in the other direction.

Edges required just a couple pegs and the crochet.

The dadoes in the vertical boards were the standard practice of work with knife…

saw…

and chisel. Then a little cleanup with a router plane.

Assembly occurred on the floor with some glue and some screws.
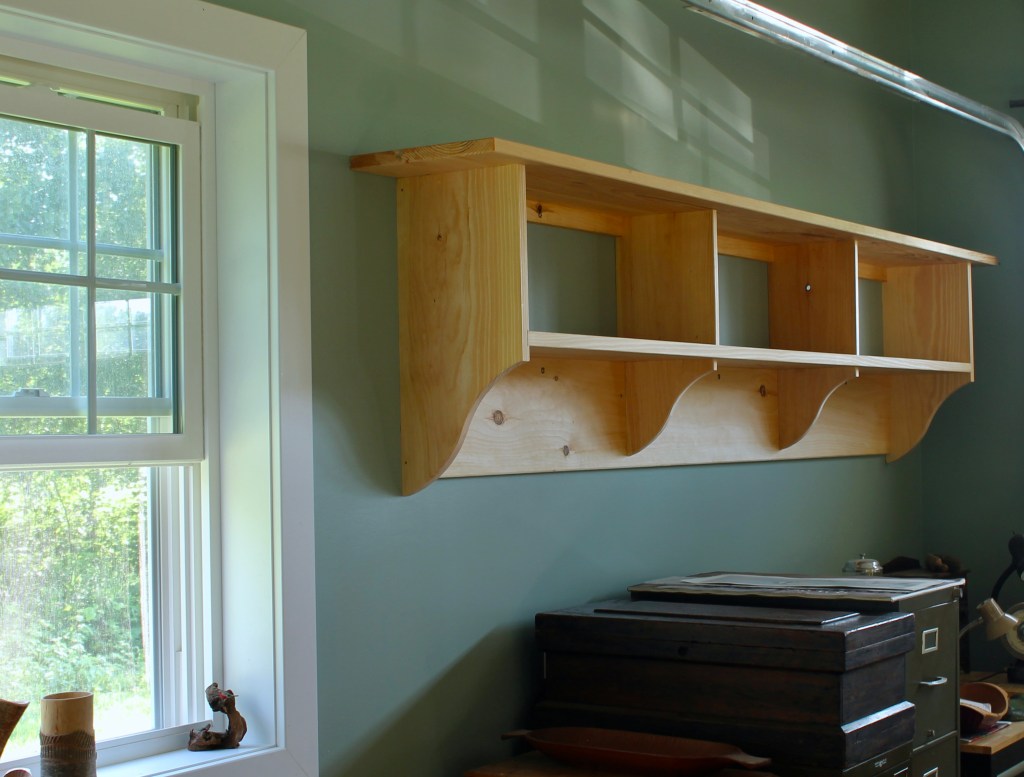
There’s the shelf to the right of the window.
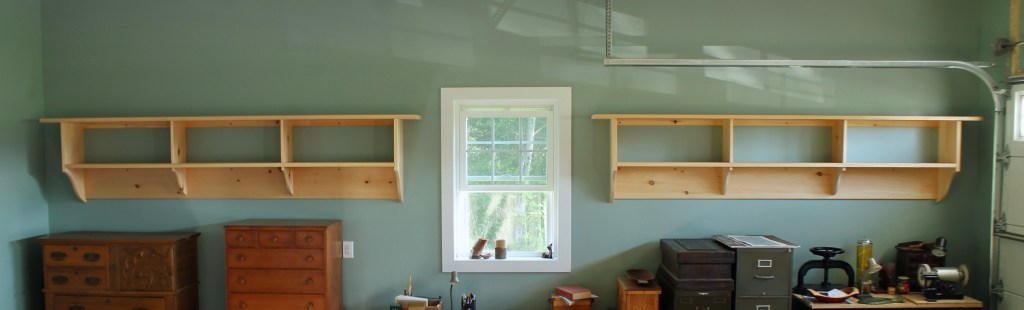
So, both shelf units were up and ready for loading.

Loaded they are. I’ll go more into tool storage and general shop organization later, but for now you can get an idea of how I’m employing the shelving units and where they are in some context.

Here’s the other side. Some adjustments will likely be made as I see what works well in practice in the new space and what doesn’t. That’s as clean as it will ever be.

Of course, I found my spokeshaves right after I finished the shelves. There are the two I tend to use most.

The only thing missing is some fancy letter carving ,I can send you some end grain white oak
LikeLiked by 1 person
I’ll leave the end grain white oak to you, Gene!
LikeLike
What I grand time you must be having with a clean canvas… Everything is looking GREAT….! Hope you and all the family are enjoying and settling into your new home….! Best to all of you…
LikeLiked by 1 person
Looks great. Construction question: at the middle dividers/supports joined with a lap joint to the shelf?
LikeLiked by 1 person
Hi Phil. No, I considered that, but in the end I decided it was more important to keep the continuity of the shelf board intact for strength. So, the two middle dividers of each unit are actually separate pieces (below and above the shelf). Joined to the shelf and ledger with screws. In the case of the upper portion of the divider, the screws are finish screws toenailed down into the shelf. This was a practical choice under the circumstances and the screws only need to keep that upper portion from shifting to one side or the other.
LikeLike
coming along–very nice
LikeLiked by 1 person
pas de cuilleres dan le porte-cuilllere!?
LikeLiked by 1 person
Translation: no spoons in the spoon holder!?
Good eye, Kiko. And you speak French! I haven’t loaded it up with spoons yet, but I will soon. That is one of my prized possessions. As you may remember, it was made for me by the one and only Jane Mickelborough. I wrote a post about it a few years ago: https://davidffisher.com/2018/02/03/look-what-arrived-from-brittany/
LikeLike
I’ve admired those holders for a long time. I want/need to make something along the same lines…but simpler…
LikeLike
Those look great Dave. It is always nice to have lots of good storage for tools and books. I am sure you are enjoying your new, larger work space.
Thanks for sharing.
Cheers, Michael
LikeLiked by 1 person
They look great! Also the process you detail adds to the build.
LikeLiked by 1 person
Great job Dave. And the whole project done with your knowledge and use of non-powered tools. You certainly have so much to teach (beyond your classroom). A lot of us out here are grateful for your sharing and inspiration. (I also like your light fixtures.)
LikeLiked by 1 person
Thanks Scott. I had lights like that over the workbench in the old shop, and I like how they look and perform over the bench. They’re not very expensive at all. I think the style is typically referred to as “barn lights.”
LikeLike
Very nice work!!!
<
div>Bob
Sent from Bob’s iPhone
<
div dir=”ltr”>
<
blockquote type=”cite”>
LikeLiked by 1 person
Dave — this is all the news I need today. Well, maybe the weather forecast too. Thank you.
LikeLiked by 1 person
Sweet!
“I learned this, at least, by my experiment: that if one advances confidently in the direction of his dreams, and endeavors to live the life which he has imagined, he will meet with a success unexpected in common hours.” HDT
LikeLiked by 1 person
That pine is in good hands. Thanks for sharing the process Dave. Always inspiring!
LikeLiked by 1 person
Hi Rick!
LikeLike
All looks great! Those two chests of drawers are eye-catching; what’s their story? Thanks for sharing.
LikeLike
Thanks for the question about the chests of drawers. I’ll answer it in a new post before long. A big theme for my new shop was repurposing!
LikeLike
I love your shop. Thank you for taking the time to record and share your journey with us. I’ve recently found your blog and enjoying every article you’ve blogged. I’m only at the 2015 timeline and I’m glad it is so. So much more to enjoy. Thanks again Dave. My workbench is finished and there are plywood walls on my shop. Looking forward to some insights on shop organization and tool storage ideas. Have a great day!
LikeLiked by 1 person
Pingback: Empty Your Sock Drawer | David Fisher, Carving Explorations