

What you see above is the face frame/apron from my old workbench. Southern yellow pine 2x6s joined with mortises and tenons, with a sliding deadman in the middle. I had made this as an addition to my old bench several years ago, and I was able to salvage it and bring it with me to the new place. I decided to make this the starting point for my new bench, so now I just needed to build the entire rest of the bench around it.

I wanted the workbench top to be about 2 feet deep and seven feet long. There are lots of ways to hold a workbench top above the ground, and there are names and plans for them all over the place. This isn’t really representative of any of those in particular. Rather, it’s just the result of some creative problem solving that applies to this situation.
I went to the lumber yard and picked up a bunch of southern yellow pine 2x8s, 2x10s, and 2x12s. With my old circular saw, I started ripping them down as needed by clamping a piece of straight flooring to the timbers as a fence. I hand-planed the edges and joined them with glue and deck screws into big L-shaped legs. So the general idea, as you may be able to tell from the photo above, was to begin with these legs and run two rings of skirts inside of them, with lots of bearing surface to resist racking. The legs support the upper and lower rails. The upper rails support the top and the lower rails support the shelf. All components are large and heavy to resist any movement.
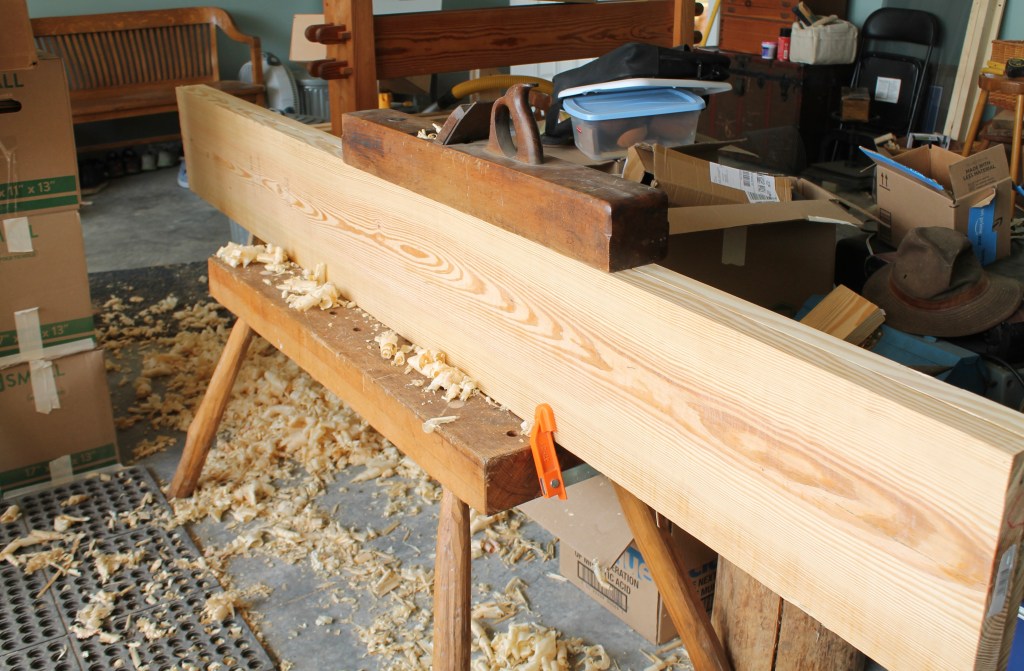
I know it would have been sensible to laminate a bunch of boards into a stable top, but I did this instead. I face-glued two pairs of 2x12s together, using regular yellow glue and a crapload of 2 1/2″ deck screws from the eventual underside as temporary clamps. After the glue dried for a day or two, I removed all of the screws. This created two timbers that were 3″ thick, 11 1/4″ wide, and 8′ long. These were to be edge glued together to form the top, and one edge would also need to meet up with the back side of my old face frame. So I needed to joint the edges.
I started in with my old Stanley #7 jointer plane. I bought it for $10 at an antique mall about 25 years ago. It’s pitted and tattered and works great. But then I remembered this wooden jointer plane, a giant thing, that a neighbor had given me years ago. I had tuned it up, but hadn’t used it much over the years. Turned out that it was perfect for this. I set the timber on my low bench and attached a clamp to keep it from sliding forward. The wood sole of the jointer glided across the surface and the momentum of the massive plane kept it moving smoothly.
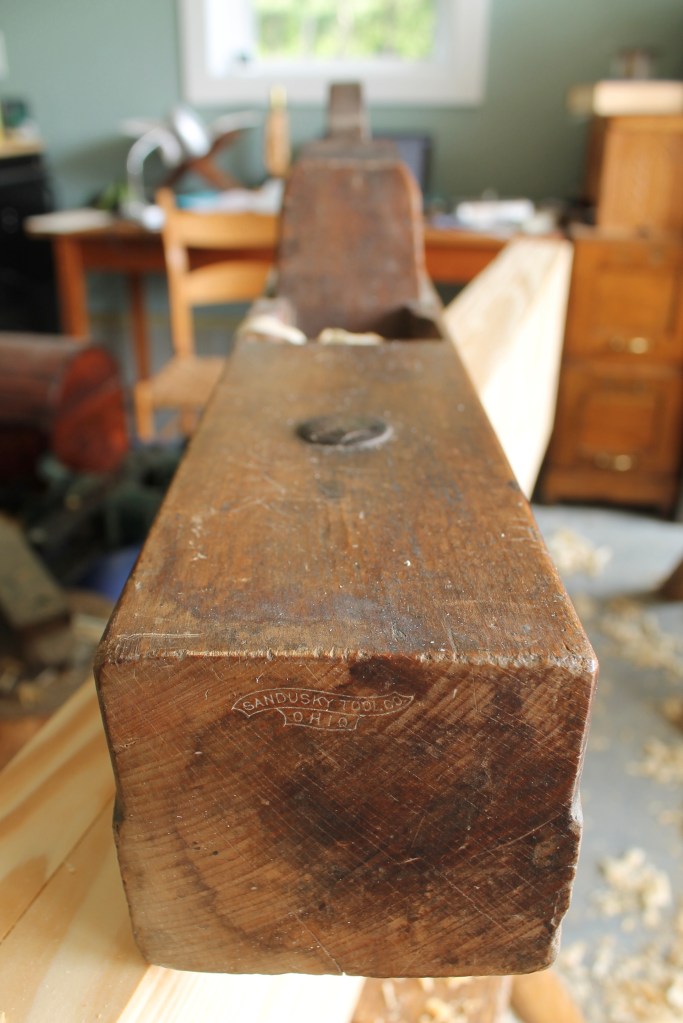
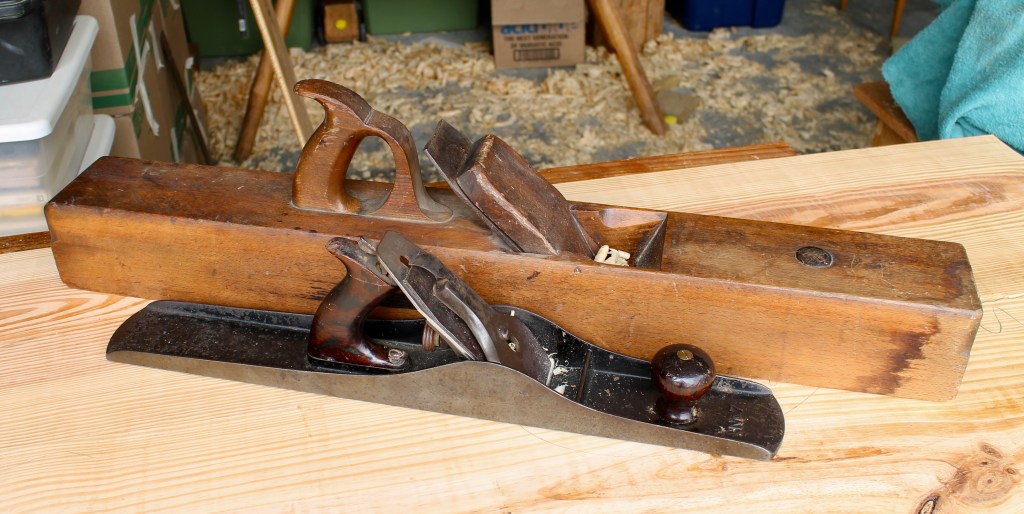
There are the two jointer planes side by side. The wooden plane is 30″ long with a 3″ wide iron.
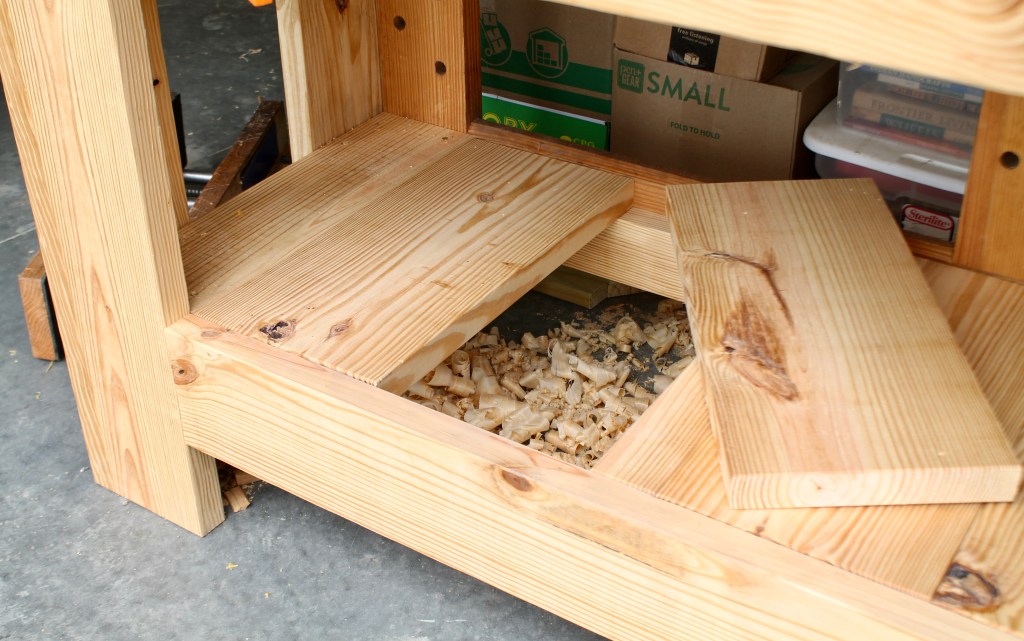
Anyway, it all came together. The end shelf boards are screwed down as extra assurance against racking, but the rest of the shelf boards just rest in the rabbet formed by the timbers.
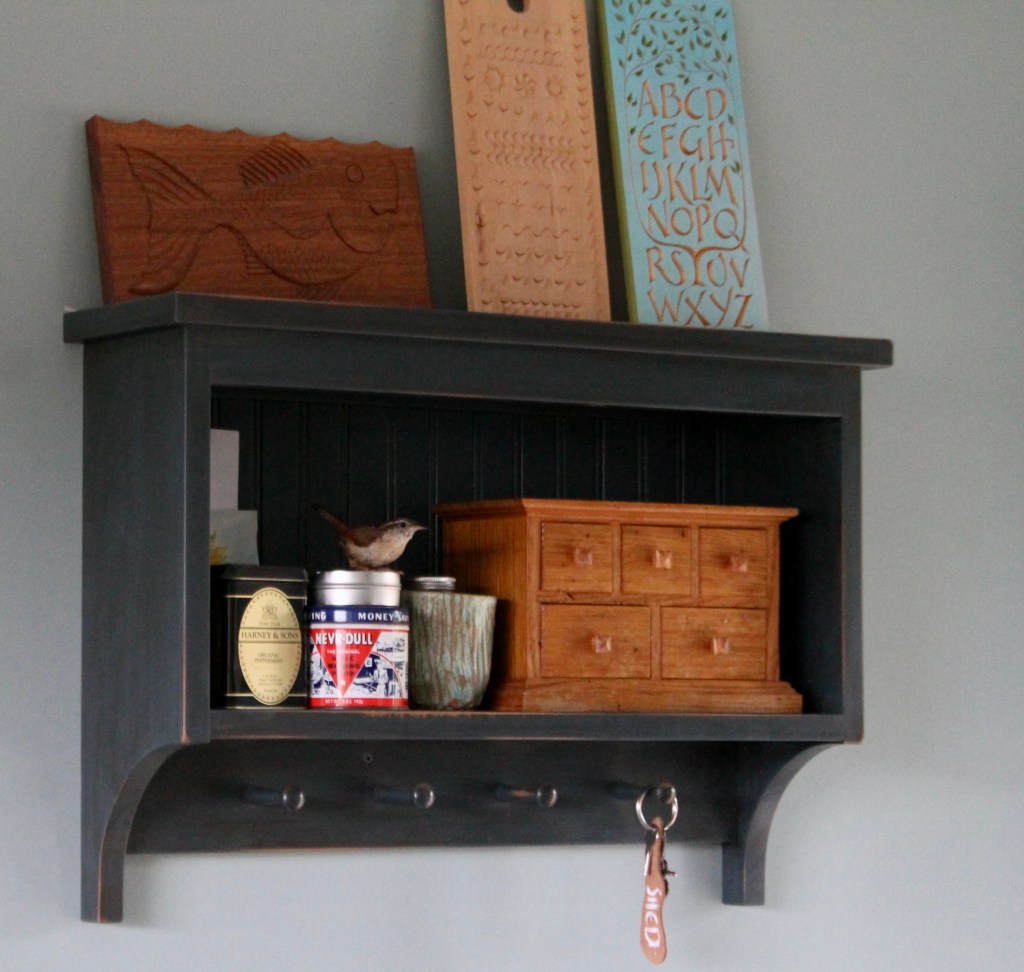
While I was working on the bench, a pair of Carolina wrens were trying to make a nest in this wall shelf. The photo is a little blurry, but there’s one of them on top of the tin. We’ve got less wall space in this house, so the shelf that I made years ago for the house now lives in the shop. But Carolina wrens should not.
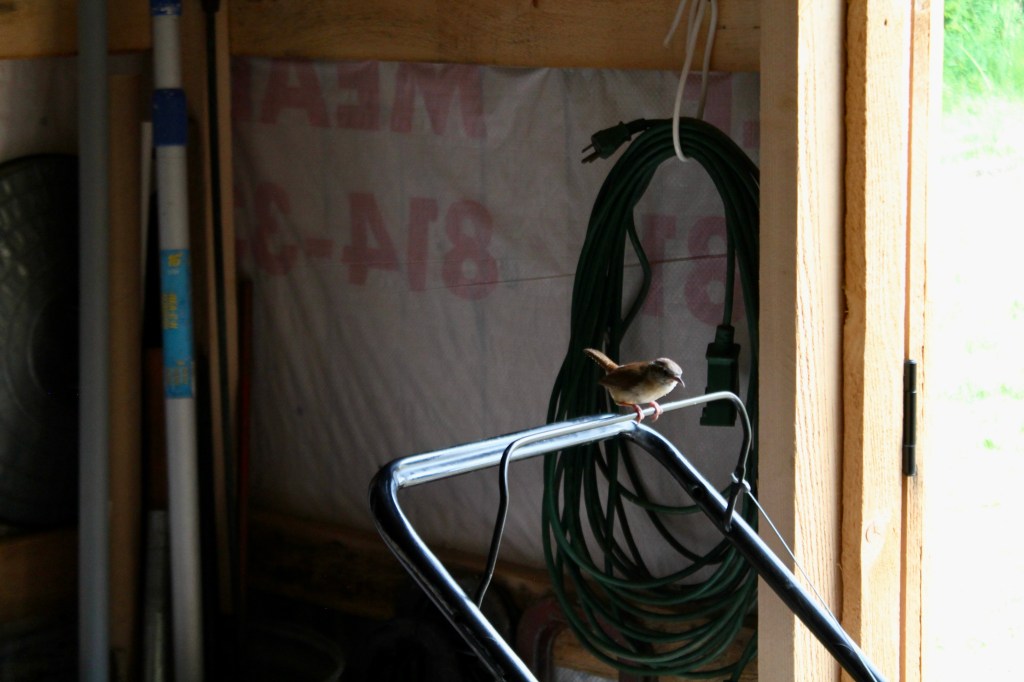
The same pair also tried to make a nest in the shed. Again, not a good idea. They had no concern whatsoever if I was in there.
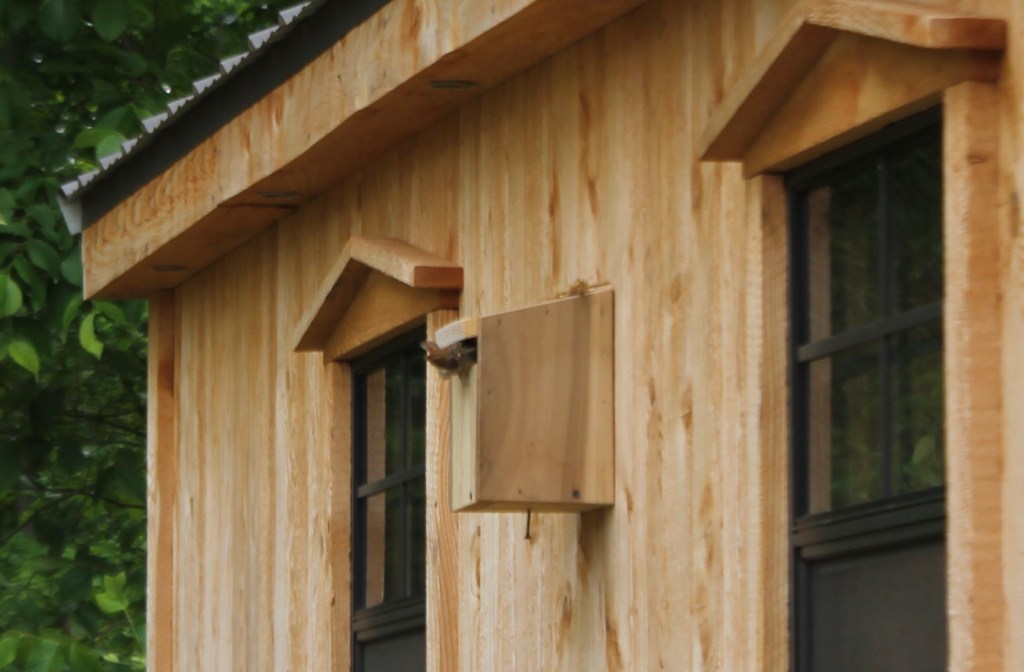
I looked up some Carolina wren box dimensions and nailed together a little house, which they started building in right away.
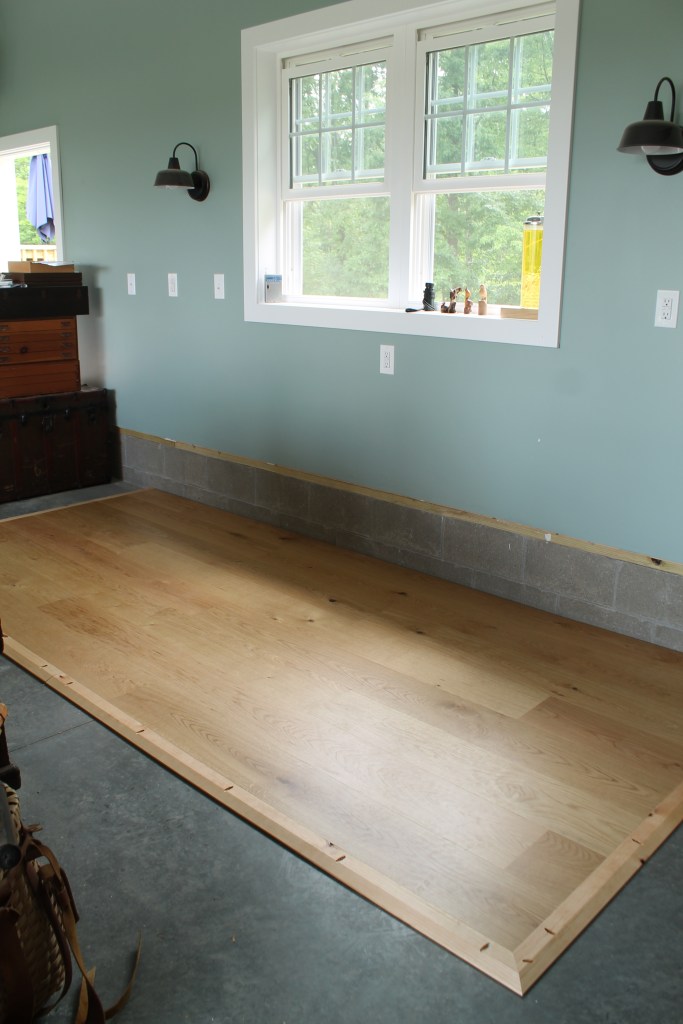
I had a couple boxes of salvaged engineered hardwood flooring (white oak). Just enough to make a little floating floor area on top of the concrete. I put down a vapor barrier underlayment first that has a slight bit of cushioning as well. I made tapered edging from pine boards and attached it with pocket screws all around. So, that’s not a dance floor, but more of a stage for the workbench. It will be a lot easier on my feet and on any dropped tools.

I left the top 1/8 or 3/16″ of the bench top proud of the old part to allow it to be planed flat and true. The top is held down to the rails with long lag bolts. The holes through the rails are elongated to allow for movement of the top over time.
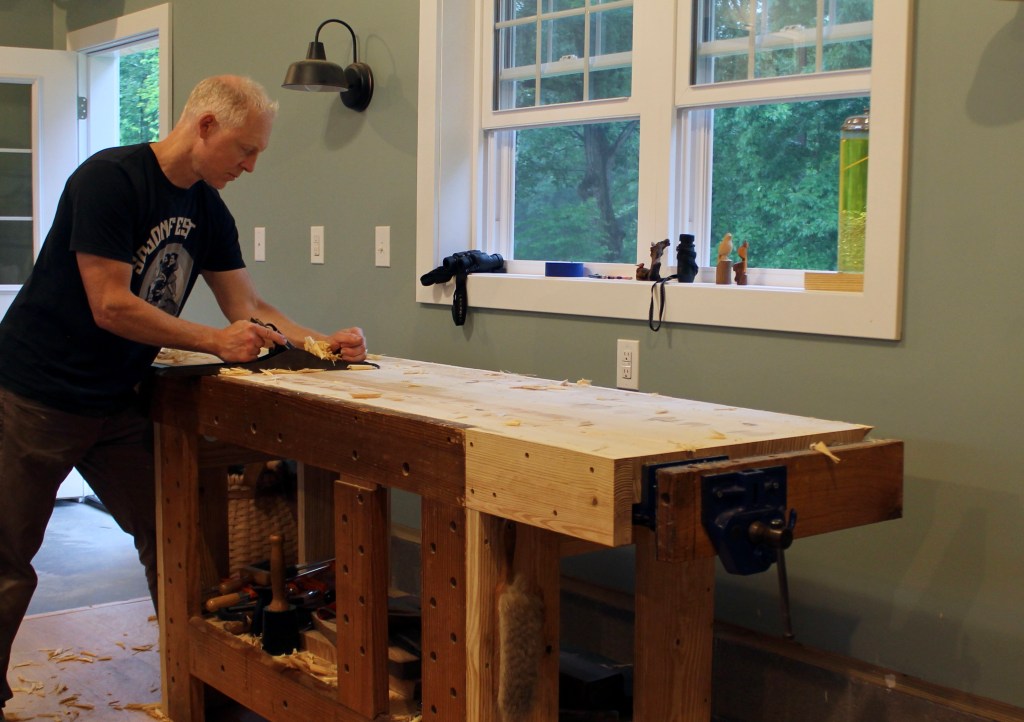
I attached a temporary board across the back to avoid blowout at the far edge, then started in with the #7 jointer plane working across the grain. I’ve never been to Disney World, but I’ll tell you there’s no way it could be as much fun as was planing down that top.
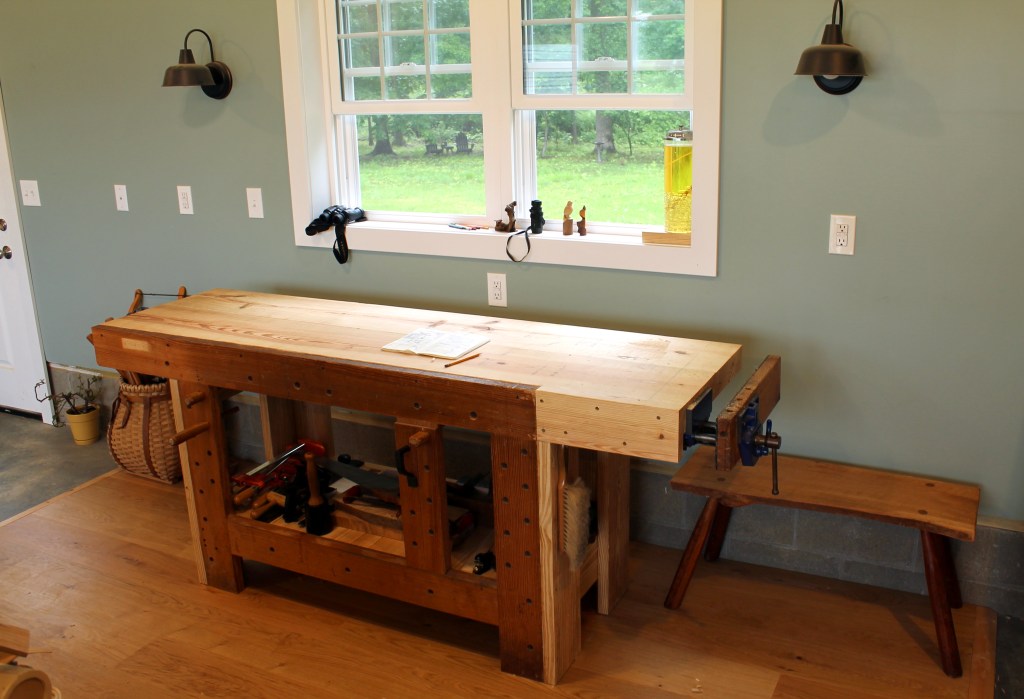
So, there’s the bench still waiting for some accessories. A couple windows and a little paint really transforms a garage.
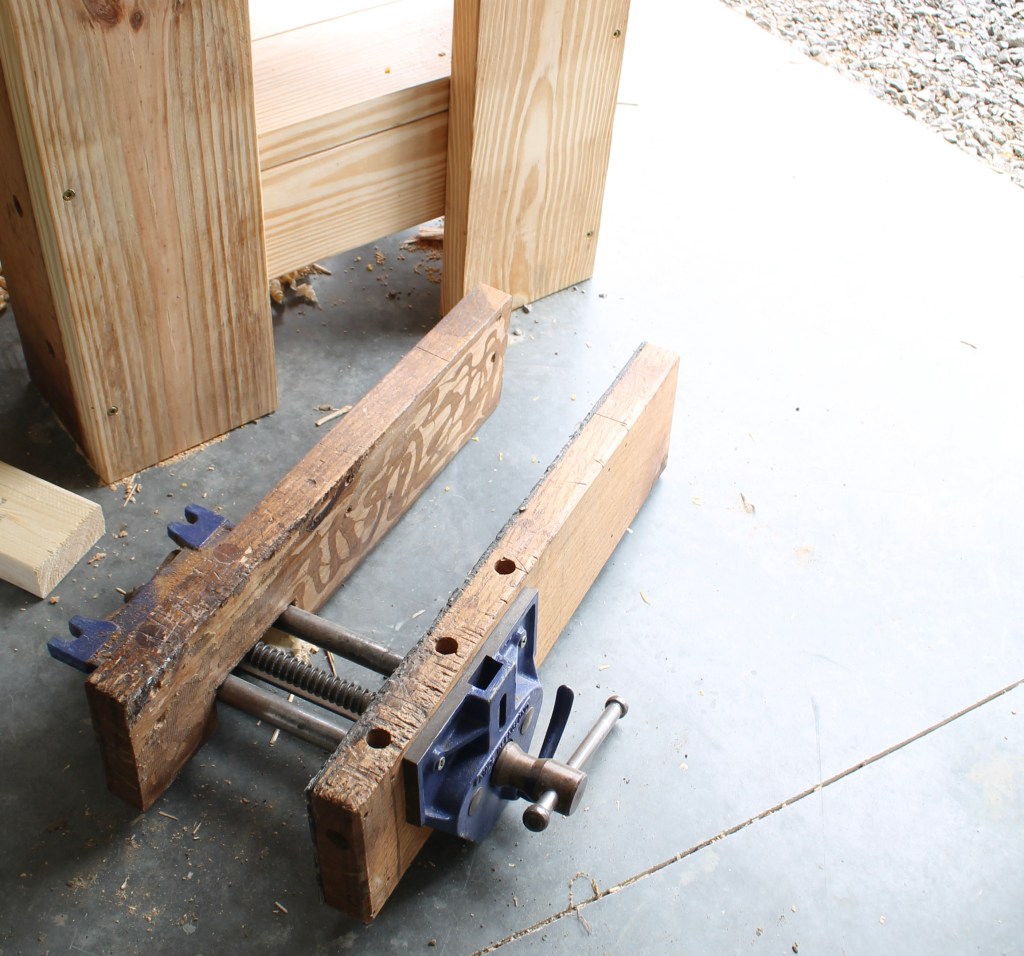
Next time I’ll get into the new jaws for this vise and the dog holes in the bench.

With all the workbench plans I have researched (no offense to Chris Schwarz whom I admire), this seems the most suited to me. Thank you for this post! I’d love to also see the wren box you made more closely. I made one years ago but none have set up housekeeping yet. And Disney World is unbearably hot. Take that from a 7th generation Floridian who knows hot and likes it.
LikeLike
Thanks, Brian. Chris certainly does know way more about workbenches than I do. I’ll be showing more of the bench in action before long. Here’s a link to the information I used to make the wren box. I adjusted to the materials I had around, but they include plans for one that can be made out of a 1×6 board: https://www.wildlifecenter.org/sites/default/files/PDFs/Nestbox/House%20and%20Carolina%20Wren%20Nest%20Box%20Plans.pdf
You must be in heaven right now. Florida in July!
LikeLike
Thanks! Looks similar to the one I made, but maybe my gaps were too large, or the location not ideal. And yes, we’re dying from the heat here in Florida. Just finished a 10-day heat wave with temps over 100. The two hottest months still to come! Yay!
LikeLike
Everything looks (typically) great Dave!
LikeLiked by 1 person
Benches with a story are much more interesting…
LikeLiked by 1 person
Handsome bench, and I like that it has evolved to serve your needs, rather than just being of a style for style-sake. Looks sturdy and solidly made. Lovely bit about the wrens!
LikeLiked by 1 person
thank you for taking care of the wrens and nice shop–moving right along–
LikeLiked by 1 person
I have been to Disney, but reading this post gave it a run for it’s money.
LikeLike
Thanks Ben. Disney is overcharging!
LikeLike
A pragmatic approach that lets you get on to making stuff. Thanks for sharing, a lot of good techniques applicable to folks regardless of skill level.
LikeLiked by 1 person
Congratulations on your wonderful bench. Thanks for sharing. A fun name I’ve heard for a “sliding deadman” is a “walking deadman”. It creates a fun mental image.
LikeLiked by 1 person
If those Carolina Wrens hold still long enough, you could do a “figure study” carving. It’s nice to see you moving into your new space, with memories already having begun.
LikeLike
Hi Bryan! The wrens sure are a good subject.
LikeLike
Dave
I love the bench, the old tools, the whole story!
Also the floating floor. I’ve got plenty of flooring stacked in the corner & Ive wondered for years what I could use it for. Thanks for the idea(s) & inspiration.
Any particular moisture barrier?
LikeLike
Sam, I used some stuff called “Floor Comfort” I picked up at Lowe’s: https://www.lowes.com/pd/FloorComfort-100-sq-ft-Premium-2-mm-Flooring-Underlayment/50402206
My flooring was 5/8″ thick and the underlayment is about 1/8″, so the 3/4″ thick edge trim (without underlayment) worked out well.
LikeLike
David,
It looks terrific! You also make it look comfortable to work at as you planed the top.
Great that it already has history since it was partially salvaged. It will be with you for a long time.
Building the bird house is an added touch.
LikeLiked by 1 person
So glad that you made the bird nest for the wrens. It goes very well with your amazing shop. I really like the the design elements in that picture with the bird house. Hopefully we will get a shop tour once you get settled in your new shop. Please take a couple of pictures of the shop in your next write up.
Looking forward to the end vise article. Have a great day David.
LikeLike
Thank you. Just to clarify, the birdhouse is on our storage shed in the back yard. My workshop is the two-car garage attached to the house. So, from the outside, it looks like a typical garage, except with more windows than usual. I’ll be sharing more about the shop setup in future posts. I appreciate your interest.
LikeLike
How nice that you were able to take the front of your old bench with you. Kind of like having an old friend still with you. Thanks for sharing. When I was at Disneyland, I actually purchased a really cool workbench (not joking – too much). I even blogged about it. Will give you a chuckle. It was the coolest thing I’ve ever bought at Disneyland and the woman who helped me knew the artist who made it so we had a nice discussion.
https://joeswoodworkingjourney.blogspot.com/2020/11/geppettos-workbench.html
LikeLike
Nice leg vise on that little bench, Joe!
LikeLike
I liked this sentence: “I’ve never been to Disney World, but I’ll tell you there’s no way it could be as much fun as was planing down that top.” I have been to Disney ___??__, whichever one is in FL, and I agree that sanding an old Dining Room Table for a new finish was more pleasurable!
LikeLiked by 1 person
Pingback: Dog Holes and Vise Jaws | David Fisher, Carving Explorations
Excellent article, particularly glad you were able to save your face frame/apron for your new bench. Too many memories in your old bench to just let them fade away. Thanks for taking care of the wrens. Noticed you used a slot opening on your house, compared to the round opening in the plans. I think I may try the slot opening on a new house for our home.
LikeLike
Yeah, I went with the slot because the article with the plans mentioned that Carolina wrens prefer a slot opening and a rigidly mounted house, while house wrens prefer the hole opening and a hanging house. We have some house wrens nesting in a hanging house, so maybe there’s something to that.
LikeLike