Back to Basics Bowls

IMG_8421

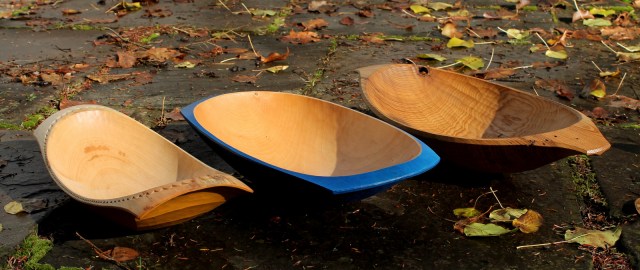
I’ve been wanting to have some bowls to keep around as examples of forms that are aesthetically pleasing, yet more straightforward in execution than other bowls I make.  One consideration is size.  These bowls range from 14-18 inches long, 7-9 inches wide, and 3-4 inches high.  That size and proportion is ideal for starting out with an axe and an adze.

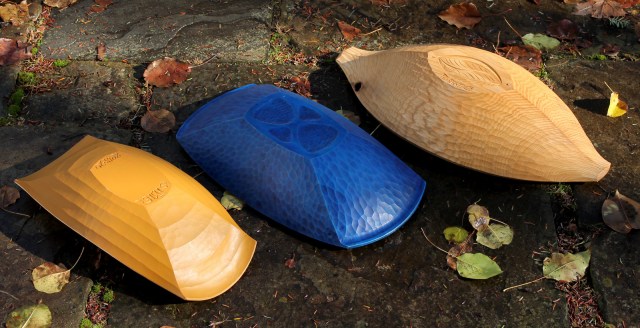
From left to right, these bowls were carved from tulip poplar, red maple, and sassafras.  Through a few other photos, I’ll share some thoughts on some of the design elements.  And the paint is just an option you could easily forego, but I had fun with it.  That’s just one example of the endless variations possible.
IMG_8435

IMG_8368

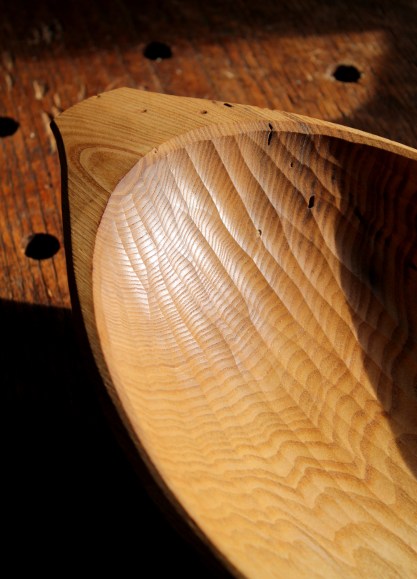
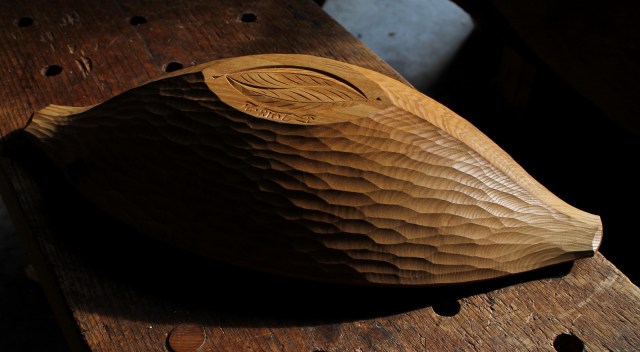
Using a relatively soft hardwood encourages bold, yet crisply cut surfaces.  The hollow was finished with paring cuts with a sharp bent gouge.

The open pores of sassafras aren’t ideal for a bowl used with liquids, but it would serve well as a fruit or bread bowl.
IMG_8366

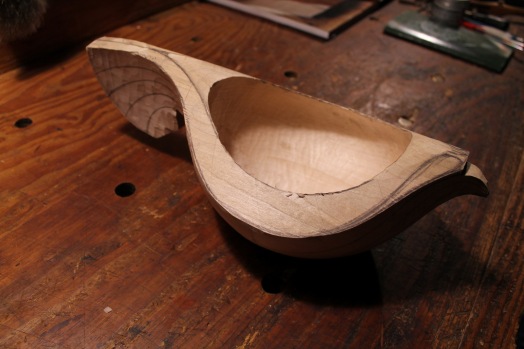
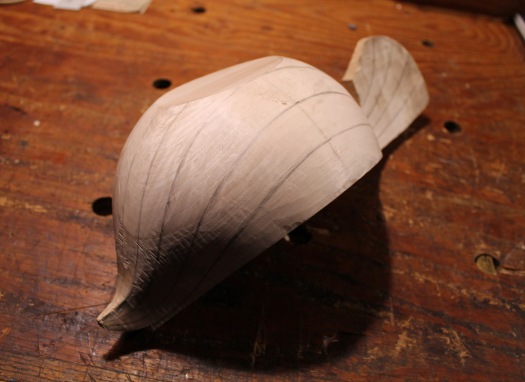
The shape of the exterior tapering down to the narrow handles makes for relatively simple axe work.  Decisive cuts with a gouge refine the surface and leave a distinct ridge flowing from the points at the end of the foot through the ends of the handles.  Very few tools are needed; Even the leaf design on the foot was carved with just a knife.
IMG_8306

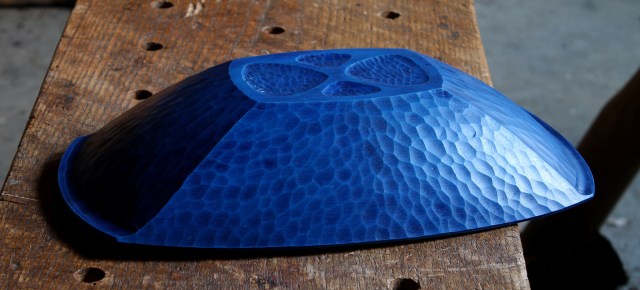
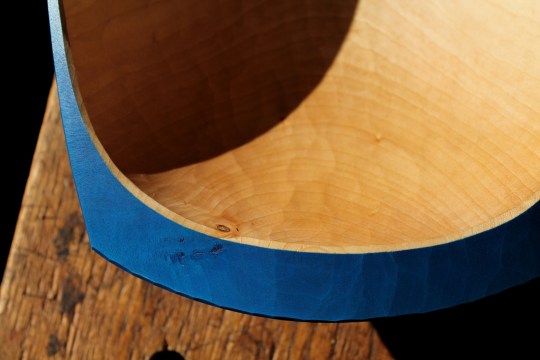
The sides of this blue bowl flow to the corners of the handles without flaring back out in an s-curve, and the end walls slope simply in a slightly convex curve mirroring the interior hollow.  A lip under the handles adds a little more challenge.  If the handles were extended the form of the end walls could be adjusted, resulting in a shallower slope, easier to cut.

The surface was painted with artists oils, a base coat of brighter blue, followed by a much thinner coat of very dark blue which was rubbed back.
IMG_8417

IMG_8307

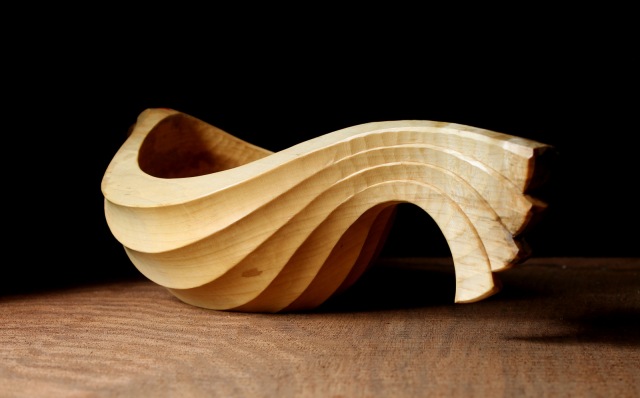
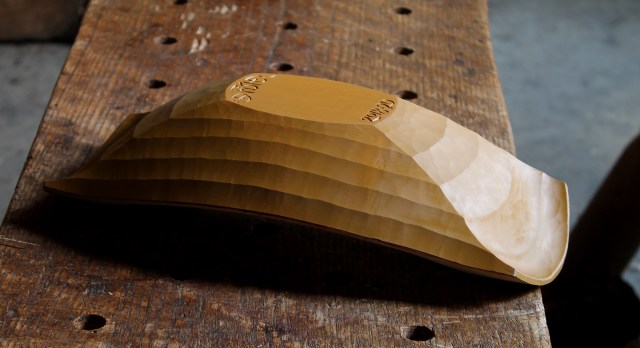
The form of the yellow bowl is a bit more complex.  The end walls are s curves from foot to handle and scooped out beneath the curved handles, but still not as dramatically as they are in other designs.  The exterior surface is fluted, but in this case they are carved relatively loosely and freely with the gouge.  Again, painted with artists oils.

IMG_8372

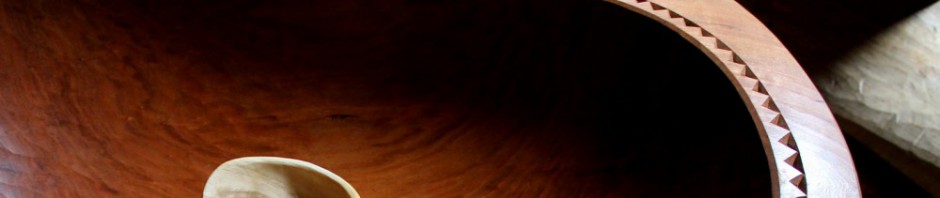
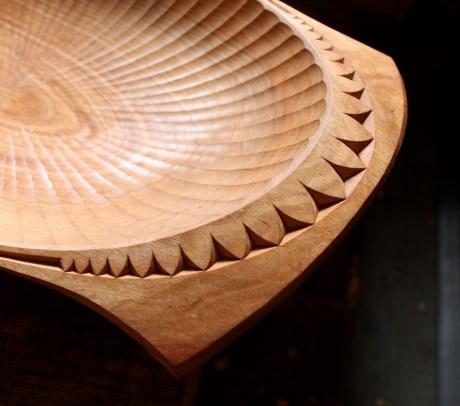
The necklace around the rim really catches light and shadow.  It’s made up of smaller chip cuts from a knife, rather than the more demanding design I’ve done many times, most recently on this just-finished walnut bowl:

IMG_8458

It makes a lot of sense to start with a relatively simple design and strive to execute it well.  Even if you’re beyond starting out, there’s plenty of challenge, beauty, and joy to be found in these forms.

Posted in bowls, layout, paint, Uncategorized | Tagged | 19 Comments

The Nimble Fishtail

IMG_8328

Having just finished carving “necklaces” on a couple bowls, I thought I’d explain a bit more about the tool I use for the carving of the large triangular recesses that make up the design.  In the FWW  article and video, I refer to the tool as a skew chisel, but, the more I think of it, it’s the fishtail aspect of the tool that’s at least as important as the skew.

IMG_8299Here’s a shot of the necklace I just finished on a cherry bowl.  I briefly outlined the procedure in a blog post a couple years ago.  And in another post, I showed the fishtail skew in action on a straight-walled version of the necklace.
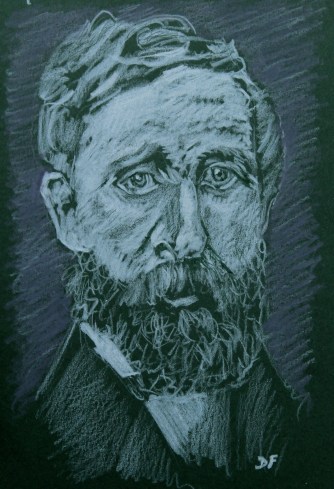
The fishtail shape excels in these tight quarters, as the shank of the tool doesn’t interfere or mar the surrounding wood.  By grinding away the sharp corners on the sides of the tool behind the cutting edge, the tool can be made even more stealthy and nimble.

Technically speaking, the tool is a double-bevel fishtail carving chisel.  As it is straight, it is a #1 sweep (sweepless).  I’ve not been able to find one that also comes with a skewed edge, but no matter.  The fishtail aspect is the most important, and if you wish to make a skew of it, it’s a simple procedure (see the top sketch) and you can create as much or little skew as you wish.

The particular brand doesn’t matter, so long as it is by a good reliable maker.  How wide the edge should be depends on the size of work you’ll be doing, but mine is 20mm (3/4″) wide and serves me well.  Here are some links to a few options and no doubt more can be found:

Fishtail Gouge

https://twocherriesusa.com/product/spade-chisel/ (looks like single bevel, but could easily be reground to a double-bevel)

https://www.lie-nielsen.com/product/auriou-lettering-chisels/auriou-lettering-chisels-fishtail-chisel-14mm-9-16-double-bevel-?node=4163

http://www.stubai.com/index.php/en/woodworkingtools/serie-52-k/n-53-stubai-fishtail-chisels-detail

You’ll find such a chisel useful for all sorts of situations, including lettering.


Posted in Lettering, patterns, sketch, tools, Uncategorized | Tagged | 9 Comments

Perpetual Thanksgiving

IMG_7640

I am grateful for what I am and have.  My thanksgiving is perpetual.  It is surprising how contented one can be with nothing definite,–only a sense of existence.

—Henry David Thoreau, letter to H.G.O. Blake, 6 December 1856

Posted in quotes and excerpts, Uncategorized | Tagged , | 11 Comments

Sign Auction

IMG_8254

The sign now, with light coming from the upper right.

It’s been four months since I wrote a blog post about carving this sign for Jennie Alexander.  Since then, the leaves have fallen and the oiled oak has begun to take on a patina.  Although Jennie was able to see photos of the finished sign, she passed away before she was able to receive it.  After a lot of thought and talking with Jennie’s daughter and others close to her, I’ve decided to auction the sign and donate the money to the recently established Plymouth CRAFT Green Woodworking Scholarship.

This scholarship has already received some generous contributions, and they will allow many people over the coming years to participate in Plymouth CRAFT classes and events who would have otherwise been unable to.  I think that Jennie would have supported such an idea, especially considering the special relationship between her and Peter Follansbee, one of Plymouth CRAFT’s founders and most active instructors.

IMG_6808

The sign in July, with light coming from the upper left.

After researching all sorts of options, including raffles, many options involve tangled legal webs and reporting issues.  So I’m going to keep it simple:  I’ve just posted the sign for sale on ebay.  The link is here.  I’ll ship the sign to the winner of the auction, then I’ll donate all of the proceeds to The Plymouth CRAFT Scholarship Fund.

IMG_6802

There’s more information about the sign and the carving process on the original blog post.  It is 29 1/2″ x 7 3/4″.  The thickness tapers from roughly 1/2″ to 3/4″ from bottom to top as it was radially split from the tree.  White oak — Jennie’s favorite.


Posted in Uncategorized | 5 Comments

On Eating Spoons and Such

IMG_8237

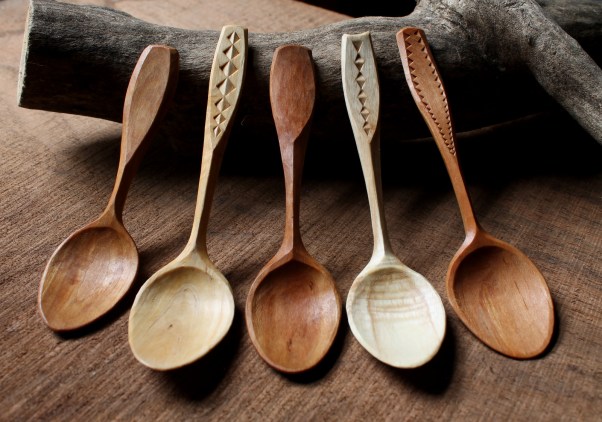
I finished carving a few eating spoons and bowls recently.  There are many factors to consider when making objects such as these that will be held and used daily.  First among these is wood choice.  Relatively dense hardwoods with tight grain are generally stronger and less absorbent than softer or open-pored species.  The spoons above are all black cherry except for the fourth from the left, which is American sycamore.  The fact that they’re all from branch crooks also allows for more delicacy and thinness while maintaining strength.

IMG_8230

Carved accents can be a nice touch.  The three patterns on these spoons were all achieved by combining the same sort of triangular chip cuts in different ways.  One benefit of sliced, rather than sanded, surfaces is the lack of grain raising in use and after washing.

IMG_8274

The interior surface of this cherry eating bowl allows the eating spoon to glide along getting the last bit of ice cream.

IMG_8096

The outside can be textured and or painted in a variety of ways as with the maple bowl above.  For more on this, keep your eyes on Fine Woodworking Magazine.  I’ve written an article that goes step-by-step on the carving of eating bowls like these, including subtle design options, that will be in a future issue.

I wrote in this post about my typical oil treatment for bowls.  Cleanup is just a matter of a quick wash at the sink, then dry with a towel.  After a while you can re-treat to freshen the surface if you’d like.   I also have some information on treatment and care on this page of my website.


Posted in bowls, cherry, patterns, spoons, Uncategorized | Tagged , | 2 Comments

Maple Hen

IMG_8166

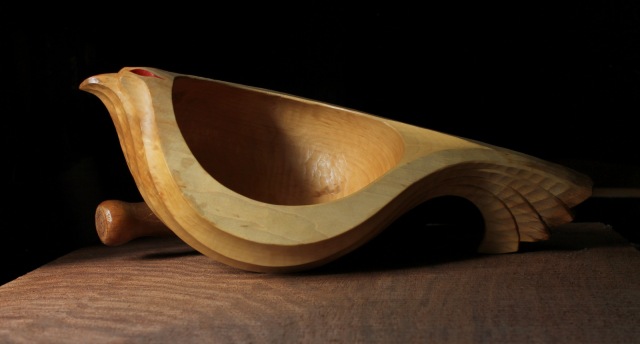
I just finished a hen bowl in maple and left it natural except for the bit of red paint on the comb.  Besides the lack of paint on the body, I made a couple other changes compared to those I’ve carved before.

IMG_8157

The most obvious difference is the longer tail feathers.  This log was long enough to allow for them, so I used it up.  The finished bowl is 15 inches long, 7 inches wide, and 4 3/4 inches high.  The coloration of the wood near the beak and tail occurred while the log was in storage.  Begins pretty quickly in maple, and I like the effect in this case.

IMG_7143

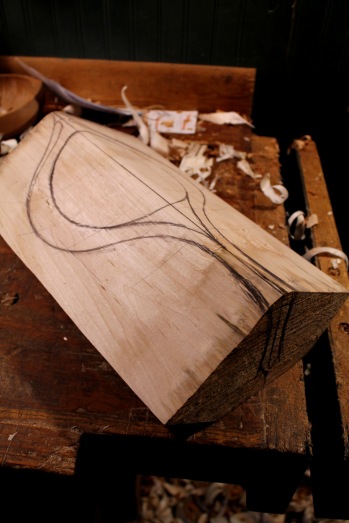
Here’s the blank prepared and laid out.

IMG_8113

I hollow it out first.  The adze does a bit of the work, but with such a deep and undercut hollow it gets put aside pretty quickly in favor of a bent gouge.  After that, the remainder of the hollowing work is done with a spoon bent gouge and hook tools.  Then I hew the outside with an axe and follow up with a spokeshave.  Then it’s ready to dry before moving on.

IMG_8112

After drying, I sketch on the ridge lines between the flutes to be carved and dig in with a gouge.  Just keep it between the lines.  I wrote a post about that general process here.

One last shot with the oiled hen tilted for a better view of the hollow and crest.


IMG_8174-001


Posted in ale bowls, bird bowls, bowls, layout, Uncategorized | Tagged , | 9 Comments

Shrink Pots, Paint and Lettering

IMG_8057   IMG_8059

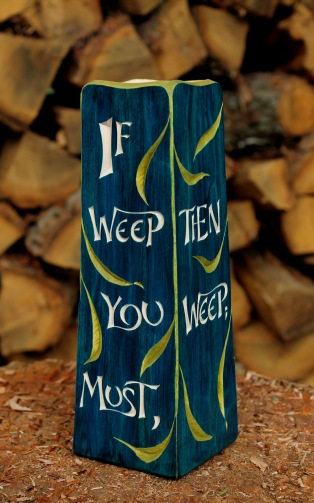
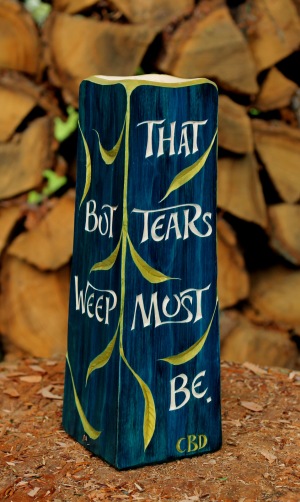
If weep you must, then weep; but weep that tears must be, and be

Gentle and grow as, weeping to the ground, the willow tree;

And grace will come, lighting the eyes of heaven, after thee.

— Catherine Breese Davis, Be Graced

The shrink pot above is the result of being asked to design and make a shrink pot to feature a portion of a beloved poem.   This pot, as well as a couple others, will let me share some brief thoughts on lettering and painting ideas I’ve been exploring.

The CBD shrink pot above has a square base; as long as the pith was in the middle, the pot walls will shrink around a square as well.  This is the same idea as the rectangular base of the book style shrink pots like the one you can see part way down this post.  After boring a 2″ hole through, I used a long gouge to shape the tapering square hollow of the interior.

The outside was textured with long loose cuts with a wide shallow gouge, then painted with a couple different layers of glazes of thinned artist oil paints.  After carving the willow leaves, I added another layer of thin green, and wiped it off the surface of the rest of the pot.  Then I cut the letters, leaving them the natural color of the aspen wood.

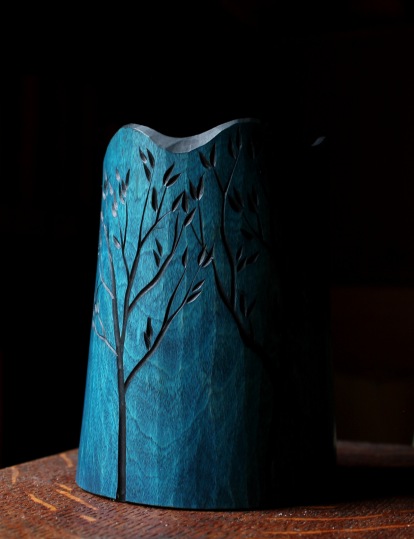
IMG_6717I used a similar technique on this shrink pot to the right.  After painting a very thin, and relatively bright, blue over the pot, I carved the trees and the undulating rim.  Then I painted a thin black over all, wiping the surface completely right after; like applying and wiping off wood stain.  The black pigment was accepted readily by the bare wood of the trees and rim.  However, on the surface that had been painted a bright blue, it only deepened the color of the blue to a sort of twilight blue.
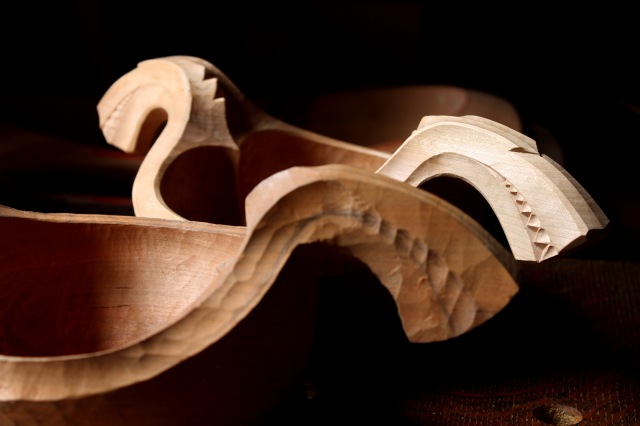
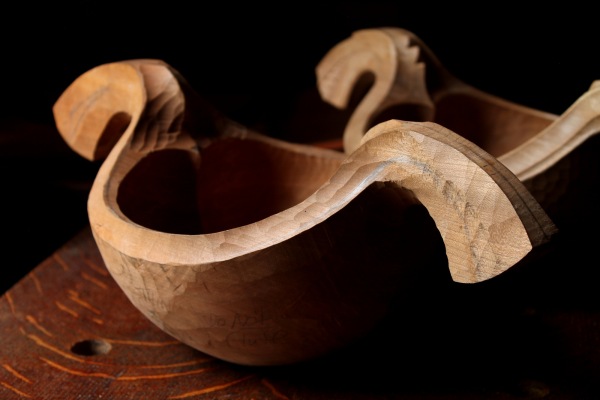
There are many other ways to play around with different color combinations and carving sequences.

Of course, there are still many occasions where I want the character of the wood to speak for itself.  The slide show below shows a cherry shrink pot made by request for a wedding gift.  The couple was married in the mountains of Indonesia, and the words refer to how the couple met.

This slideshow requires JavaScript.

IMG_6278

Sharpen your knife and make some chips.


Posted in Lettering, paint, patterns, quotes and excerpts, shrink box, Uncategorized | Tagged , , | 24 Comments

Before-and-After Dragon

IMG_7933

I’ve completed the carving on one of the cherry dragon ale bowls I roughed out a month ago, and thought I’d share a few photos to contrast the piece after the final carving with its unfinished twin.  The same ideas carry over to other bowl designs as well.

In the photo above, the rough cuts left from the green carving stage are evident in the dragon in the foreground, as well as the darker color that develops through oxidation as the piece dries.  The cuts of the dry carving stage reveal a fresh surface, the color of which will deepen with the application of oil, time and sunlight to a rich reddish brown.

In the photos below, you can see various surface and form refinements as well as added details such as the teeth.  The wood is significantly harder after drying, so I remove as much as I can while it’s green.  The dry wood responds with crisp cuts and a burnished surface.

IMG_7940

Cherry dragon ale bowl roughed green, waiting for finish carving.

IMG_7939

Cherry dragon ale bowl after finish carving, waiting for oil — and ale.


IMG_7943

Spokeshave marks on the left, gouge texture on the right.

IMG_7955

View from above. I’m even more diligent to remove all I can in the hollow when green, leaving just a light surface carving in there after drying.

It’s 13 1/2 inches long and will hold 24 ounces.  Now to oil it and get it on its way to a very patient and thirsty person.


Posted in ale bowls, cherry, drying, Uncategorized | Tagged , | 23 Comments

Florida in February

Florida postcardIf you want to drop in for three days at the Florida School of Woodworking in Tampa, I’ll be teaching a bowl carving class there as part of Fine Woodworking’s Hands On Tampa event February 1-3, 2019.  I’ve never spent a single day of winter where there’s no winter, but I’ll manage somehow.  They tell me we may even get to carve outside — in February!
There are seven other classes as well, with a list of instructors that I would love to learn from, including Mary May and Peter Galbert. Registration has now opened.  Check it out at the link above.

I’ll be in Plymouth again too — after things warm up next year.  More on that and other possibilities later as things take shape.


Posted in classes, events, Uncategorized | Tagged | 4 Comments

Three Bears’ Bowls

IMG_7766

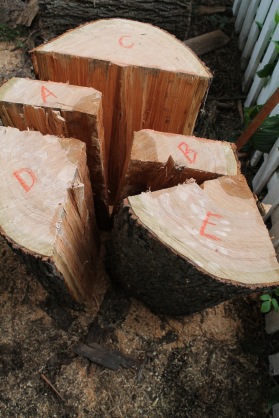
Among the projects I’ve got underway are these three bowls that Goldilocks might find just right for pilfered porridge.  I made use of a central section of the big cherry log I split up a few weeks ago.  I wrote about that process in this post.  This is the section labeled “A” in the photo below.

IMG_7104

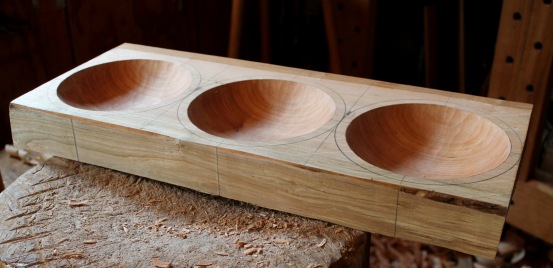
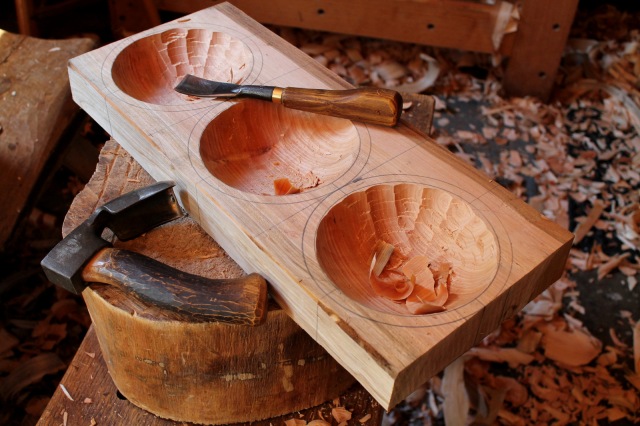
I wanted three bowls of the same size, so I hewed and planed this billet, then laid out the three bowls in a row along its length.  After some adze chopping, I cleaned up the hollows with a bent gouge.

IMG_7779

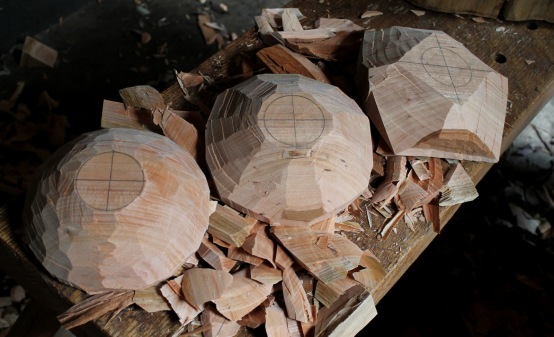
Then I sawed them apart before hewing the outsides with an axe.  Three stages of that process can be seen below from right to left.

IMG_7792

After a little work with a spokeshave, they’re ready to dry.

IMG_7806

After drying, I’ll re-carve all of the inner and outer surfaces, including three different texture patterns on the exteriors.  If all goes as planned, these will appear again, finished, in a future article.  There, I’ll write at greater length about the process, and we’ll see which one turns out “just right.”


Posted in axe, bowls, cherry, holding, layout, Uncategorized, writing | Tagged | 7 Comments