The Beginnings of a Rooftop Hen

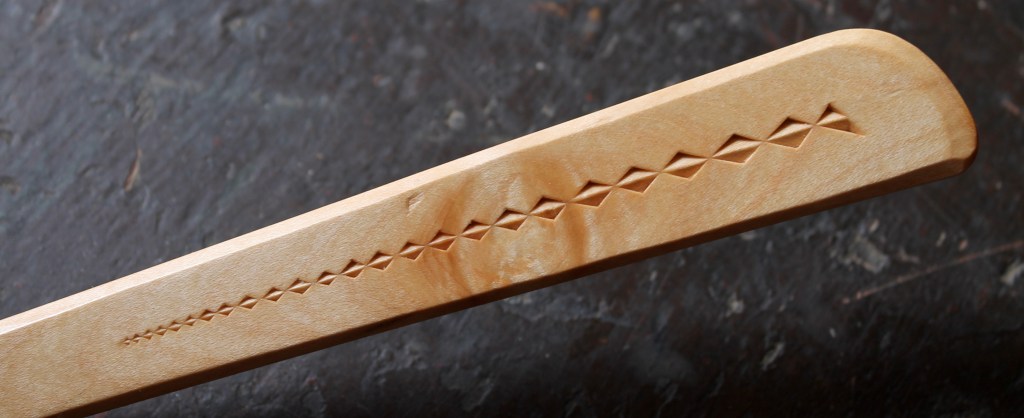
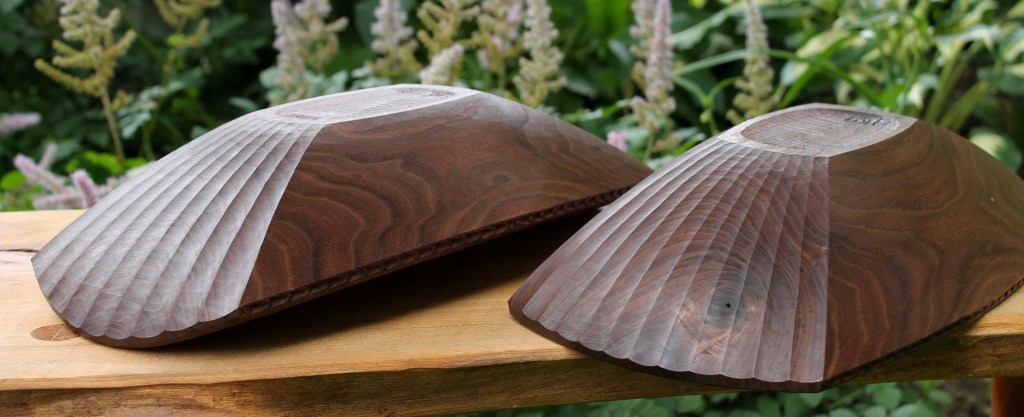
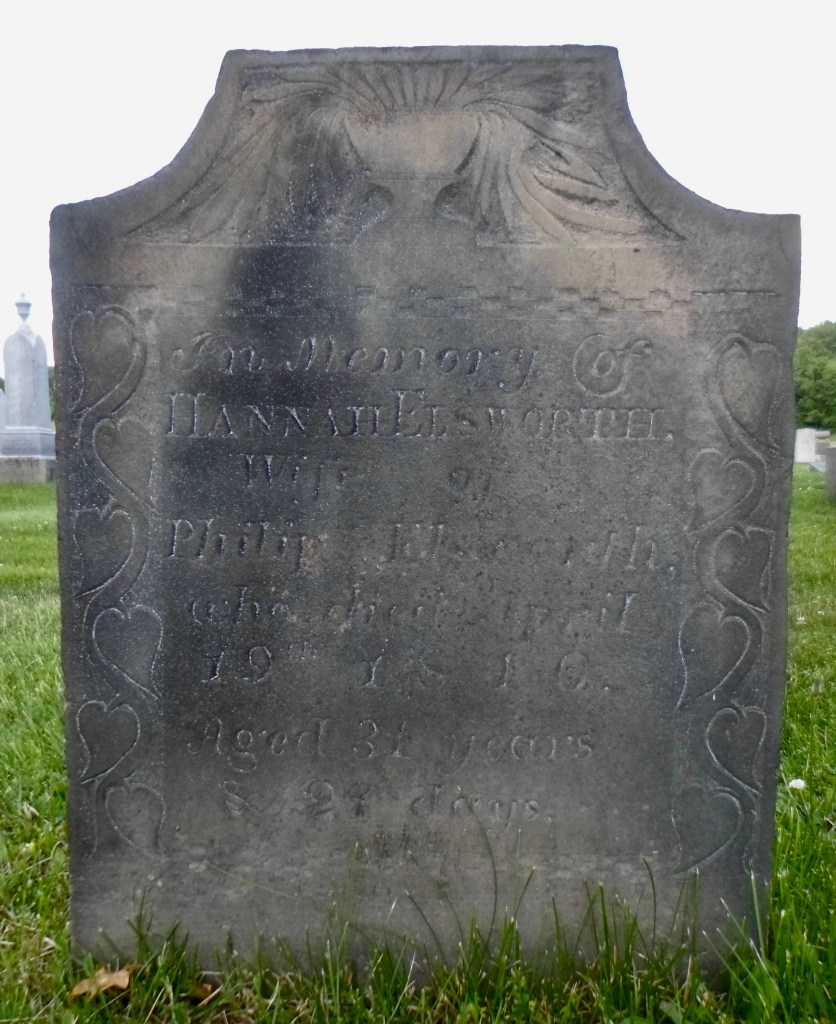
There’s a hen bowl in that big chunk of butternut. I’ve made some of these bowls (call them hens, roosters, fowl…) using various log orientations, but the most common have been what I call rooftop bowls. The drawing below accompanied an old post in which I wrote about the general idea.

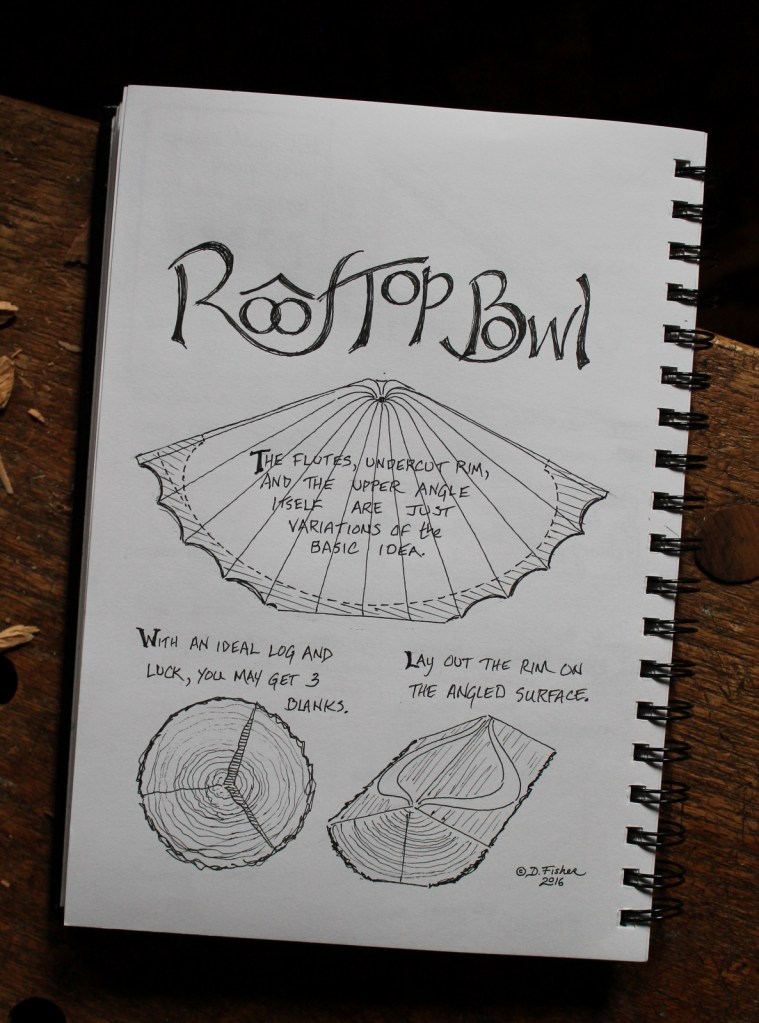
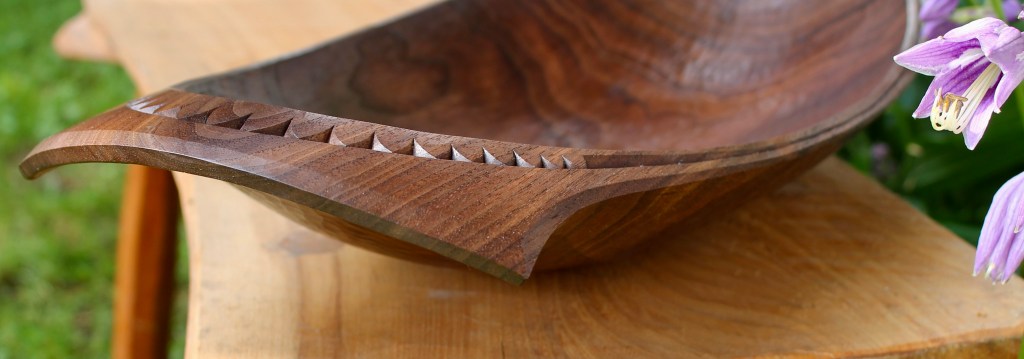
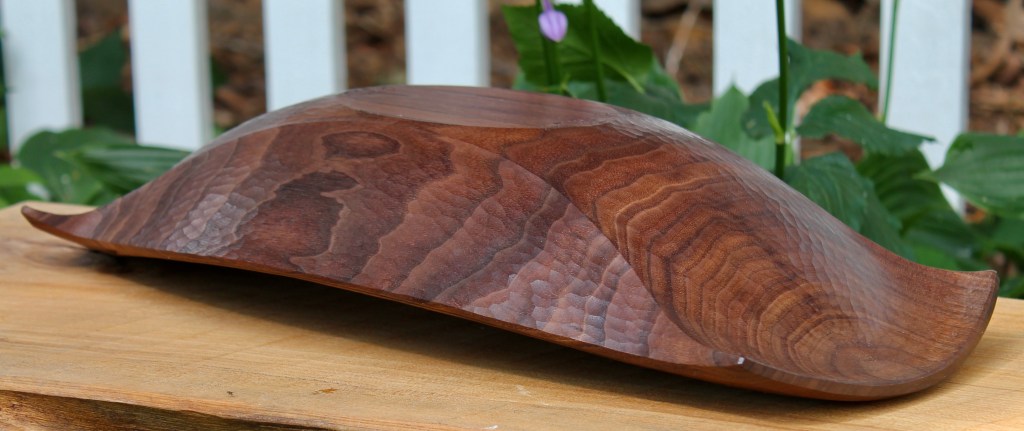
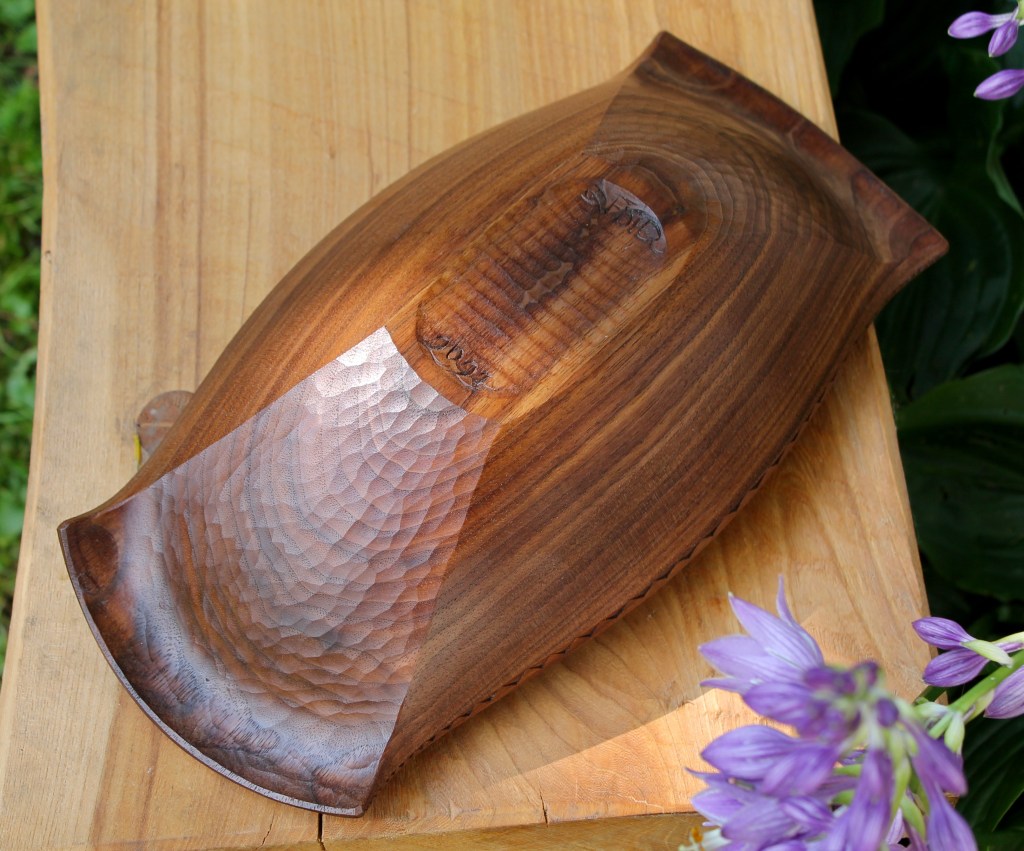
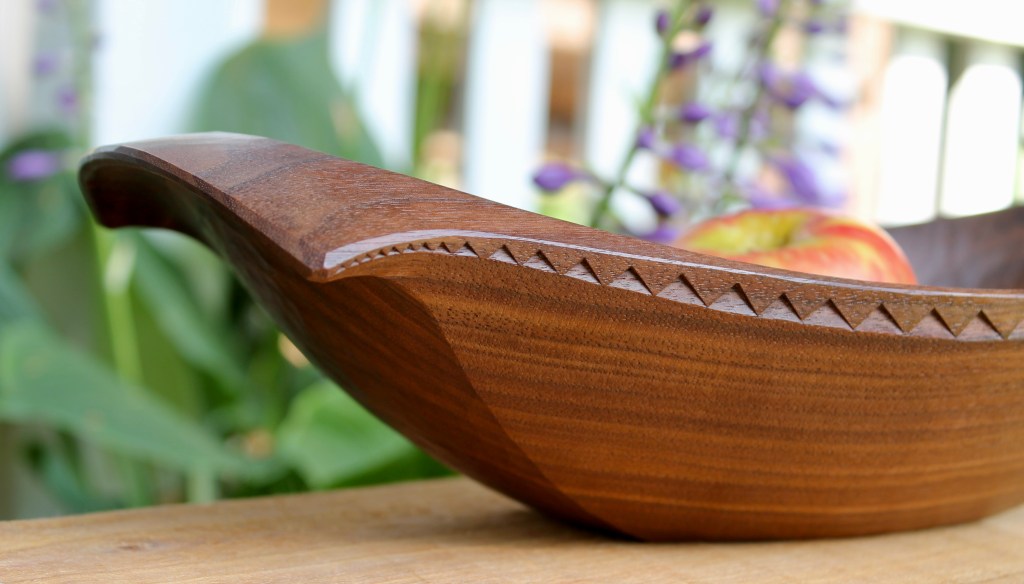
A hen bowl is just a variation on the rooftop bowl represented in the drawing above and shown in the photo below. Just shape one end into a head and the other into a tail.

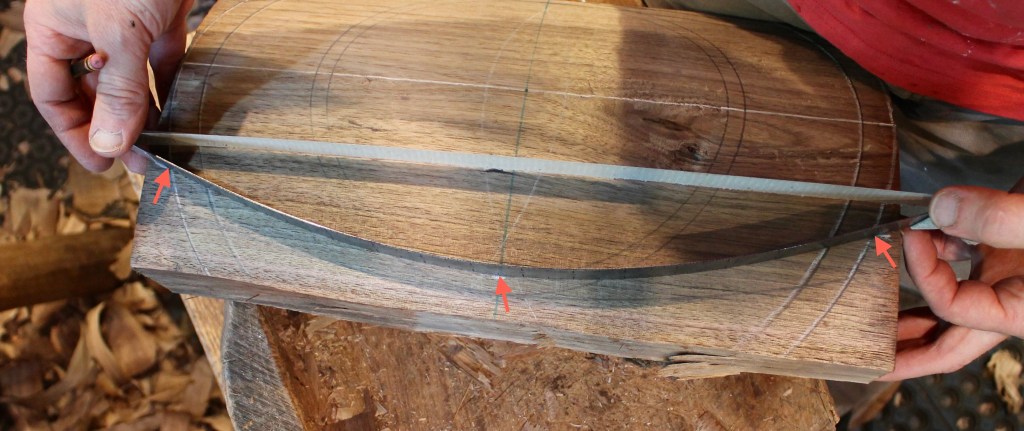
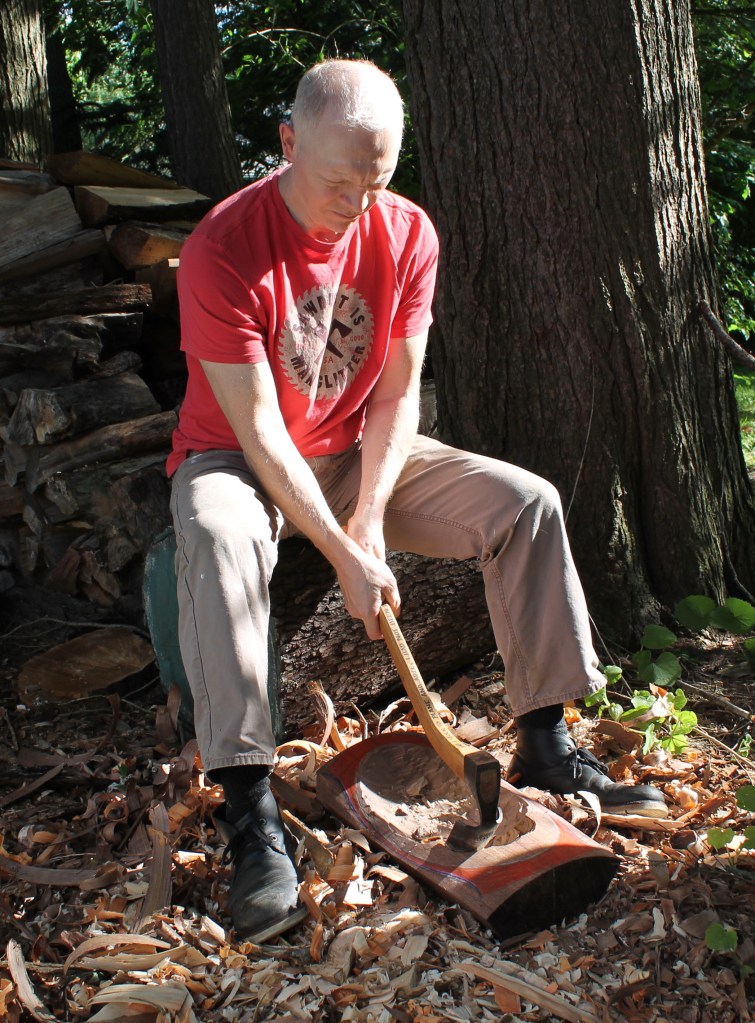
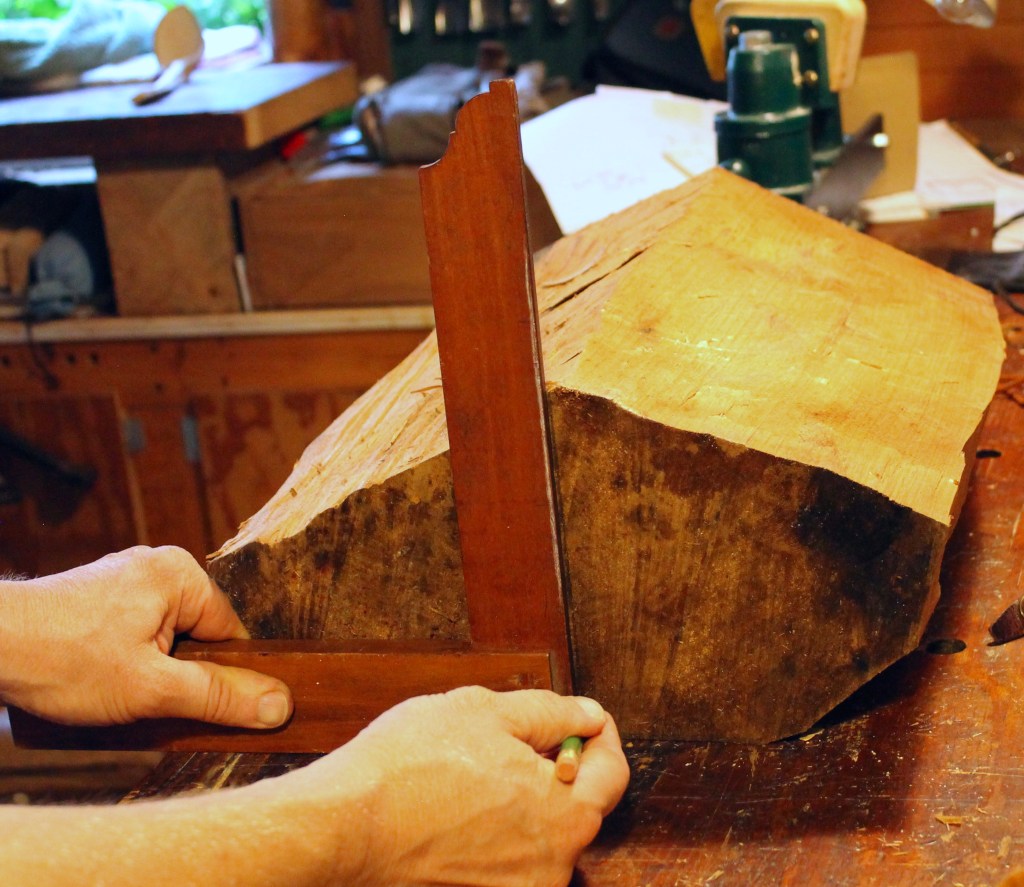
The process always begins with flattening the bottom. With that plane resting on the bench, the vertical centerline can be established on each end (see the photo with the square at the top of the post). The angle sometimes depends most on what the blank provides. You may have to split a little more away to get rid of a major knot, for example. I’ve made rooftop bowls with angles as acute as 45 degrees, like the one in this post.

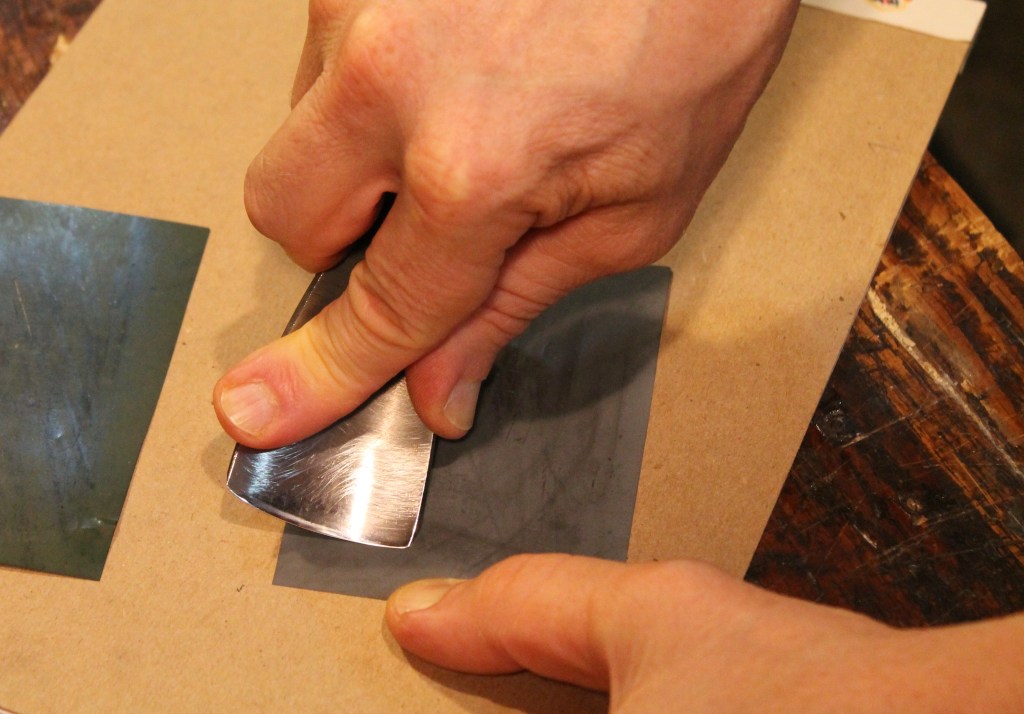
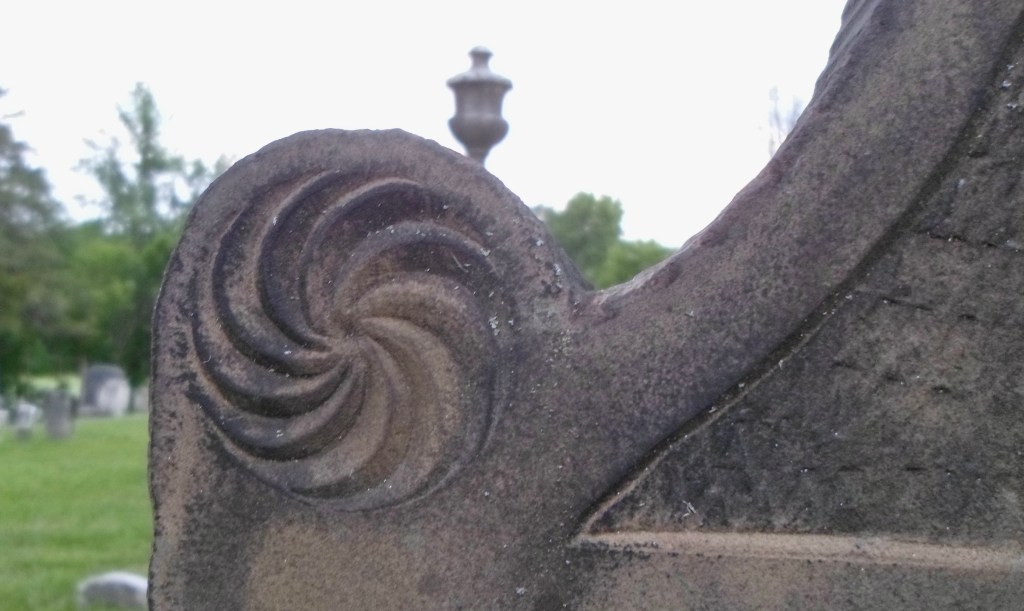
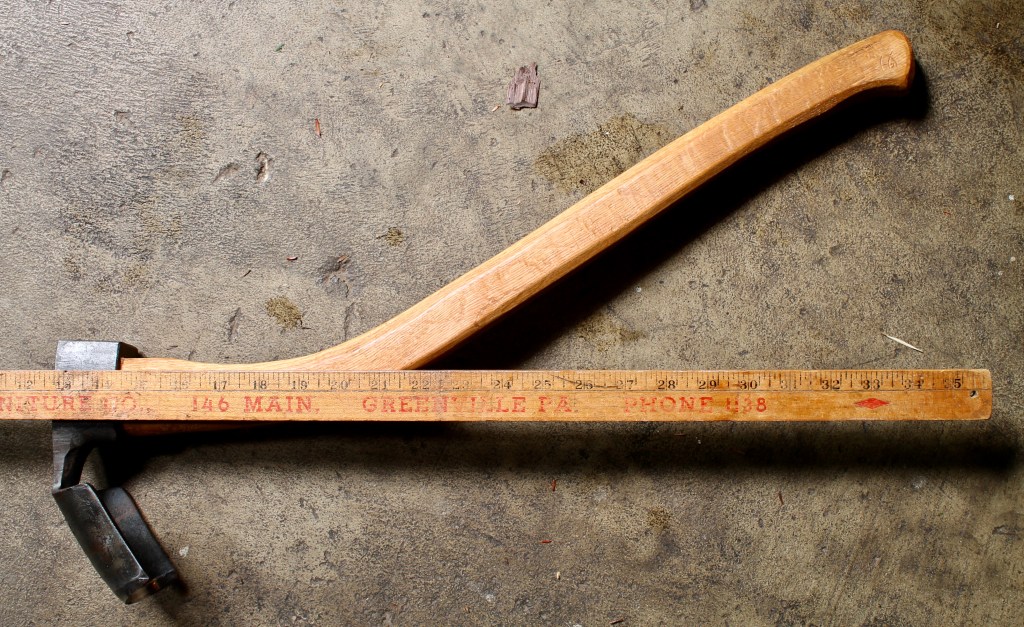
To mark the final angle to which I want to shave the blank, I use a large wooden compass I threw together several years ago with some scrap wood and a bolt, washers, and a wing nut at the joint. You can make one in no time. Ideally the wood at the upper ends of the arms will be shaped to a semicircle so that corners won’t lift the arm off the bench.

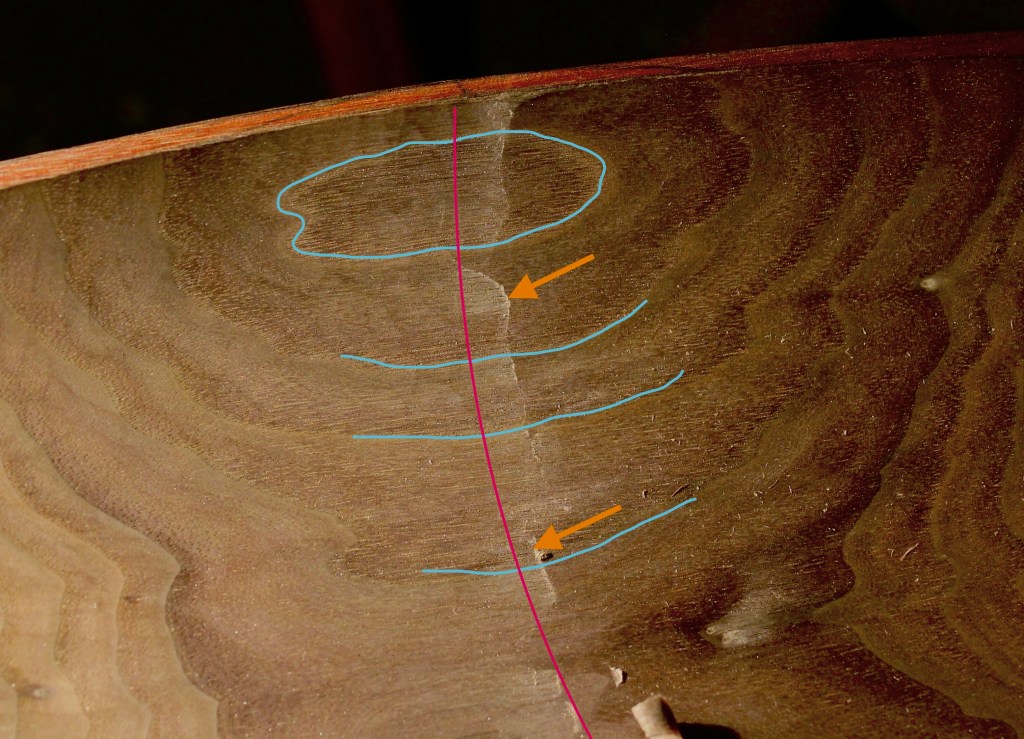
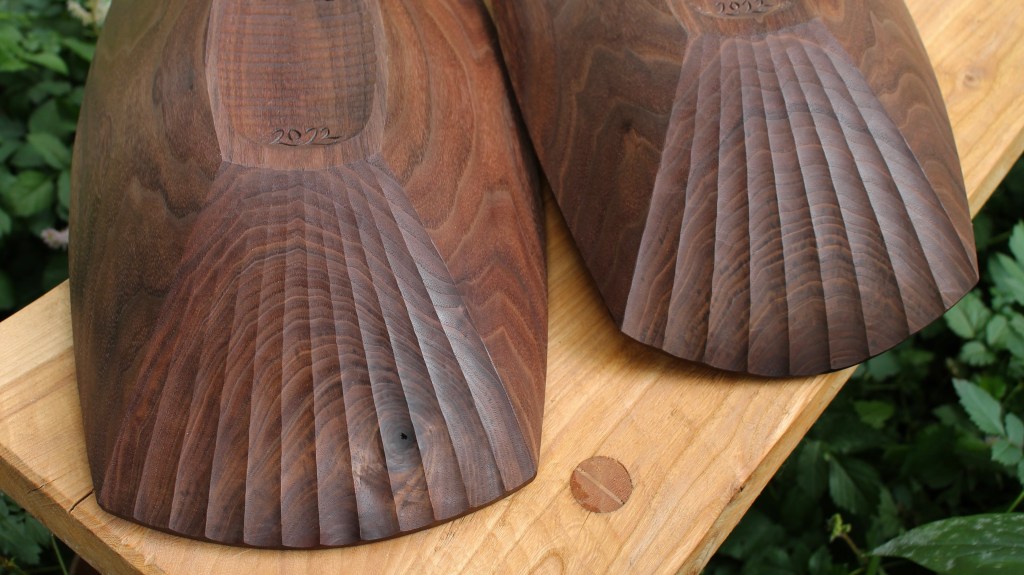
It’s a rare log that has no twist. This one had a fair amount. Ignore it and decide on an angle that looks to work well for this log (do a rough check on both ends). After marking to one side of center, flip the bevel around and mark the other, making sure that the angles meet at the vertical center line. Mark the same height at the center line on the other end and mark the angles on it the same way. On this one, I rounded off the top of the peak. Hew and shave to the lines, and draw the guidelines onto the upper surface.

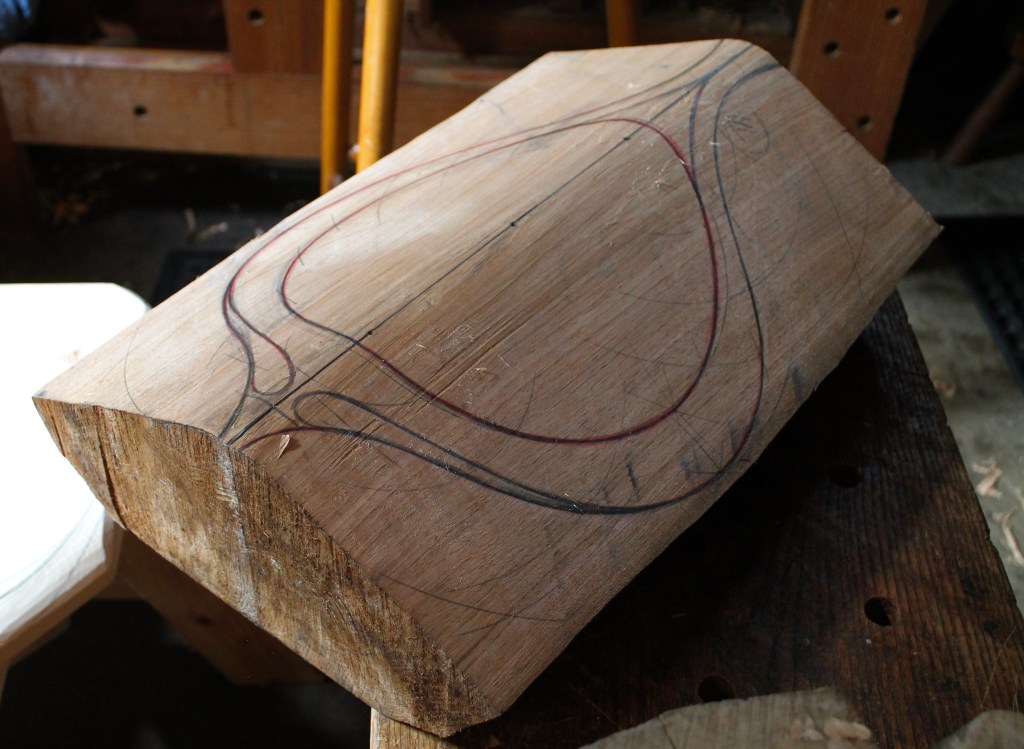
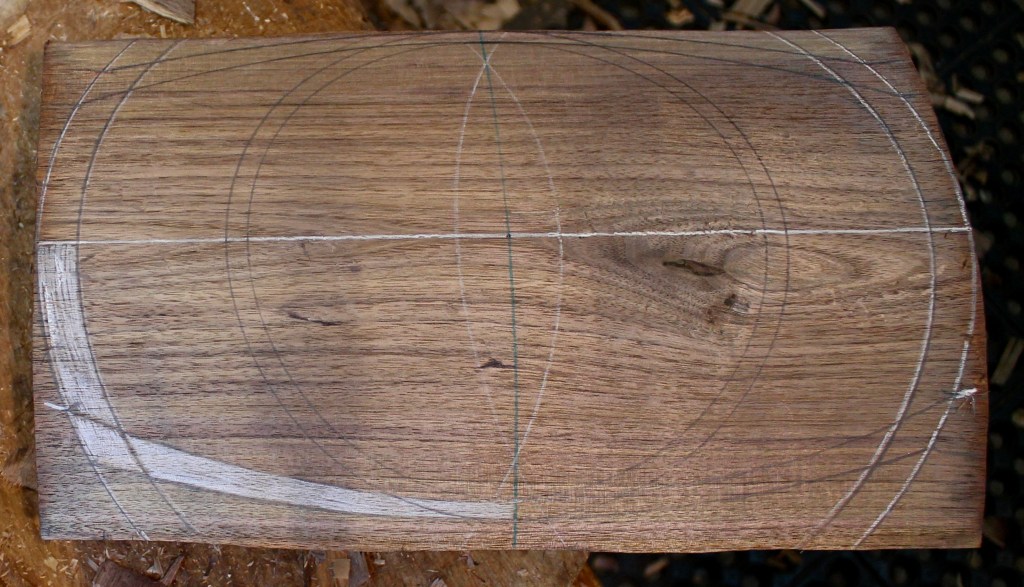
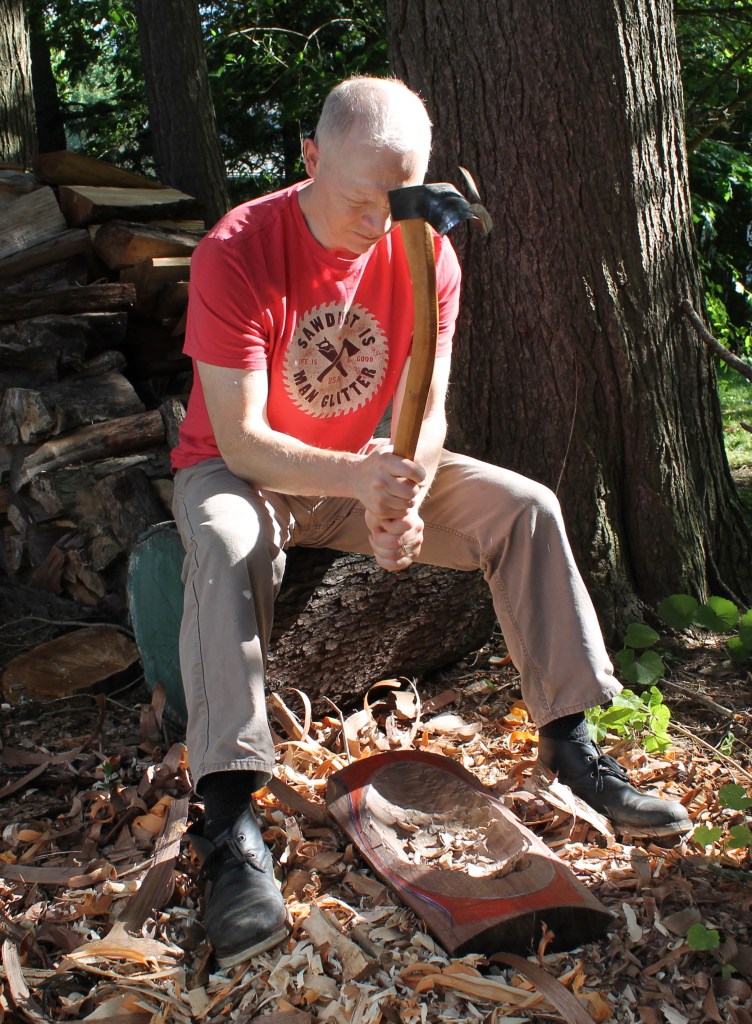
The specific layout is unique to the size and situation with each blank. I start hollowing with an adze, then move on to bent gouges and spoon bent gouges.

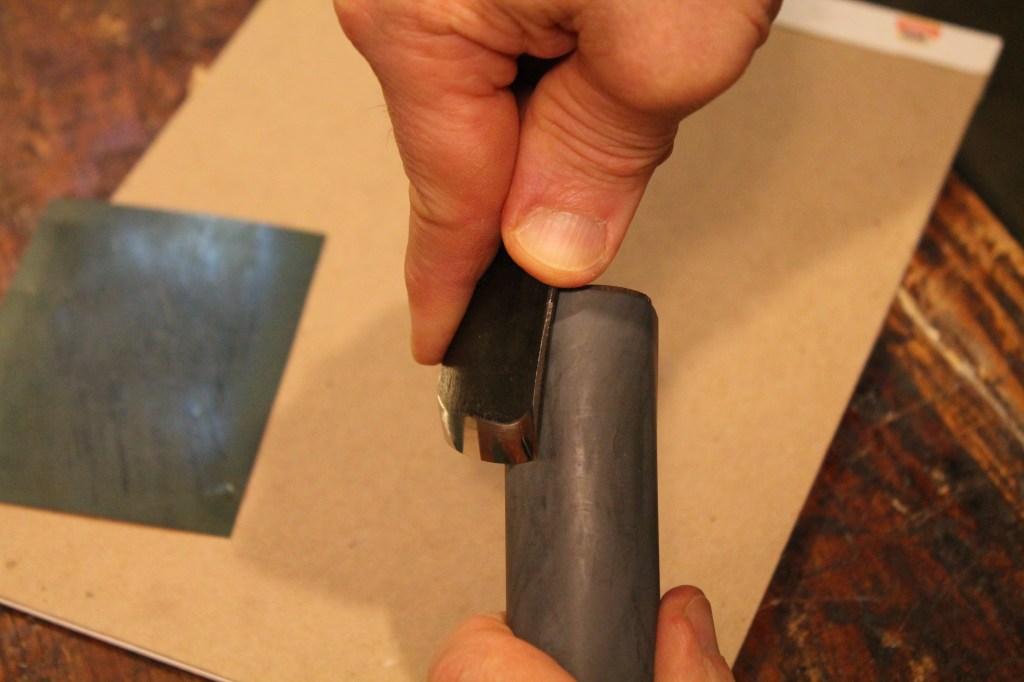
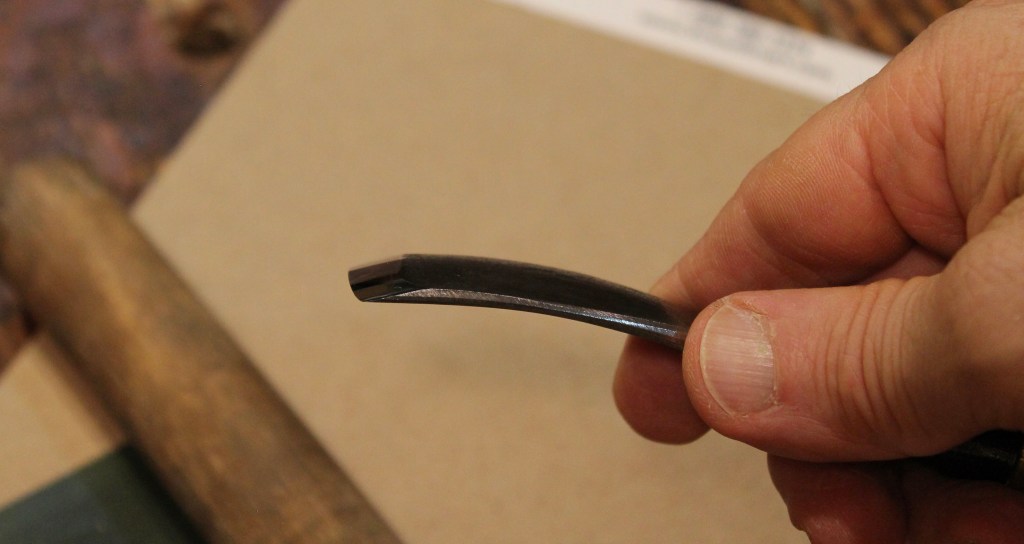
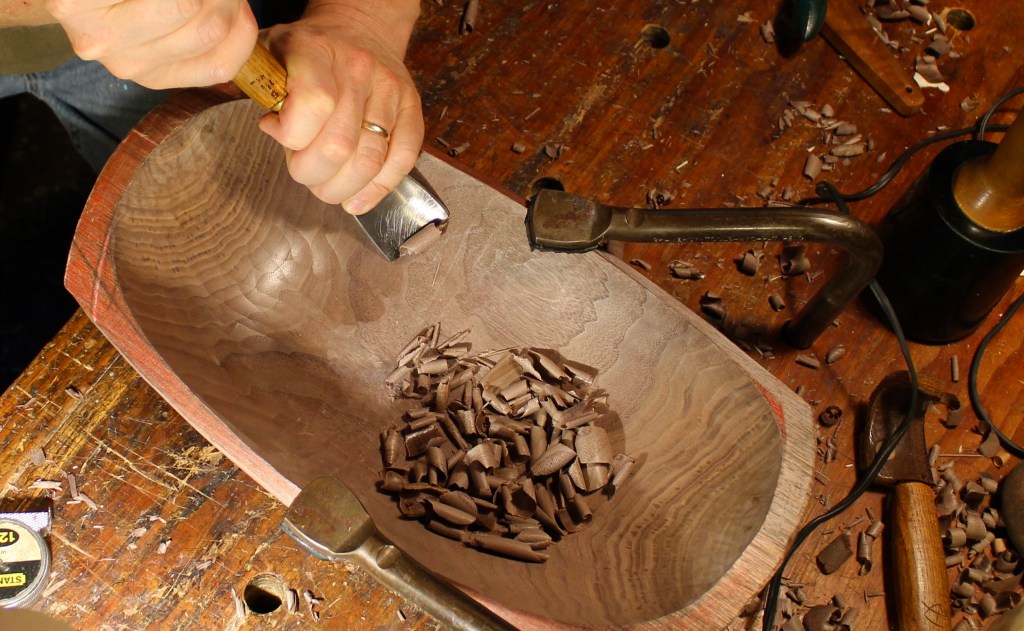
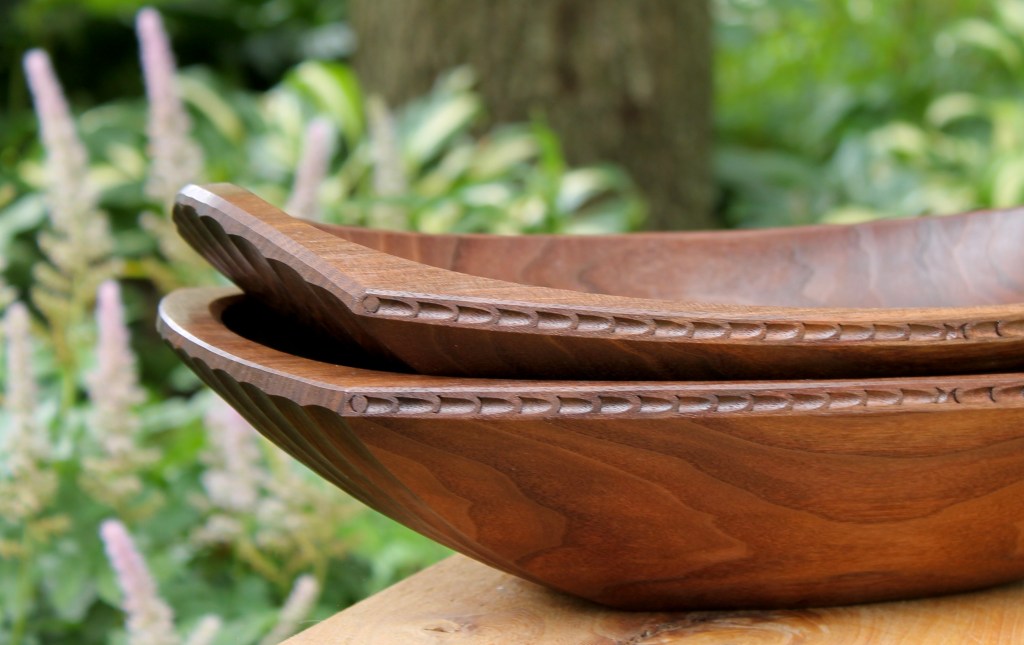
In the case of this bowl, I moved on to hook tools and a scorp that worked really well for this (by Lee Stoffer) to achieve the undercut. I have a whole slideshow with many photos of the steps of carving a different hen bowl in this post.

It’s getting there. The bowl had dried and I made a little more progress over the weekend with a light rain falling outside the shop.

Posted in bird bowls, layout, patterns, proportions, Uncategorized | Tagged , , , , , | 5 Comments

Drew Langsner’s Latest Adventure

Circus by Drew Langsner

Drew Langsner is an adventurer. A few years after earning his M.A. in painting and sculpture, he and his wife, Louise, embarked on an exploration of Asia Minor, the Balkans, and much of central and northern Europe. Don’t picture them eating at sidewalk cafes and lounging at posh hotels. Much of their 1971-1972 journey was by motorcycle through remote areas as they set out to discover, first-hand, alternative modes of living. Drew and Louise compiled their experiences in a book titled Handmade (Harmony Books, 1974), which includes everything from roofing to recipes. Here is an excerpt describing one of the places they stayed along the way, near the Aegean Sea:

We lived up a crumbling stone staircase in a single room, formerly a kitchen, some 8 by 10 feet in dimension. On the ground floor were four rooms used for storage and animal shelters. We had one window, without glass, but fitted with board shutters. The fireplace was such that it would not heat even our small room. (This was the coldest winter in more than 30 years.) Our bed was straw. The roofing was tile, mortared over bamboo-lathing strips — aesthetic, and leaky. An early task was repairing the many drafts. There was no privy.

How’s that for an adventure?! Drew and Louise returned to the United States to begin a homestead in the mountains of North Carolina and started the incredibly influential handcraft school known as Country Workshops, welcoming folks from all over to their homestead for over 40 years. All along the way, Drew continued to travel, write, carve, hew, sail, farm, teach, build, parent, and much more.

Drew’s mind is always open to discovery. His latest adventure involves chairs, but from an entirely new perspective. Drew tells the story of how he began making these sculptures from chair parts here. At the end of this month, there will be a pop-up exhibition of Drew’s sculptures, entitled This is Not a Chair. It will be at the studio of Drew’s friend Jim Dillon at 2895 Washington St., Avondale Estates, Georgia (just east of Atlanta). The days and hours are:

Friday, Sep 30. 5 – 8 PM

Saturday, Oct 1. 10 AM – 6 PM

Sunday, Oct 2. 11 AM – 5 PM

If you can’t make it to Georgia, a Zoom or other video view of the exhibition may be available later. For more information, you can email Drew at drewandlouiselangsner@gmail.com. You can also explore more of his art adventures at his website.

When I look at this one, I think of jazz music.
Posted in events, Persons, Uncategorized | Tagged , | 3 Comments

Merging Cuts in the Hollow

Earlier this month, I wrote a post about two walnut bowls, and there was a question in the comments about dealing with the tricky area where the grain direction merges across the middle of the hollow. I wanted to expand upon my answer with some more thoughts in this post.

I often direct all of my cuts generally toward the center of the hollow, which means cutting across, or obliquely to, the grain along the sidewalls. Another option, which I used on one of those walnut bowls, is to work directly with the grain from one end to the other. The tricky bit in that case is merging the cuts running head on into each other without going too far and lifting the grain on the other side of the divide.

The growth ring pattern can be read to reveal the location of the dividing line. I’ve highlighted them (in part) in blue in the top photo. The center of those O’s and U’s indicates approximately where the dividing line (in red) will be. Shifting a light while you’re working will reveal areas where you’ve gone beyond it; the gold arrows point to a couple more obvious spots where I have gone a little too far after making a series of light paring cuts from the left.  The light is being caught by the torn grain at the end of the cuts.

Now I can work my way down making successive wispy cuts from the right, allowing the edge to merge out of the cut before lifting fibers on the opposite side. Here I’m working with a very shallow sweep gouge for the subtle texture I wanted in this bowl. It may require a little back and forth, but you’ve also got to know when to leave well enough alone!

One thing’s for sure: this paring business goes a lot more smoothly if your gouge is sharp. I’ve got several posts about sharpening and there are many good ways to get sharp. I typically go from diamond stones, to a very fine ceramic, to a strop. A few months ago, I remembered I had some 3M sharpening film in a drawer. It’s another good alternative for refining the scratch pattern and polishing the edge. Essentially, it’s super fine sandpaper on a very thin strong plastic film. Looks like you can buy it lots of places, but I got mine from Lee Valley.

I have the 5 micron and the .5 micron. I just hold the edge of the sheet against some tablet cardboard with my left thumb, put the bevel flat on the film, then draw the gouge backward, while slowly rotating the edge. 

The stroke finishes something like that. The stiff cardboard provides just a little bit of give to assure that the bevel is being polished to the edge without significant dubbing.

I hold the film around a dowel and rotating the edge back and across it for the inner bevel. Just a couple swipes.

And I do need an inner bevel to keep the edge strong enough while allowing for a shallow outer bevel, which provides a lower (better in this case) angle of approach.

Posted in bowls, carving, sharpening, tools, Uncategorized | Tagged , , , | 10 Comments

2022 Slöjd Fellowships

Anja Sundberg and Owen Thomas.

Back in 2019, I ventured to England (Spoonfest) and Sweden (Täljfest) and had an amazing experience of learning, teaching, and sharing. I had the pleasure of meeting so many wonderful people, including Owen Thomas and Anja Sundberg. I was very happy to learn that, at Täljfest last week, Jögge Sundqvist presented Owen and Anja with the 2022 Fellowships.

Anja Sundberg, Jögge Sundqvist, and Owen Thomas with the birchbark certificates made, as always, by Peter Lamb.

Here is a little general information about both of these folks who have done
so much to spread the joy and satisfaction of handwork:

Owen Thomas
Owen is a master pole lathe turner, tool maker, spoon carver, and is a
full-time green woodworker and teacher. He was mentored by MikeAbbott and Robin
Wood and he apprenticed under Barnaby Carder. In addition, he teaches green
woodwork as therapy in social care. He is inspired by historical work and
contemporary design.
He lives in Herefordshire, UK.
More on Owen at OwenThomasWoodcraft.com
Instagram: OwenThomasWoodCraft

Anja Sundberg
Anja was educated as a slöjder at the premier craft school, Sätergläntan. She
is one of Sweden’s most talented woodworkers inspired by traditional work using
axes and knives. Her playful and colorful spoons, knives, bowls and figures are
well known amongst the slöjd field. She is a frequent and sought after teacher
including gatherings such as SpoonFest and Täljfest.
She lives in Orsa in Dalarna, Sweden.
More on Anja at
Instagram: sundberganja

There have now been eleven recipients of the award since it was established
in 2015. You can learn more about it here.

Congratulations Anja and Owen!

Posted in events, Persons, Uncategorized | Tagged , , , | 1 Comment

Maple Spoons

Like many places, we have a lot of maple trees around here. Such wonderful trees for shade, syrup, or playing with the samaras, or “propellors.” And the wood is ideal for spoons. I seemed to be on a lucky roll for finding good maple crooks and carved a group of spoons, each one different in response to the character of the piece of wood. I’ll list them below, going left to right in the photo above. If you’re interested, please email me at dandkfish@gmail.com. Prices include shipping.

#1: 12 1/2″ x 3 1/2″. This large serving spoon came from a nice big crook, so I utilized all I could. The bowl is 3 1/2″ wide, so, in spite of the suggestion carved into the handle, this is not an eating spoon. $230 includes shipping. SOLD

#2: 12″ x 2 5/8″. A good all-around spoon in the kitchen. Stir, cook, serve. Chip-carved handle. Probably from red maple, which is a little yellower than the rest when oiled. $140 includes shipping. SOLD

#3: 13 1/4″ x 2 1/2″. This one had a tight dark knot that I was able to position in the center of the handle. A little deeper bowl and longer than #2. NFS

#4: 13 1/2″ x 2″. This spatula is thin and nimble, but very strong. The balance worked out so that it rests naturally in such a way that the blade stays off the table. A lucky feature that might keep the counter clean. Chip-carved handle. $130 includes shipping. SOLD

#5: 13 1/2″ x 2 1/4″. This long multi-tasker had a little perfectly round knot in the bowl. On a whim, when the spoon was finished, I added the smile with a wood-burning tool. $150 includes shipping. SOLD

Posted in spoons, trees | Tagged , , | 5 Comments

Simple Drawing Bow

Impromptu drawing bow made from a steel ruler and duct tape.

When I lay out the “rectoval” bowls like the walnut bowls featured in my most recent post, I usually simply sketch in the long side curves by hand. On those two bowls, I experimented with a technique using an improvised drawing bow.

The side rim of the bowl is defined by two non-parallel arcs. In the photo above, the outer arc needs to pass through the three points indicated by the blue arrows, and the inner arc by the red arrows. Notice that the distance between the arrows is narrowest at the widest point of the bowl, in this case about 8 or 9mm (5/16″ or so). The degree of curvature itself is a matter of taste, and I usually just say to myself, “Right about there looks good for this one.” A good starting point is to make the ends of the bowls about 80% (4/5) as wide as the middle. Then I transfer that point on the end wall to the other three quadrants (with a compass, for symmetry’s sake) and connect these three points with a continuous curve. I’ve done that, in the photo above as indicated by the pencil line connecting the three blue arrows. Now for the inner arc ending at my fingertips.

You can connect the dots by arranging the bowl on the bench with reference lines and making a giant compass to reach over the arch of the top. Or you can just draw by eye (sighting down the line can reveal irregularities in the curve). But this drawing bow turned out to be a good option too.

There are all sorts of commercially available drawing bows. I’ve never tried them, but I suppose they would work well. You could take a thin slat of wood or many other things and accomplish the same idea, but I just grabbed my trusty 18″ steel ruler off the wall and ripped a strip of duct tape. By folding the duct tape over the ends, the ruler was held in an even bend that could be adjusted easily by lifting and repositioning one end of the tape in a second. Any tape that doesn’t stretch would work as well. After a little fiddling, the arc passed through all three red points and could be traced.

Here’s the layout filled in with white pencil on one quadrant. A bowl could be carved based on that with inner corners, but I rounded them.

Then, all that’s left is the carving.

Posted in layout, proportions, Uncategorized | Tagged , , , | 6 Comments

Arch Top and Flat Top

Walnut Bowls and Astilbe Flowers

These two walnut bowls are very much alike in all aspects of their design except for the shape of the upper surface. I split both blanks from the same log. After hewing and planing both bottom surfaces flat, I gave the one an arched top and the other a flat top.

Above are both blanks. It may be more intuitive to create an arched blank when working in the “bark-up” orientation, since the arch is already there the natural form. But it can also be done with a “bark-down” (or “pith-up”?) blank, and may be a good choice for certain logs and circumstances.

Realizing that the growth rings were difficult to see on the blanks and having just discovered the feature that lets me mark on photos, I’ve indicated the growth ring pattern with the yellow lines.

Both bowls were laid out in the same way on the upper surface, in a “rectoval” shape. From the angle above, you can see the same sort of grain pattern on the inside of the hollows.

Drop down a bit and the difference made by the blank form becomes more apparent. Neither is inherently better; it’s a matter of taste, setting, and/or purpose. It’s good to have both options to be able to make the best use of a particular log.

I chose to finish the interior of both bowls with a subtle texture by paring the surface with a relatively shallow gouge. In the case of this bowl, I’m using a Hans Karlsson bent gouge 150 sweep (the edge represents an arc of a circle 150mm in diameter) 45mm wide, equivalent to a #4 sweep or so, I’d say. The specific gouge doesn’t matter, but sharp does, especially when pushing an edge that wide through dry (at this stage) walnut. Even with all that pushing, two holdfasts and some rubber pads are all that’s needed. Simple and effective. I don’t know what I’d do without holdfasts.

The side panels of both bowls were finished at the bowl horse with a drawknife. I carved flutes on the end panels but I varied the number. Flat top got 12 flutes, and arch top got 9, slightly wider.

There’s a knot in the end wall of flat top. It carved easily, and I like the way the grain swirls around it.

I carved the same nail-cut pattern on both bowls.

Posted in bowls, holding, layout, Uncategorized, walnut | Tagged , , | 12 Comments

Lettering Inspiration From Long Ago

My snapshot of Saluting Protective Spirit (883–859 BC) at the Cleveland Museum of Art

I’ve been designing some new lettering projects, for myself to carve, but also with the idea of offering some lettering patterns for sale. As I sat drawing, my mind went back to a trip to Cleveland last month and the protective spirit I encountered.

My mom and I spent part of the day at the Cleveland Museum of Art. When we walked into the Ancient Near East room, we were met by a larger-than-life Assyrian spirit, impressive in his own right, beautifully carved and over seven feet tall.

A closer look revealed a pattern of cuneiform script carved right across the hand, body, and feathered wings. A translation of the message brings to light the typical report of a king’s conquests, power, and palatial details. That last bit is interesting if only for the types of wood used in the construction of the palace. A complete translation of the inscription, background information about the piece, and an image that can be explored in detail are all at The CMA website, here.

In addition to the way that the carver inscribed the text right over the details of the background carving, I was fascinated by the subtle arcs making up the walls of each symbol and the way the walls of neighboring shapes are linked to form continuous lines and wonderful curves. This is evident in my photos, but can be seen especially well by zooming in at the link above.

We may think of cuneiform as simply different combinations of wedge shapes, but it seems to me that this carver delighted in the possibilities and the carving of them. I understand relatively little about that carver’s world or language, but when it comes to beauty and the joy of creating, of watching a shape emerge at the cutting edge, what’s three thousand years? But some things do change; I suppose he’d be surprised to learn that his carving is on a wall in Cleveland.

Driving eastward home through rural Ohio that evening, I pulled off the road to walk through a couple small cemeteries. There are interesting things to see even among the sandblasted letters, but I mainly look for older, hand carved stones. I discovered the work of a letter carver from only two centuries ago, which are about the oldest gravestones you’ll tend to find in this part of the country.

The style and carving designs led me to believe that many of these stones in two cemeteries in close proximity were carved by the same person. For example, notice the zig-zag element at the side borders of the stones above and below. This was a fine-grained local sandstone of some sort that has held up pretty well.

I won’t bother pointing out all of the elements I noticed, but I’ll just share some photos of the stones. The shadows weren’t falling right to get good shots. Next time I can visit, I’ll try to remember to take some big paper and make some rubbings. These stones scratch the surface of stories that go much deeper than the carving.

One stone had the initials “P.W.” carved at the bottom. Possibly the carver. More to explore another time. Now it’s back to the drawing board.

Posted in historical reference, Lettering, Uncategorized | Tagged , , | 6 Comments

Long Handled Adze

Although I rarely use it, I do have a hollowing adze meant to be swung with two hands. For large bowls, it can help to hog out material a little faster. It was looking lonely, so I pulled it off the wall to begin hollowing the walnut bowl that led my last post. In his book Country Woodcraft Then and Now, Drew Langsner has an extensive bowl carving section that includes a low base for securing a blank while using an adze with two hands. That would be better, but I haven’t gotten around to making one, so I just took a seat on a convenient log and set the heavy bowl blank in front of me. With my elbows on my legs, I swung the adze by pivoting at my elbows and rotating my wrists. The hardest part was concentrating, what with the neighborhood kids laughing at my pants, asking where the flood was.

In the shot above, it may look like the handle is breaking at that sharp bend, but it’s not.

When I bought this adze, I expected I would have to change the handle. The geometry of the head and the handle were not in harmony. In the photo above, I’ve used a yardstick to represent the original handle. It came straight out of the eye. When swung naturally, the cutting edge was tucked at an inward angle and the area behind the edge just slammed into the wood. So it was either reforge the head to open it up with less of a tucked profile, or make a new handle that brought the geometry of the head into harmony with the swing arc. I’m not a blacksmith, so I went to the woods.

I found a limb in a fallen oak with an appropriate bend in it, split it, and made this handle from it. Drew Langsner used to offer a similar handle design for an adze in his Country Workshops catalog. He steam bent the handles from straight grained wood, which makes more sense when you have multiples of the same thing to make.

In the detail photo, you can see the flow of the fibers through the handle.

I don’t think this exact one is available any more. The cutting edge is deeply curved and nearly 3″ across. I found some Biber adzes, but it looks like they’ve been radically redesigned. They have a short-handled one now with a design that seems to have been modeled closely on Hans Karlsonn’s adze. But, no matter. Whatever adze you use, consider the proper relationship between the head and handle, something I’ve written about and illustrated in other articles.

Like I mentioned, I tend to use this only rarely, but some folks rely more on a long handled adze. I find that the short one hogs away nearly as fast and I have to go to to it for more precision anyway as I near the line. The photo above shows about as close as I want to get with the big one. That one cut almost required a bowl re-design.

Posted in adze, green woodworking, tools, Uncategorized | Tagged , , | 9 Comments

Walnut Bowls and Hosta Flowers

Earlier this week, I was preparing to take some photos in the shop of two recently-finished walnut bowls, but the light filtering into the shop wasn’t really bringing out the color variations in the wood. I looked into the back yard and saw the light hitting the hosta flowers, and took the bowls out there.

This first one is a long open form in a style that I’ve done many times, but it had been a little while.

I was reminded of the time required to carve the complex exterior form and to get the flow of the lines just so. And I think you can see what I mean about the right light revealing the color variations in the walnut.

And then it’s on to the necklace. I wrote an article for Fine Woodworking Magazine (Issue #263) five years ago about carving this bowl form as well as the necklace. It’s still a fun challenge, and I learn some subtle thing every time I make it.

The proportions (usually determined by the particular piece of wood) within the design can vary widely and still work well. This iteration is 19 1/2″ long, 9 1/2″ wide, and about 4″ high.

I weighed the finished bowl out of curiosity; 1 lb., 9 3/8 oz.

And the shot above is for all of you using that newfangled system.

Chip was patiently waiting as I snapped the photos. He read that hostas are poisonous to dogs, so he doesn’t eat them. He lays on them instead.

I already have a home for that first walnut bowl, but his little brother is available:

Still walnut, but many different elements to the form and detail that make it more straightforward to carve. Smaller too, at 13″ long, 6 1/2″ wide, and 3 1/2″ high. Three more shots below.

Update: SOLD

Hosta flowers weren’t the only ones on display. The first rose of Sharon flower bloomed at the edge of the yard. The bumble bees will be happy, like the one I showed in this post a few years ago.

Posted in bowls, nature, Uncategorized, walnut | Tagged , , | 11 Comments