Fall Fluttering

My workshop is our attached garage at one end of the house. While it’s not an idyllic cabin-shop among the trees, I did get pretty lucky that there is a grove of quaking aspens just outside one window. For much of the year the leaves, with their flat wispy stalks, “quake” and flutter in the slightest breeze. It’s such a soothing sound and the trees shimmer like sequined dancers.

In his essay “Listening Point,” Sigurd Olson described his personal discovery of the spot where he would build a small cabin as a base for his exploration and contemplation:

Wilderness sounds would be here, bird songs in the mornings and at dusk. The aspen leaves would whisper and the pines as well, and in the sound of water and wind I would hear all that is worth listening for.

Sigurd Olson, Listening Point (1958)
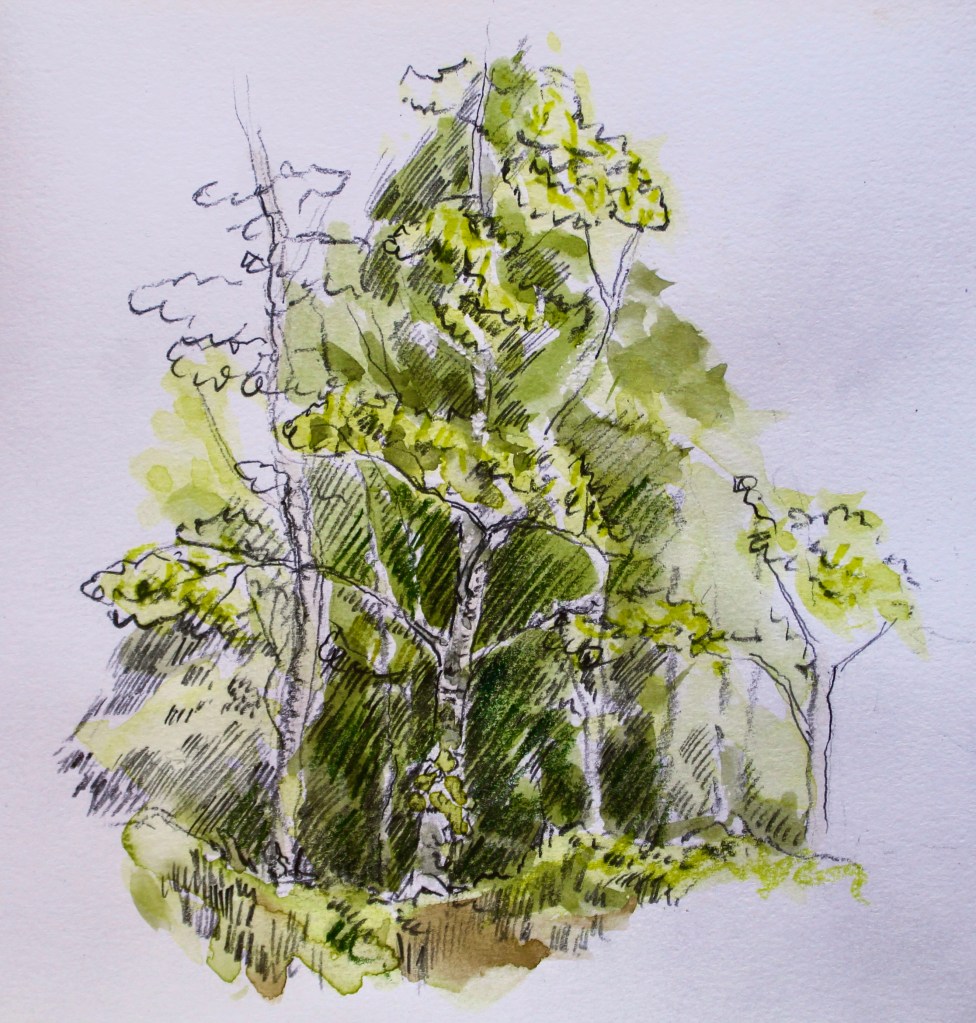
Aspen Trees in Spring outside of the shop window.

After the leafless winter, it’s a thrill to see the leaves emerge bright green in the spring and play on all through the summer.

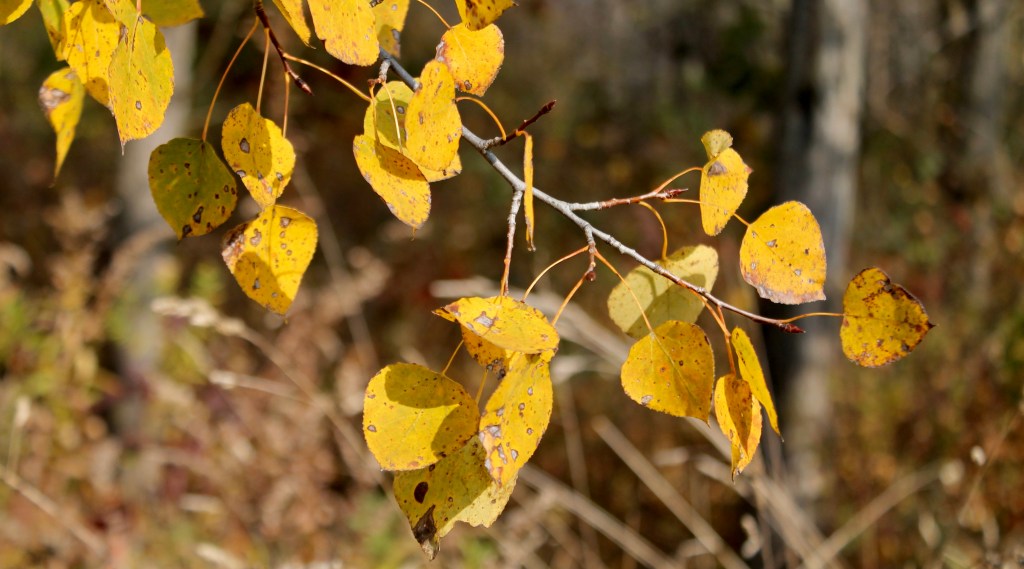
Fall aspen leaves through the shop window.

In autumn, the leaves turn golden and begin to fall to the ground, leading me to listen and watch more closely.

Watching the fall leaves always takes me back to reading Peanuts collections when I was a kid. Some of my favorite strips were the ones related to the leaf-falling theme that Charles Schulz returned to again and again. Here’s a link to some of them.

Soon the leaves will have all fallen, but next year’s buds are waiting.

And the leaves aren’t the only things that flutter. These guys will be around all winter.

I’ll end this post with a thank-you to all of you who have been reading my blog. I wrote my first post on January 1, 2015, nearly 10 years ago. This post is number 500! What started it, especially, was all I had learned from Peter Follansbee’s blog. Peter has been a big influence and his example encouraged me to share through my blog and otherwise. He’s got a new blog now, but the old one is still up as well.

In most normal social situations, if I start going on and on about my excitement over a bowl design, or a carving technique, or fluttering leaves, people suddenly remember an important appointment they need to get to. So, thanks for reading and/or commenting on these posts over the years. I’m grateful.

Posted in nature, quotes and excerpts, sketch, trees, Uncategorized, video, writing | Tagged , , , , , , , , | 22 Comments

Carving the Hollow: A Trick and Some Video Clips

Sometimes, after you’ve hogged away most of the wood and the hollow is nearing the final shape, your hands and eyes tell you that one end/side of the bowl has a steeper slope than the other. Your hands and eyes are usually right. But if you want to verify, here’s a simple technique that I started playing around with this year.

Place a slat of wood across the rim of the bowl. A yardstick works well, but it can be any straight stick. Make/choose a reference mark on the stick to line up with the rim of the bowl. Set an adjustable square so that the blade is somewhere about half of the overall depth of the bowl (It doesn’t matter as long as you keep the same setting when checking both ends). Register the shoulder of the square against the stick and slide it forward until the corner of the blade just touches the slope of the bowl hollow. Make a tick mark on the stick at the edge of the blade (or note the measurement if using a yard stick). Now do the same on the opposite end of the bowl. If the slopes are the same, then the blade of the square will register at the same tick mark. Adjust for any differences by shaving more wood away from the appropriate end until the slopes match. You can check different points on the curve by adjusting the blade of the square, but one reference point in the middle is probably plenty.
This same technique can be adjusted in many ways to check the exterior of a bowl and so on. None of this is necessary, but, especially on larger bowls, it can put your mind at ease that you’re where you want to be. Essentially, it’s a very simplified version of a “pointing machine” used for centuries to assure consistency between a sculpted model and a carving in progress. You can see one in use by a master stone carver in a short film called The Stone Carvers. Filmed in 1984, it documents the carving done for the National Cathedral in Washington D.C. The few minutes with the pointing machine begins at 3:45, but you’ll likely want to watch the whole 28 minute film. It won the Academy Award for Best Documentary Short. The Folkstreams website is a trove of unique films on a variety of subjects, and they have a category dedicated to Traditional Arts and Crafts.

I’ll end this post with a couple short video clips of my own. I set up the camera as I used the adze to do the last bit of shaping on the hollow of an oval walnut bowl a couple days ago. It looks a lot different when the same tool is roughing out big chunks earlier in the process. This isn’t a matter of 10,000 hours of practice or anything. It’s simply about referencing/feeling the bevel against the surface and making minor adjustments as the cut proceeds. The bevel provides control by registering against the surface it has just cut.

In the first (one-minute) clip, below, I’m working on the quadrant to my left. I do that with the bowl sitting flat. Notice, near the end, that the final chips will release at the cross-grain trench where the grain direction reverses. The intended boundary of the hollow is marked by a pencil line. Beyond the pencil line, I’ve scribbled with some red pencil to avoid any potential confusion for myself with any other layout lines.

In this final clip, I’m working on the right quadrant. Rather than try to hold the adze awkwardly (sort of backhanded), I hold the bowl up to allow for a more natural swing. This means I can’t quite see the line at times, thus I tilt the bowl back now and then to see how it’s going. After I make the pass inside the edge of the rim, I use that new surface as a landing zone as the adze begins each series of rows/passes that bring the surface of the rest of the quadrant to shape. Each of these passes ends near the bottom of the cross-grain trench. I don’t bother talking in this clip, either. It simply sounds like somebody knocking on your door for three minutes straight. Zero Academy Award nominations.

Posted in adze, carving, holding, layout, tools, Uncategorized, video | Tagged , , , , , | 7 Comments

A Couple Announcements

For those of you interested in an axe and/or a couple exhibitions of wood art in Philly, read on.

First, a few months ago, Robin Wood sent an axe to me to try out and provide him with some feedback. I’ve known Robin and his daughter, JoJo, now for several years. They’re friends of mine and I admire them as craftspersons and persons. This new axe of theirs, the Wood Tools Sheffield Axe, is forged in the historic steel city of Sheffield, England. It’s the one I’m using in the photo above. You can read more about it here.

Robin didn’t ask or expect me to post any review or recommendation, but I recorded my observations in my notebook so I’ll share those pages below. Beats typing at a computer.

Two Mark Sfirri Exhibitions:

Last year I had some work included in an exhibition curated by Mark Sfirri, a highly-skilled and imaginative wood turner and carver, known especially for his multi-axis turning techniques. Mark has been making beautiful things from wood for over 50 years and he has two solo exhibitions coming up. One actually opened last night and the other opens December 14. If you can make it in person, there will be a lot to be inspired by and to learn from. Here are some links:

La Famiglia exhibition, Museum for Art in Wood, Philadelphia, PA. (If you can’t make it in person, here’s a link to a broadcast about it.)

The Flower Show exhibition. The James A. Michener Art Museum. Doylestown, PA.

Ellis Islander’s, 2021. The series consists of 29 figures carved in holly wood. Photo by Mark Sfirri.
Posted in sketch, Uncategorized | Tagged , | 10 Comments

Round Walnut Bowl Layout: Plan for Shrinkage

A wide walnut logs came my way a couple weeks ago, and I’ve been busy roughing out a few things from it. One of them will be a big open round bowl, 18 or 19 inches (46-48cm) in diameter. In the photo above, The pith of the tree is up, bark side down. I split the lower portion of this half log for another bowl blank. I chainsawed the corners off to form a rough circle, then hewed and planed the upper and lower surfaces flat and parallel, working across the grain with the plane.

This walnut is green, full of moisture. As it dries it will shrink across the grain but not with it. If I carve a circle, I’ll end up with an oval. So I laid out an oval in order to end up with a circle. I’ve mentioned this sort of layout before, but I think these marked-up photos may make it more clear.

Large round bowl layout — allowing for shrinkage across the grain.

Instead of using one central focal point for the compass, I established two focal points 3/4″ apart from each other along the cross-grain center line. The yellow and blue lines represent the radii forming the right and left boundaries, respectively. The two sides are sketched together in the area of the green boxes. The 3/4″ difference is a hopeful estimate. There are tables with simple shrinkage percentages for various wood species, but there are all sort of confounding variables at play (what time of year was the tree harvested, how long has the log been sitting around, variations in individual trees, etc.).

I’m confident it will shrink at least that much, maybe a little more. At any rate it will end up closer to a circle than it would have otherwise.

Long-handled adze with big round walnut bowl.

For a bowl this big, I began hollowing with this long-handled adze. I hadn’t used it in a while, but I wrote about it a couple years ago in this post.

Surveying the axe work on the outside of the round walnut bowl.

After much more adzing on the inside and axing on the outside, it’s much further along now. It’s wrapped in a couple old towels to control the rate of drying and I’ll keep my fingers crossed.

Drawknife work on walnut bowl blank at the bowl horse.

Meanwhile, I’ve been roughing out more pieces from this same walnut log. One of my strategies for storing green wood is to avoid storing it. Within reason and when possible, I rough out a bunch of pieces in succession, then return to them whenever it’s convenient, after they’ve dried. Above, I’m shaping up a quarter-log blank that should become a hen bowl. And there are a couple more in-process almost ready to begin drying. We’ll see all these bowls someday.

Posted in bowls, green woodworking, layout, tools, Uncategorized, walnut | Tagged , , | 12 Comments

“A Crust — a Crumb” Walnut Bowl

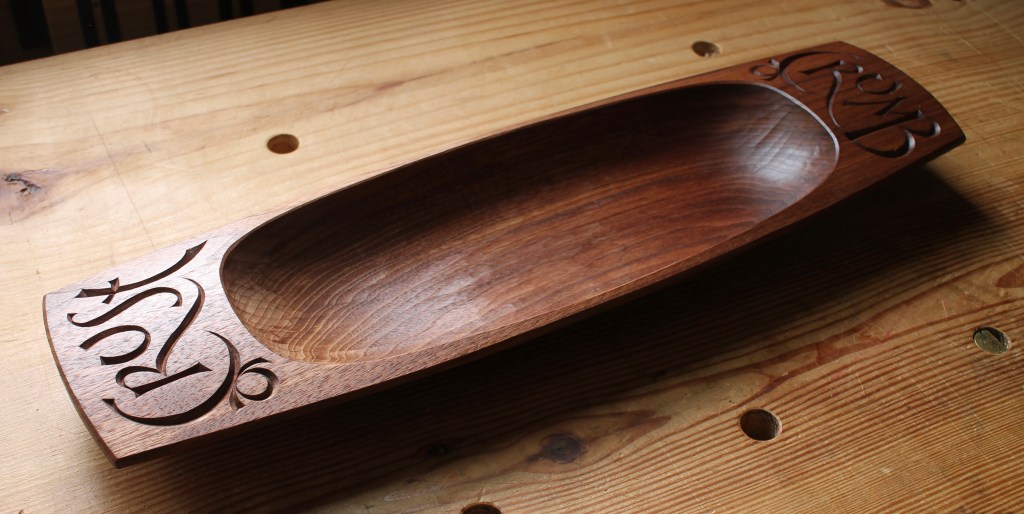
Walnut “A Crust — a Crumb” bowl 2024, 21″ x 6″ x 2″

It’s been a week since I’ve returned from teaching an October class at Peter Galbert Workshops. I carved this walnut bowl in July and took it along as an example for the students. I’ve decided to offer it for sale now, since I’ll have one or two new ones before the class in March. That class is full, but it’s a good idea to get on the waiting list if you’re interested. Even if nothing opens up for March, you’ll get first dibs on the next one.

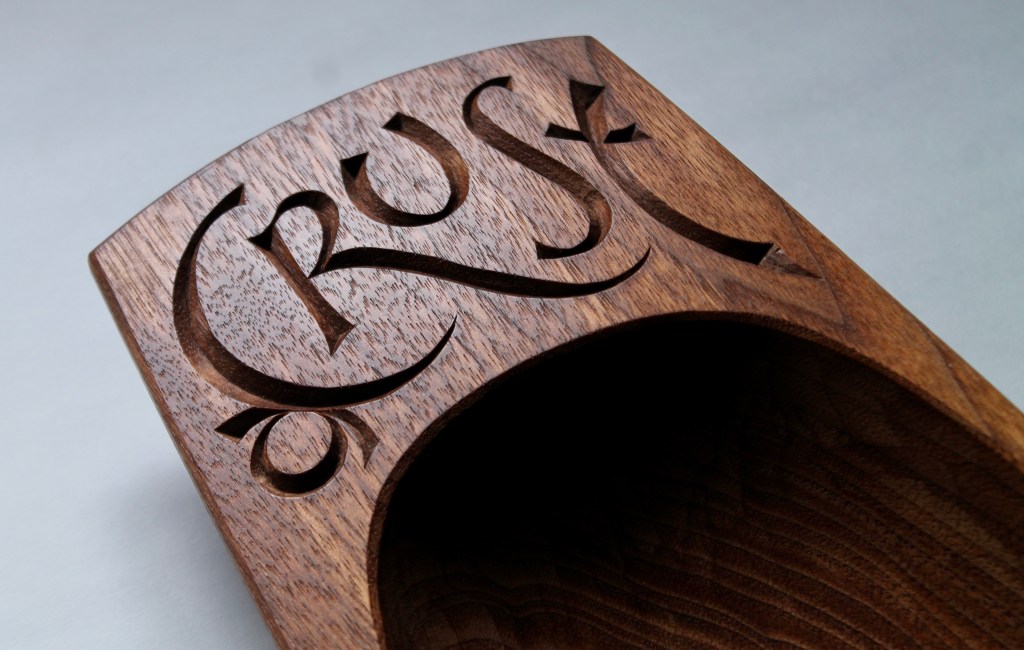
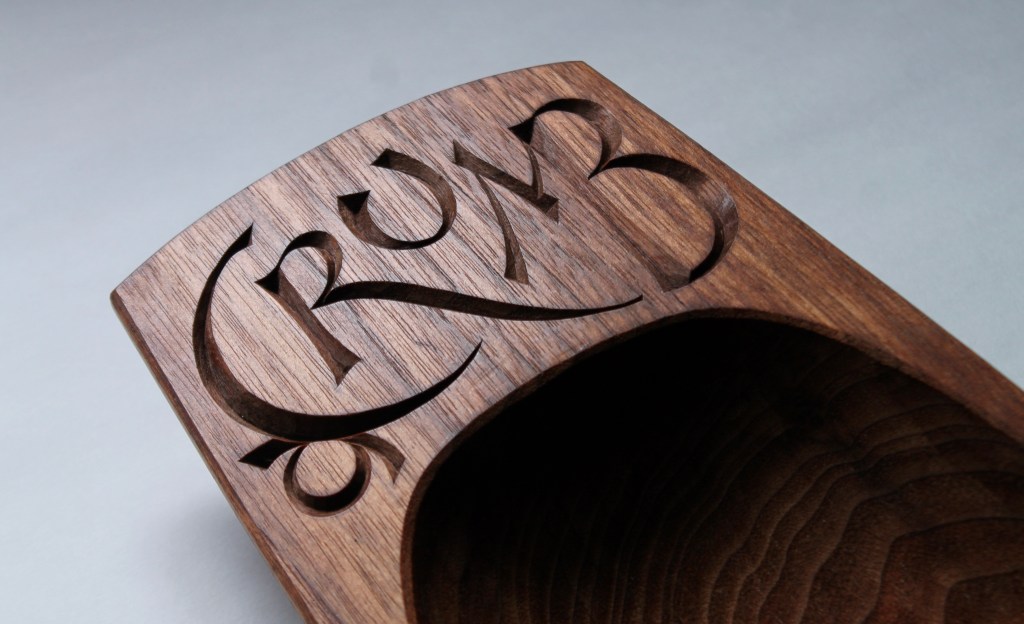
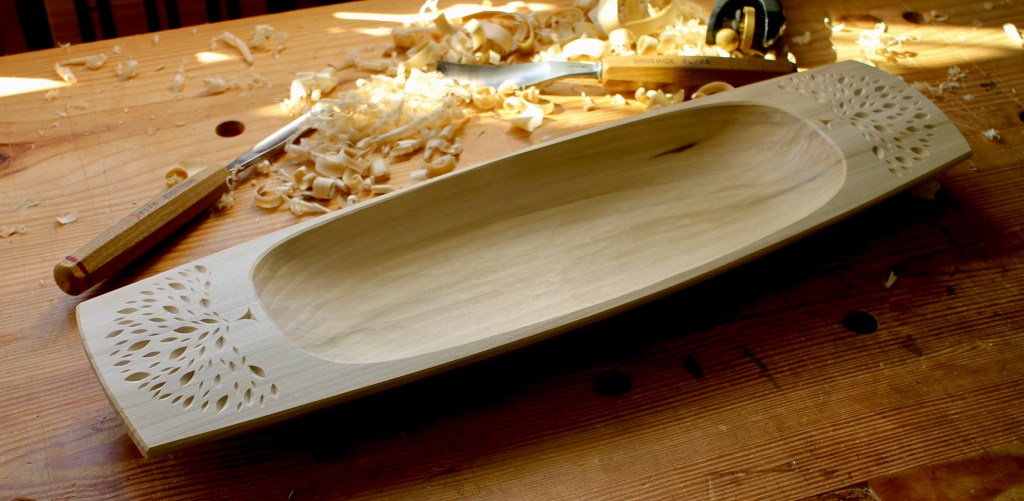
Departing from the tree design I’ve carved on the other Bowls-from-Planks, I carved an excerpt from an Emily Dickinson poem on the handles.

A little bread—a crust—a crumb—
A little trust—a demijohn—
Can keep the soul alive—

— Emily Dickinson, from Poem 159 (1896)

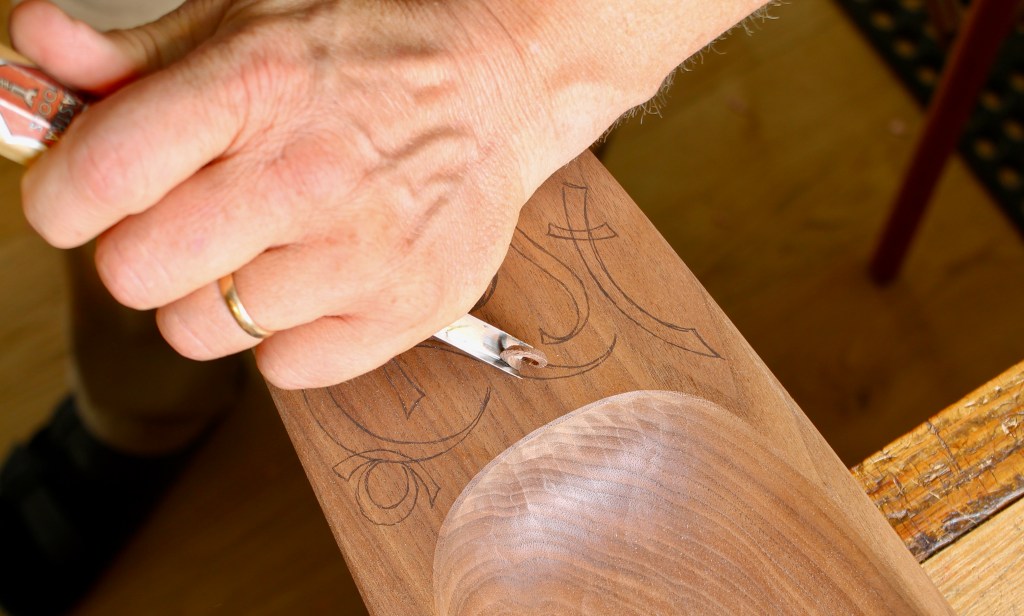
I adjust my letter carving technique depending on the size and style of the letters as well as according to the hardness of the wood. In the case of this walnut, I began with a v-tool after transferring my drawing to the wood with graphite paper.

I use a mallet for this v-tool work. The little taps provide controlled bursts that provide a lot of control.

I leave the lines and then some. Every wall and junction will be carved over. This just gets rid of the majority of the waste and goes relatively quickly.

There’s what it looks like after the v-tool work. Ready for the more painstaking knife and gouge stage.

There’s a shot of the foot and underside of the bowl. I carved flutes under the handles of this one, a technique I demonstrate in class that can be used in many other circumstances.

If you’re interested in purchasing this walnut bowl, please email me at dandkfish@gmail.com. It is 21″ long, 6″ wide, and 2″ high. The price of $950 includes shipping. SOLD

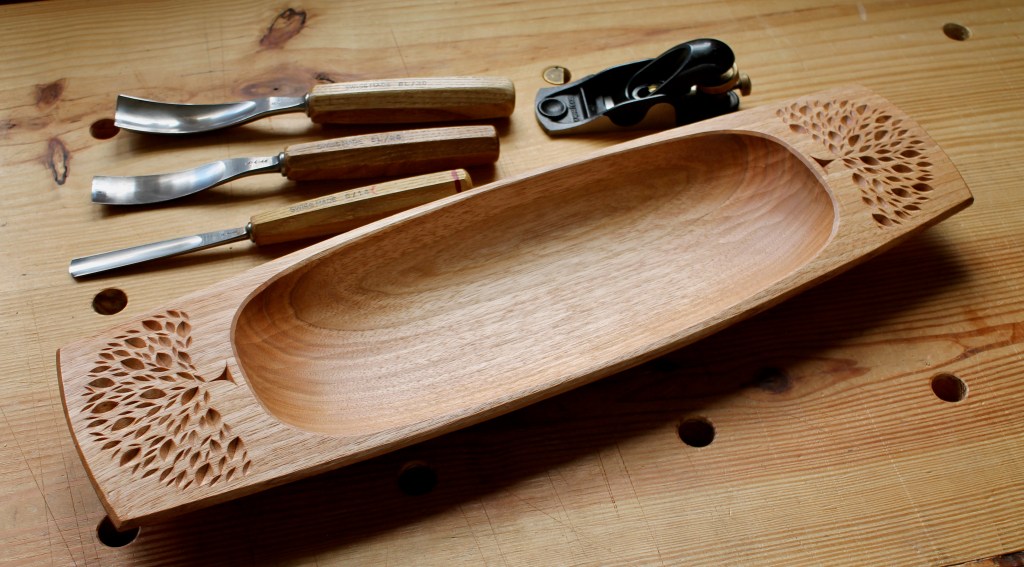
Tulip Poplar Bowl-from-a-Plank 2024, 21″ x 6″ x 2″

During class, I demonstrated each step on my own blank, but often only on half or a quarter of it. I brought it home with me and finished it up to take with me in March for an example. There it is, above. We used tulip poplar for this class, which is ideal in many ways. Softer than cherry and walnut, but harder than basswood (linden) and butternut, it works easily enough (even as a dry plank) while still holding crisp detail. It makes sense that it was such a traditional choice for bowls.

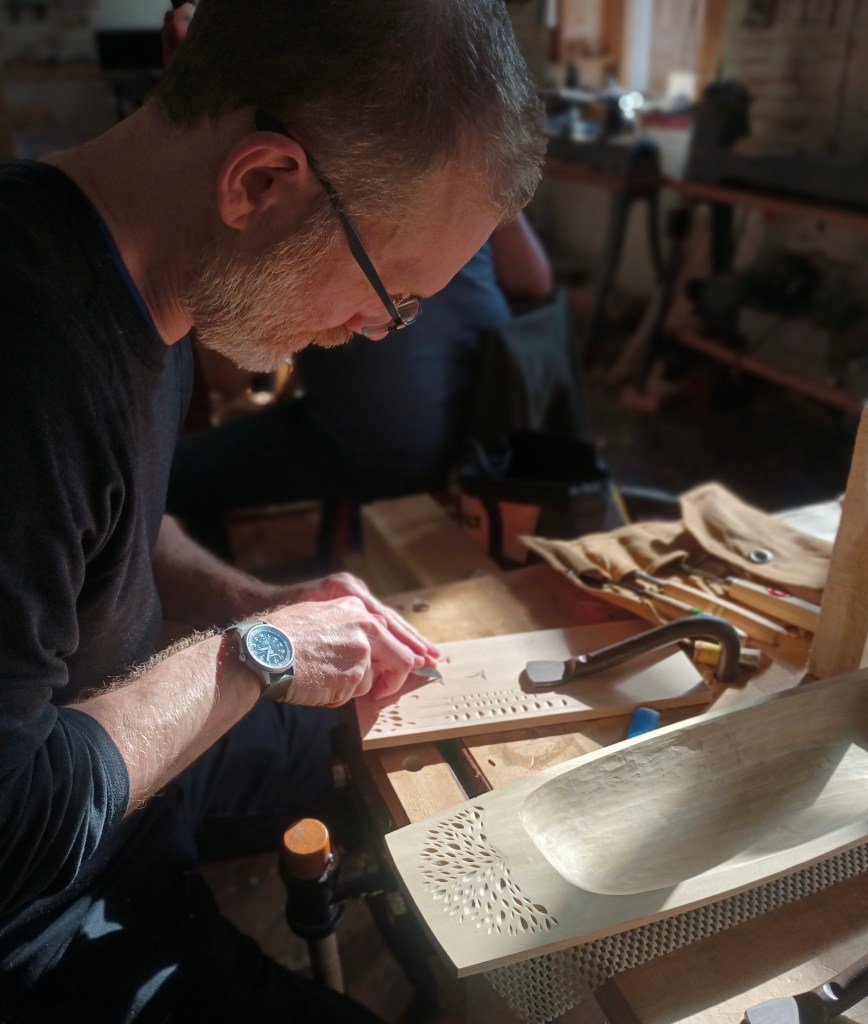
There’s one of the students, Jon, practicing his decorative carving on a sample board with his tulip poplar bowl, almost finished, beside him. Pete’s shop gets wonderful afternoon light coming through the windows. Ideal for carving. It was another wonderful group and we had a great week together.

The pale greenish hue of tulip poplar wood will mellow to a pleasing soft brown with subtle variations in the grain.

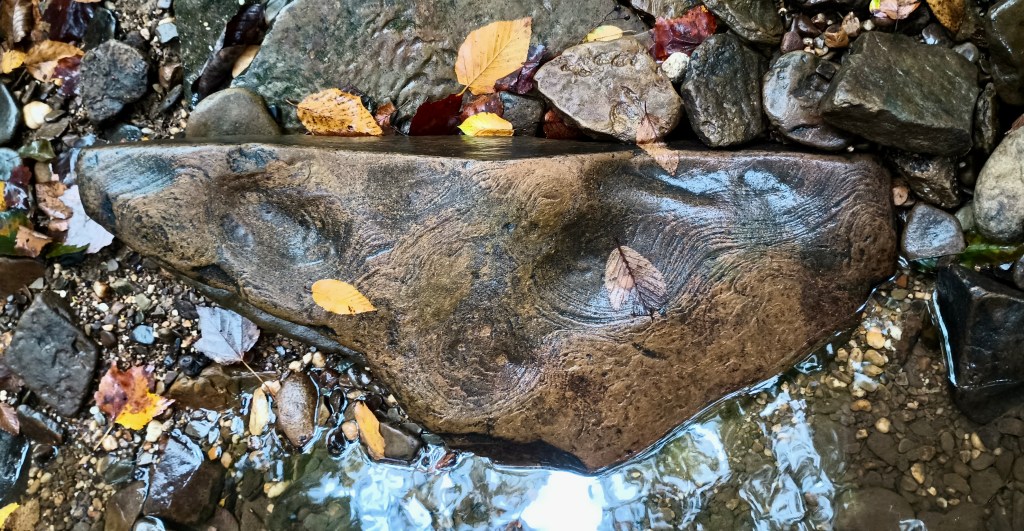
The tulip poplar leaves around here are mellowing pretty nicely as well.

Posted in bowls, Lettering, teaching, trees, Uncategorized, walnut | Tagged , , , , , | 8 Comments

March Bowl Class at Pete’s

Fall is here and I’m excited for my October class at Pete Galbert’s. I’ll burrow into the shop for the winter, then we’re going to do it again in spring. Registration for a class at Pete’s March 10-15 opens up on Monday, October 7 at 8:00 a.m. Through the week, we’ll carve the bowl above, right down to the final cuts and finish. But more importantly, we’ll learn how to adapt to make other bowl designs, sharpen gouges for optimal performance, lay out other bowl forms, carve decorative motifs, and more. In the August class, we even were able to touch upon the basics of letter carving. It’s really about the understanding and skills you take home with you, more so than the bowl. We call it Bowl Carving Exploration.

The trees are still mainly green around here, but some leaves have begun to fall.

Posted in classes, Uncategorized | 6 Comments

Wandering Cherry Bowl

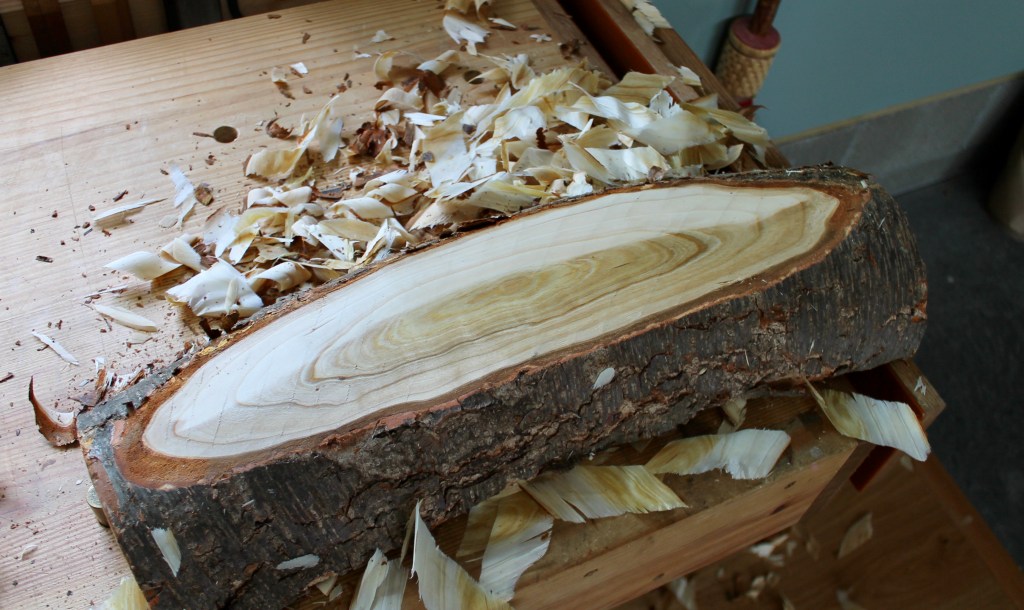
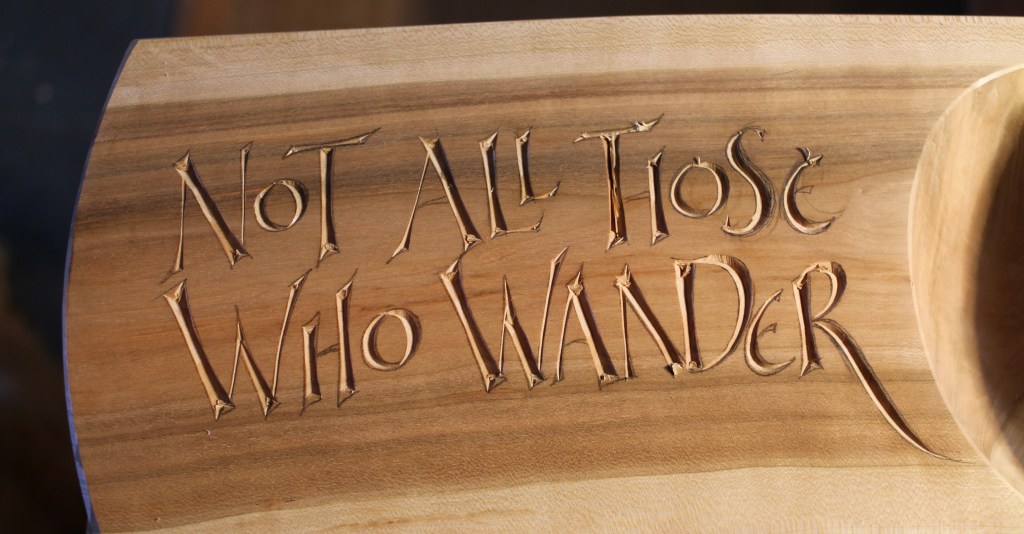
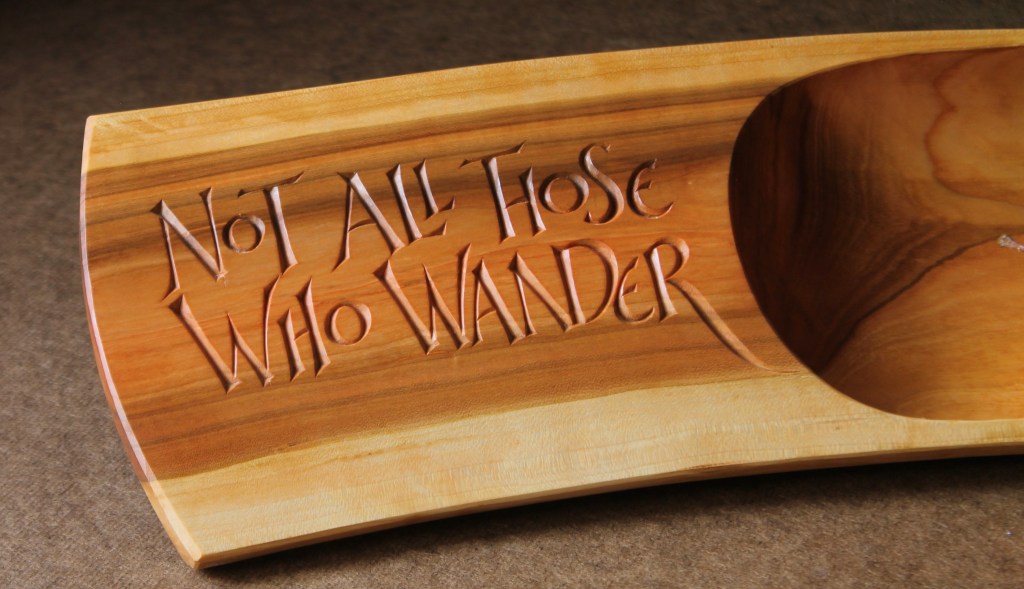
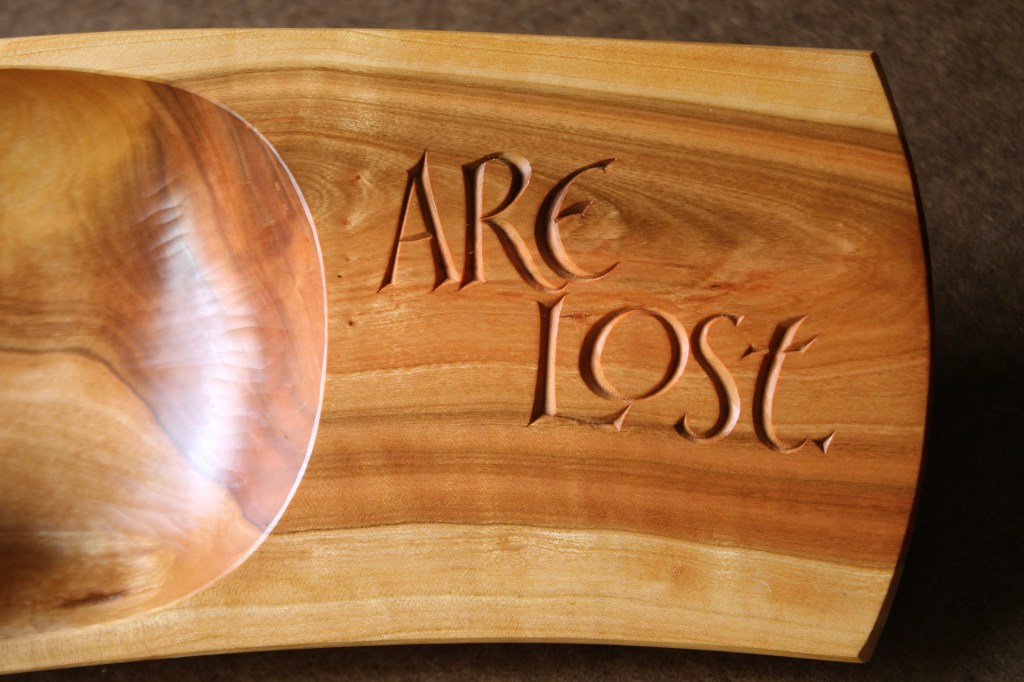
This is the third time I’ve carved these words from J.R.R. Tolkien on a bowl, but it has been several years. Each bowl has been different, and so has the lettering. I think working with green wood straight from the tree, especially, can be a form of wandering. We don’t know where the journey into a piece of tree will take us. We respond to discoveries made along the way. That’s the way it was with the bowl above that came from the lower half of the cherry log below.

I brought this chunk home because I was intrigued by the top half with the “handle” of a branch that had merged back into the trunk of the tree. I sawed the piece in half and set the top aside. I hadn’t planned anything for the bottom half, but staring at it there, I decided to explore it a bit. It was nearly two feet long and only six or seven inches wide, bending a little in both directions.

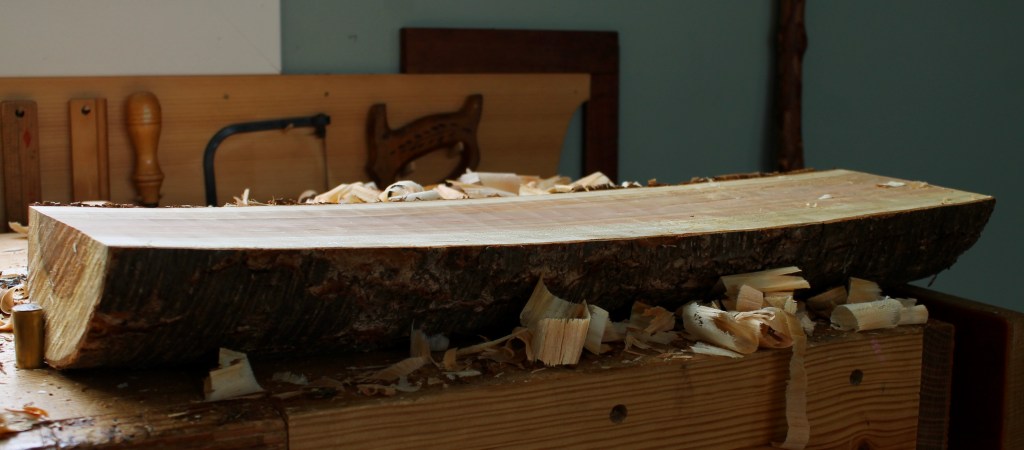
I shaved a flat on the bottom. You can tell by the growth ring pattern that the fibers curve up (or down, in this shot) from the bottom toward both ends.

I flipped it over and shaved the top surface, following the general flow of the fibers. I finished by working across the grain with a plane.

I shaved the top flat across from side to side. As the bowl dried after the green carving stage, the top moved into a gentle arch.

The layout of everything was just freehand sketching. Here you can just see a general safe zone mapped out for the foot. The final shape would be refined later. I’m working across the grain with an adze to remove the wood under the long handles.

It wasn’t until I wandered into the hollow that the whole idea for this bowl came together.

This is a shot of the hollow just after I’ve carved it in the green stage. There was a dark growth ring band at the sapwood/heartwood border on one side of the log. It brought to mind a hill and sky. And I thought about a journey across that landscape.

After a few weeks of drying followed by the final carving stages, I started sketching Tolkien’s well-known words. Here they are in the context of the whole stanza:

All that is gold does not glitter,
Not all those who wander are lost;
The old that is strong does not wither,
Deep roots are not reached by the frost.

— J. R. R. Tolkien, from “The Riddle of Strider”, The Lord of the Rings: The Fellowship of the Ring

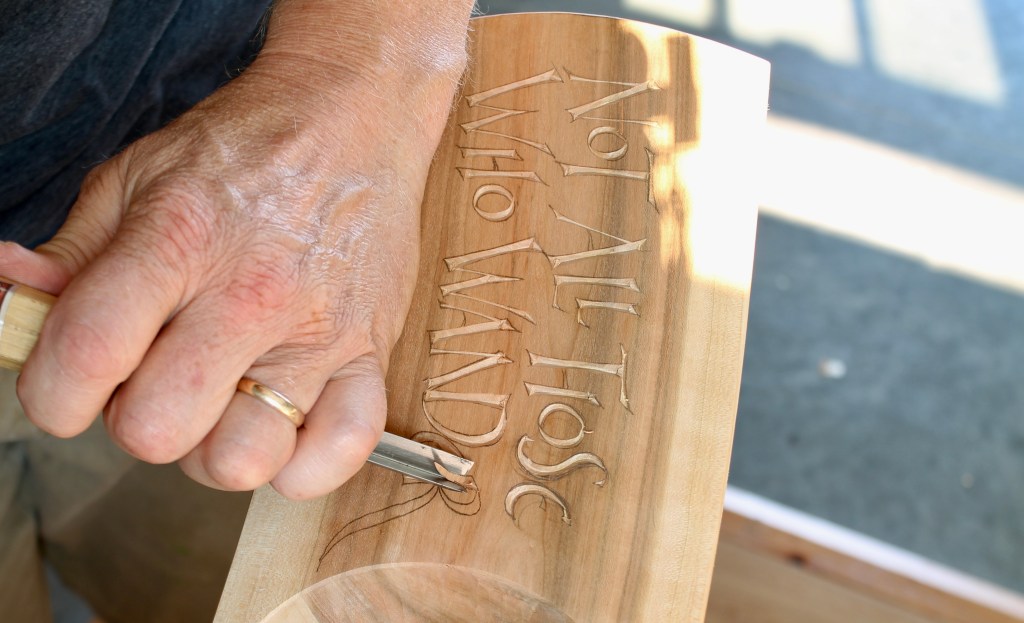
In this (particularly) hard cherry, I removed much of the wood with a v-tool before going in with knife and some gouges.

Above is where I stopped with the v-tool. I have left the lines, and then some, for the next stage with the other tools. In terms of time in the letter carving (not including the designing/drawing time), it’s probably not even 20% along at this point. As with bowl carving, removing the bulk goes relatively quickly.

I’ll end with a few shots of the finished bowl below. Dimensions are 22 1/2″ long, 6″ across, and 3″ high. It is available for purchase. $1200 includes insured shipping to you. If you’re interested, please email me at dandkfish@gmail.com. SOLD

Posted in bowls, cherry, Lettering, quotes and excerpts, Uncategorized | Tagged , , , , , | 6 Comments

A Silver Maple Bowl and My New Old Drawknife

Silver Maple Bowl 2024, 16 3/4 x 9″ x 2″

I like this silver maple bowl that I just finished, and I liked making it even more. Part of the reason is that it gave me an opportunity to use a curved (cooper’s hollowing) drawknife that I had picked it up on eBay a couple years ago.

Whenever you’re working with a good drawknife, it seems like the birds sing more sweetly. That held true once again after I honed it up and used this cooper’s hollowing drawknife to shave a series of concave facets on the sides and ends of the bowl. Above, I’m shaving the uppermost facet. I started next to the foot, concentrating on leaving a good line on the left edge of the facet. Then same with the adjacent one after that, and so on.

Here’s a photo of the drawknife. The edge is about 6″ long. The outer edges of the handles are about 15″ apart. I can’t see any stamp on it, but I’m nearly certain it was made by D. R. Barton. They made great tools in Rochester, NY beginning in 1832. I have a couple other drawknives by them and this one shares the characteristics.

Here’s an edge-on shot. A relatively gentle curve compared to some others. Probably made for hollowing the staves of larger barrels, with less curvature than those of smaller containers.

And there’s the back side.

After working on the sides, I adjusted the bowl horse to hold the bowl sideways as I worked across the end grain, skewing the knife to get a cleaner cut. The last row, right under the handles, was a little tighter, so I used a gouge there.

I rotated the bowl up almost vertical and shaved the ends of the handles with a regular drawknife.

Again, skewing the blade eases the end grain cuts.

Then, more fun easing the sharp edges by shaving chamfers with the drawknife.

For the edge of the hollow, I switched to a sloyd knife. I’m guiding it with both hands here.

Above is the outside of the finished bowl. The dimensions are 16 3/4″ x 9″ x 2″. This silver maple had some ambrosia streaks in it, a reaction of the tree to fungus carried by boring beetles. The dark spots on the bottom there are beetle holes. The lighter wood is sapwood (near the bark) and the darker wood is heartwood. This blank is a radially-split blank, so, like quarter sawn. That meant the broad foot stayed flat even as it dried.

And there’s the view from the top. A broad shallow bowl useful for all sorts of things.

From this low angle, the hollow facets from the drawknife can be seen. And an apple for scale.

The line of gouge chips on the end emphasizes the curve of the handle, but is subtle enough to not compete with the strong character of the color and figure in the wood. Those of you from the class at Pete’s might recognize this pattern from our sample boards.

This bowl is available for purchase. If you’re interested please email me at dandkfish@gmail.com. The price of $600 includes shipping. SOLD

Posted in carving, figure, holding, tools, trees, Uncategorized | Tagged , , , | 4 Comments

Souped-Up Sharpening Shelf

A couple months ago, I wrote a post that included an explanation of a honing method using a board secured vertically in a vise as an aid to honing gouges and chisels. I don’t know what to call it. Honing ledger? Sharpening shelf? I’ll go with alliteration.

Anyway, it allows the gouge to be slid side-to-side across the stone while maintaining a consistent sharpening angle. There’s a photo from the original post above. Call it what you want, but it’s just a scrap board.

A couple weeks ago, this showed up in my mailbox, a gift from Bill Skinner. Bill took the idea and made a deluxe version with a 1/2″ diameter steel rod at the top.

Here’s a shot of the other side. The uprights are joined to the body with a half-lap joint. Overall dimensions are 13″ x 6″ x 7/8″. Bar length between uprights is 11″. There’s a 1/2″ gap between the bottom of the rod and the top of the body.

I tried it out just like it is and it works great, especially with a drop of oil or a little wax rubbed onto the bar.

So, it works just like a board, but the special benefit of Bill’s configuration is that it can be used with the Tormek SVS 38 clamp. I don’t have one, but Bill says it keeps the tool square but still allows the rotation to sharpen the gouge. Above are photos that Bill sent. On the right is a depth setting block to allow for a consistent angle when setting the clamp on a gouge. Again, I don’t have a Tormek or one of these clamps, but Bill says you can get one (the clamp, not the Tormek) used on Ebay for around $20.

Posted in sharpening, Uncategorized | 15 Comments

Silly Putty Cherry Bowl… and Three Spoons

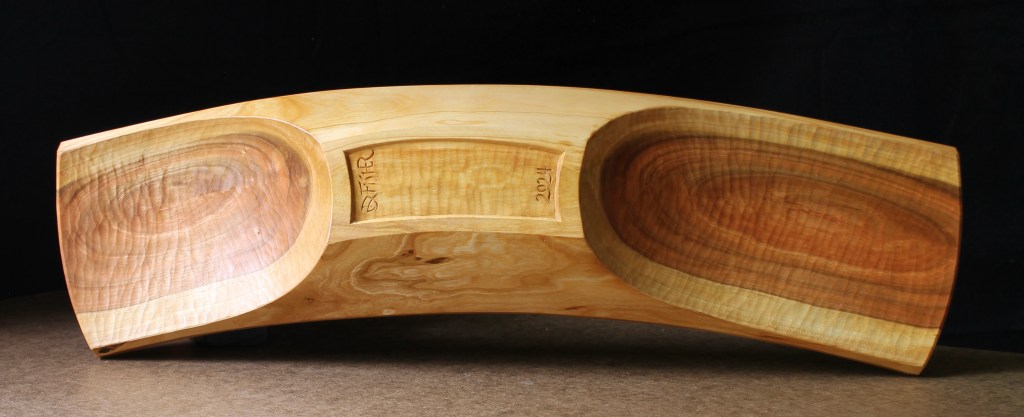
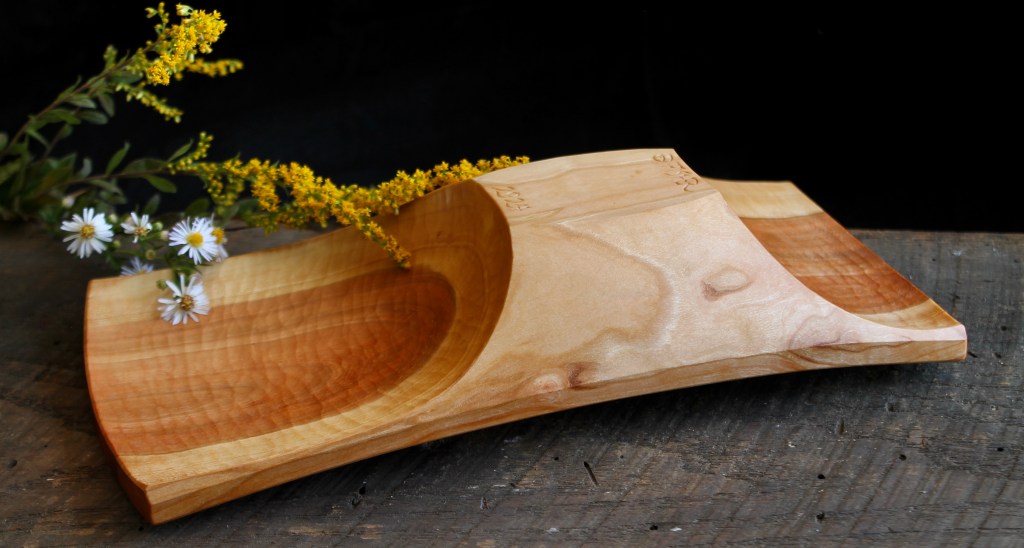
Cherry Bowl 2024, 11 1/4″ x 5 1/2″ x 2 3/8″.

What I make is usually dependent on what bits of tree become available. Responding to each piece is a fun challenge. When I checked out a small cherry tree that had fallen over in a yard, it had already been cut into various lengths. I split open this short chunk, only about a foot long, with a little upward curve and a striking band of heartwood.

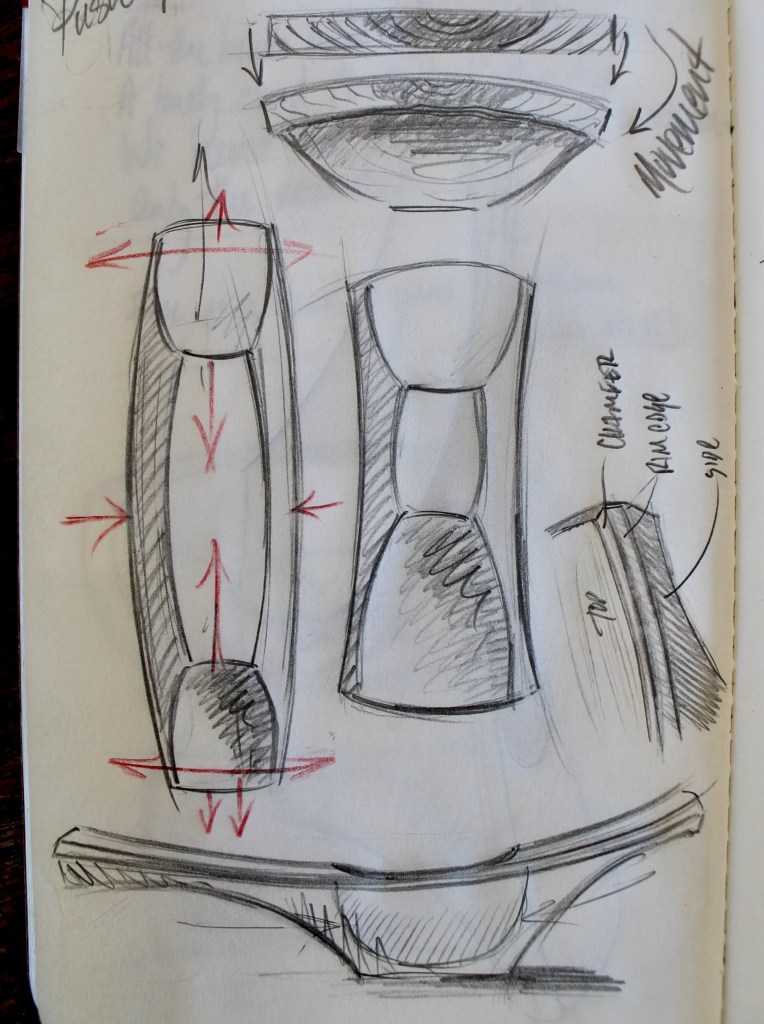
I wanted to keep a lot of that heartwood streak. Long “handles”, like in the Bowl-from-a-Plank design, would allow for that. But this piece of wood wouldn’t fit that exact design. So, I thought about distorting the Bowl-from-a-Plank design, much like you could distort an image of Snoopy from the Sunday comics with Silly Putty. The sketchbook page above reflects some of this mental Silly Putty stretching. The bowl with the red arrows is the Bowl-from-a-Plank (underside), and the rest represent the design for this bowl.

There’s the underside of a Bowl-from-a-Plank, above…

…and a similar view of this latest bowl. The areas beneath the handles are slightly hollow along their lengths and widths.

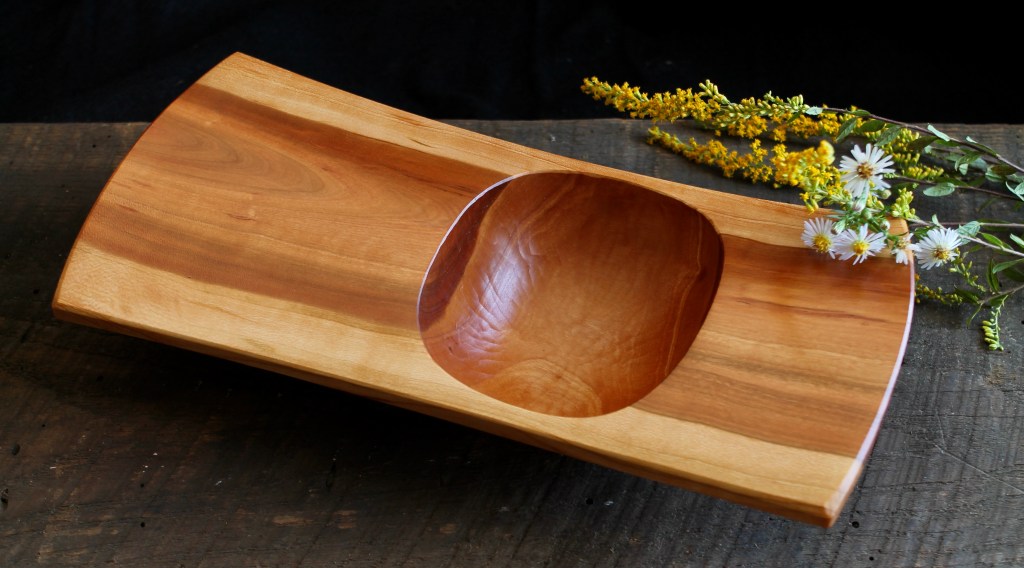
The layout for this one is just freehand sketching. A spoon-bent gouge was needed to shape the steep tight hollow. The hollow itself is 4 1/2″ x 3 3/4″, a nice size for candy or olives.

This bowl is available for purchase. Overall dimensions are 11 1/4″ long, 5 1/2″ wide, 2 3/8″ high. If you’re interested, please email me at dandkfish@gmail.com. $600 includes shipping. SOLD

And now for the spoons…

Normally, I wait until I have more spoons before posting a group, but I know it will be a while before I can get to more (other projects underway). So here are three spoons, all from crooks, finished with pure refined cold-pressed linseed oil and cured in my kiln. Ready to serve. Again, if you’re interested, email me at dandkfish@gmail.com and let me know if you’d prefer to receive a PayPal invoice or send a check. Thanks for looking.

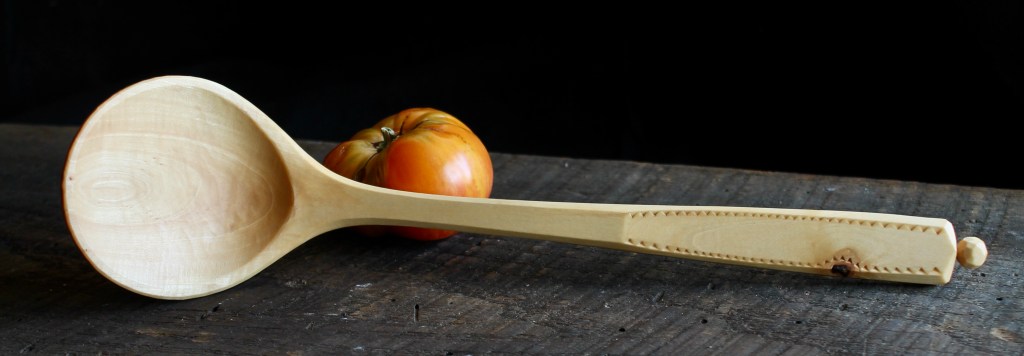
#1: Maple, 12 1/2″ x 3″. The shape of this maple crook called for a ladle with a wide shallow bowl. The second photo gives a better indication of the relatively tight bend from handle to bowl. You can reach deep into the pot. Chip carved handle. $150 includes shipping. SOLD

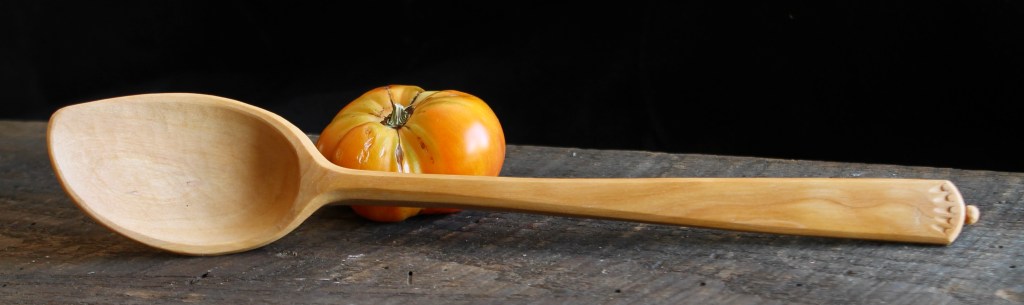
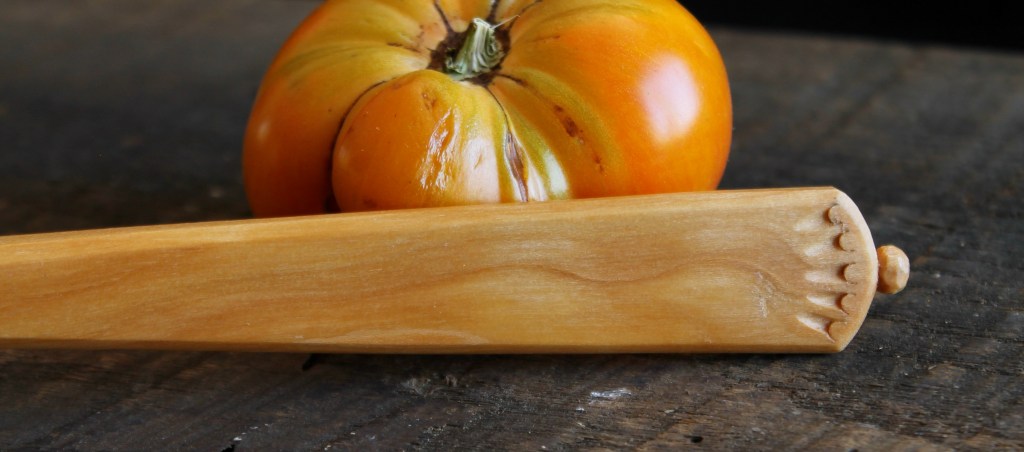
#2: Cherry, 12 1/2″ x 2 1/4″. This is a good general use kitchen spoon for stirring, cooking, serving or whatever. Carved from the sapwood of a black cherry crook. Handle detail below. $150 includes shipping. SOLD

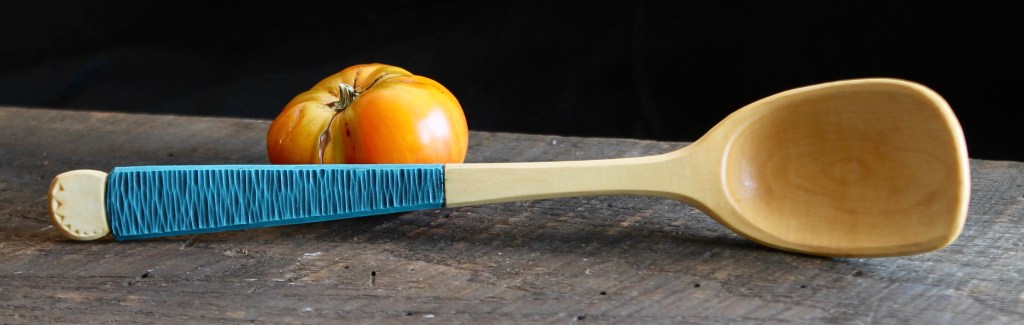
#3: Maple, 11 1/4″ x 2 1/8″. Another good general use spoon. A little more crank than the cherry one above. The handle was textured with a narrow gouge then painted with artist-oils (linseed oil and pigment), black over blue. $140 includes shipping. SOLD

I couldn’t resist adding some goldenrod and aster blossoms to the bowl photos. The goldenrod is in full bloom all along the trail. The colors of fall are coming.

Posted in bowls, cherry, patterns, proportions, sketch, spoons, Uncategorized | Tagged , , , , | 4 Comments