Anybody that wants to get somewhere quickly doesn’t want to ride with me. One of the annoying things I do is pull the car over every half-hour or so to take a 10 minute stroll. This is difficult to do on interstate highways, so I stay off of them when I can. There are all sorts of interesting places on smaller roads. Little cemeteries, shaded and quiet, are good spots.
While I’m meandering around a cemetery, I’m on the lookout for hand-cut stones among the ubiquitous sandblasted granite ones. In other areas, slate is a common material for hand-cut stones. It holds up very well, with crisp edges and fine lines after centuries. It’s the best, but I hardly ever see it in cemeteries around here, even among old stones. Around here, most of the hand-cut stones are marble from the 19th century. Sadly, just about all of them look like they have melted due to the effects of acid rain. Many are completely illegible now. So, the hand-cut stones still in good shape were typically cut from some variety of local sandstone. Apparently silicates typically aren’t effected drastically by acid rain.

I found a gem recently while stretching my legs in a cemetery beside a rural road about an hour west of me, in eastern Ohio. The whole lovely cemetery is no larger than a football field. The stone is in memory of Jacob Welsh who, it records, died on April 19th, 1822, age 67.
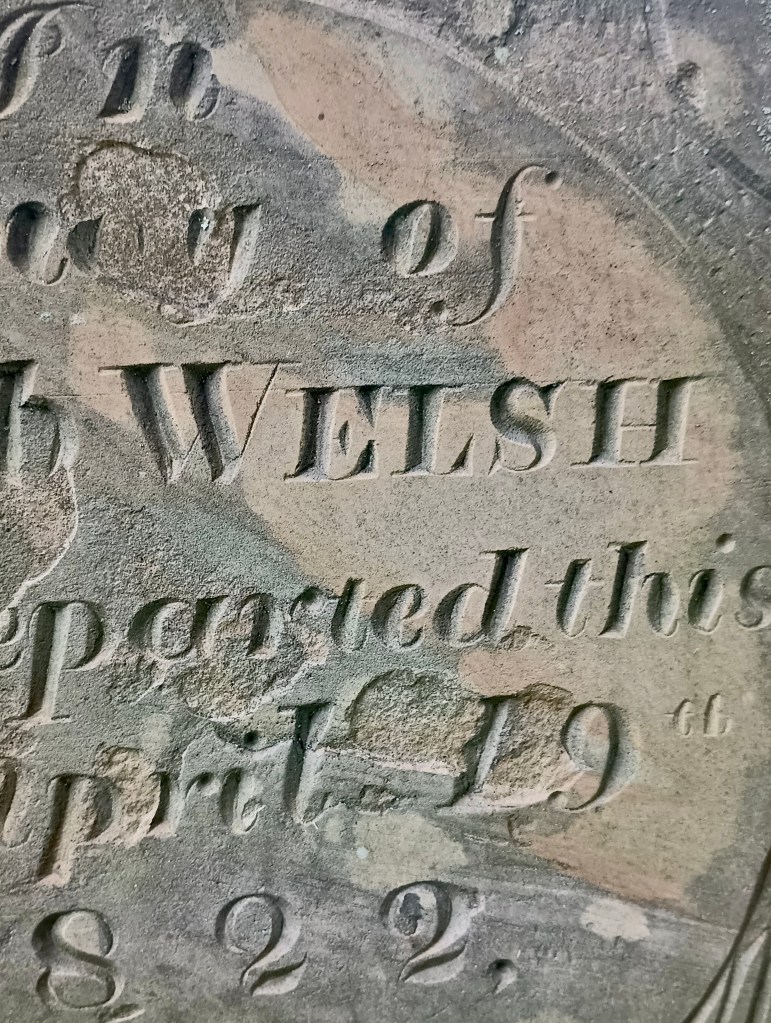
The lettering, clearly influenced by the popular typefaces of the time, was skillfully cut. But in this case it was something other than the lettering that most captivated me.

It was that angel’s head at the top of the stone. “Angel’s Head” stones have a long history. The image is thought to represent the soul of the departed ascending to a heavenly reward. This site features many of them found around Hartford, Connecticut. And this site documents hundreds, going further back, located in the Bale of Belvoir in England.
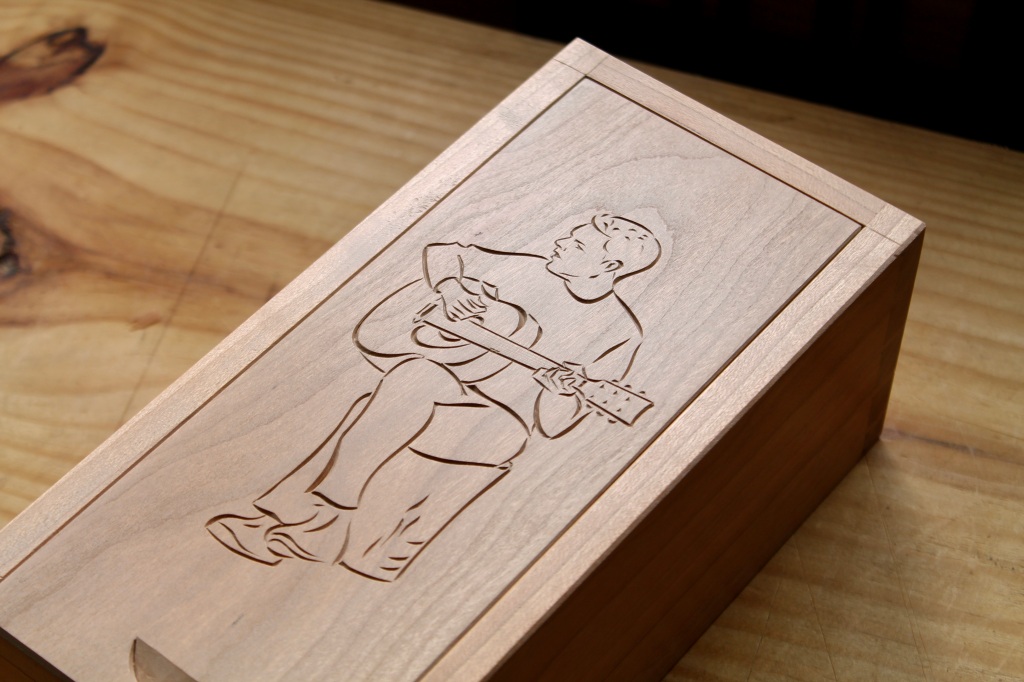
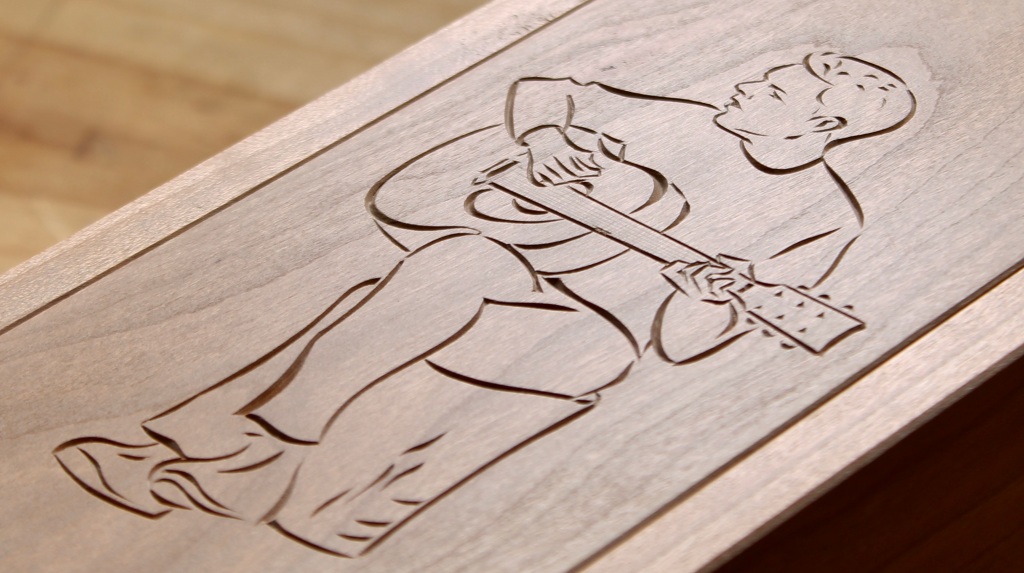
To my eye, there’s something special about this one. It is so animated and delightful, even with the little frown on the face. I love how the carver has merged the frame surrounding the inscription up and into the angel’s face. It seems that he wanted to say that this angel is indeed intended to represent Jacob Welsh. The carver has used texturing effectively on the background and also added interest to the wings. The curves are lovely, and how about that bouffant?
Whoever the carver was, he created a memorial with personality, meaning, and charm with his or her thoughtfulness and craftsmanship. I don’t know much about the funeral industry, but it seems to me that folks are usually directed toward the standard packages while there are lesser-known alternatives that might be a better fit and may even cost less. The cost of machine cut stones is so high that it may well be possible to get a special hand-cut stone in slate or a local sandstone for less. The Lettering Arts Trust in the UK is one organization that is dedicated to helping people navigate that possibility. And their site features gobs of incredible lettering art inspiration.
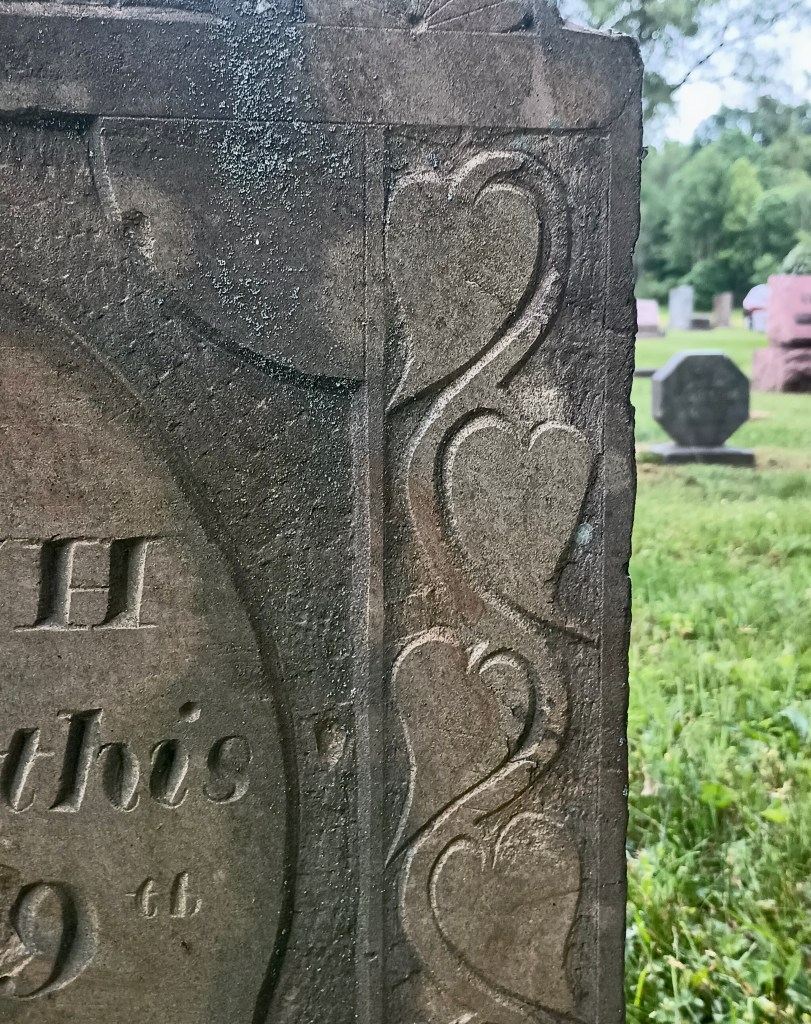
Returning to Jacob’s stone, the vine pattern with heart-shaped leaves is eye-catching. Looks like something that should be on the stiles of one of Peter Follansbee’s chests.

The shoulders of the stone are decorated with these little compass-derived epaulettes.

Here’s a shot of the back of the stone.
As I was writing this post, I decided to see if I could find anything out about Jacob Welsh. Surprisingly, some information popped up after just a few clicks. It turns out Jacob Welsh had a pretty interesting life.
Born in Boston in 1755, he graduated from Harvard at age 19 and fought as an officer in the American Revolutionary War in his early twenties, during which he corresponded with George Washington. He followed this service with some industrial espionage, traveling to Europe and somehow smuggling out a carding and spinning machine and bringing it back to Massachusetts. In 1809, at the age of 54, Jacob left the comforts of Lunenburg, Massachusetts and ventured to what could be considered the Wild West of the time — the eastern Ohio/western Pennsylvania frontier. He donated 50 acres of his newly acquired land (which the government had recently taken from Native Americans through forced treaties and such) to establish “Welshfield”, Ohio. He died there of tuberculosis ten years later, just shy of his 67th birthday.
Yet, none of that is mentioned on his modest hand-cut stone in the little cemetery. It was the hand-carving that drew me in.