On Flutes and Aging

IMG_6541

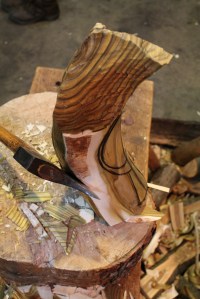
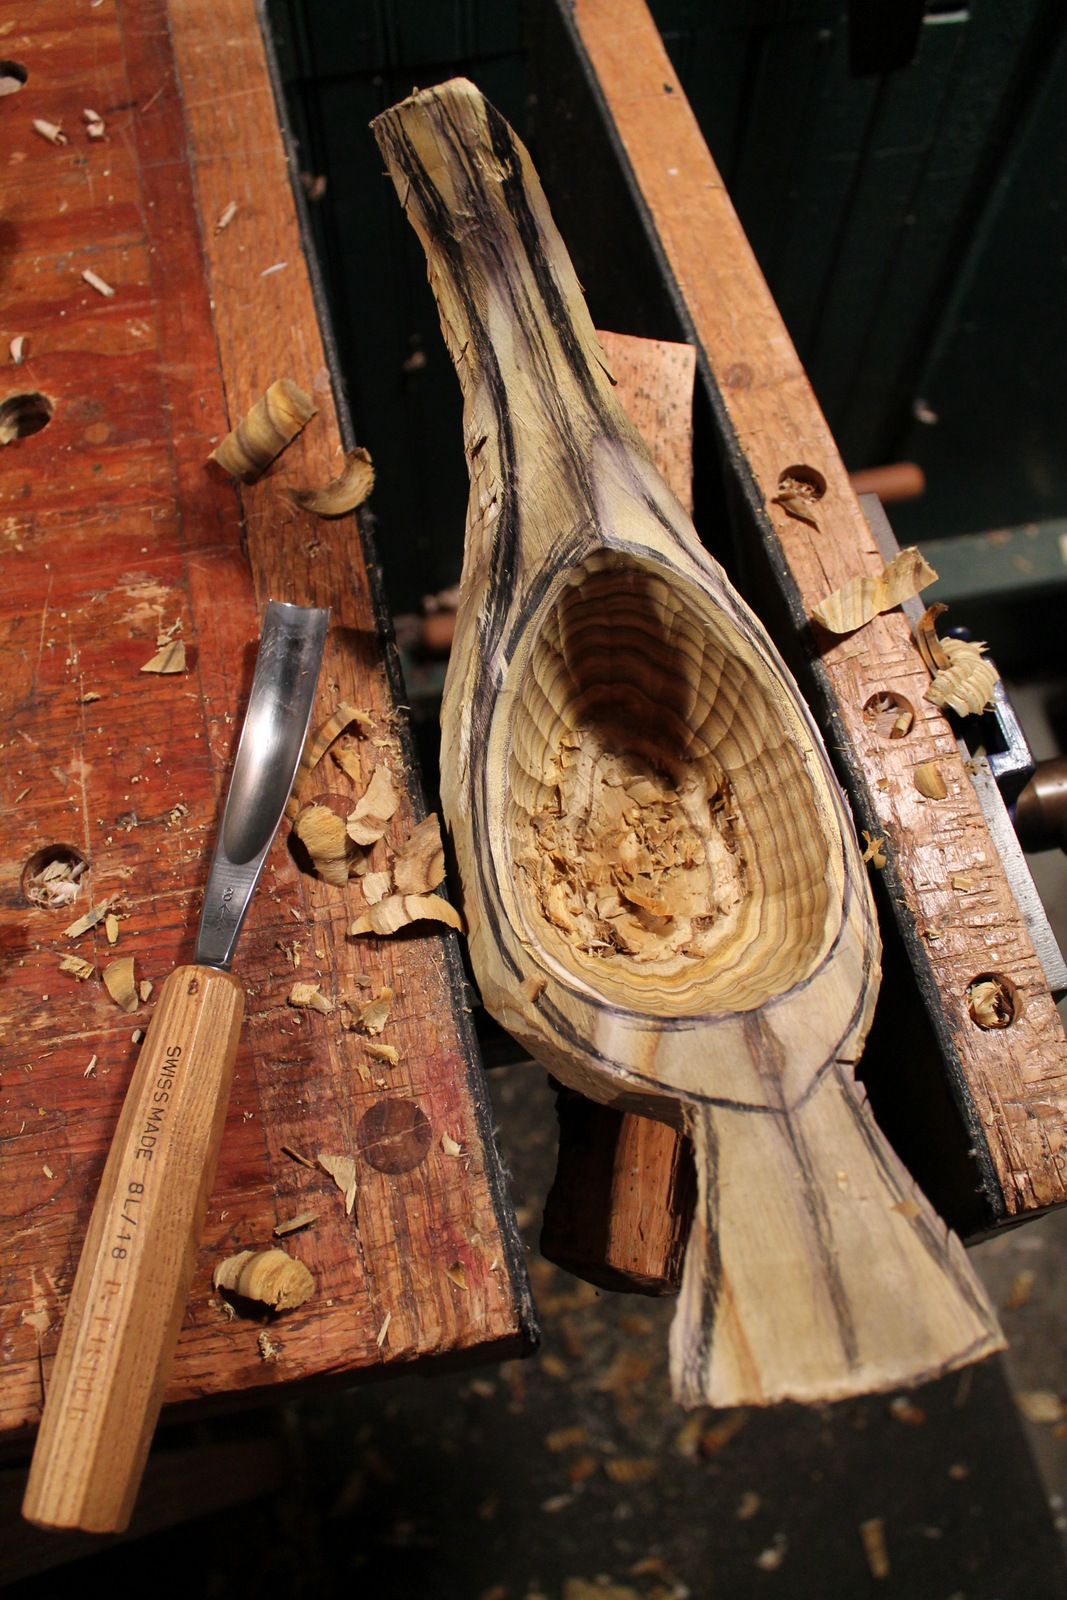
I don’t know much about cheese or scotch, but I’ve heard they can improve if you just let them sit around awhile.  The same might be said for wood sometimes.  This maple bowl underway is from a log that hung around in my shop longer than planned, sealed in a plastic bag.  By the time I got to it, it had developed some nice coloration — early spalting of a sort, I guess.  So, if you’d like to promote character development in maple, try procrastinating. Just don’t wait too long or you’ll have mushy maple.

IMG_6360

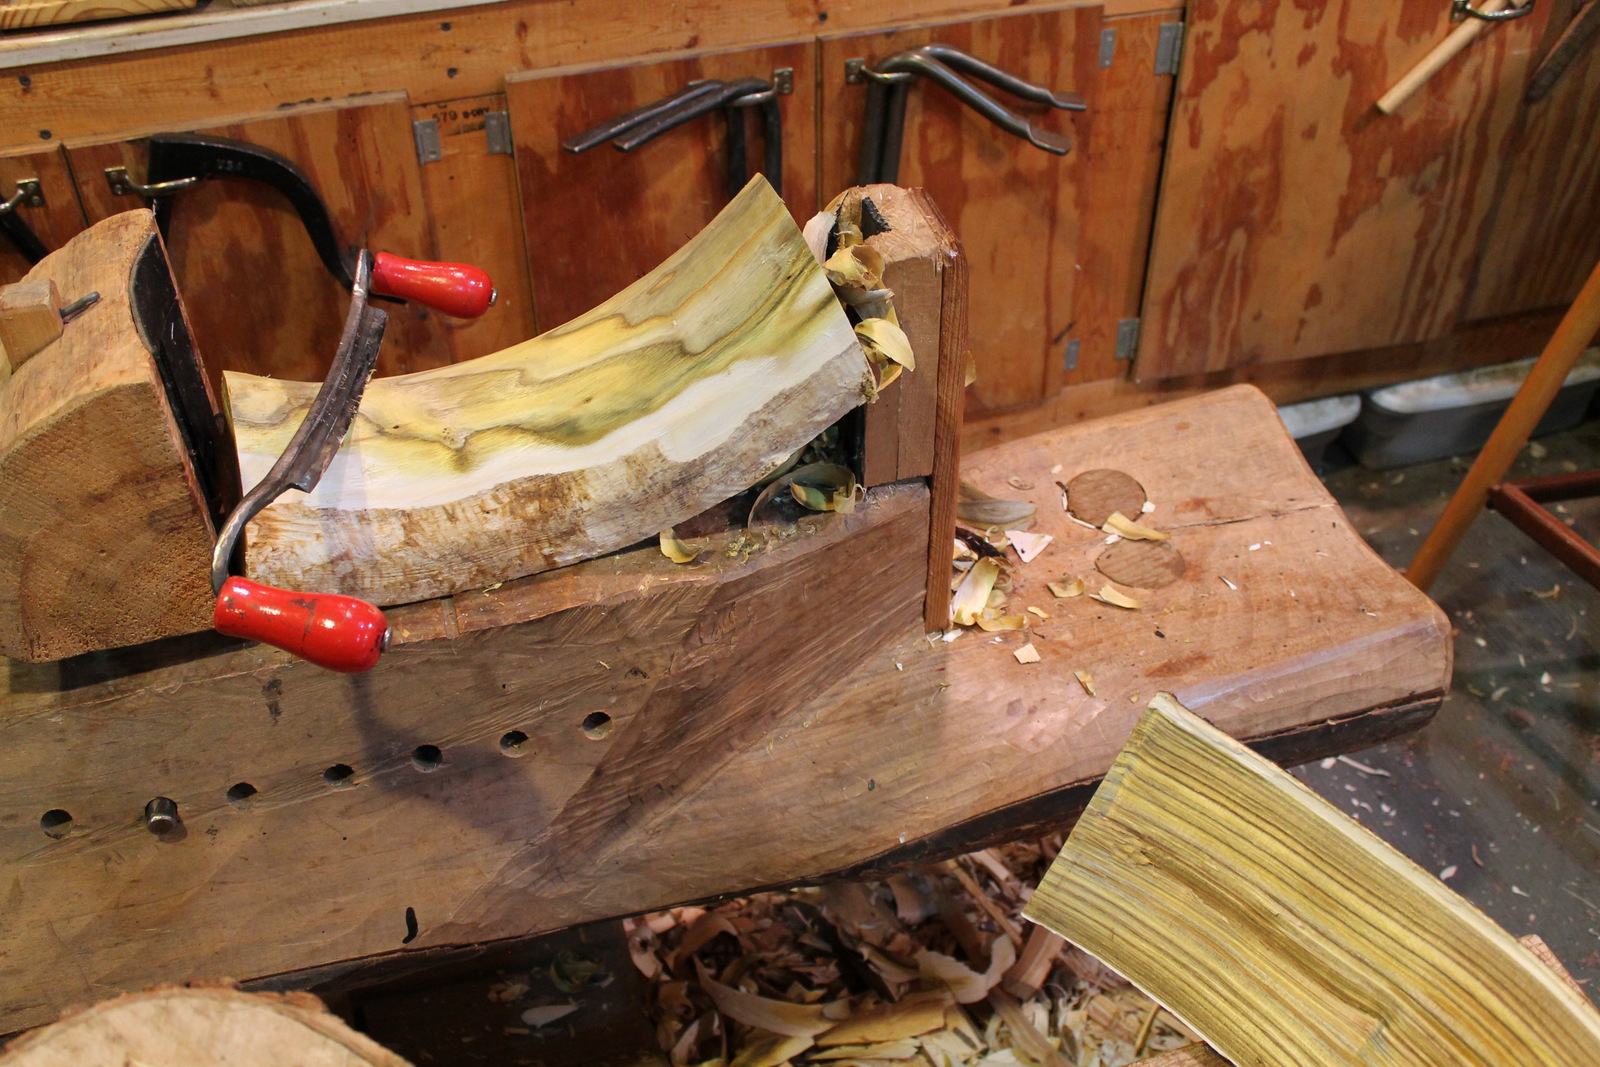
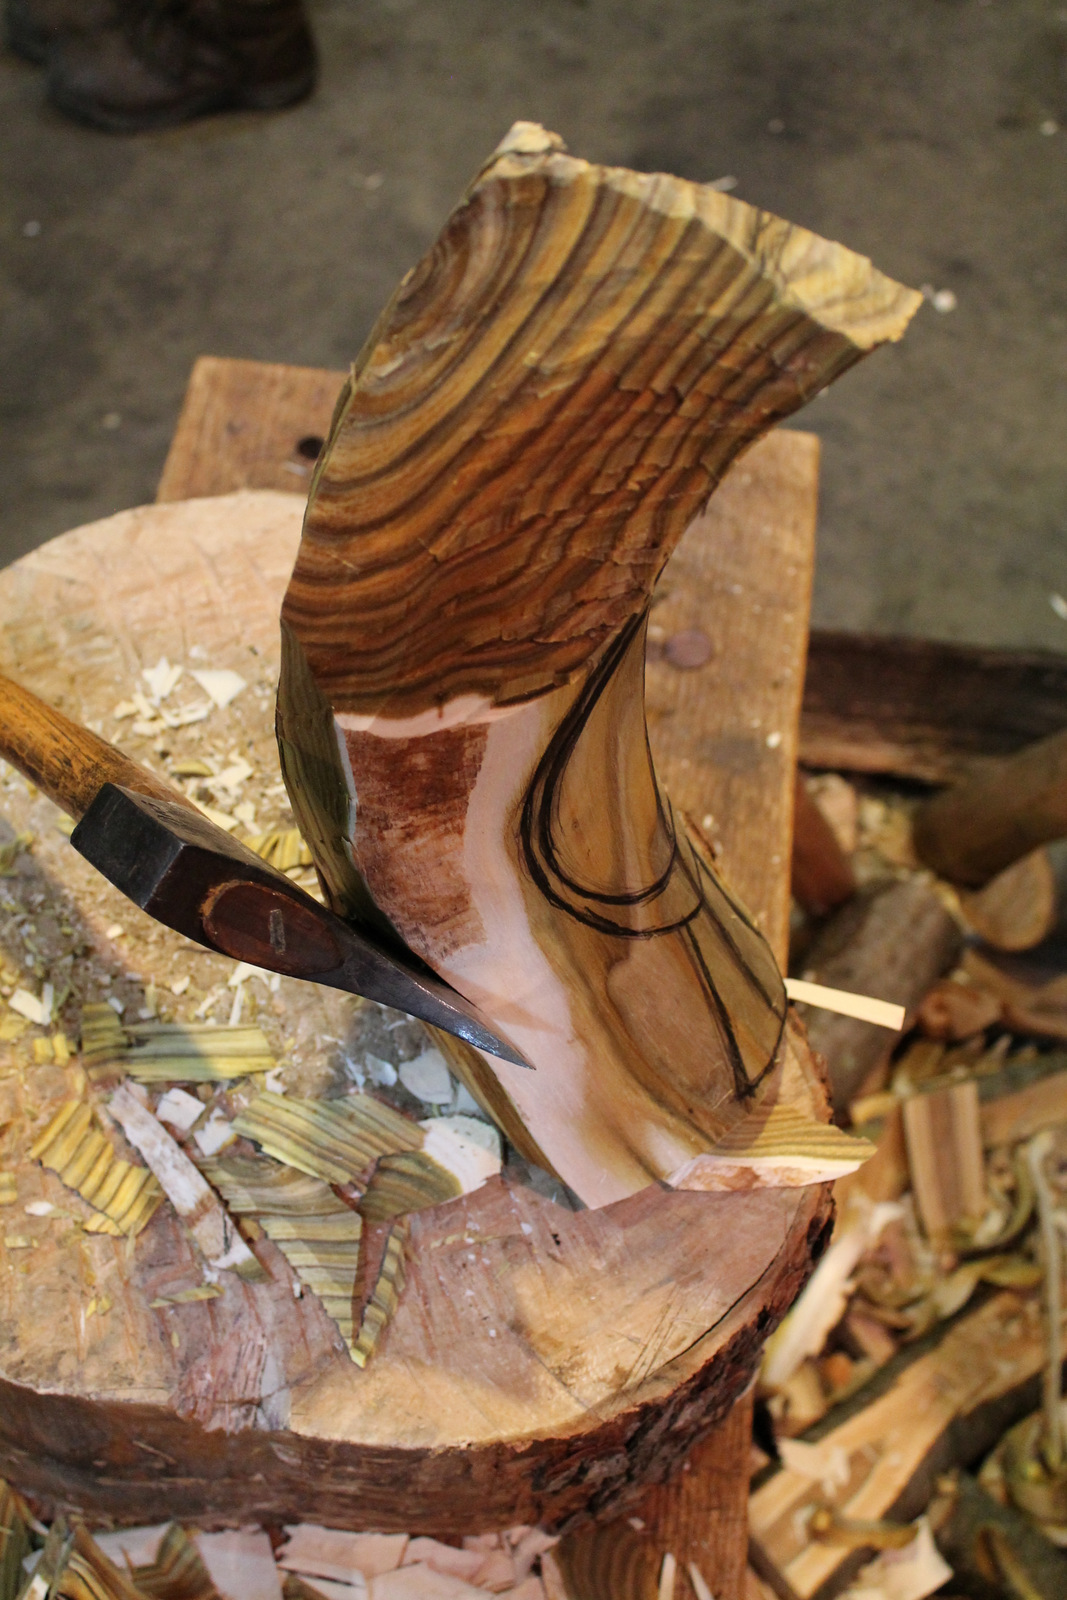
The bowl during hewing.

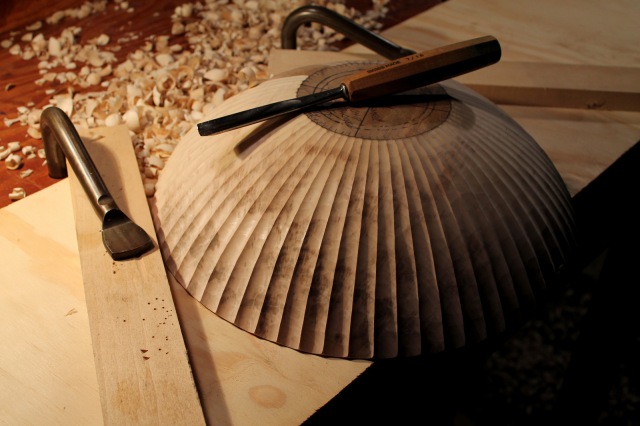
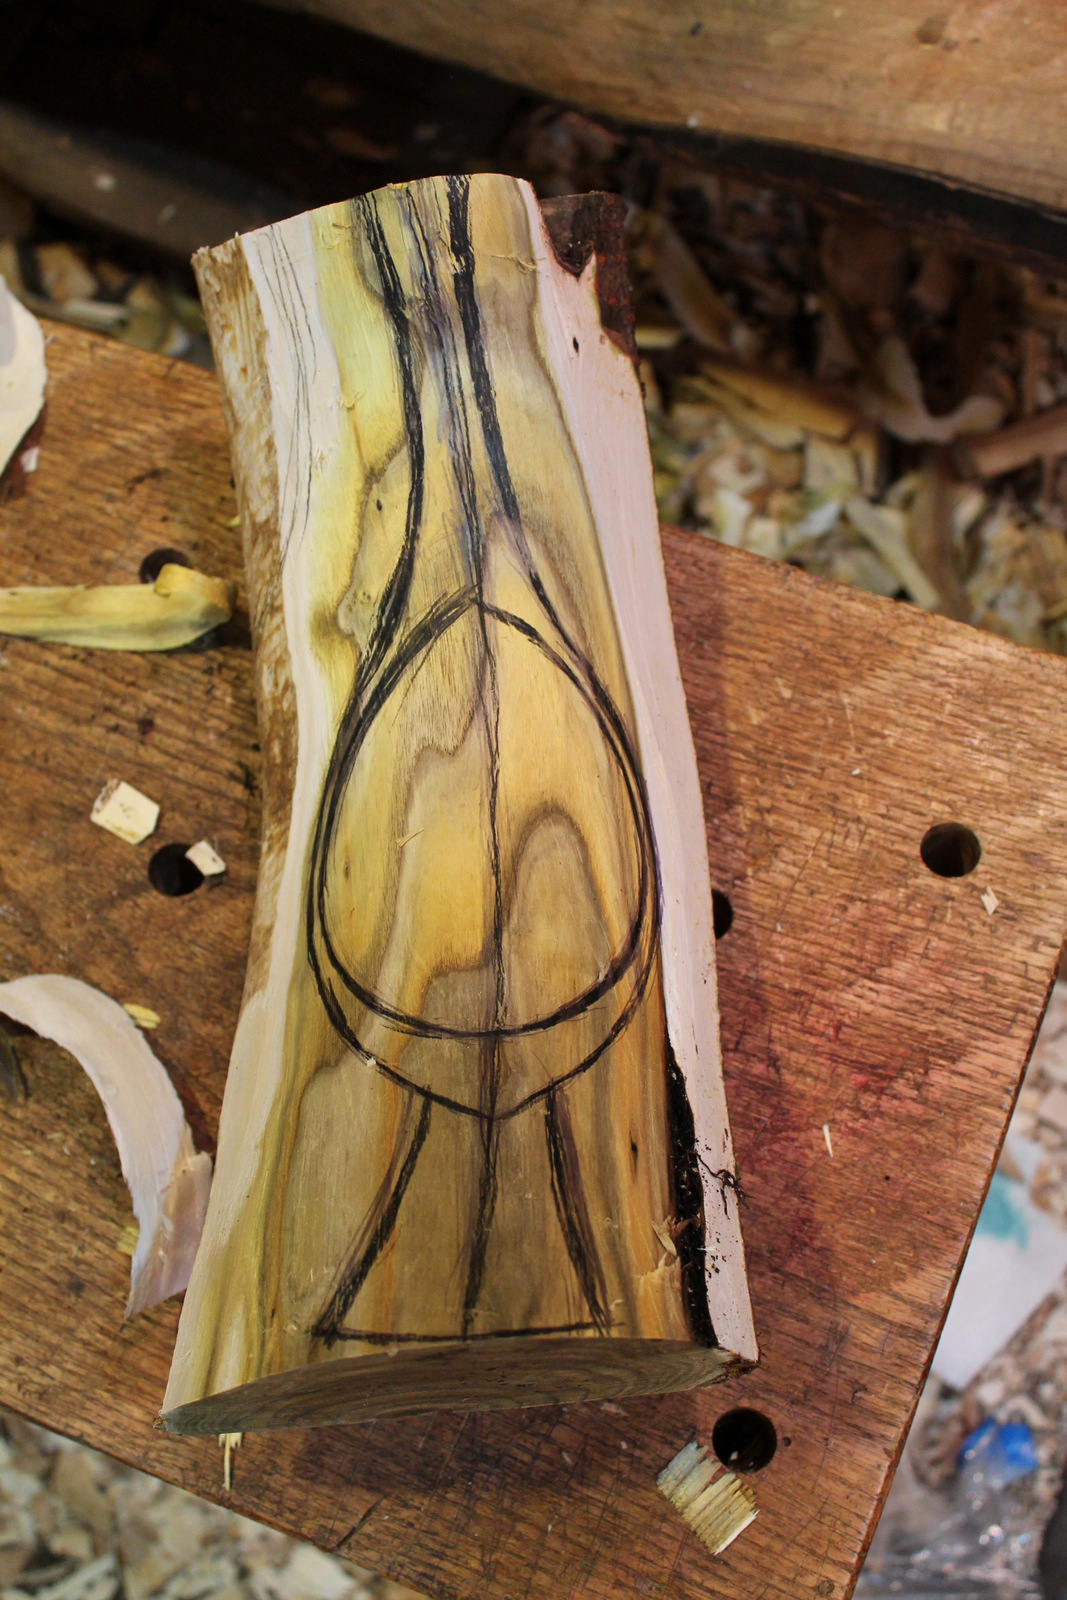
I carved a round bowl from this piece, then carved flutes around the exterior surface.  The fluting itself came after hewing the exterior with an axe, then refining with a spokeshave.  To maintain some consistency in the fluting, I paced around the bottom perimeter and the top perimeter with dividers until I arrived at the same number of divisions around each circle. Lines connecting the marks indicate the arrises between the flutes.

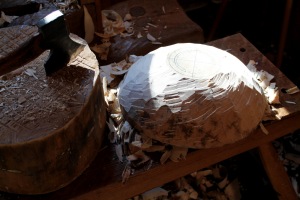
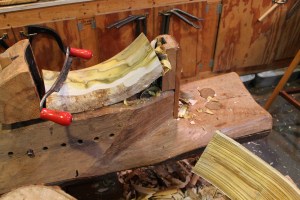
Each flute is carved from the base of the bowl to the rim.  My set up for this can be seen in the photo.  The boards and the holdfasts form a sort of funnel to keep the bowl from sliding forward, but still allow the bowl to be rotated freely as the carving proceeds from flute to flute.  The plywood piece just serves to protect the benchtop as the gouge plunges downward at the end of the flute.

I still have some carving to do on this piece, then I should have some more photos to share sometime.


Posted in green woodworking, holding, layout, patterns, Uncategorized | Tagged , , | 12 Comments

It’s Not Easy Bein’ Green

IMG_6543

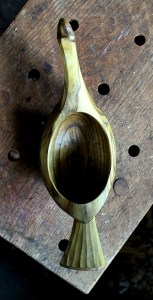
So here is the finished little sumac bowl that I discussed in this earlier post.  No coloring of any kind has been added to this piece; the wood is just that wild.  I like the color against the little tangerines.  Well, at least that’s what I still want to call ’em; I guess they call them “cuties” or something now.  Anyway, they’re not full-size oranges, the bowl is 12 1/2″ long, 4 1/2″ wide, and 5 3/4″ high.

IMG_6517

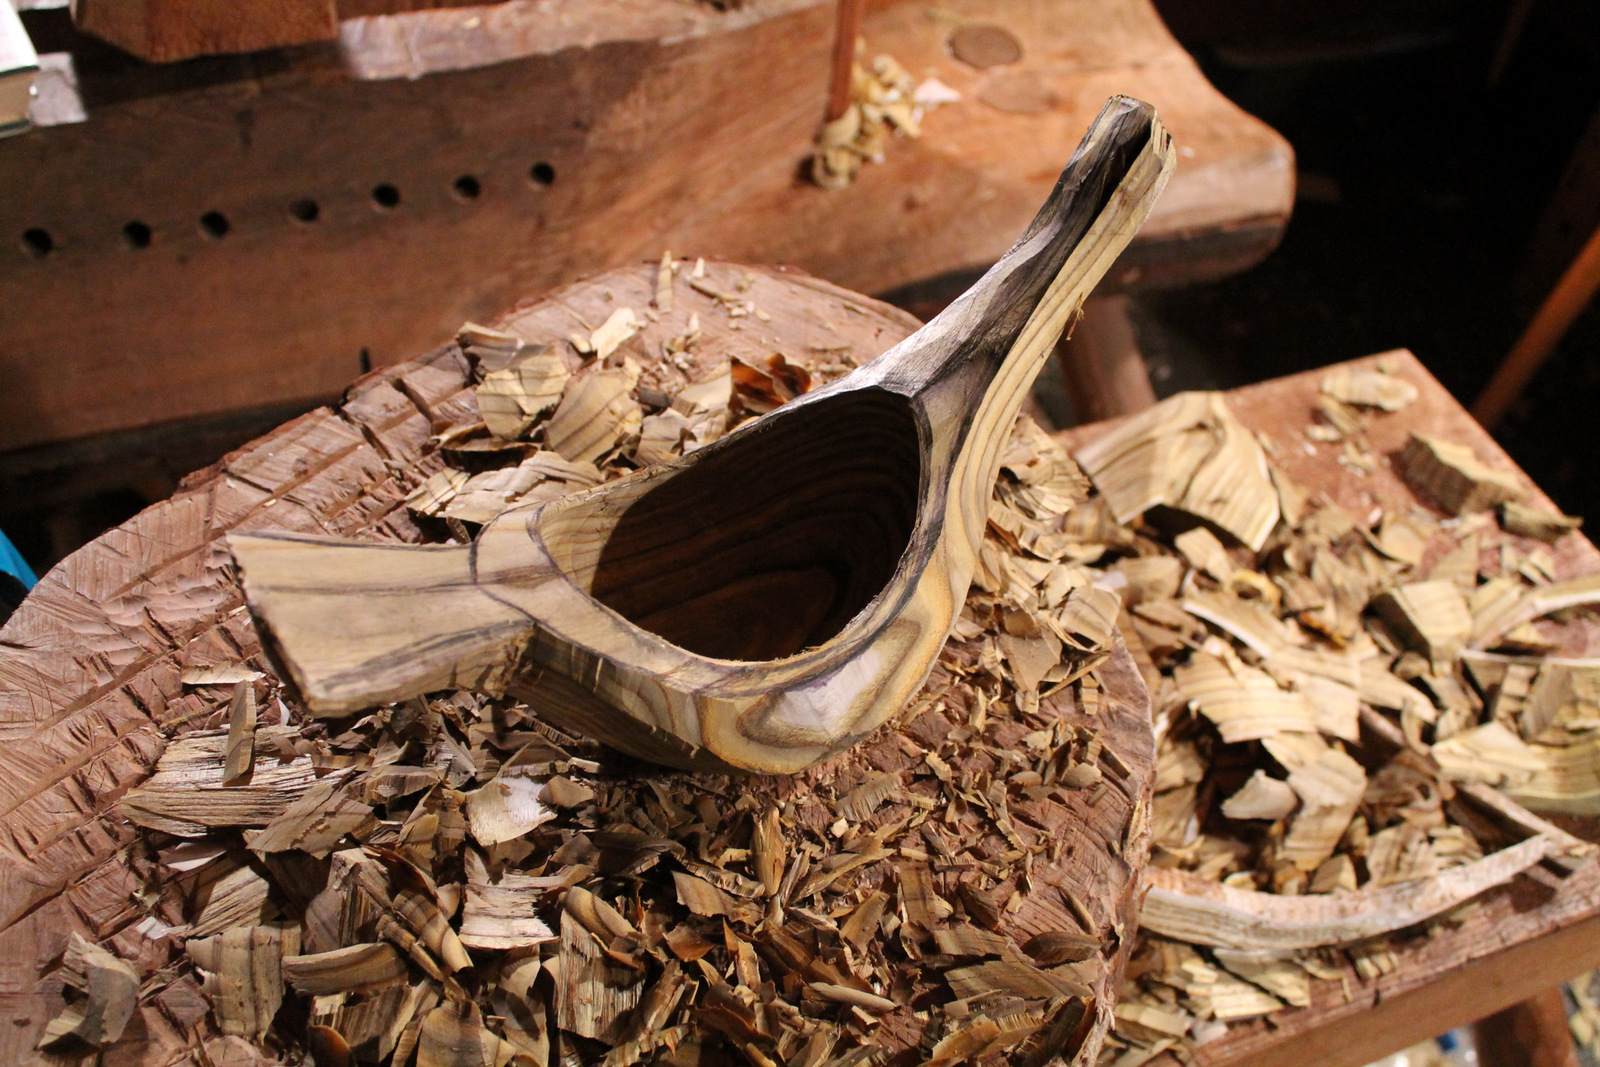
Sumac bird bowl

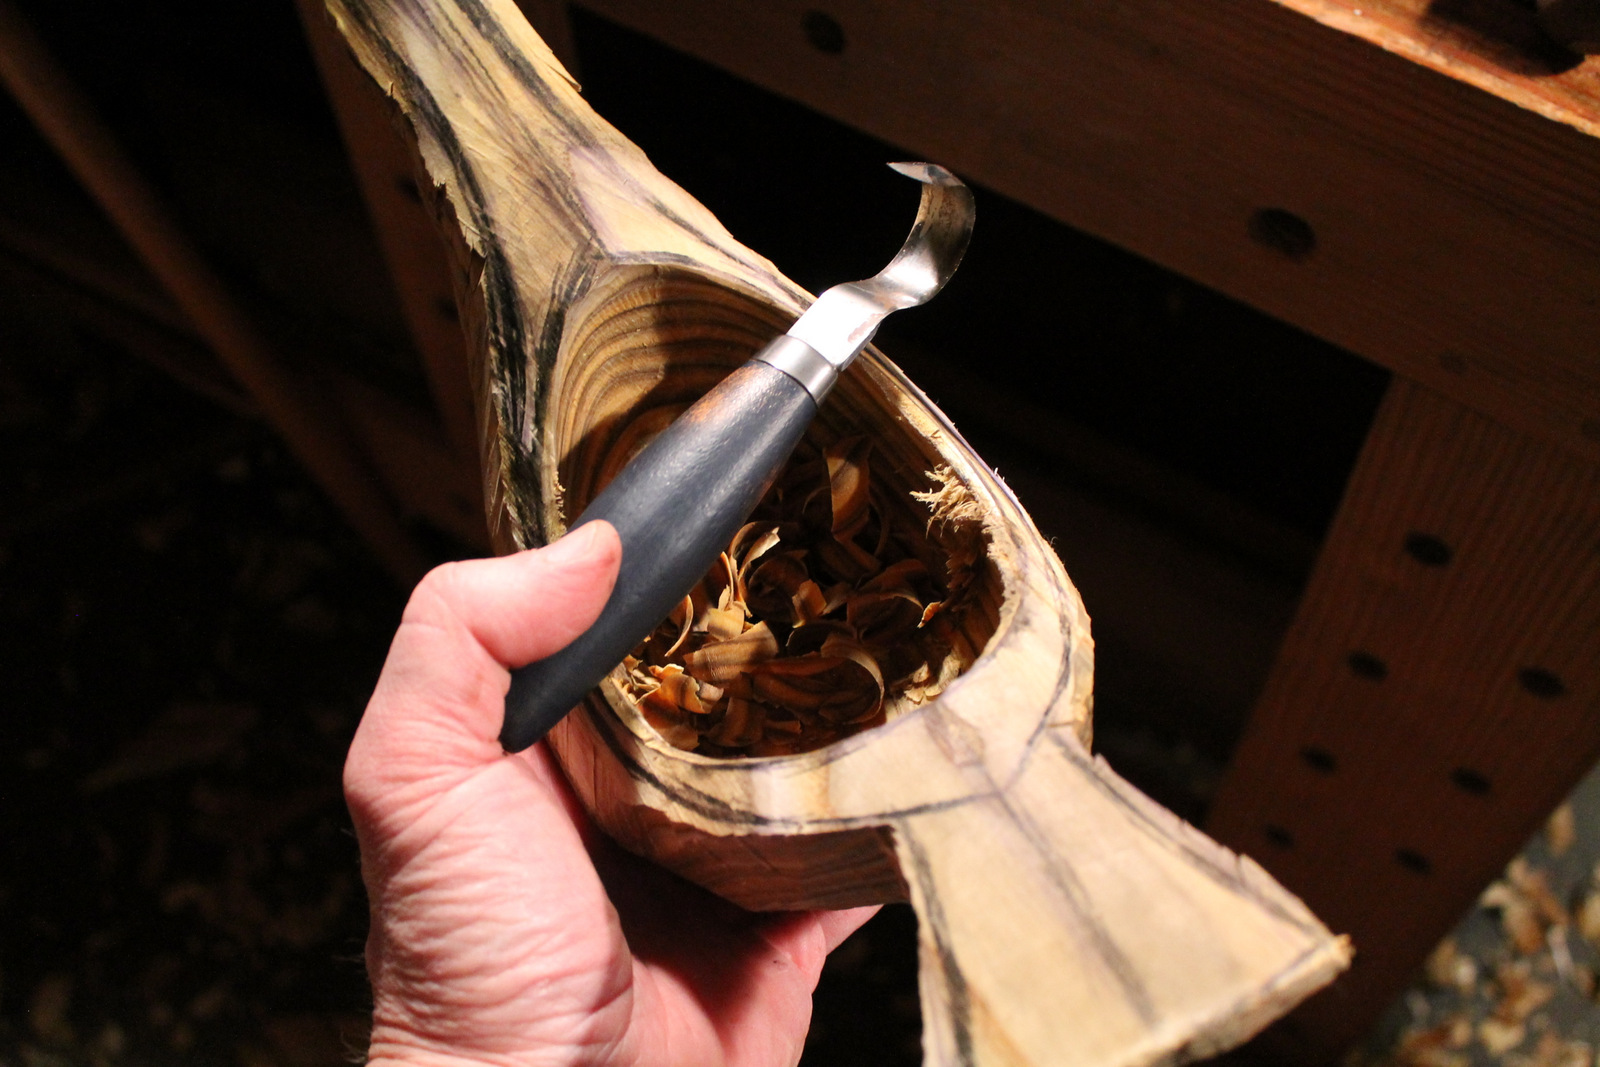
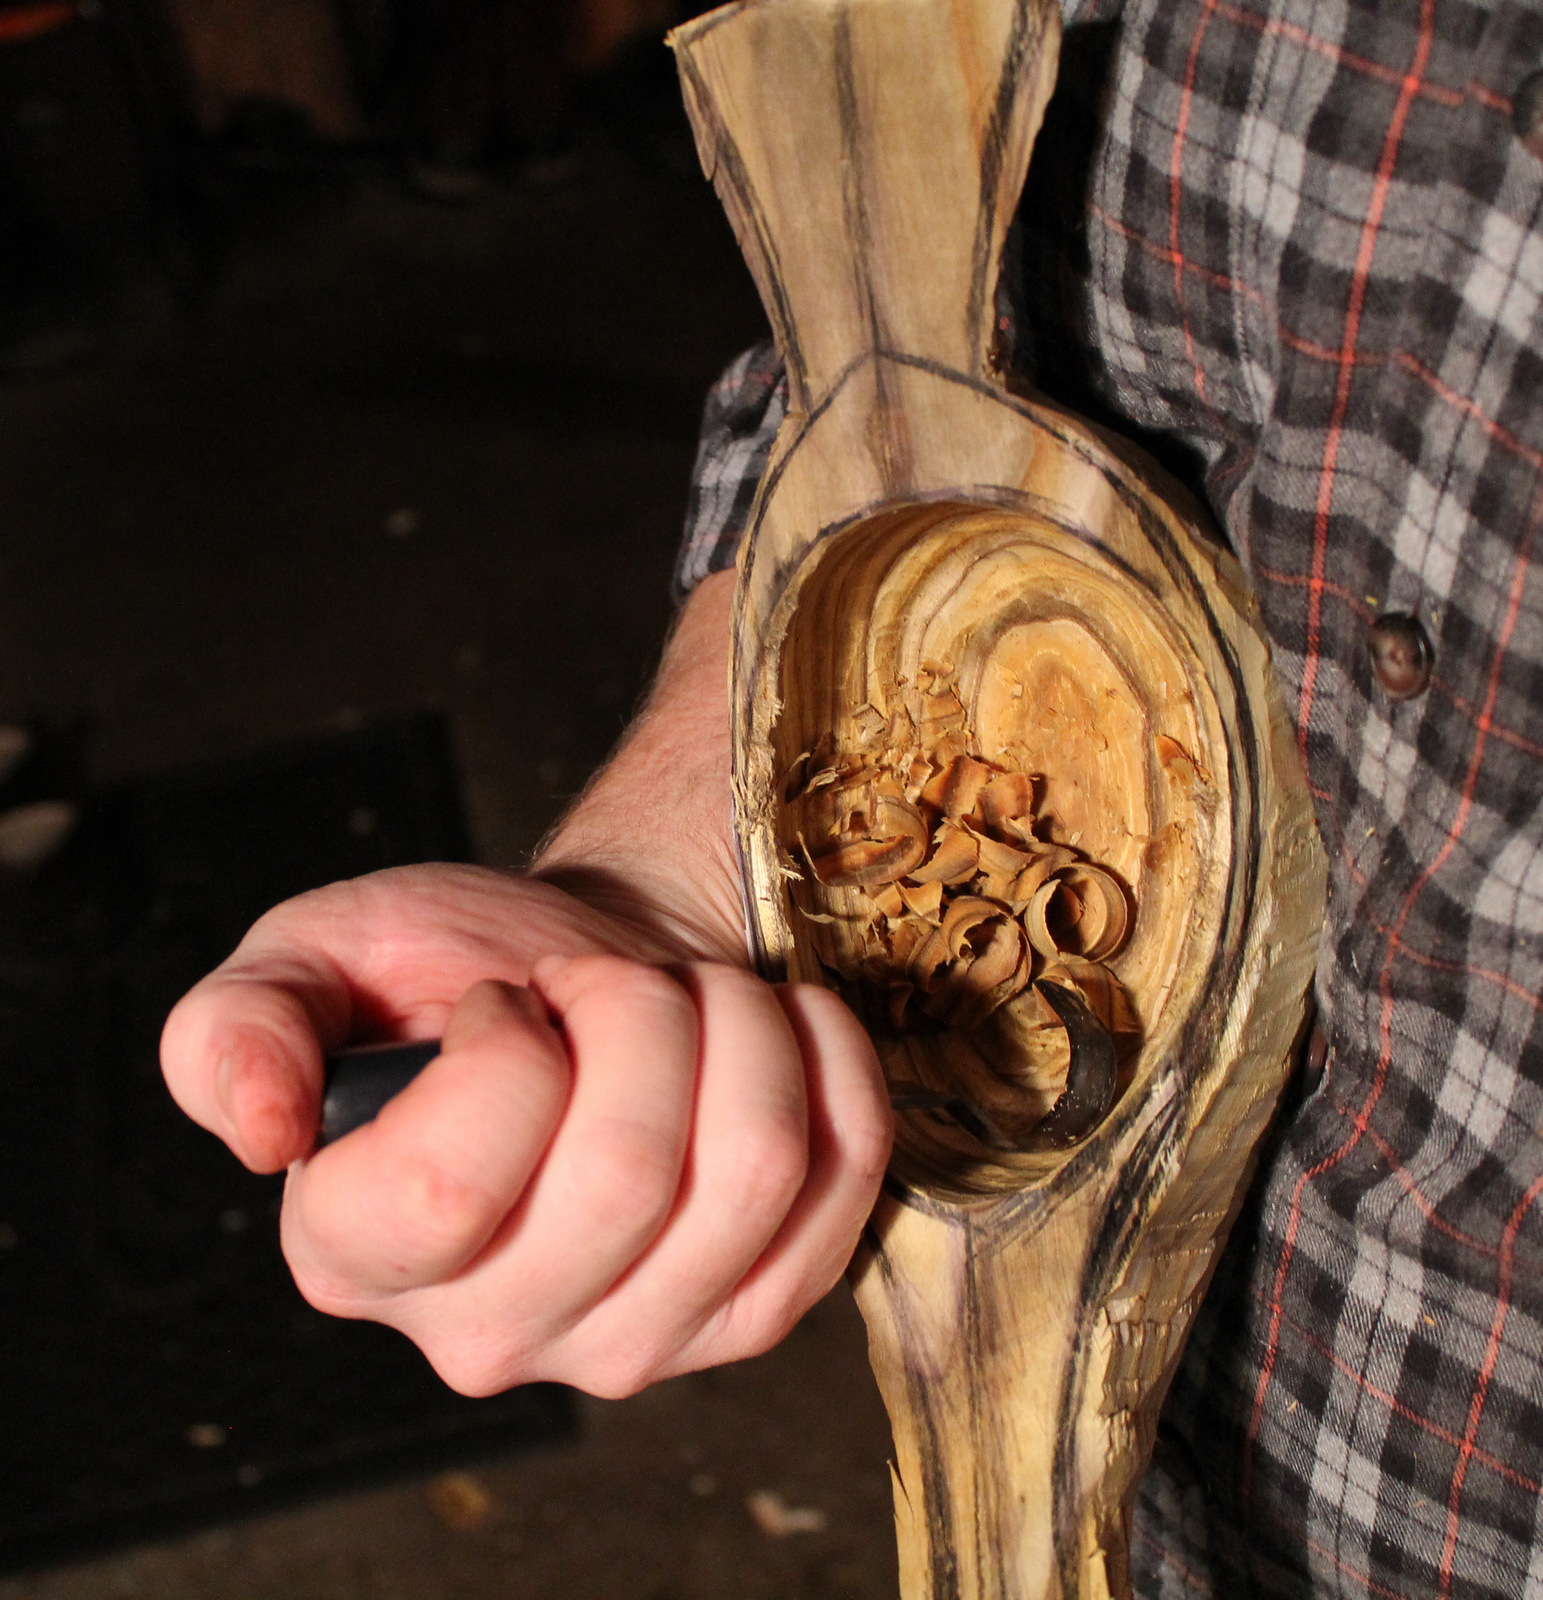
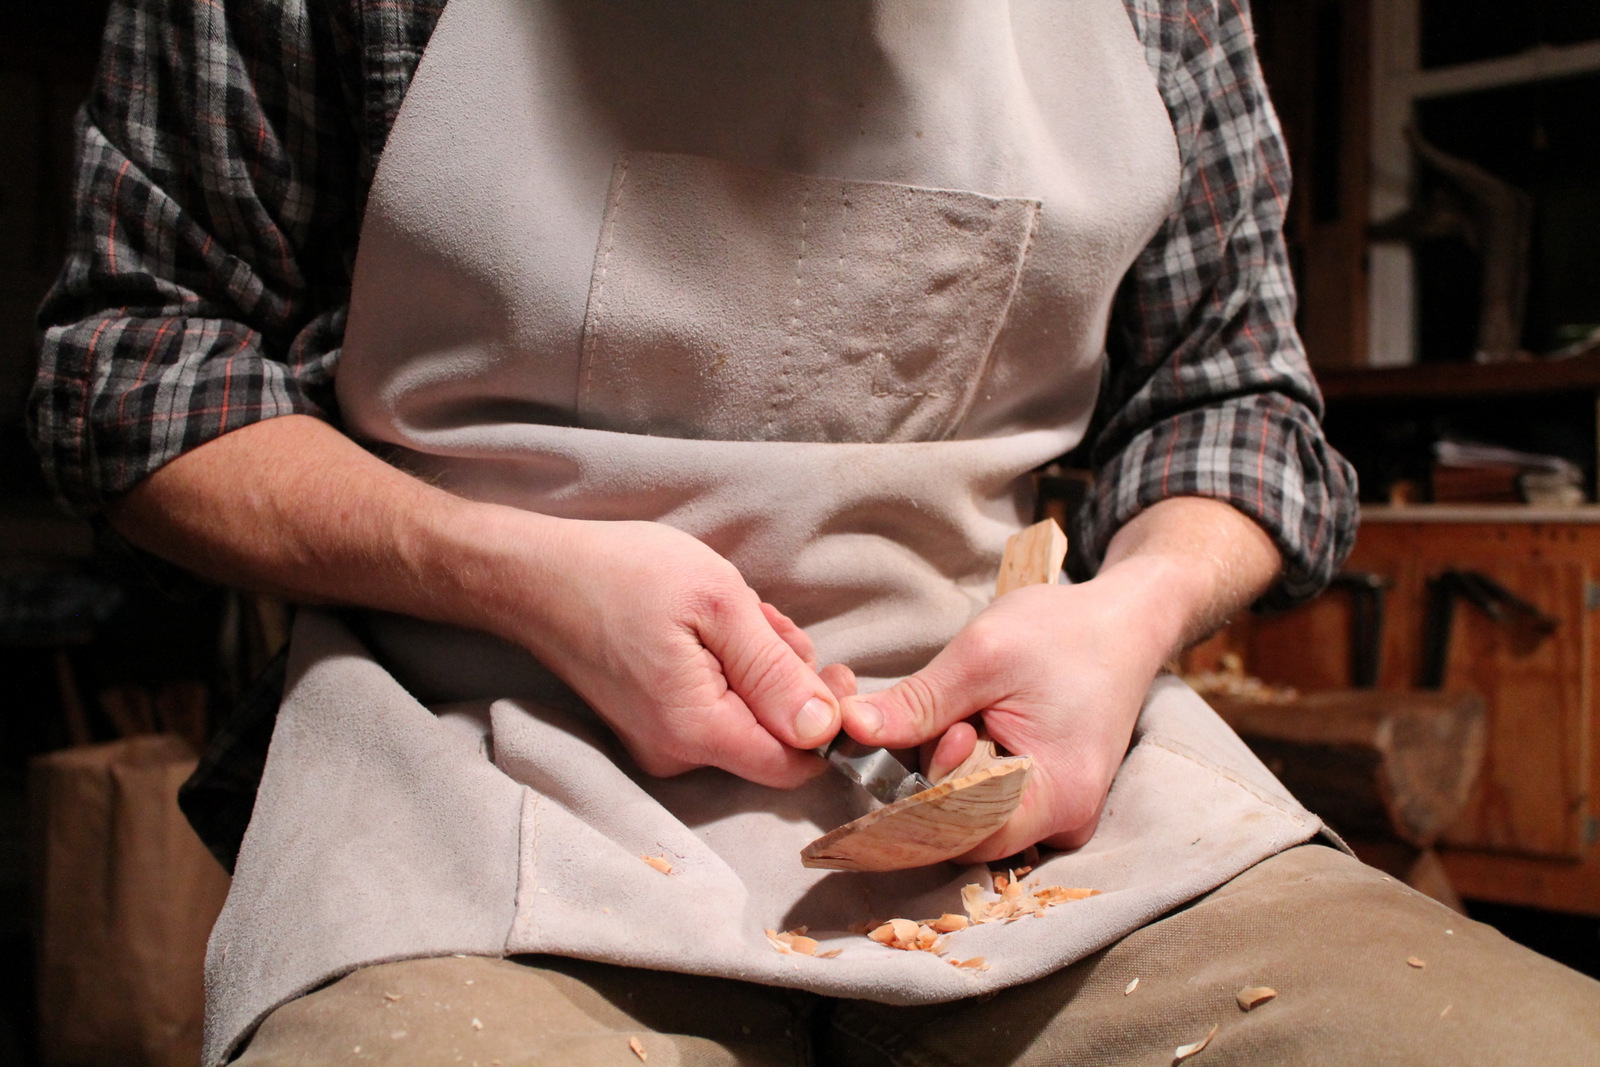
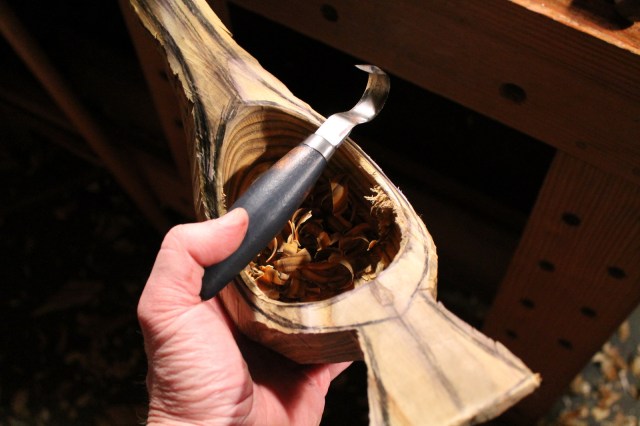
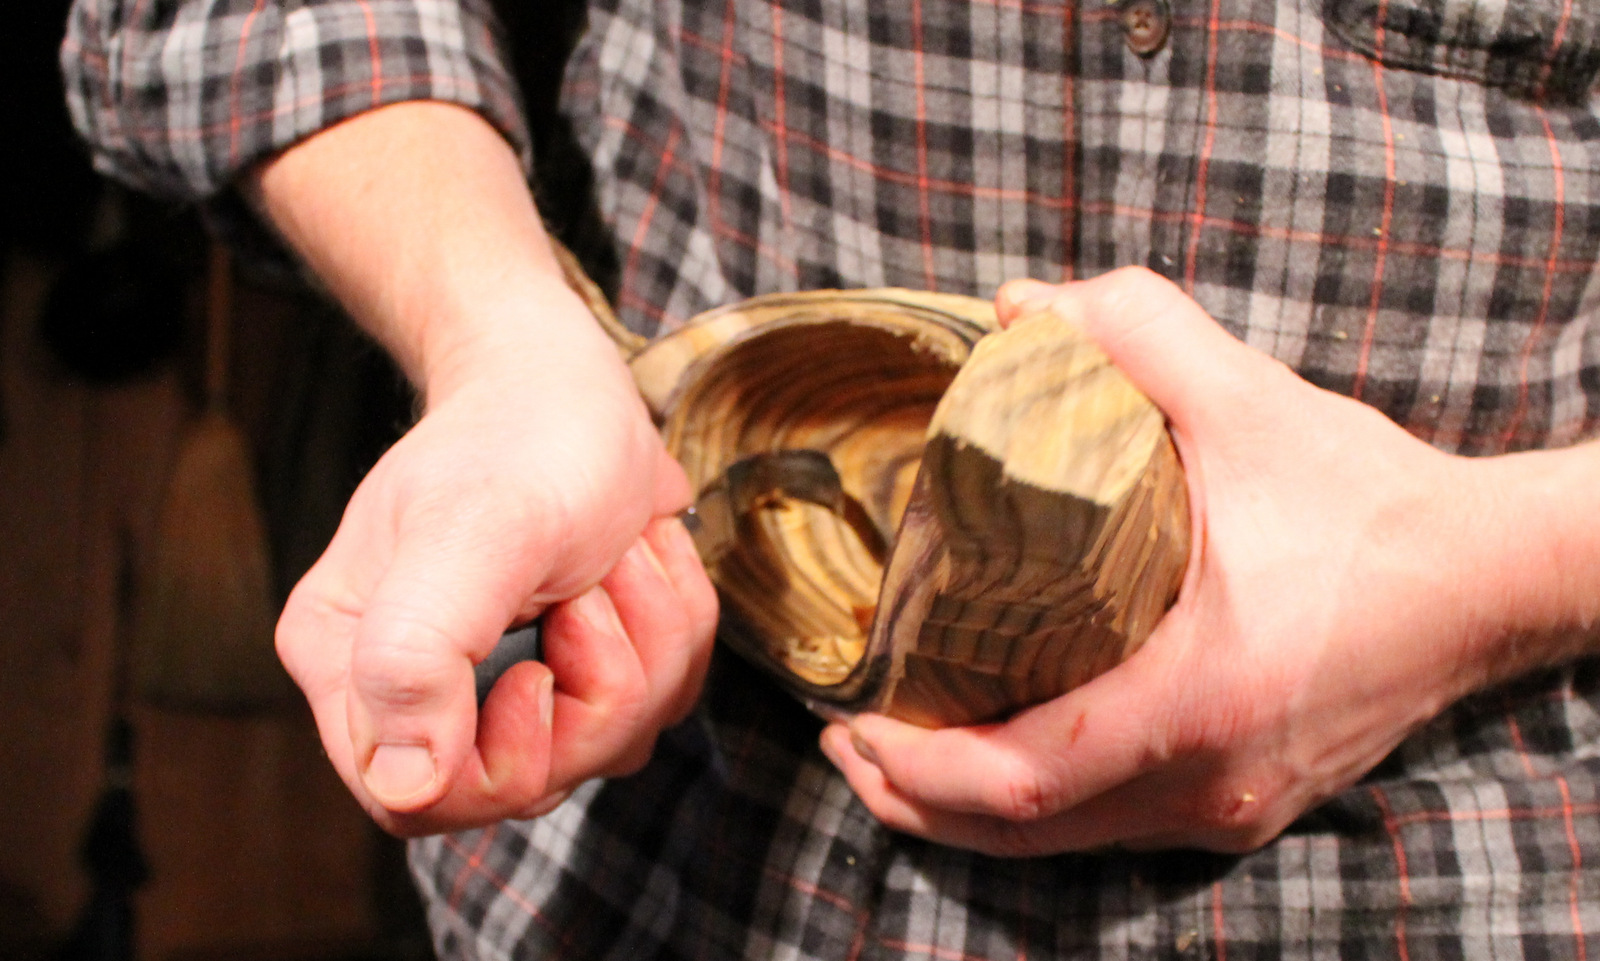
This crooked sumac trunk allowed for the rising neck and tail of the bird, and I also went with the flow of the grain from above.  Bird bowls like this are fun to carve, combining elements of bowl carving and spoon carving.  For example, the undercut hollow has to be cut largely with a hook knife while the piece is held in the opposite hand.

IMG_6545

The bold grain of sumac, the color will continue mellowing over time.

I resisted doing any decorative carving other than the line of chips running along the wing edges.  Decorative carving on a bold prominent grain pattern like this would be like writing on wrapping paper: hard to read.

By the way, they say sumac fluoresces under a black light, but I haven’t tried it.  Must have left my black light at a rave.

I’ll pop this onto the website, and get back to a couple larger bowls in progress.

And how could I leave this out:


Posted in bird bowls, bowls, patterns, Uncategorized, video | Tagged , , , | 8 Comments

Jason Lonon

Adze by Jason Lonon

Adze by Jason Lonon

Today, we are lucky to be experiencing a revival of traditional toolmaking, and there are many smiths making excellent tools.  However, there has been a bit of an exception when it comes to the adze.  About six months ago, I wrote a post about the shortage of quality adzes available without a long wait and what a challenge it is to make an adze that works well.  Jason Lonon is up to the challenge, and I hope that it will help end some of the adze-deprived frustration out there if I mention him.  But keep in mind, I don’t have any connection with Jason and he did not seek my endorsement.  I just think this information may be helpful to those waiting for a good adze.

Although tools tend to build up over time, I try to keep a relatively small basic toolkit.  Of course, there are lots of tools I’ve never tried.  For all the bowls I have made, I have really only used two adzes — primarily the Hans Karlsson adze that I highlighted as part of my thoughts on adze design nearly a year ago.  The Karlsson’s have found it difficult to keep up with the increased demand over the last couple of years, and admirably, they won’t compromise the quality of their tools in an attempt.  I certainly won’t give up mine.

Recently, I bought an adze from Jason, sort of a smaller version of my HK, with a 1 3/4″ wide edge and a weight of about 24 ounces.  I like this style with the shallow sweep in the middle of the edge and the raised lips that allow for a big bite.  However, Jason makes adzes in different sizes and with different profiles.

Jason lives in North Carolina where he has practiced many types of woodworking in addition to blacksmithing.  This background has helped him produce a tool that works sweetly.  He has thought long and hard about the geometry of the head, the bevel, and how it all relates to the handle.  The handle is hand carved and fitted very well.  In short — this is a great adze.

You can check out Jason’s website and Facebook page.  I have no idea if you’ll have to wait if you want and adze, but if you do, it will be worth it.


Posted in adze, tools, Uncategorized | Tagged , | 13 Comments

Painted Bowl


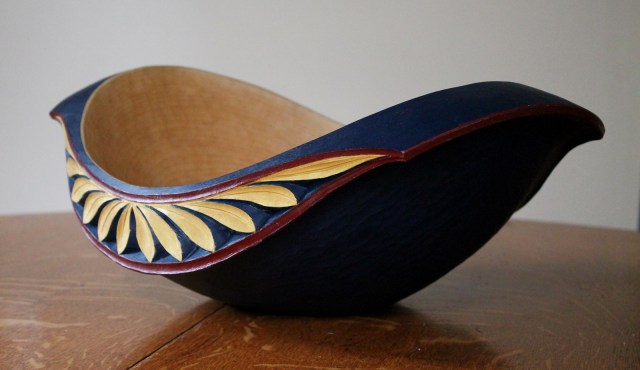
IMG_6738Several weeks ago, I wrote a post about carving the side panels of this maple bowl.  Since then, I’ve completed the painting — a slow process.  Not just because artist’s oils dry slowly, but more so because I did a lot of thinking about and experimenting with the color scheme.  Normally, in carving, my considerations involve line, light, and shadow.  Color throws a whole other factor into the mix, and it can be intimidating.  I was really pleased with the form of the bowl; especially the deeply sculpted curves.  I didn’t want to take a chance and ruin it, but the relatively plain maple seemed to call out for a little more, a little risk.  I won’t be going wild with a paintbrush on all my stuff, but I’m glad I did on this one.

IMG_6503

I made copies of this sketch in order to sample color combinations.

To experiment with different color combinations, I drew a basic sketch of a portion of the bowl, then made several xerox copies.  I used colored pencils at first, then  painted sample sections directly onto the paper.  I used lots of paper, but finally decided on what you see above.  Once that was settled it was time to paint the bowl itself.

IMG_6752I used high quality artist’s oil paints and thinned them with a little linseed oil to a consistency that wasn’t too thick or too thin.  Jogge Sundquist uses artist’s oils on most of his work, and is an expert in their use.  Over the summer I talked with him about the amount of oil to add, and he explained that there is no rule — “Until it is just right.” It even varies among colors and pigment types.   You can also add thinner (turps or even citrus thinner) instead of oil to create more of a stain.  Anyway, it is fun stuff to mess around with.  I don’t know if it is just right, but I like it.

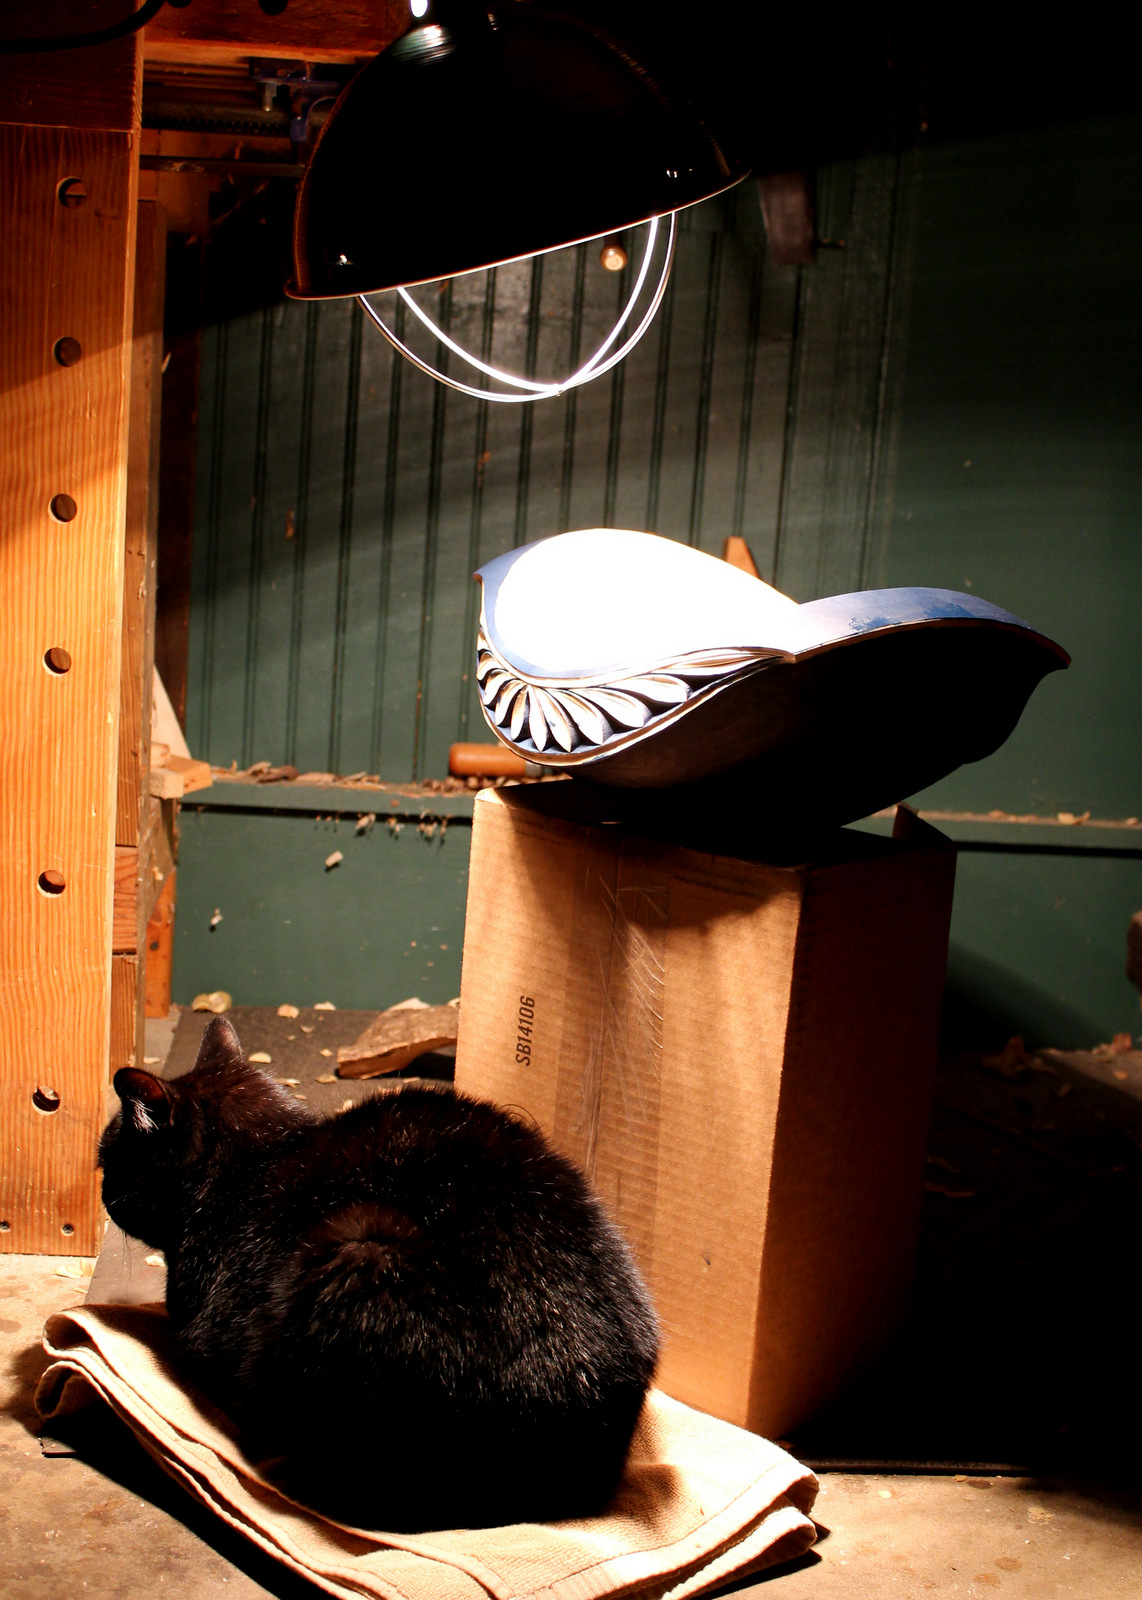
IMG_6325Compared to the paints most of us are used to, artist’s oils take a long time to dry — it can be over a week to be dry to the touch!  Since I painted the colors in sequence after each dried, I sped up the drying process with a heat lamp — which our cat, Mavis, appreciated as well.  After the painting was completely finished, I treated the interior of the bowl with a few coats of flax seed oil, then another over the entire bowl, paint and all.

The dimensions are 17 1/2″ long, 12″ wide, and 6 1/2″ high.


IMG_6501


Posted in bowls, drying, paint, patterns, Uncategorized | Tagged | 11 Comments

Great Wonders

SAM_2641

If I say to my neighbor, “Come with me, I have great wonders to show you,” he pricks up his ears and comes forthwith; but when I take him on the hills under the full blaze of the sun, or along the country road, our footsteps lighted by the moon and stars, and say to him, “Behold, these are the wonders, these are the circuits of the gods, this we now tread is a morning star,” he feels defrauded, and as if I had played him a trick.  And yet nothing less than dilation and enthusiasm like this is the badge of the master walker.

— John Burroughs, The Exhilarations of the Road (1875)

Posted in quotes and excerpts, trees, Uncategorized | Tagged | 4 Comments

Some Spoons For Sale

IMG_6473

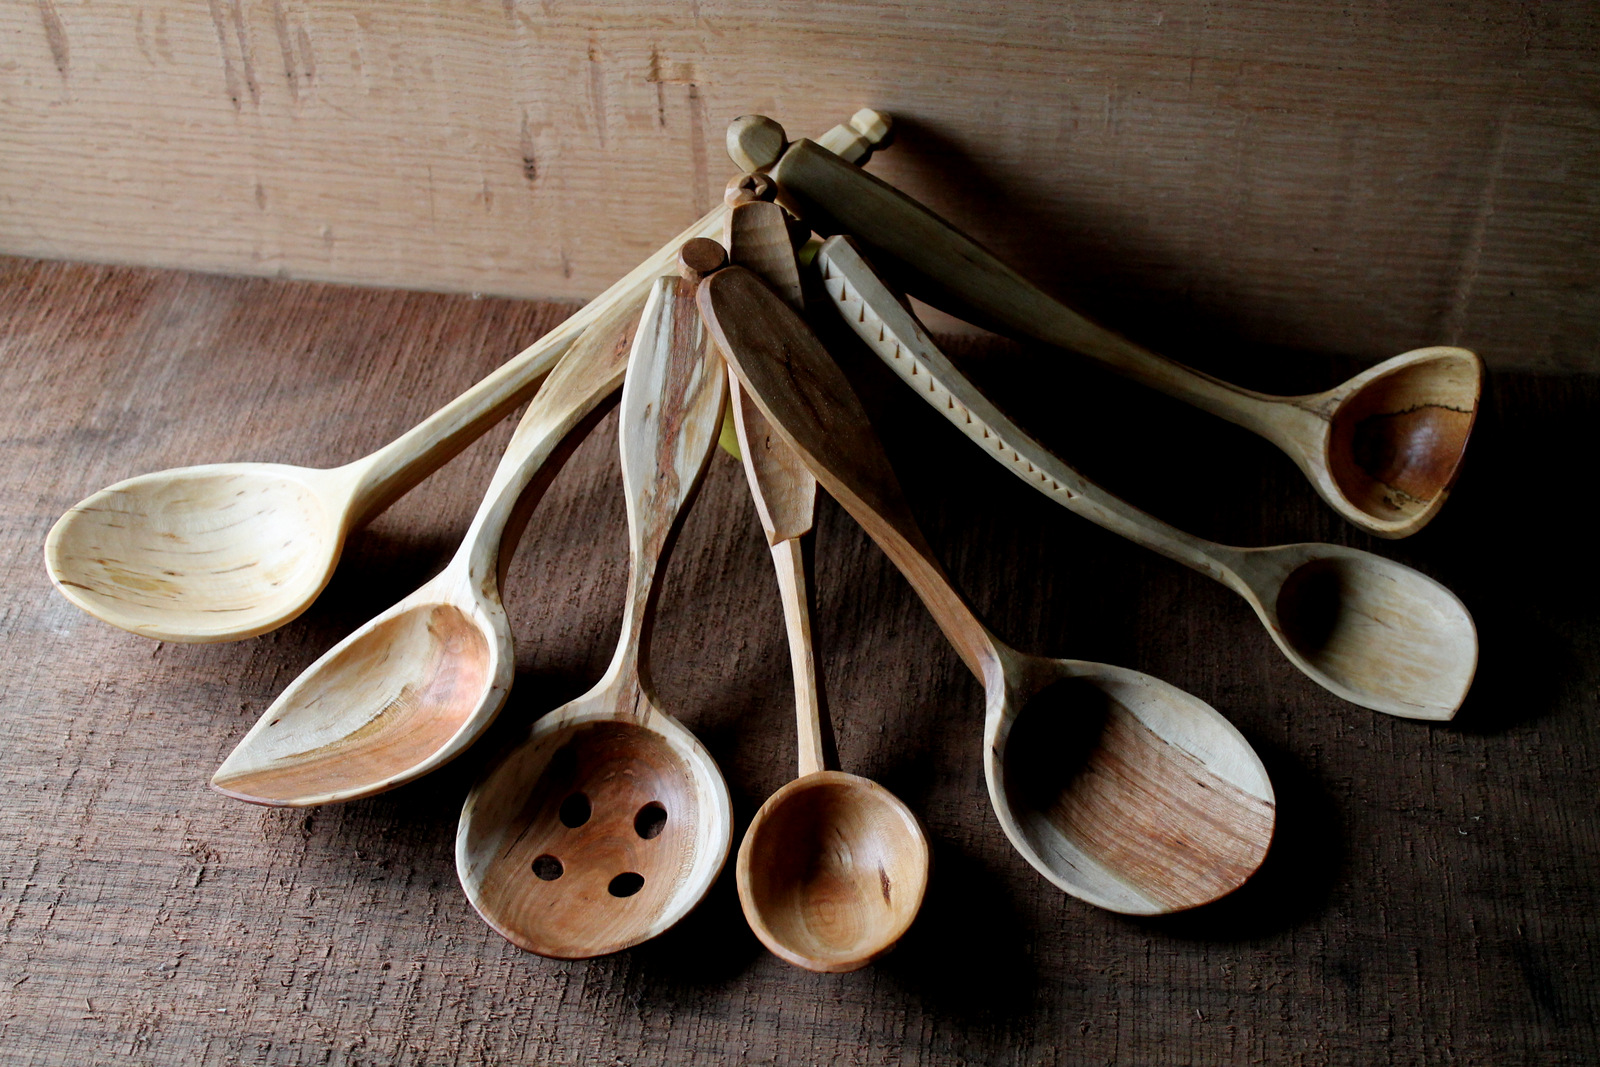
As I mentioned in my last post, I’ve been carving some spoons from crooks.  Here are seven of them, and I’m offering them for sale.  I’ll provide photos and a brief description of each one below, but there are some things they all have in common.  Each of them is carved from a crook, and the grain flows through the handle and the bowl of the spoon. These are all serving/cooking spoons of one form or another, and they are ready to use. I’ve treated all of them with food grade flax seed oil, and experience has shown that spoons like these hold up very well over years of use.  Six of the seven are carved from Pennsylvania black cherry, the other sycamore.  I’ve carved all of them, start to finish, with axe and knife — no sandpaper.

If you’d like to purchase one, let me know with a comment below — or an email at dandkfish@gmail.com if that doesn’t work.  You can pay through Paypal or by sending a check in the mail.  If Paypal is your preference, I’ll send an invoice to your email through Paypal. As usual, I’ll keep things simple and include shipping within the U.S. in the price listed. For shipping outside of the U.S., there will be an additional charge, and we’ll figure that out later.

Click on a photo for an enlarged view.

#1: A cherry serving spoon/ladle with a nice wide bowl.  The translucence of cherry sapwood (as opposed to the heartwood streak along the middle of the underside) is evident in the left photo.  It is very durable and strong.  11 3/4″ x 3 3/8″  —  $85 includes shipping.  SOLD

IMG_6405  IMG_6406

#2: This cherry spoon has an octagonal handle that sweeps away from the bowl to the right, following the curve of the grain.  Tough for lefties.  9 1/4″ x 2″ — $55 includes shipping.  SOLD

IMG_6423  IMG_6424

#3: If you’re like me, and don’t like too much sauce in your baked beans, then this is the spoon for you.  Striking heartwood running through this cherry spoon.  8 1/2″ x 3″ — $70 includes shipping.  SOLD

IMG_6409  IMG_6411

#4: I really like the lines of this cherry serving spoon. 10″ x 3″ — $ 70 includes shipping. SOLD

IMG_6427  IMG_6426  IMG_6425

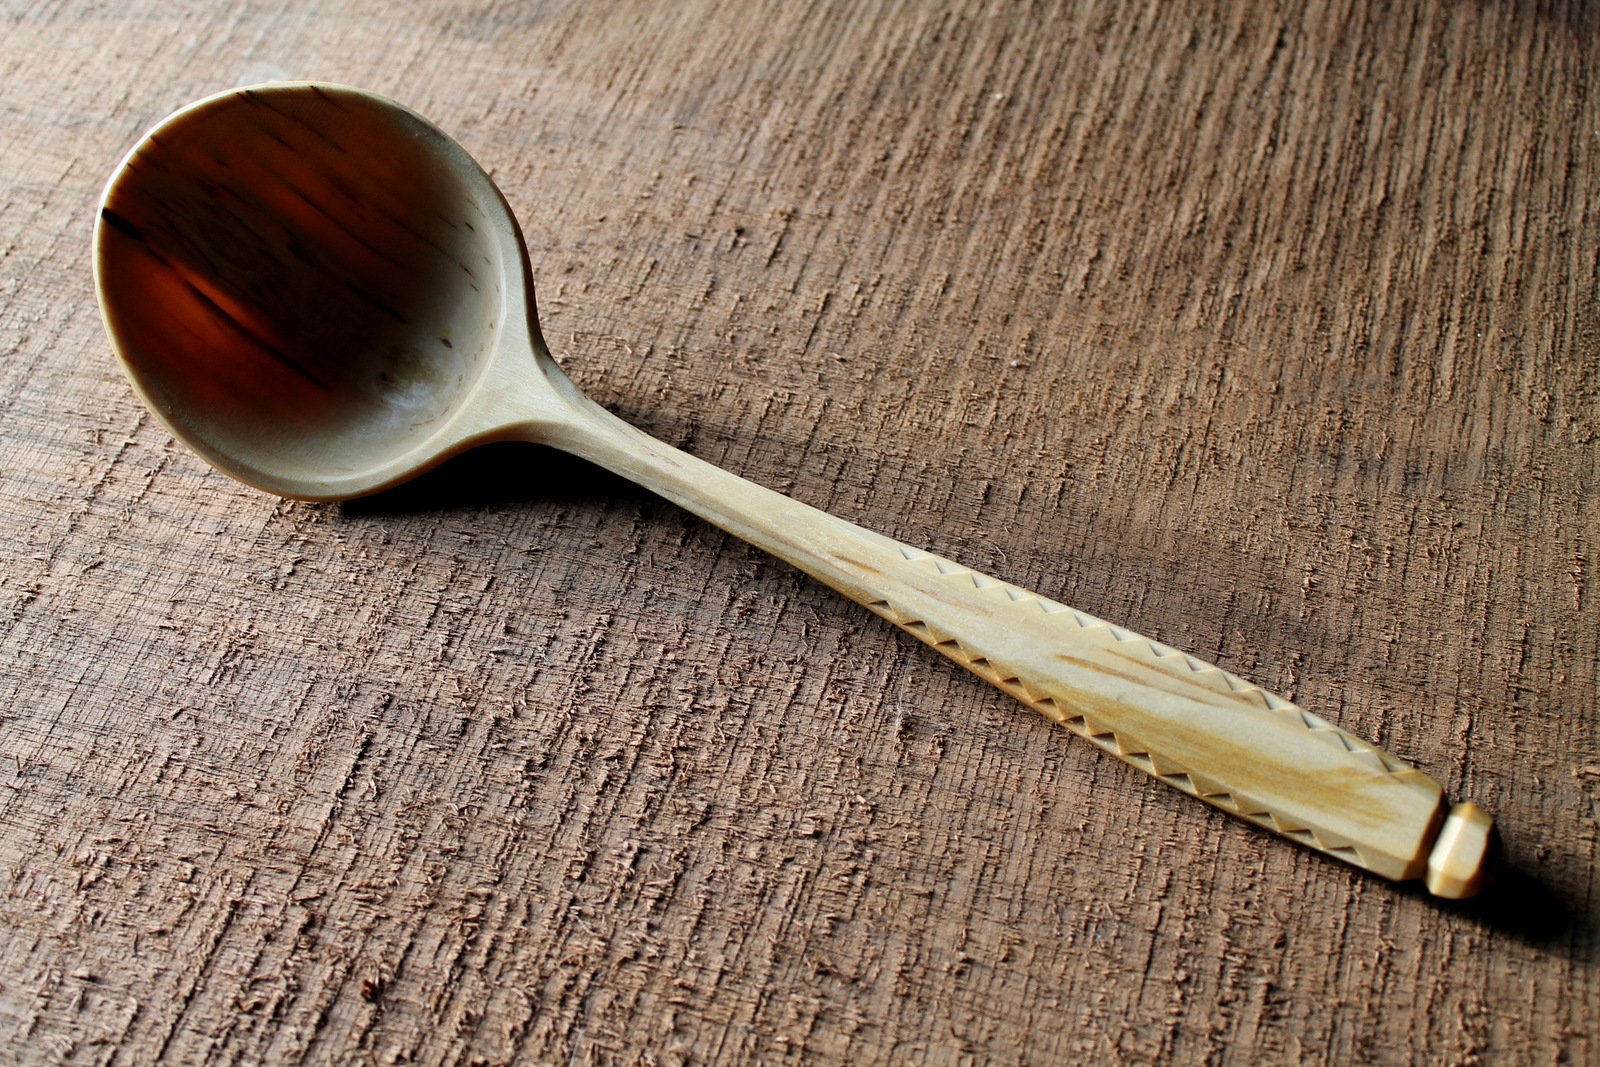
#5:  This cherry server/ladle has narrower, deeper bowl as well as some different design details and texture.  10″ x 2 1/8″ — $75 includes shipping. SOLD

IMG_6431  IMG_6433  IMG_6432

#6: I went with the flow of this wonky cherry crook.  I love the feel of it in the hand — very solid with a deep, wide bowl. 9 3/4″ x 3″ — $80 includes shipping.  SOLD

IMG_6416  IMG_6419  IMG_6413


#7:  And finally, a sycamore ladle.  It takes an extreme and rare bend in a crook to have the grain run through a ladle like this (It came from the crook in the bottom photo).  I love the contrast between the heartwood and the sapwood and the dark streak between them.  10″ x 2 1/2″ —  $90 includes shipping.  SOLD

IMG_6435  IMG_6442  IMG_6439  IMG_6445

It takes a radical crook like this one to have the grain run true through the bottom of a deep soup ladle. This one is in sycamore.

Posted in cherry, spoons, Uncategorized | Tagged | 12 Comments

Finding the Spoon in the Crook

IMG_6178

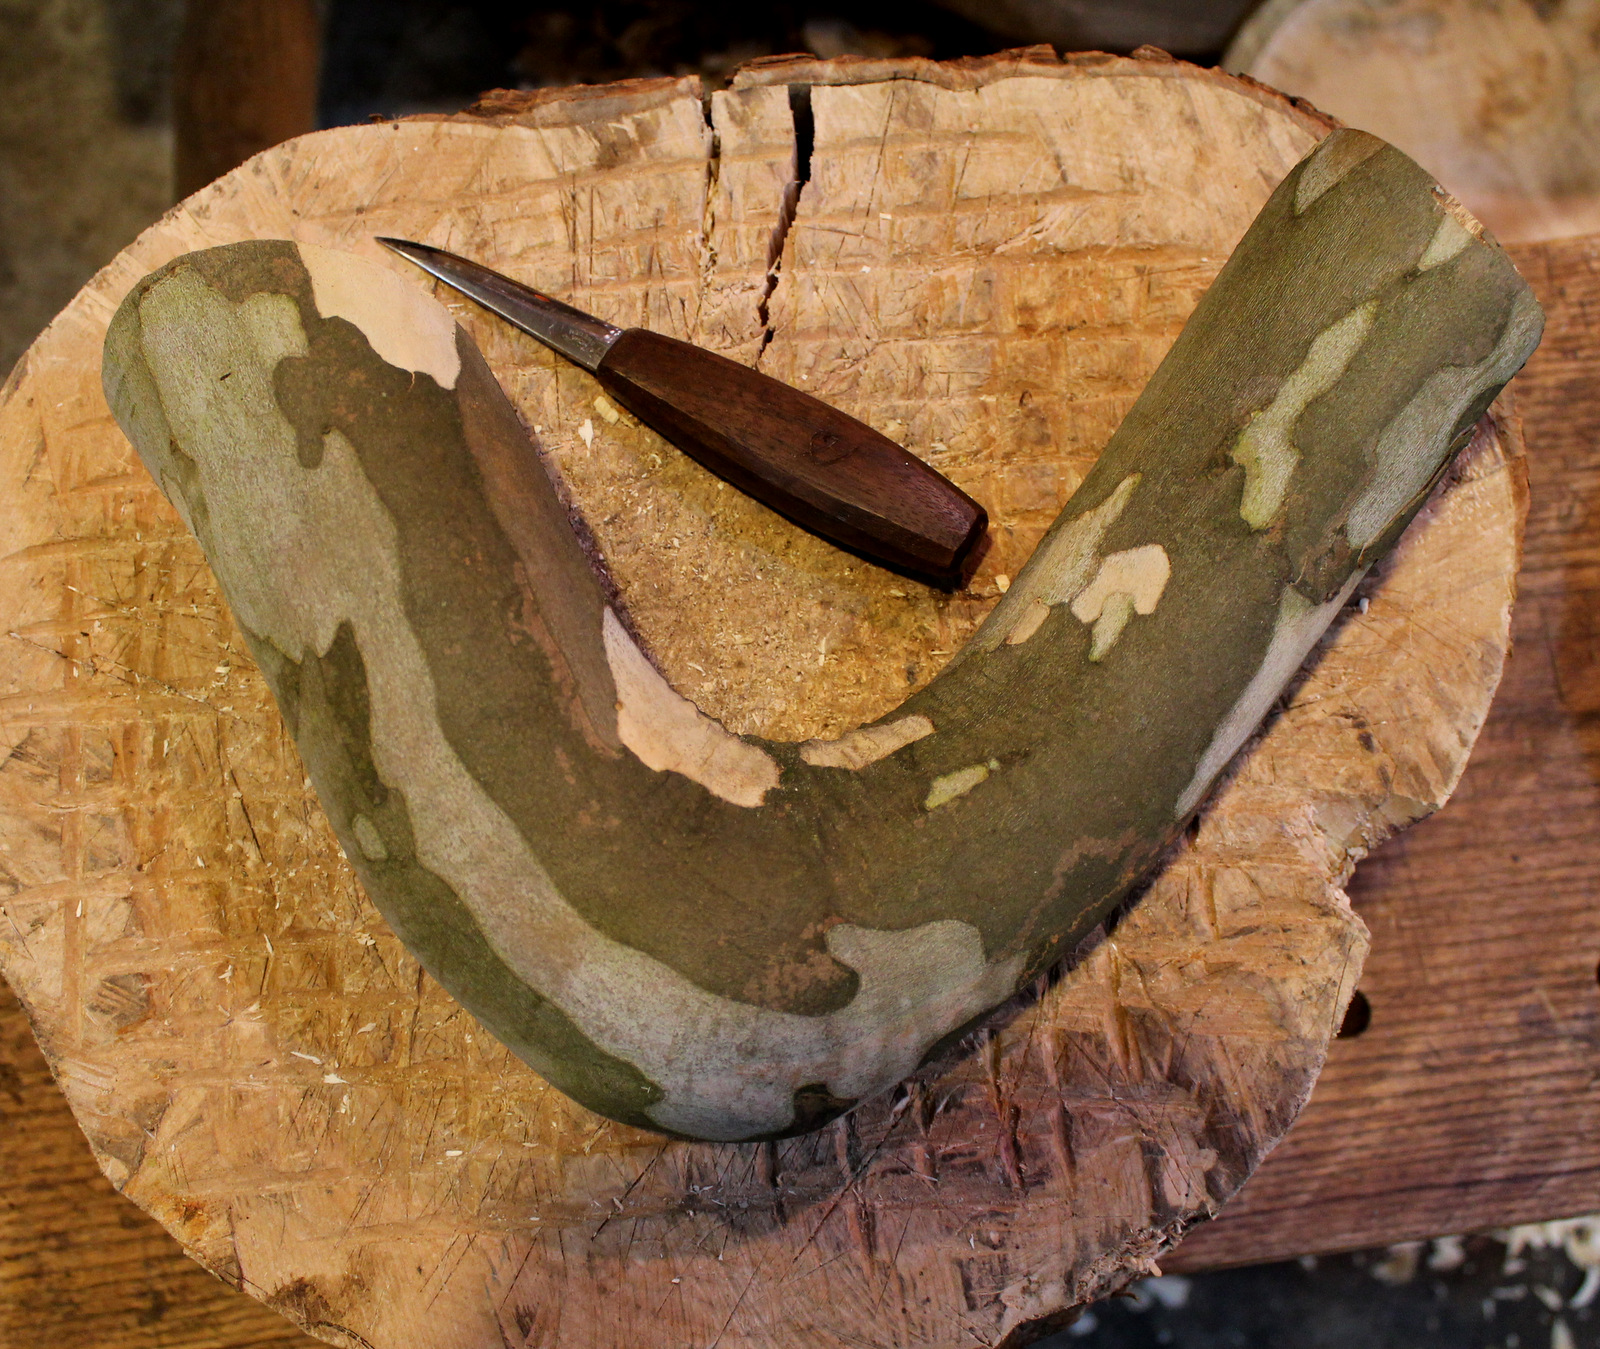
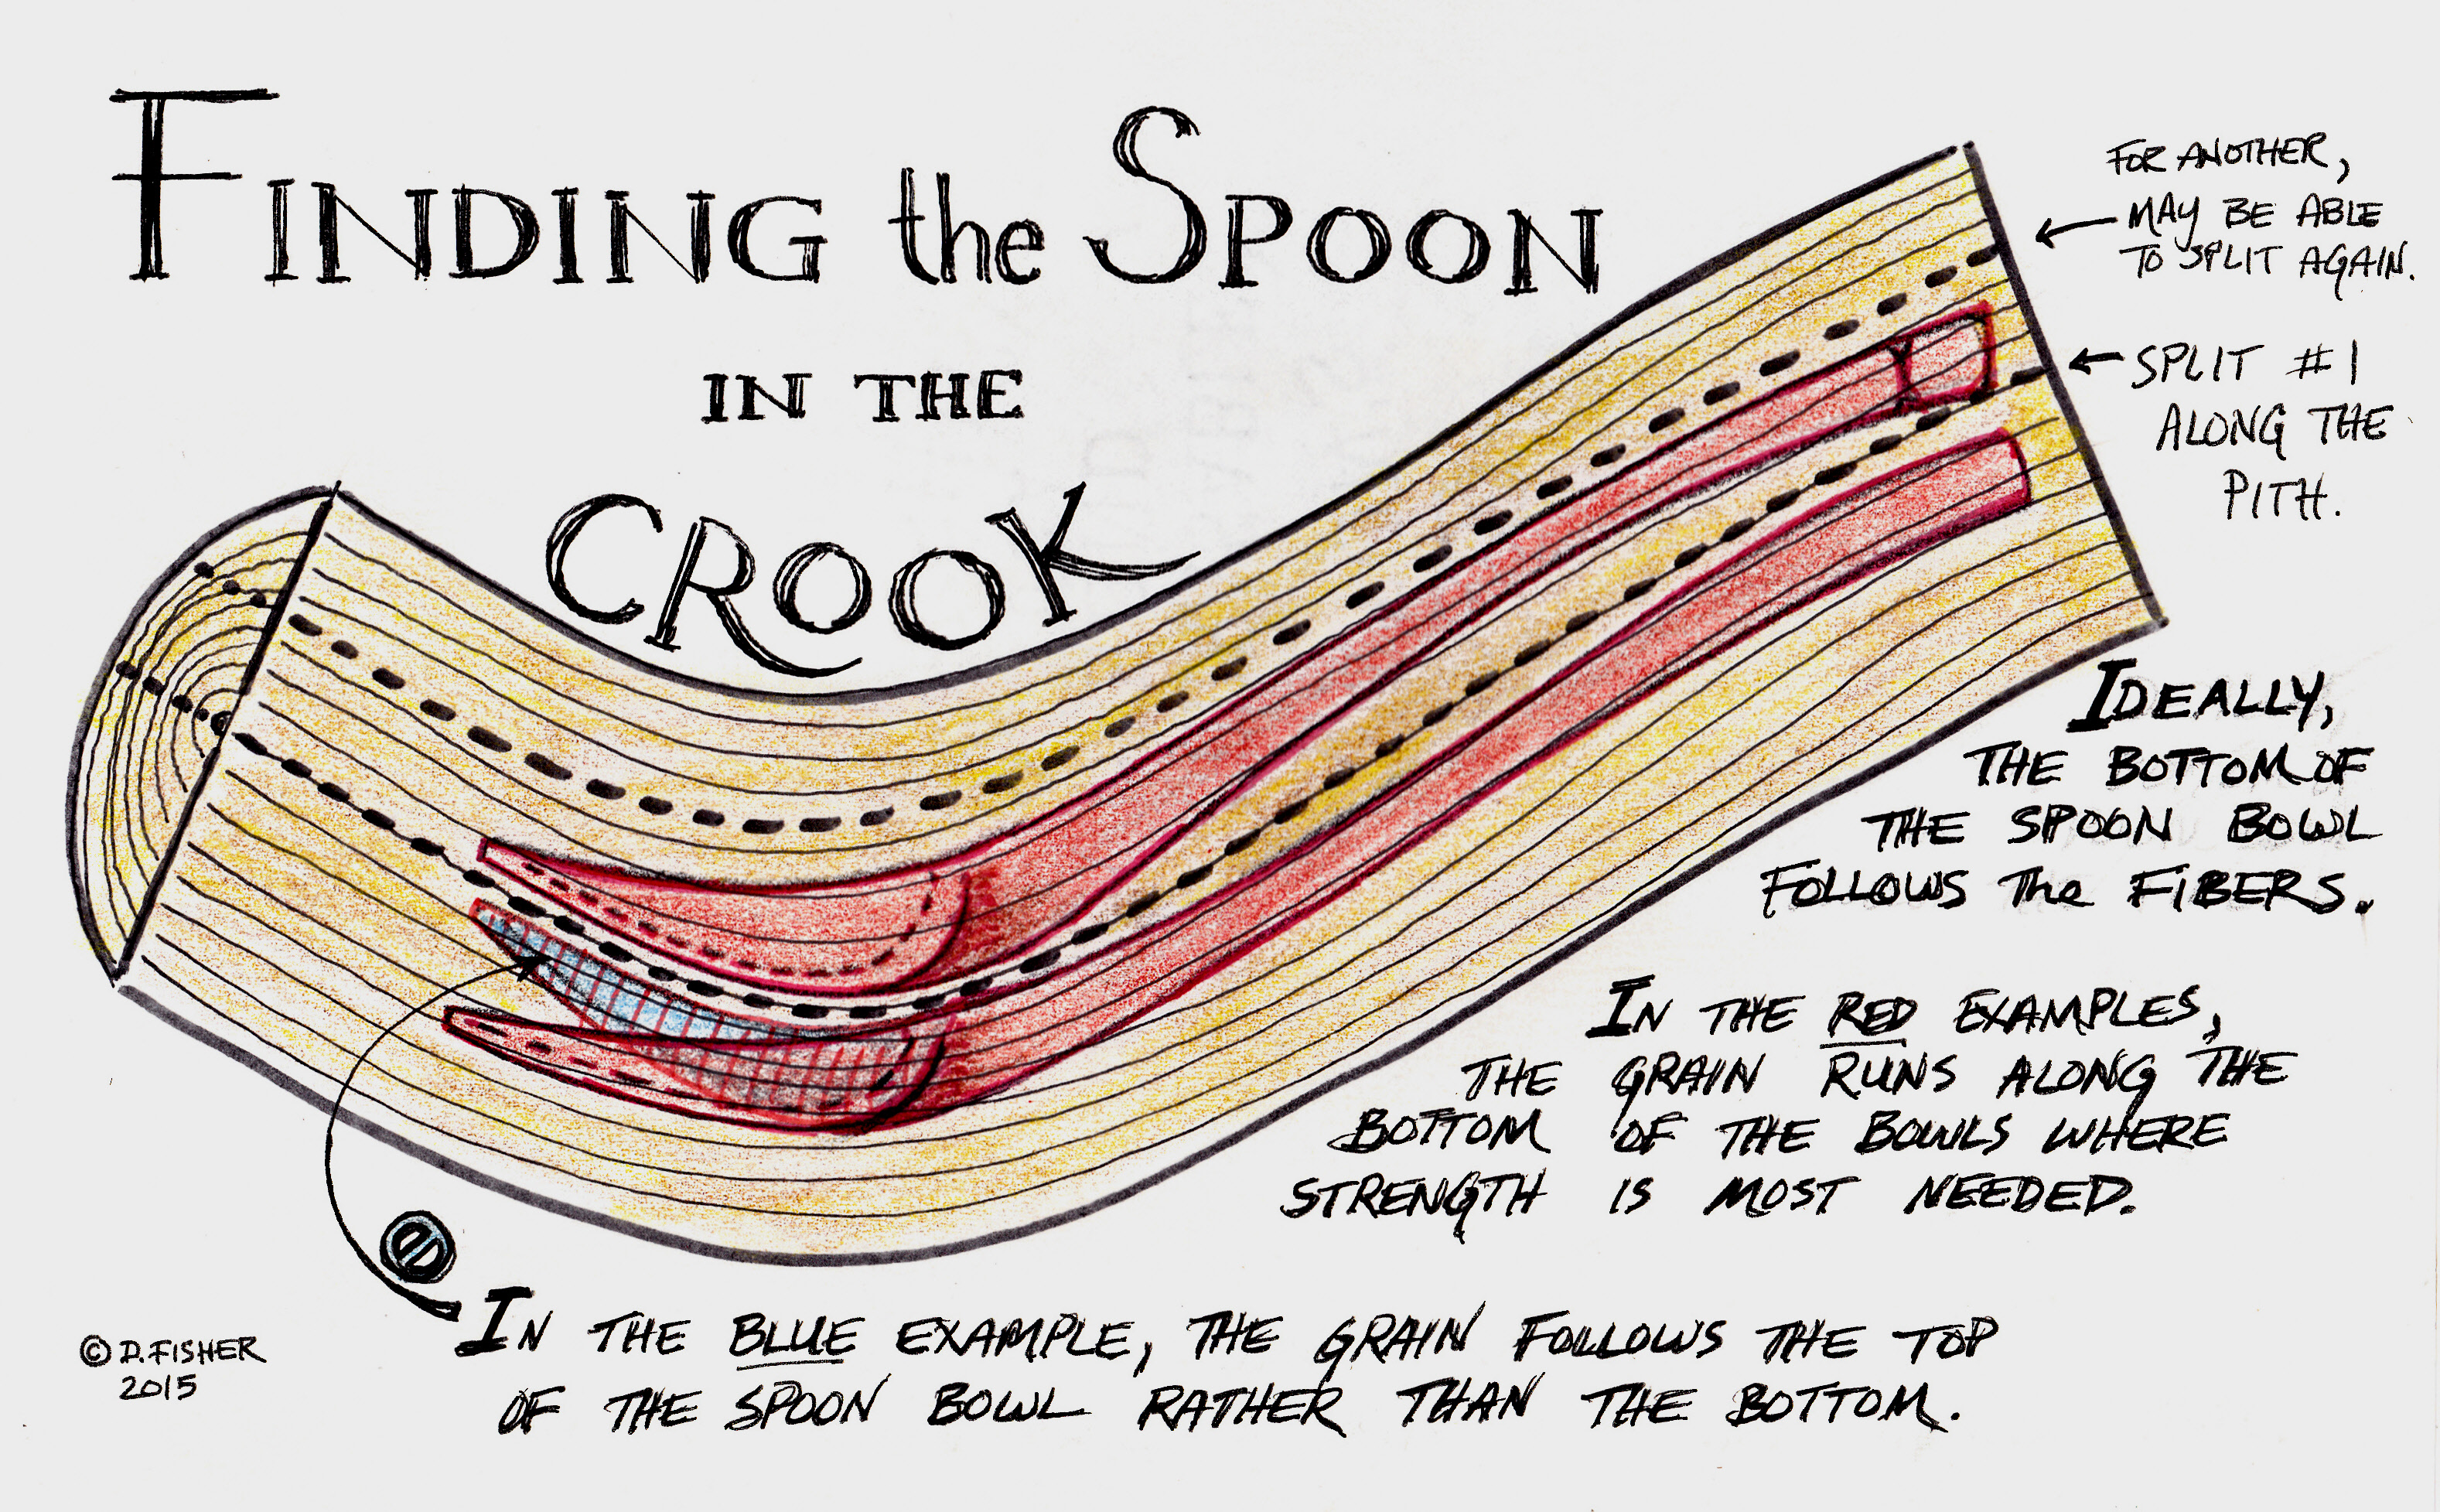
I like making spoons from crooks.  It makes for strong elegant spoons that let the tree be a design partner.  Besides, I like discovering the crooks.

It takes a radical crook like this one to have the grain run true through the bottom of a deep soup ladle. This one is in sycamore.

It takes a radical crook like this one to have the grain run true through the bottom of a deep soup ladle. This one is in sycamore.

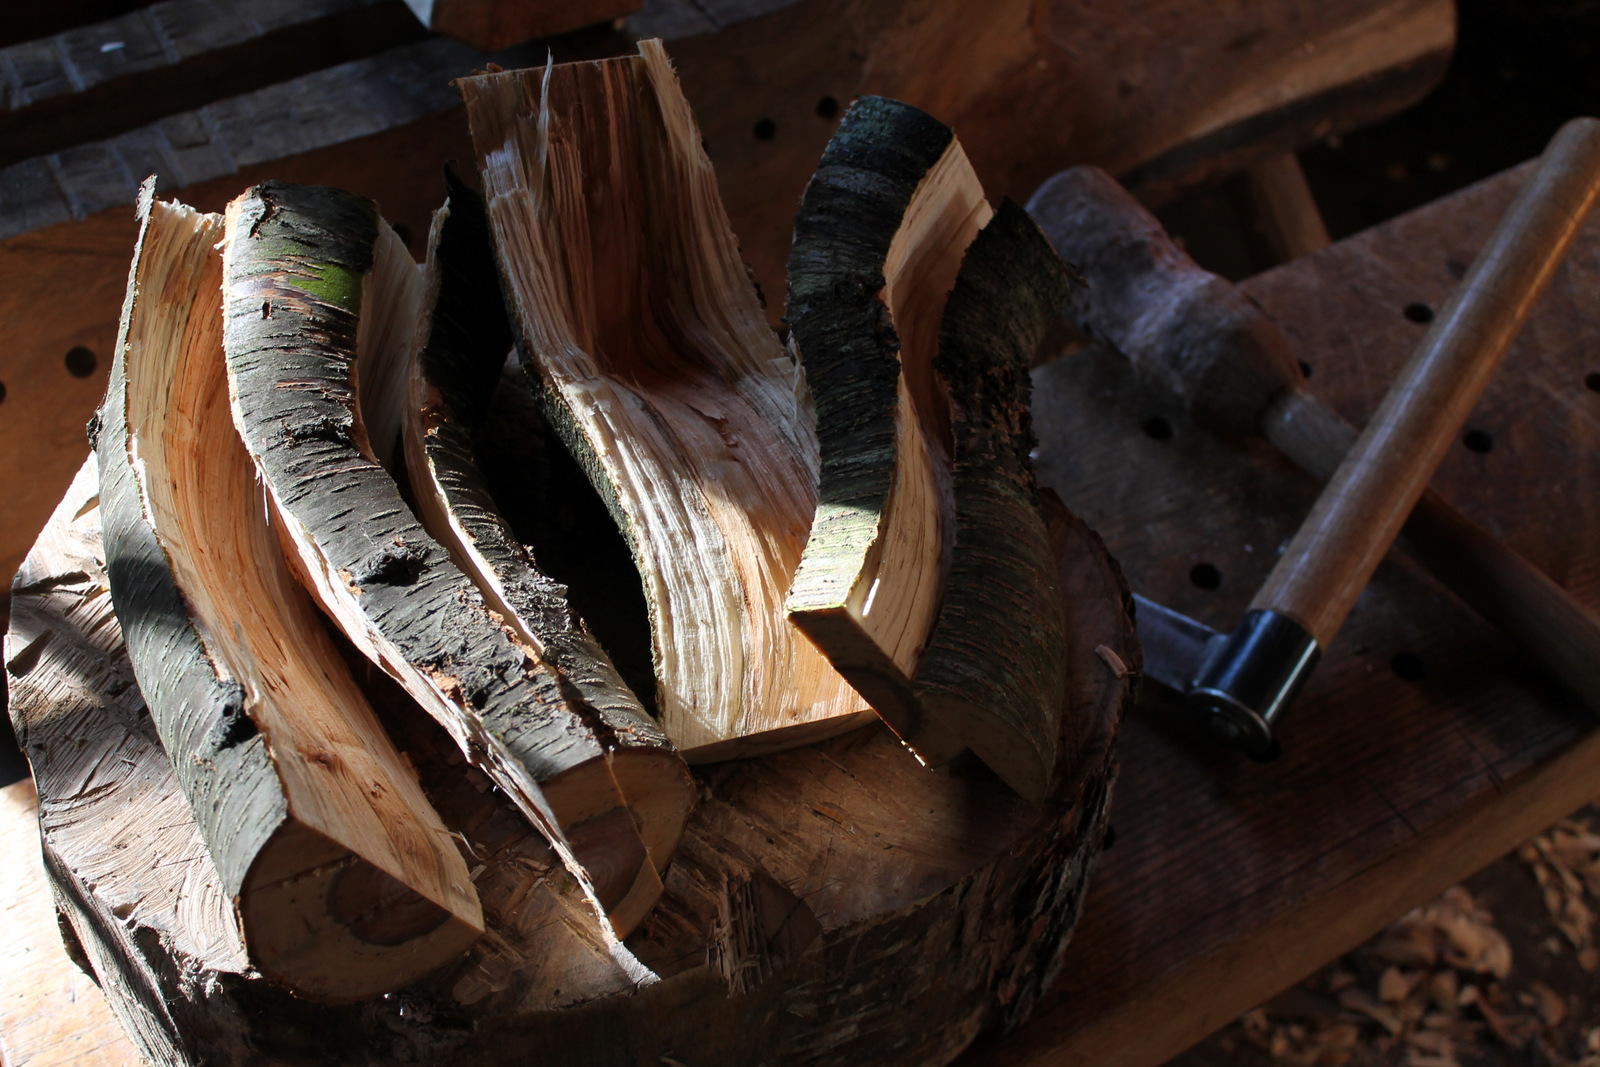
When a crook is split, the sinuous ergonomic profile of the spoon is revealed.  There it is.  Step back and relax.  The tree has spoken.  Of course, there is still plenty of room for design within the strength of those fibers, but ideally  the fibers will run through the handle and along the bottom of the spoon bowl.  So when forming the “wedge” of the bowl, I remove wood above the bowl rather than below.  If a crook is particularly uncooperative, there is room for compromise — as evidenced by spoons carved from straight-grained blanks.

Finding the Spoon in the Crook_NEW

I’ve been finding some good crooks lately.  I’ve got some photos to take, then in the next post, I plan on offering some of the spoons I’ve been carving from them.


Posted in cherry, finding wood, green woodworking, sketch, spoons, trees, Uncategorized | Tagged , | 5 Comments

What Thumbnails Are For

IMG_6348

Sharp makes everything better; less force is required to cut, control is gained, and the surface left from the tool is superior.  As obvious as that is, it is easily forgotten in the midst of a project and the haste to get to work.

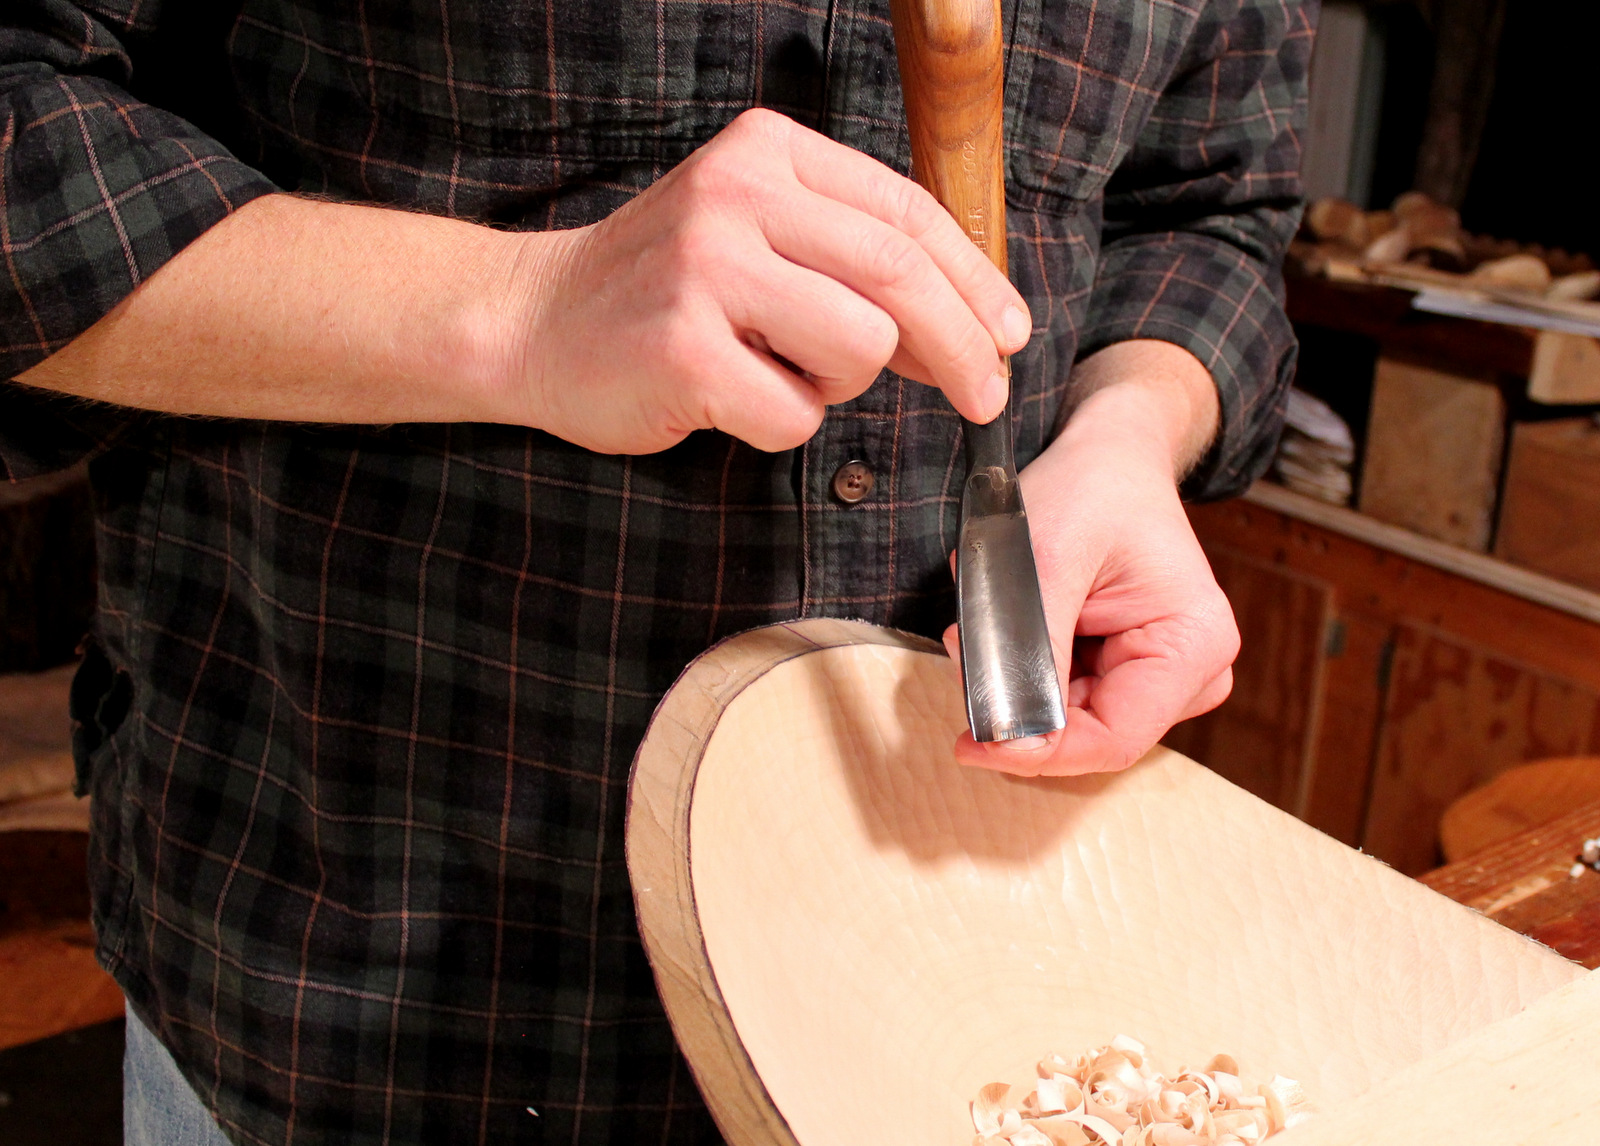
I was reminded of this once again as I was paring the interior of this maple bowl a couple days ago.  I had been working for about ten minutes and the gouge was cutting, but maybe not as sweetly as I’d have liked.  The amount of effort required to propel a tool and the quality of the wood surface left behind provide feedback, but I also find a quick and simple test often helps to confirm suspicions of an edge in need of a touch-up.

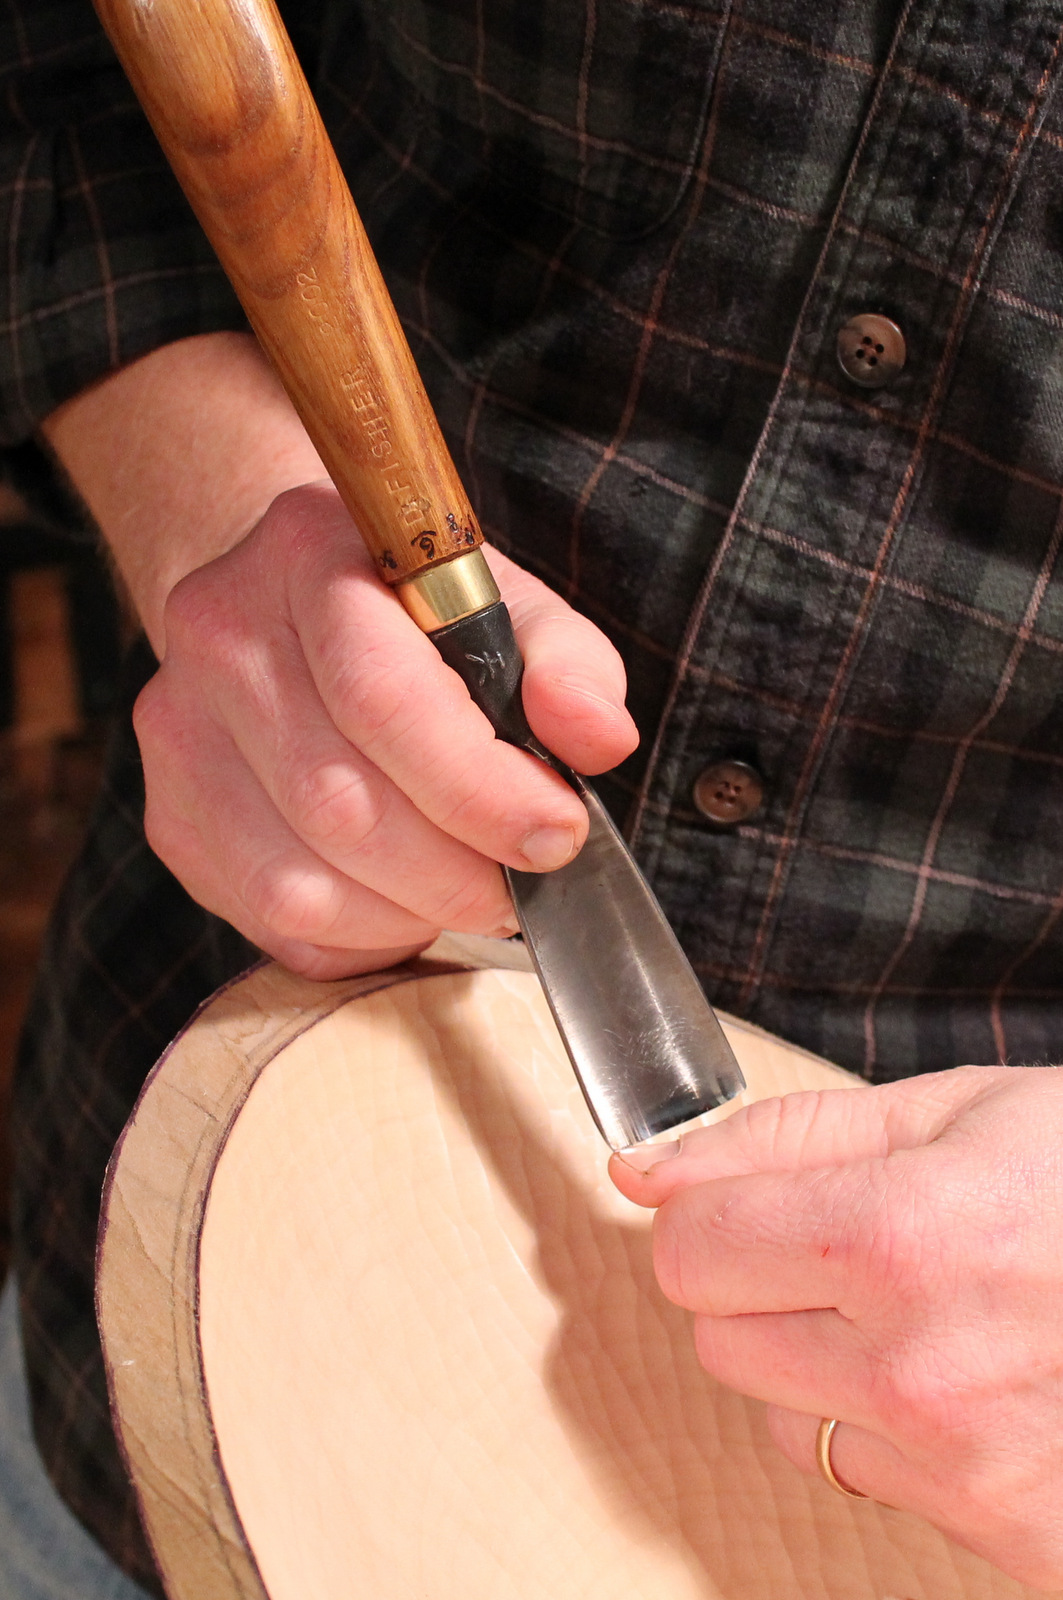
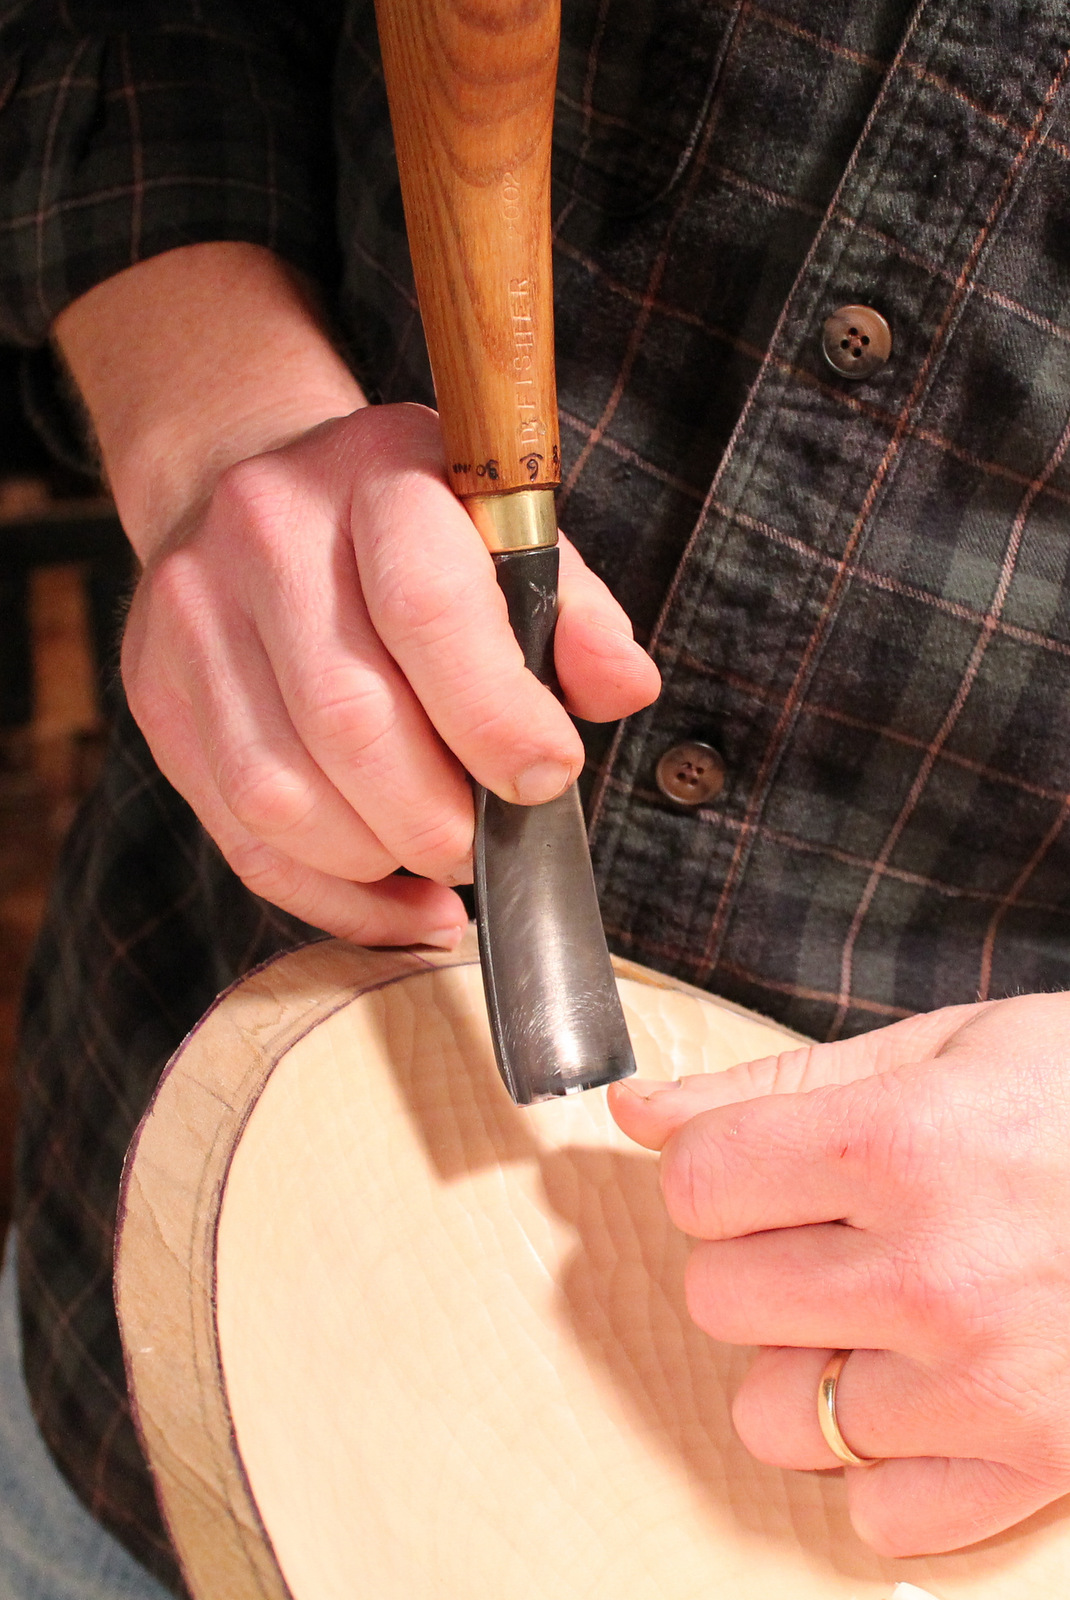
I hold the gouge (or chisel, knife, axe…) very lightly and at a shallow angle to my thumbnail.  With just the slightest of pressure — no more than the weight of the tool, for most tools, less — the edge should bite instantly rather than slide down the thumbnail.  In the case of my gouge, only the wings of the edge bit instantly, the more-used middle portion slid.

Often, a bit of stropping is all it takes to get back to work.  But eventually the area near the very edge of the tool becomes too rounded.  You’ll find that the tool has to be raised to a much higher angle to get a good thumbnail bite.  So the thumbnail test not only tells you about the sharpness of the very edge, but also about the geometry near the edge.  It may tell you it is time for a touch up on a stone, as it did for me in this case.

Start at the far corner of the edge...

Start at the far corner of the edge…

...and slide the tool forward with the lightest pressure along the edge of the thumbnail. Obviously, avoid contact with any skin in front of the nail.

…and slide the tool forward with the lightest pressure along the edge of the thumbnail. Obviously, avoid contact with any skin in front of the nail.

Another thumbnail test involves running the edge of the tool very lightly along the end of the thumbnail.  I often do this test during the final stages of sharpening.  It will reveal even the slightest of nicks or wire-edge remnants.  It is amazing how something imperceptible to the naked eye can be revealed through a vibration transferred through the thumbnail.  This one might make observers cringe, but there is really no danger if you’re careful.

You might wonder why a thumbnail? Why not a scrap piece of wood, or something else not attached to your body?  What about my manicure?  I think the best answer is feel.  You feel the subtle bite not only with the hand holding the tool, but in the thumb as well.  You receive more information.  You will not end up with gouges in your thumbnail; the edge leaves just the slightest of nicks.  Plus, thumbnails just seem to be about the right hardness — and they’re always there when you need them!  I guess that’s what they’re there for.


Posted in sharpening, tools, Uncategorized | Tagged , , | 5 Comments

Overlooked Hooks and Crooks

IMG_6280

Here’s to the overlooked.  Like the next guy, I appreciate the smooth curves of a well-made hook knife or the rich brown tones of a piece of walnut.  But last week I devoted some attention to a hook and tree that often go unnoticed.
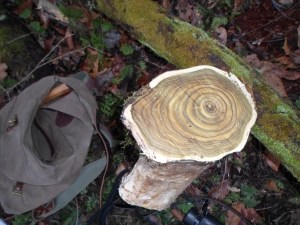
SAM_2587It all started on a walk by the beaver pond. One busy fellow decided he liked the taste of sumac and I harvested a piece of his leftovers.  Other than a minor exception, I had never carved sumac.  But I thought there might be a small bird bowl in this curving crook of the sumac trunk, and curiosity won the day.
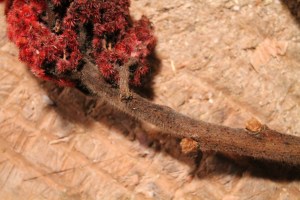
 

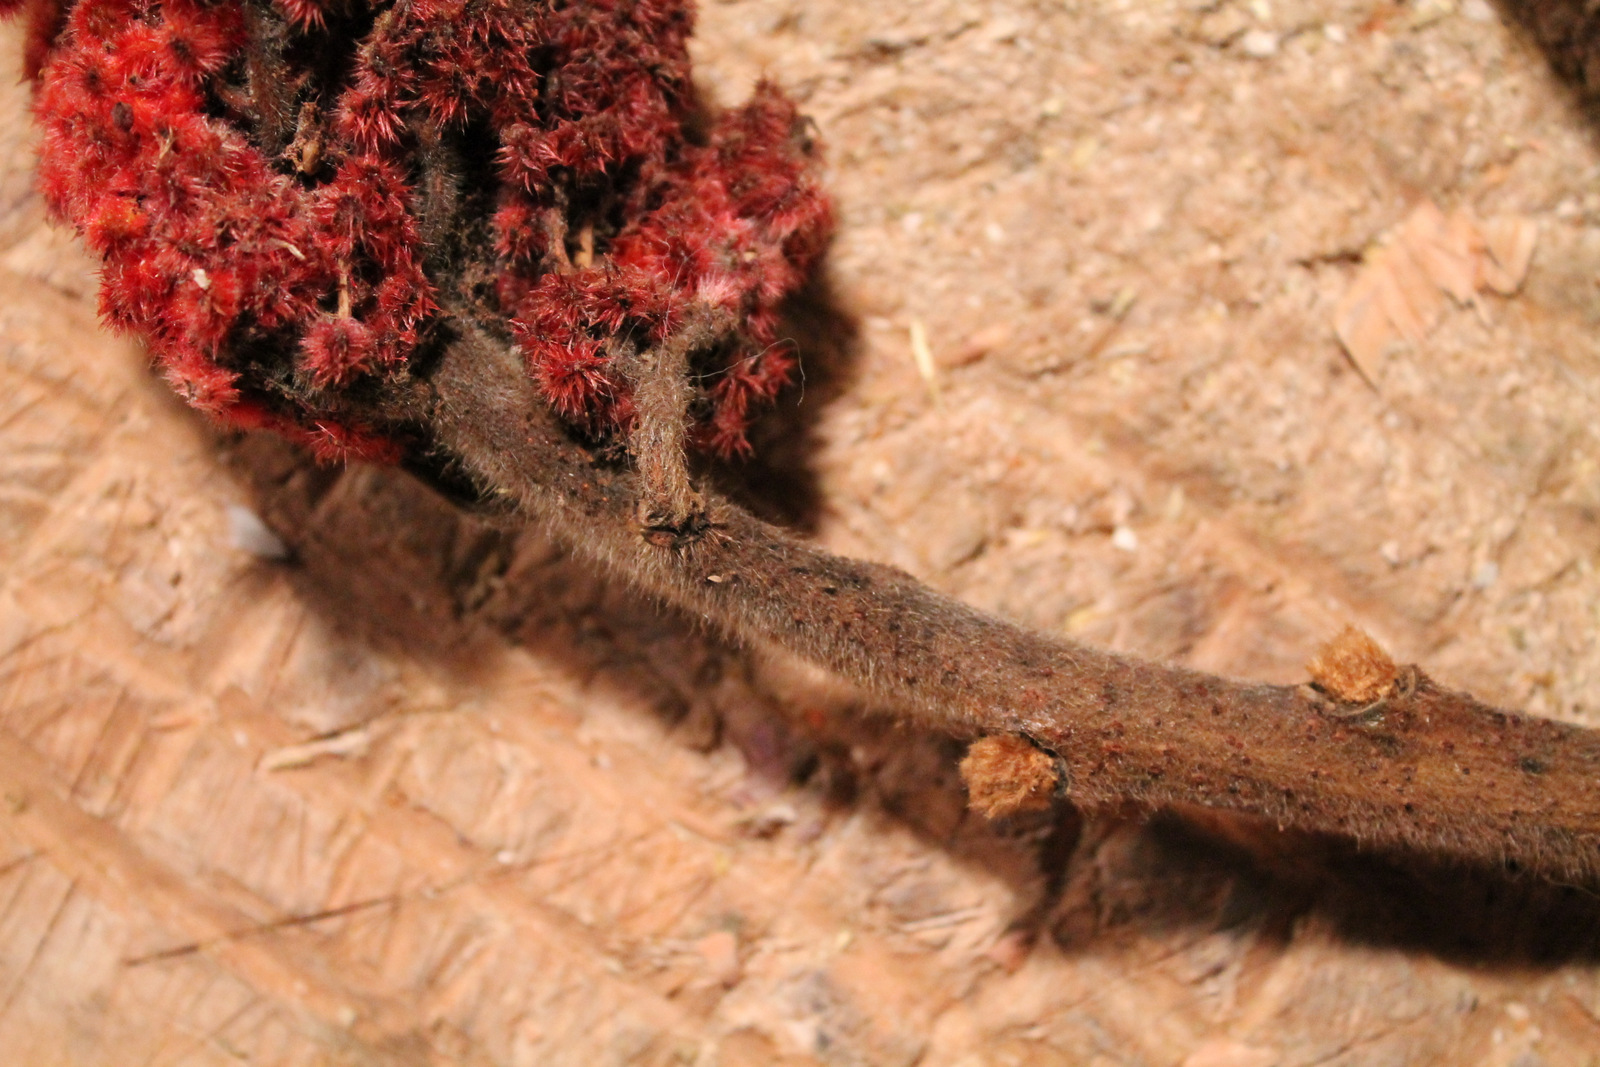
The fine hairs on the branches remind one of deer antlers in velvet and give the staghorn sumac its common name.

The fine hairs on the branches remind one of deer antlers in velvet and give the staghorn sumac its common name.

Actually, sumac, in this case — staghorn sumac (Rhus typhina) is a fascinating tree.  Native Americans used it for medicinal purposes, and the berry clusters are still used by some to make a pink-lemonade drink full of vitamins. Many mammals and birds eat the fruit, leaves, and bark.  Colonists reamed out the wide soft pith from branches to make spiles for gathering maple sap.  Its uses  extend to dying and beekeeping. Folks have even smoked it!
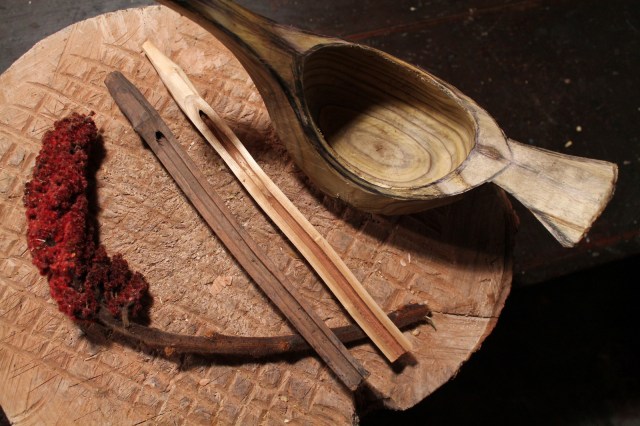
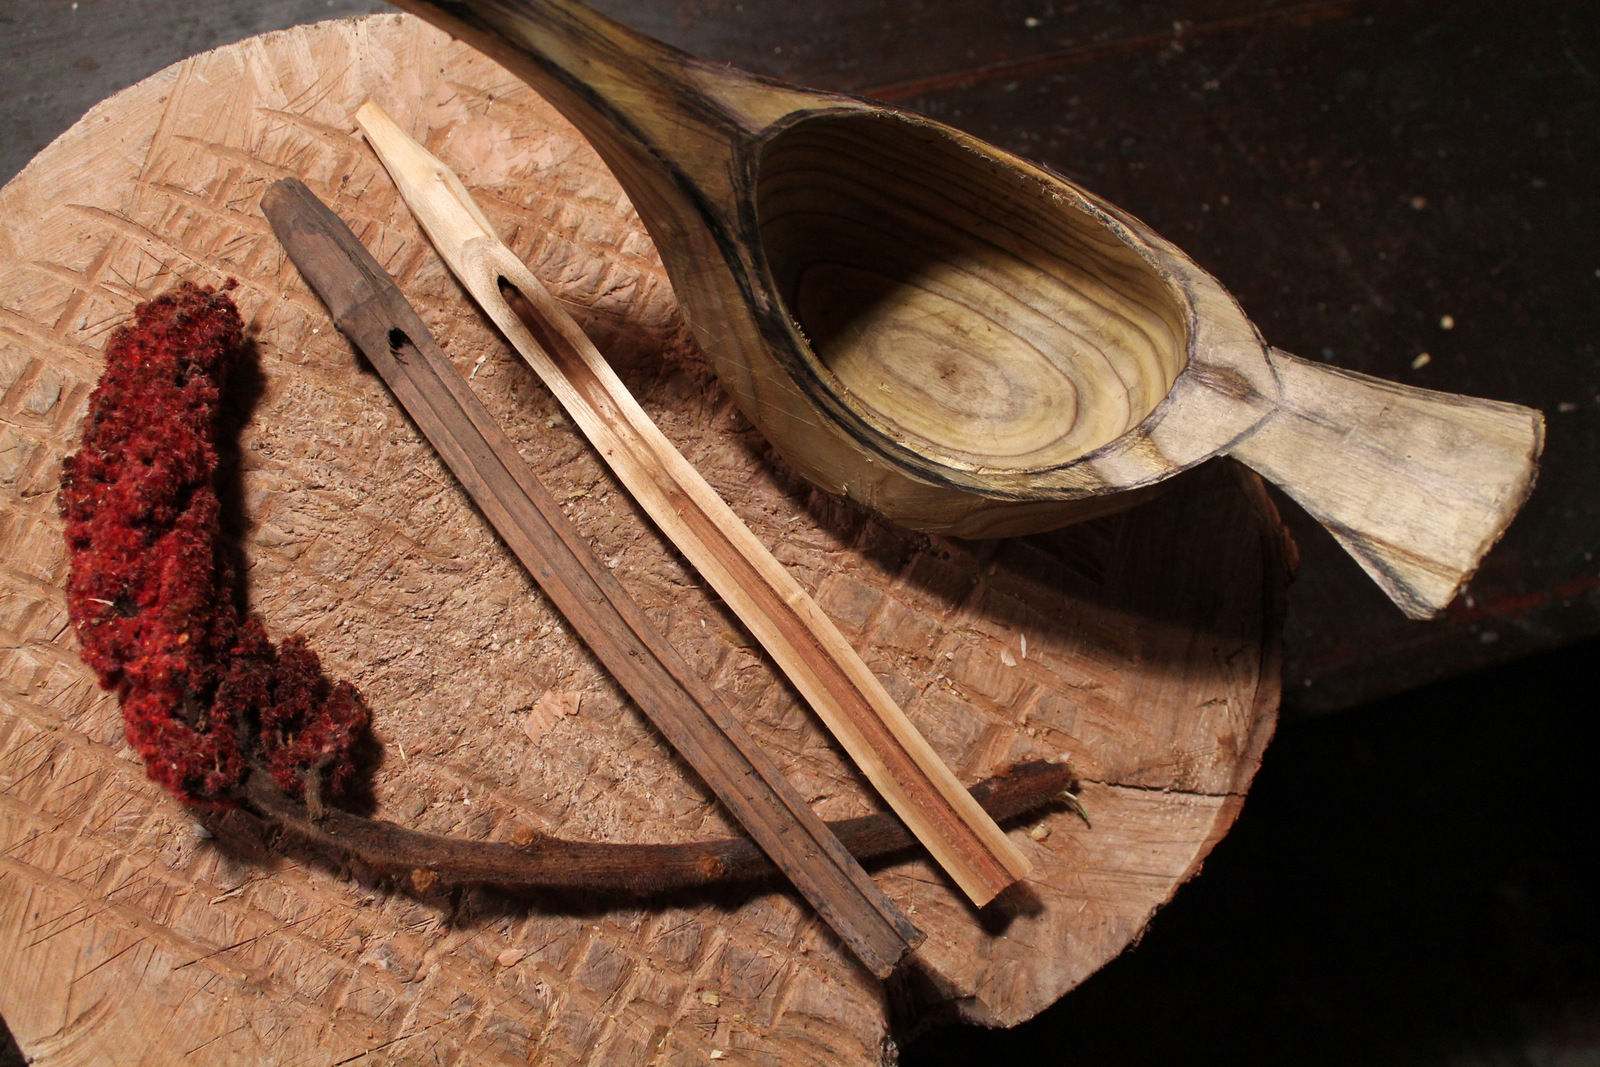
The berry clusters of sumac stand out in late summer and long after the leaves have dropped. A friend of mind found dozens of old sumac spiles in an old collapsed sugar shack. The one on the left is one of those; the one on the right is one I made a few years ago as an experiment. The pith is wide and soft, allowing for a natural tube and trough. On the far right is the roughed out sumac bowl, drying and waiting for the final carving stages.
The berry clusters of sumac stand out in late summer and long after the leaves have dropped. A friend of mine once found dozens of old sumac spiles in a collapsed sugar shack in the woods. The one on the left is one of those; the one on the right is one I made a few years ago as an experiment. The pith is wide and soft, allowing for a natural tube/trough. On the far right is the roughed out sumac bowl, drying and waiting for the final carving stages.

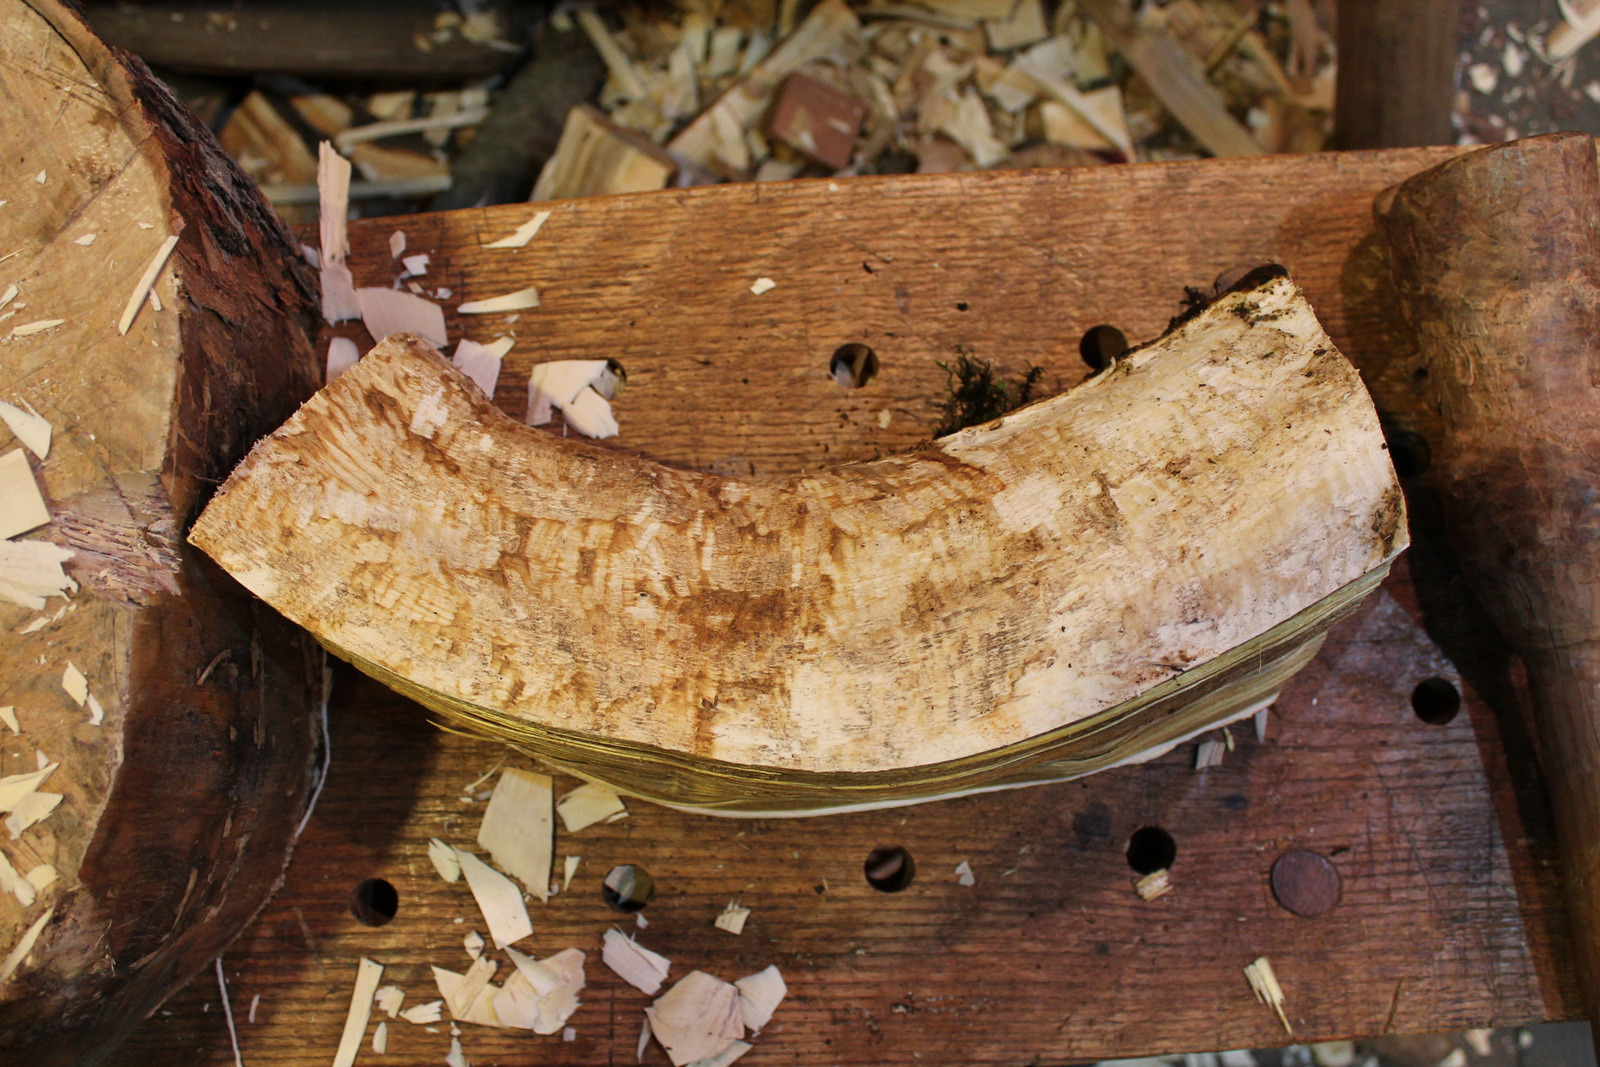
IMG_6267IMG_6268I was just looking to carve it.  As far as sumacs go, this one that the beaver liked (if you click on the photo above, you can see his teeth marks) was relatively large — about 8 inches in diameter.  I split along the open pith.  The beaver had already eaten the outer bark, but I still wanted to remove the thin layer of sapwood to get down to the brilliantly (garishly?) green heartwood.  I used a drawknife that I reserve for rough work like cutting through bark, knots, and initial shaping.  The edge has some small nicks, and I just leave them.
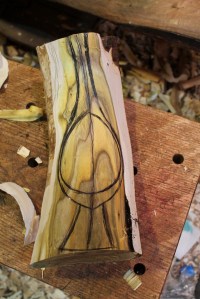
IMG_6269IMG_6270No fancy layout on a piece like this; I just go with the flow and sketch a rough idea onto the roundness of the top.  For small things like this, I often roughly shape the outside before hollowing to make things easier to hold by hand.
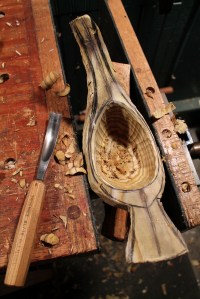


IMG_6277This hollow is too small to mess around much with the adze, so I start the hollowing with a gouge and mallet.  This fresh sumac wasn’t too hard, so I used some paring cuts as well.  But the gouge, even a spoon-bent, will only reach so far, so I grabbed my ugly, clunky and effective Frost’s #162 hook knife.

I do have a Nic Westermann twca cam, and it is a beautifully designed tool that works sweetly.  I mentioned using it a while back in this post.  It may come in handy for some of the final stages, but I love to rough with the #162 — especially small things like kuksas, ladles, and small deep bowls like this.  The tool has a deep, agressive U-shaped curve and an exaggerated offset that helps to reach in deeply to undercut areas like the belly of this bird that widens below the opening of the hollow.

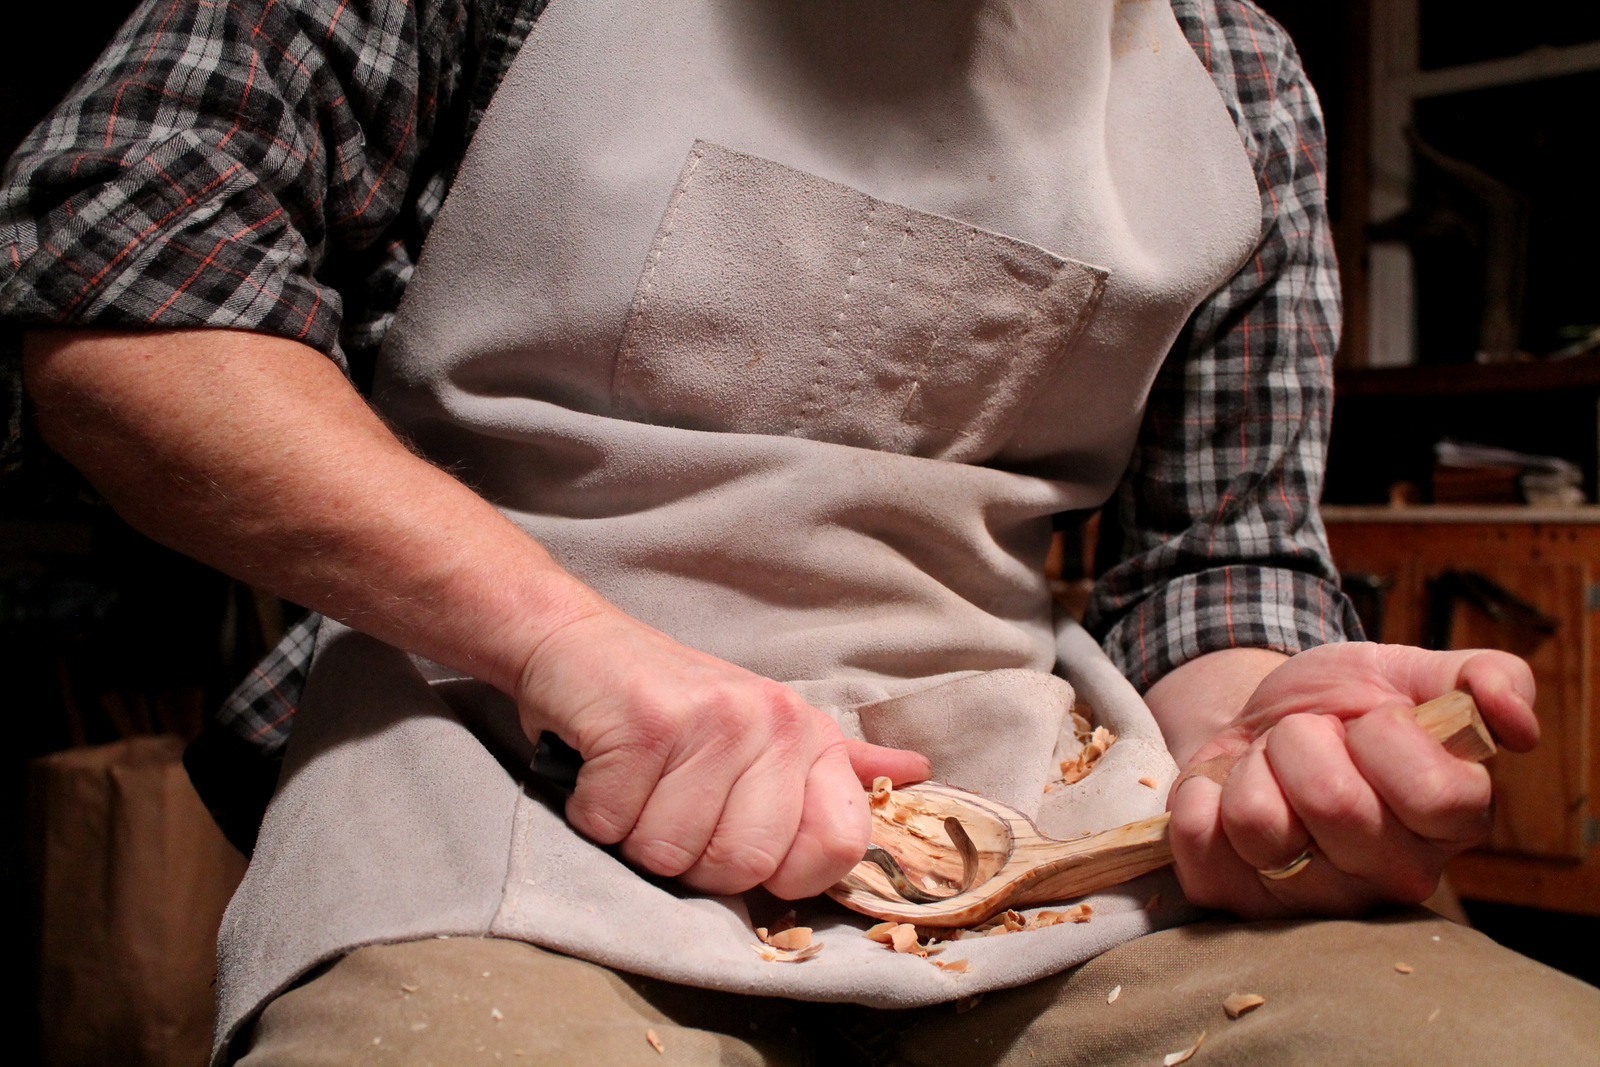
I also appreciate the fact that it is sharpened on both edges.  When roughing, I can quickly switch directions with the tool and work with the grain to full advantage.  Here’s a few photos  to illustrate that idea:
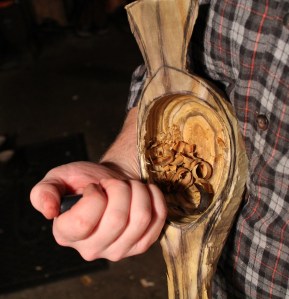
Here I am pulling the tool from the top of the grain toward the side, eventually hollowing under the rim.
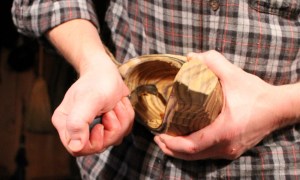
Here I am pulling the tool from the top of the grain toward the side, eventually hollowing under the rim.

By simply rotating the wrist, the opposite edge can now be pushed along the grain on the opposite side.
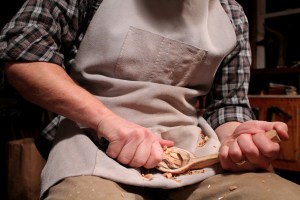
By simply rotating the wrist, the opposite edge can now be pushed along the grain on the opposite side.

When roughing spoons, I can remove wood by pulling across or down the grain.
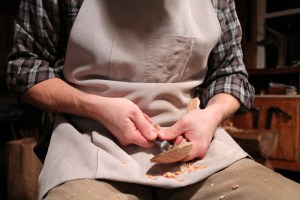
When roughing spoons, I can remove wood by pulling across or down the grain.

And, when appropriate, switch grips, levering against the opposite thumb to push the blade through the wood.

And, when appropriate, switch grips, levering against the opposite thumb to push the blade through the wood.

Although one could use the #162 right down to the final cuts, I usually prefer to switch to a hook knife with a dynamic curve (changing from relatively flat to a more rounded toe) and a rounded back edge for the final cuts after drying.  Roughing with the #162 saves the edge of my finishing hook as well.  Although relatively inexpensive, the #162 does benefit greatly from some initial sharpening, so be prepared to invest a little time and skill in honing.  I suppose there are lot’s of places to find these, but here is the page at Ragweed Forge.  You’ll see it when you scroll far down, along with some books and other things, including the popular Frosts #106.  Ragnar has a slew of knives, helpful information, etc. on his other pages as well.
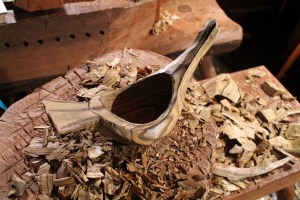
IMG_6289

Roughed sumac bird bowl, beginning to dry.

Even in just a few days of drying, the green of the sumac has begun to mellow.   Meanwhile, I’ve got lots of other projects underway, some nearly finished:  maple bowls, spoons, and even the distaff from Maine that I return to from time to time.  Then I’ll return to my sumac birdy, and we’ll see how it turns out.
 

Posted in bird bowls, bowls, carving, finding wood, green woodworking, holding, tools, trees, Uncategorized | Tagged , | 10 Comments

The Carving Fountain of Youth

Bengt Lidstrom_NEW

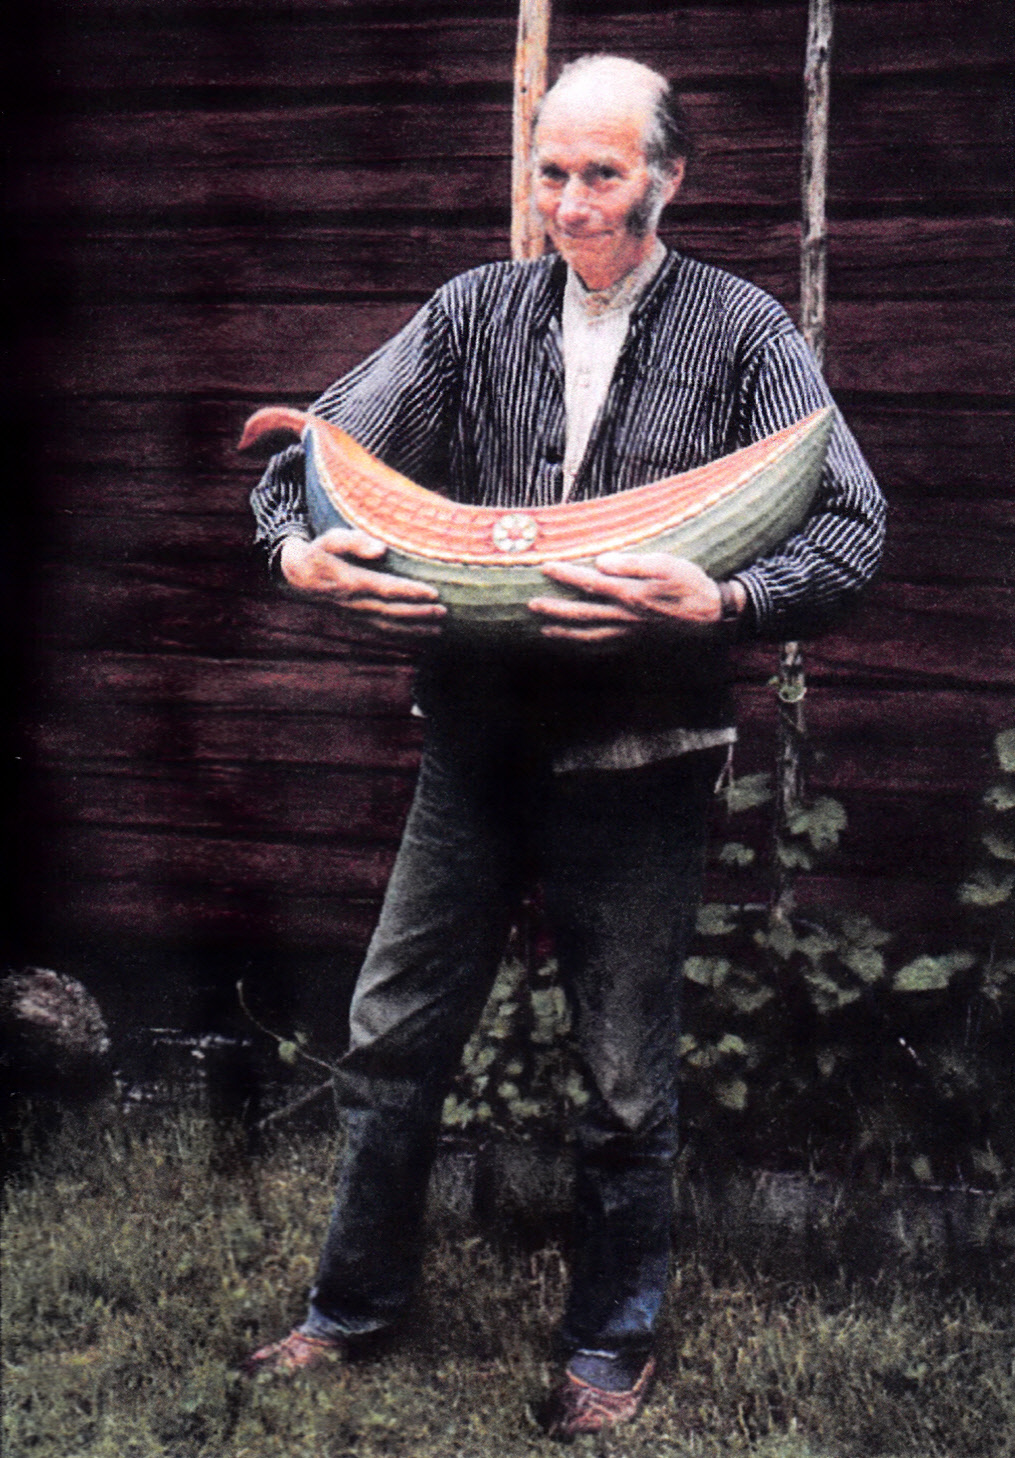
By now, most of you have probably watched the video featuring Bengt Lidström, renowned Swedish architect and bowl carver.  Recently, I contacted Drew Langsner in an effort to learn more about Bengt.  He informed me of an extensive article about Bengt in a journal published by the Västerbottens Museum in northern Sweden in 1996.  The link I once had to the article no longer seems to be active.  Dozens of pages, and all in Swedish — but the photos are in English.

I muddled through copying and pasting with Google Translate.  Later, carver Paul Anderson kindly sent me some additional translation.  Bengt was born in 1916, one of 15 children.  He grew up learning hand skills; when something was needed, the Lidströms made it.  Through his career as an architect Bengt celebrated traditional Swedish styles and methods.  His work included the restoration of many Swedish churches.  Several of the photographs in the article pertain to that work.
Bengt retired in 1981 and devoted much of his time to carving, becoming especially known for his wooden bowls.  His bowls were inspired by Swedish folk traditions, including the tradition of individual creativity.  Bengt began carving “upside-down bowls” by carving into the bark side of the log.  Over time, he increasingly decorated his bowls with carved patterns and painted them with vivid colors.  I am amazed by the beauty, creativity, and variety in his work.  And, admittedly, I have seen relatively little of it.
Every once in awhile, I’ll watch the Bengt Lidström video again.  Even though I do many things differently, I notice and learn something new every time.  As the years go by, I am also more inspired by Bengt’s age at the time of recording in 1998.  He was 82 years old, and going strong.  Carving keeps you young — mind and body engaged.  With Bengt’s age came wisdom evident in his working methods.  For example, when he carves the decorative motifs on the side panels, he takes the time to arrange the piece at a comfortable working height to save his back.  

Wille Sundqvist is another who drinks from the carving Fountain of Youth.  If you’ve not watched  The Spoon, the Bowl, and the Knife, check out that link.  And add to it Wille’s book, Swedish Carving Techniques.  I’ll have to wait for another time to say more about Wille and his influence. In the meantime, check out this video of Wille carving a spoon at Country Workshops in 1982.  Then boldly carve, ageless and shirtless!

Posted in bowls, carving, green woodworking, historical reference, holding, paint, Uncategorized | Tagged , , | 19 Comments