Exploring Bowl

IMG_7487

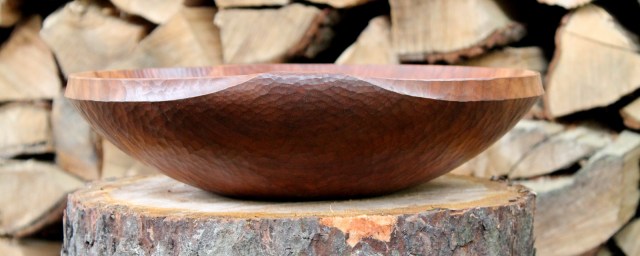
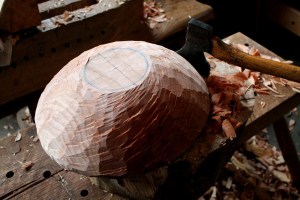
IMG_6801As I began to hew this round cherry bowl, inspiration struck and I decided to have the exterior form flow over the rim as if to explore the interior.  Since then, the form has brought other ideas to mind, including that of a lily pad.  Hopefully, the photos in the slideshow below provide an idea of the various textures as well as the subtle quilted figure within this cherry log.

This slideshow requires JavaScript.


Posted in bowls, cherry, Uncategorized | Tagged | 6 Comments

Sharpening an Adze

IMG_7424

I took some photos tonight while I sharpened my adze.  I wrote about my general sharpening procedure for an axe in this post a while back.  The general idea is the same, but sharpening an adze can be more intimidating due to the curves and geometry of the cutting edge.  I wrote a bit about that stuff here.  But really, its pretty straightforward.  There are lots of good sharpening techniques.  Here’s the way I go about it.

IMG_7400

Just slightly convex.

First check for excessive rounding of the outer bevel.  Carefully rock a straightedge down onto the bevel (see below).  It is absolutely acceptable if the bevel is very slightly and gradually convex. It is a tool for hollowing after all, and with this slight roundness, the edge will still bite instantly and glide through the cut.  However, roundness much beyond this — especially any abrupt rounding at all near the cutting edge — is a problem.  If that is the case, the bevel needs to be reshaped/flattened.  Rather than go into that right now, let’s assume all is well in general with the bevel, and the tool just needs to be honed.

I hold the adze in my left hand with the edge pointing up.  This allows me to manipulate the adze and see when the stone, held in my right hand, is flat on the bevel.  I rock the stone onto the bevel, and I’m ready to hone.

I move the stone in small circles, maintaining contact with the bevel throughout. the movement from corner to corner.

The scratch pattern provides feedback on how well contact across the bevel has been maintained.  It may be helpful to blacken the bevel with a Sharpie to see the contrast more clearly.

IMG_7416

Once I feel a slight burr along the entire inner bevel, I continue working the outer bevel with a finer stone.  Once I am finished with the extra fine stone, which may be all that was needed in the case of a little touch-up, I move on to the inner bevel.


I use a very fine ceramic teardrop slip at this point, rocking it down onto the bevel, then sliding along the inner bevel until the burr is on the outside.

I can feel the burr on the outside.  Then i use the flat portion of the same slip to lightly hone the outer bevel, which pushes the burr to the inside… This procedure continues until the burr is gone.  Sometimes the wire edge can be seen as it falls away.

Stropping polishes the edge and removes any fine burr that might remain.  I use a slip strop on the inner bevel.

I protect the edge with a good guard or sheath.  This is my favorite, a gift from a friend, and fellow carver, in Indiana who had it custom made.


Posted in adze, sharpening, tools, Uncategorized | Tagged | 6 Comments

By Hand and Eye: The New Website

IMG_7359

Here are two of the most important tools in my shop, other than my hands and eyes.  The uses of a compass extend far beyond striking circles.  I use one, or more, on just about every project to aid in design, work out proportions, establish perpendiculars…the list goes on and on.  I’ve discussed some of those ideas in more detail in my posts related to layout.  It may not seem as exciting, but the thoughtful preliminary design considerations shape a piece as much as the axe.

That should not be intimidating.  Which is why I admire the efforts of George Walker and Jim Tolpin in encouraging people to develop and trust their designer’s eyes.  They have recently expanded upon those efforts with their new website and blog that already includes some enlightening thoughts, procedures, and videos with more to come — check out the blog.

George and Jim have immersed themselves in design from an artisan’s perspective.  They balance classical design theory with very practical layout procedures.  You’ll get the idea from the creative animated video on the opening page of the website.

And if you’re looking for a big compass or two, I got mine years ago here through Lee Valley.  Same as mine, but I see they leave them shiny now instead of black.


Posted in layout, proportions, Uncategorized | Tagged , , | Leave a comment

Do Justice, Love Kindness, Walk Humbly

IMG_7152

I recently completed this commission for the congregation of a California church.  They wished to honor their minister’s ten years of leadership with a bowl featuring their church motto, Micah 6:8.  It is a beautiful verse.  I was happy to play a small role in their celebration, and I was fortunate enough to have a suitable log on hand.

I decided on a design I hadn’t carved before, a large (20″ long and 14″ wide) oval bowl in black walnut with a rim that flares out all around.  This provided room for the lettering, but made for some challenging hewing and carving on the exterior. Below is a slideshow of some more photos of the bowl.

This slideshow requires JavaScript.

It is a relief when the last painstaking cut is made on the lettering, and all is spelled correctly and so on.  There’s not much room for error, so the process begins long before the cutting.

It starts with some brainstorming mentally and on paper.  Then I do a small-scale very simple sketch in a straight line, just to determine general halfway and quarter points to help achieve the right spacing.  In this case, I then made a full-scale sketch on paper, after laying out a full size oval matching the bowl.

IMG_6969

I sketch lightly in pencil, darkening the lines as the ideas become more firmly established and the spacing shapes up. As I sketch, I keep in mind the common characteristics of the letter form, but I am still free to adjust individual letters with the goal of achieving a more pleasing whole.  Since the bowl rim is not planar (it is angled downward away from the hollow all around), the flat paper can’t be used to transfer the lettering onto the wood without puckering and distortion.  I just mark a few reference points onto the wood, and then draw the inscription with a soft pencil onto the wood.  These pencil lines are the general guidelines for the cutting, but it is the cutting itself that matters.

IMG_7108

Cutting the lettering into the bowl rim.

This is v-incised lettering, the sidewalls of the letters form a v profile, creating a nice contrast of light and shadow.  For relatively small letters like this, I rely almost exclusively on my pen knife blade, as I’ve discussed before on the blog.  I sometimes use a very narrow knife point for tight areas.

I find it best to do this with the bowl free to be manipulated with my left hand, legs, etc. to position it in different ways while making various cuts.  I also like a strong directional light.  The window is good during the day, and a clamp light works well at night.

Lettering doesn’t have to be so painstaking, depending on the piece.  More spontaneous lettering with the knife, even with no sketching at all can be a lot of fun and achieve very cool results, especially for smaller pieces like shrink boxes, spoon handles, etc.  For practice, I would encourage the use of a softer wood.  It makes a big difference.


Posted in bowls, holding, Lettering, quotes and excerpts, sketch, Uncategorized, walnut | Tagged , , | 16 Comments

April Rain

SAM_2750

Let the rain kiss you

Let the rain beat upon your head with silver liquid drops

Let the rain sing you a lullaby

— Langston Hughes, from April Rain Song

SAM_2783SAM_2774

Taken on a wonderfully rainy walk this evening.


Posted in nature, quotes and excerpts, Uncategorized | Tagged | 1 Comment

Spring has Sprung

IMG_7327

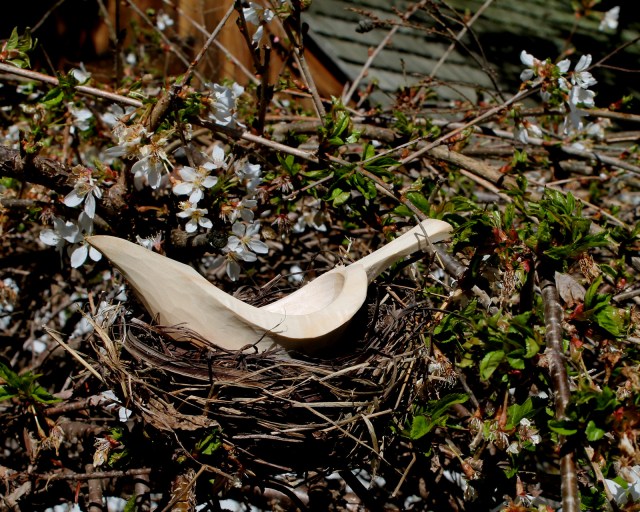
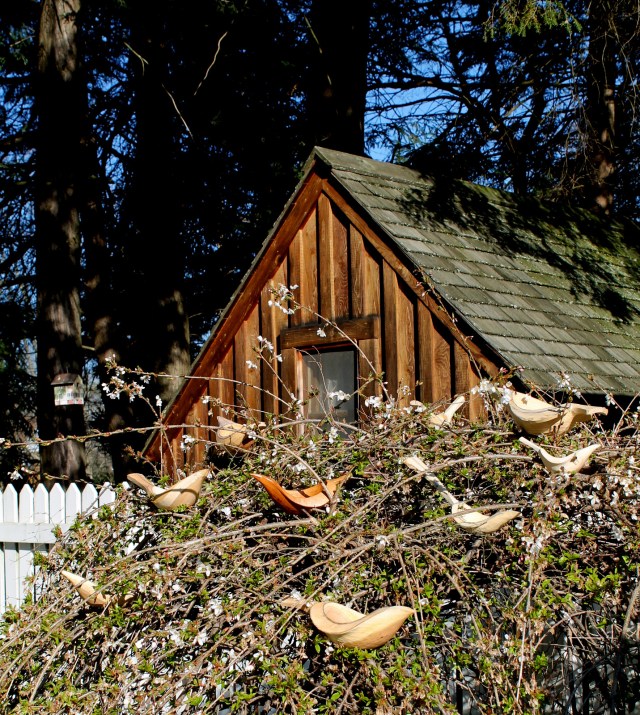
Last weekend, we had snow and lows in the teens — Winter’s last gasp, I think.  Today’s warm sun put me in the mood to snap these shots of some of the bird bowls I’ve been roughing out in preparation for Greenwood Fest.   Now I’m off to keep carving on them — outside!

IMG_7315

Escapees

Posted in bird bowls, bowls, nature, trees, Uncategorized | Tagged | 8 Comments

Chip Carving for Warlike Men and School Girls

IMG_7275-001

It is difficult to conceive the contradictory fact that this apparently simple form of art [chip carving] was once the exponent of a struggling desire for refinement on the part of fierce and warlike men, and that it should, under the influence of polite society, become the all-too-easy task of æsthetically minded school girls.

— Fred T. Hodgson, Easy Lessons in the Art of Practical Wood Carving (1905)

I assume Mr. Hodgson meant that in the best possible way, with no offense to school girls and all that.  Either way, what a sentence!  In that chapter, he does go on to point out the merits and possibilities of chip carving and even suggests some pretty interesting patterns and techniques.

Chip carving, regardless of the design, can be executed well or poorly.  Still more important than the technical prowess involved are the design choices.  Ideally, one adapts or creates a design to uniquely suit the piece on which it is carved.  The underlying form of the piece itself is most important.  The surface decoration should serve to enhance the whole, like a tastefully selected piece of jewelry.

Here is a 150 year old example of a custom design featuring various elements.  This ale bowl is a smallish personal-size ale bowl — with a bowl portion about 6 1/2 inches wide, just a little larger than the two I made and mentioned in my last post.

Some may prefer something a little more understated, but it still demonstrates the adaptability of design elements with a little creativity.

Chip carving is an accessible way, with a minimum number of tools, to capture a little light and shadow and draw the eye.  I was walking with Sam through a local cemetery a few days ago and snapped a shot of this example of, what is essentially, chip carving in stone.  An effective design that could easily be executed in wood.  Inspiration is all around us.

SAM_2715

And, how could I leave him out?

SAM_2714


Posted in books, carving, historical reference, patterns, quotes and excerpts, Uncategorized | Tagged , , | 2 Comments

Almost Ready for Ale

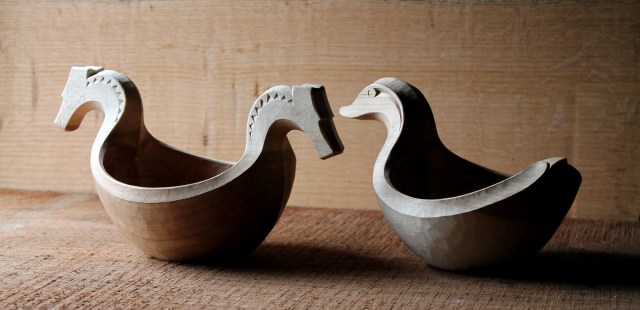
IMG_7275I finished carving a couple personal-size ale bowls over the weekend.  These are the two I mentioned having roughed out in my recent post about ale bowls.  I haven’t oiled them yet, but I thought I’d share some photos of them in the raw.

This slideshow requires JavaScript.

Neither is an exact copy of any particular historical piece.  The horse-head bowl is based much more closely on the most common design among the original examples, while the specific design of the “ale-duck” is more of a departure.  Honestly, the design for the ale-duck came about after a roughly-hewn horse head broke off of that bowl during the very early stages.  Indeed, hewing small bowls of this shape is a real challenge with axe, adze and gouge!  I was dreaming of band saws!

IMG_6693I was too focused on the hewing to take many photos, and the process would be difficult to explain here anyway.  But the photo to the left shows how I initially hewed the blanks.  It might be tempting to start with a whole round log, but you have to split it first to eliminate the pith from the piece.

Both of these bowls were carved from black cherry (Prunus serotina).  For one, I oriented the bowl with the sapwood (bark side) down, and the other with the heartwood down.  The horse head bowl has the sapwood at the top, a color difference that will show much more strongly when I oil the bowls.  The horse heads will be much lighter than the rest of the bowl, as will the lower half of the duck.


IMG_7130These are difficult to clamp or hold in a device of any kind, especially after the rough carving.  Much of the shaping must be done while holding the bowl using a variety of knife grasps.  In the photo to the right, I am using a hook knife to shape the hollowed outer rim.

These bowls would hold around 14 ounces of ale.  The horse head one is 9 1/2″ long and 5 1/4″ wide.

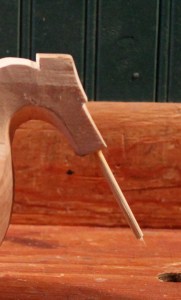
IMG_7117To guard against the future breakage of the horse heads, I drilled a hole and glued a length of bamboo skewer in each.  Now that the wood is dry, the neck areas seem quite strong in spite of the grain orientation.  The thickness of the raised center ridge helps in that regard as well.

The inner hollow is deep and undercut; plus the horse heads always seem to be getting in the way while carving the hollow.  I found that a couple bent knives from Kestrel Tool near Seattle, Washington came in very handy here.  I bought the blades and made my own handles, an easy and straightforward job.  They send instructions and rivets as well.  Unlike most carving hooks, Kestrel normally puts the bevel on the inside of the curve.  This worked well in these limited access areas, since the very sharp edge bit instantly, yet was still thin enough to rotate through the cut.  Below are a few shots of these tools.  Kestrel sends a little length of radiator hose as a blade guard, and it works pretty well.  The particular blades that I have from Kestrel are the E and the #3.  Kestrel makes a number of other tools as well, including adzes, which I will have to try someday.

This slideshow requires JavaScript.

I really enjoyed the challenge of these two little bowls, and there are lots of design possibilities.  I think I’ll carve some more in the future, including some large enough for passing around.


Posted in bird bowls, bowls, carving, cherry, historical reference, holding, layout, tools, Uncategorized | Tagged , , , | 14 Comments

A Moment with Charles Schulz

I am still searching for that wonderful pen line that comes down when you are drawing Linus standing there, and you start with the pen up near the back of his neck, and you bring it down and bring it out, and the pen point fans a little bit….and the pen line is the best pen line you can make.  That’s what it’s all about.

Charles Schulz, from his keynote speech to the National Cartoonists’ Society convention, 1994

I read that quote in the book The Art of Charles M. Schulz (Pantheon, 2001), and  he expresses beautifully an experience shared by diverse craftspeople, whatever their tools may be.

Speaking from a carver’s perspective, there are similar moments when time seems to slow down and you savor the interaction of your hands, tools, and materials.  Moments of sweetness when the knife has been turned just so and the shaving rises and curls, leaving behind the best cut you could make at that moment.  What a feeling to search for again and again.

May you enjoy such moments this weekend.


Posted in quotes and excerpts, tools, Uncategorized | Tagged | 4 Comments

Ale Bowls


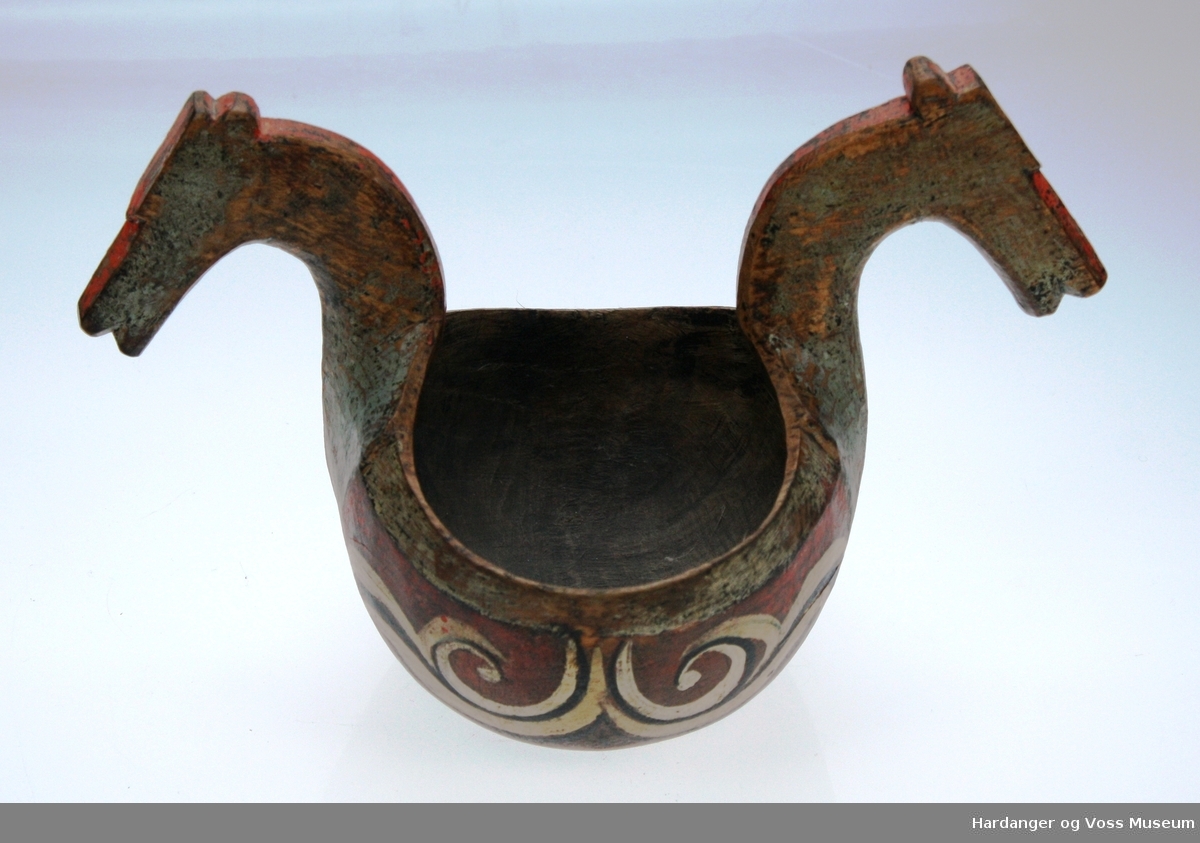
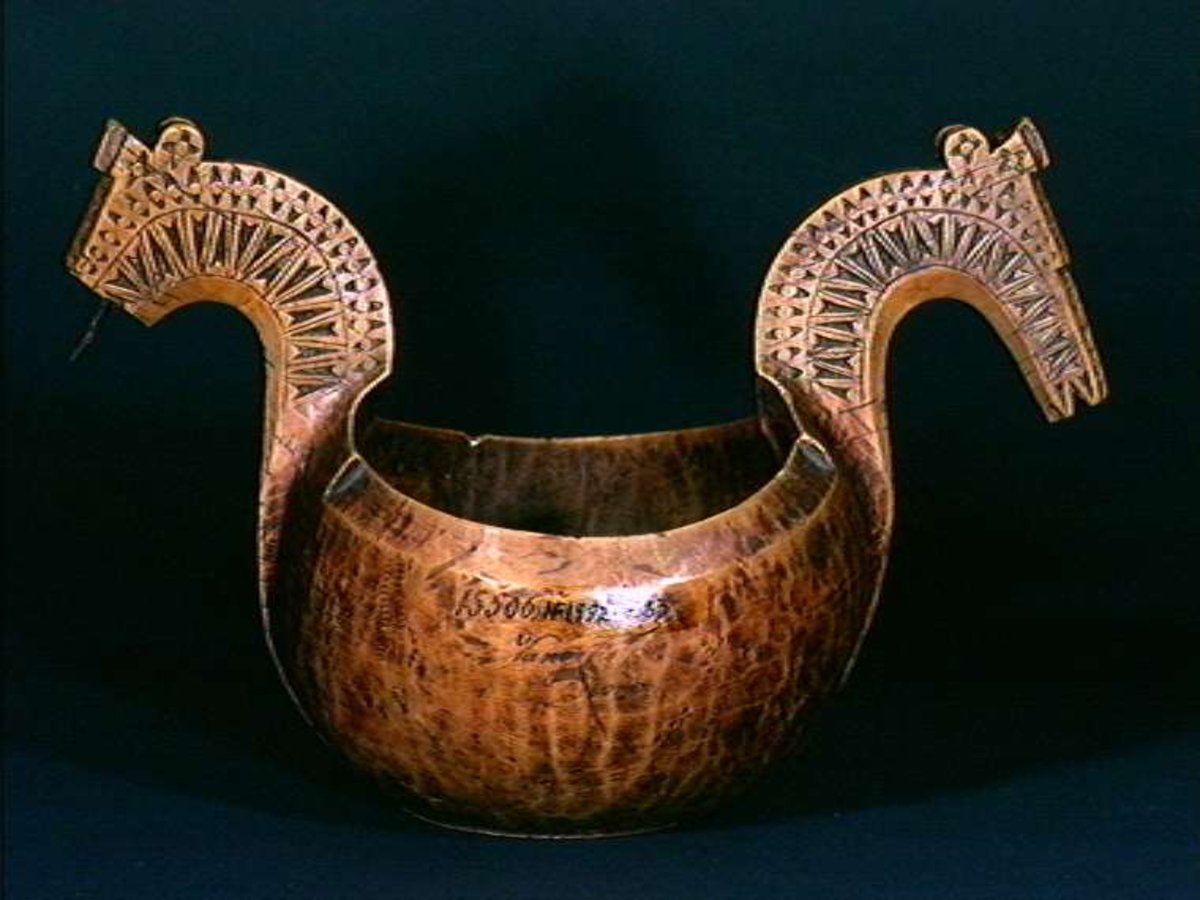
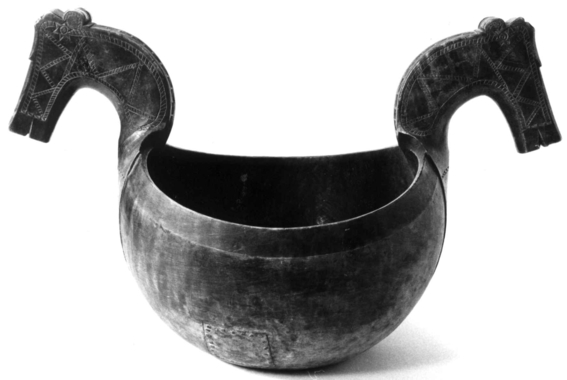
Today, most people limit their drinking from bowls to the sipping of cereal milk, but there is a long tradition of drinking from bowls.  Ale bowls are a rich part of that tradition. I have done a little research into carved ale bowls such as the one above recently.  Even though I don’t focus on making reproductions, I think there are many lessons in carving and design in a piece like this if one just looks carefully, lessons that go beyond the specific piece.

There are subtle master touches that catch the eye.  In the photo above, for example, just look at the way the thin upper edge of the rim steadily rises, broadens, then quickly returns toward the center.  Lovely.  I feel like the man who carved this is smiling at us from the past.

I already have a couple small ones underway (but no photos yet), trying to better understand the form and effective techniques while thinking creatively about design possibilities.  As my research continues, I thought I’d share a couple resources I’ve encountered.  I’d also welcome more information.  I know there are many folks out there more steeped in Scandinavian culture than I have been.
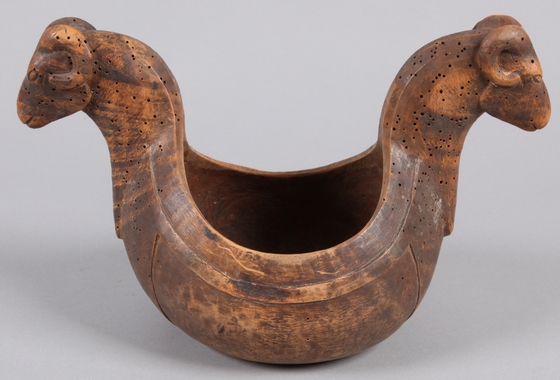
It appears that this general carved form was quite popular, especially the 18th and 19th centuries in Scandinavia (particularly Norway). It is clear by the surviving examples that many carvers were creating their own variations of a common design.  The horse-head theme seems to be most common, while others feature dragons, rams, or other animals.  One of the more common variants are birds, such as the ale goose or ale hen.

Sizes vary from large enough to pass around a large group, as was indeed a custom, to much smaller individual drinking bowls.  Just take a look at the many well-documented examples here at the Digital Museum, an online site featuring photos and information on an impressive collection of Scandinavian artifacts from many brick-and-mortar museums. The few photos I have used for this blog post are just a sampling of what is available to view there.

Like me, you will probably find that some of the specific designs are more pleasing than others.  Asking oneself, “What are the elements that make this one more pleasing to my eye (or hands, or mouth) than that one?” is a key to learning from these examples as a general lesson in design.  Many times these differences are subtle but quite consequential. The same sort of question can be asked when comparing many things from furniture to cars.
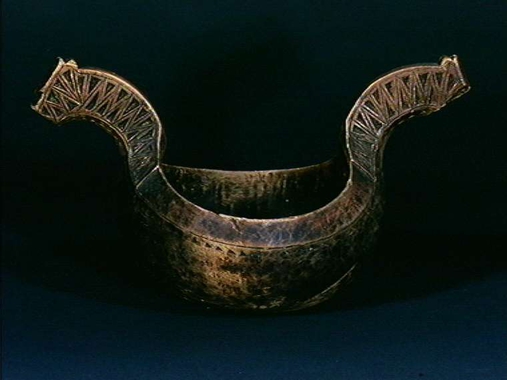
From a carver’s standpoint, my first question is the orientation of the piece within the log.  Judging by the grain visible in some of these pieces, burls — or at least wood with figured grain — was often used, presumably to guard against splitting in a design prone to it.  There are obvious weak areas of short end grain at the base of the neck and face.  In fact, there are plenty of examples in the digital museum of those that did break.  Many of those bear repairs that speak to the special value of these wooden bowls.  Just look at this example below — now that’s tenacity!
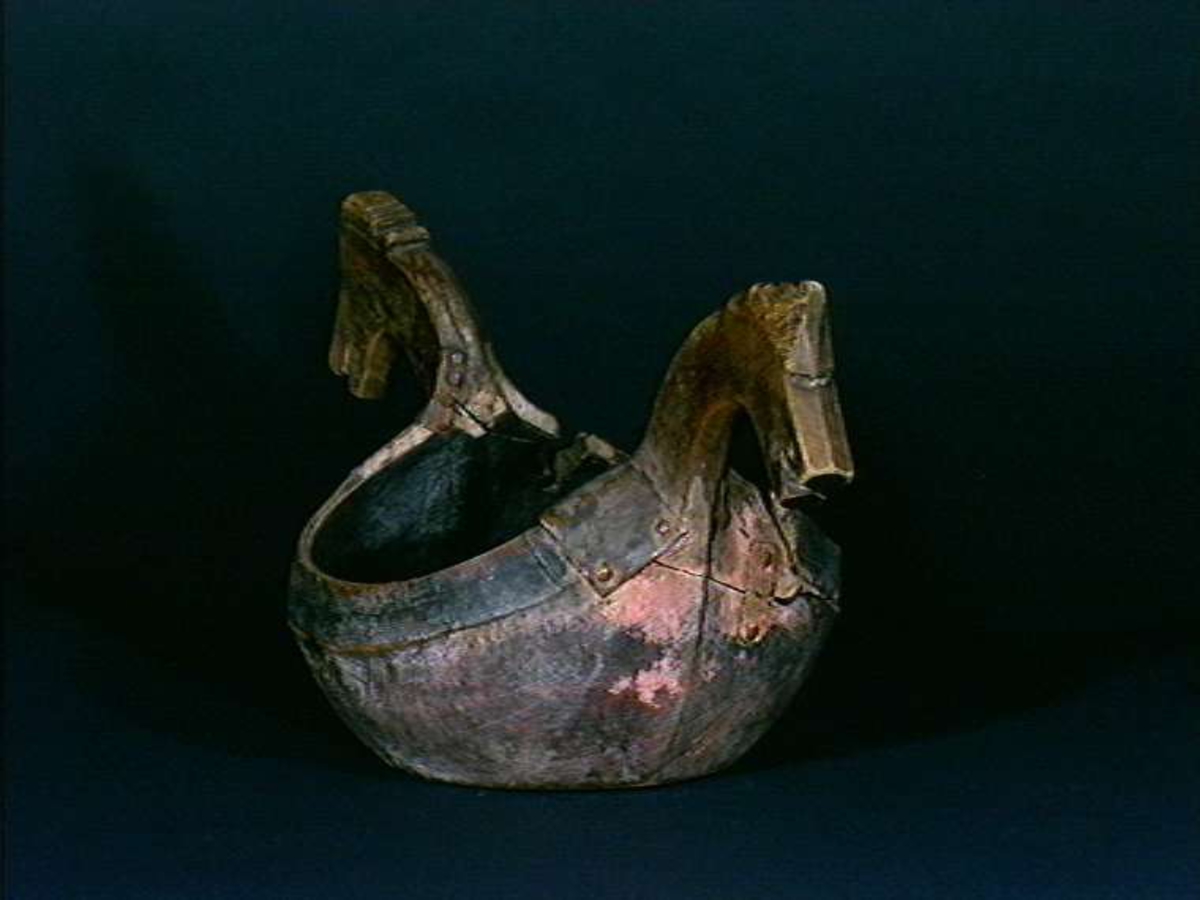
I also noticed that some seem to have been carved from crooked logs.  You can see the grain rising away through both horse heads.  Initially I wondered if there might have been some steam bending after the bowl was carved; with the horse heads flexed back and in toward the center of the bowl.  I don’t think that would be possible, considering the end-grain orientation of the area stressed while bending, but it’s just a thought.  I know that the sidewalls of some dugout canoes were bent after carving to widen them, but this feat would be very different.

Picture

I hope to study some original ale bowls in person sometime.  The Vesterheim Norwegian-American Museum has many in their permanent collection.  Chief Curator Laurann Gilbertson was very helpful when I contacted her recently.  In addition to encouraging a visit to Vesterheim, she informed me of a traveling exhibit related to Scandinavian ale and spirits traditions called “Skål! Scandinavian Spirits.”  The exhibit schedule is at that link. Laurann also informed me of this accompanying publication of the exhibit.  I’ve learned much from it, including the translations of some of the painted inscriptions that appear on the bowls.  Some are as simple as “Drink my friend, pass it to your neighbor then,” and some more reflective: “Previously I was standing in the green grove (of trees), and no one might know me, now I satisfy many a thirsty mouth.”

Here’s to ale-bowls.  Skål!


Posted in ale bowls, bowls, green woodworking, historical reference, Uncategorized | Tagged , | 24 Comments