Aspen/Poplar/Popple Ale Bowl

IMG_8685

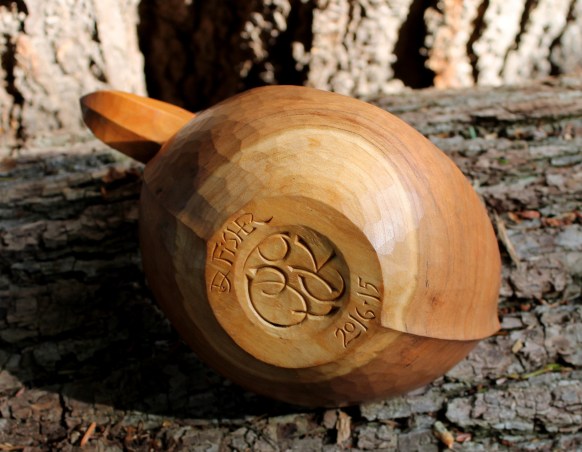
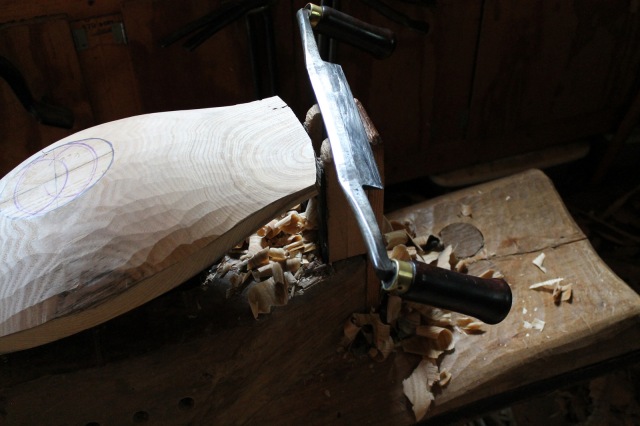
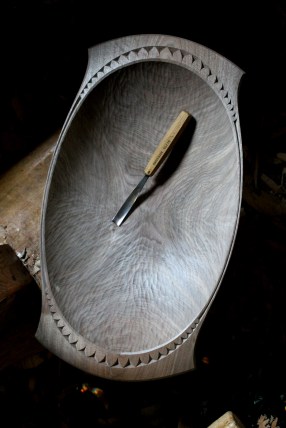
I’m settling back in after teaching a bowl carving class (not ale bowls) in the Plymouth, Mass. area with Plymouth CRAFT.  More about that great experience in another post before long. Meanwhile, one of the tasks on my list today is to package up this horse head ale bowl and get it on its way to a customer.  This one is another personal size ale bowl, about 11 inches long and holds about 18 ounces.

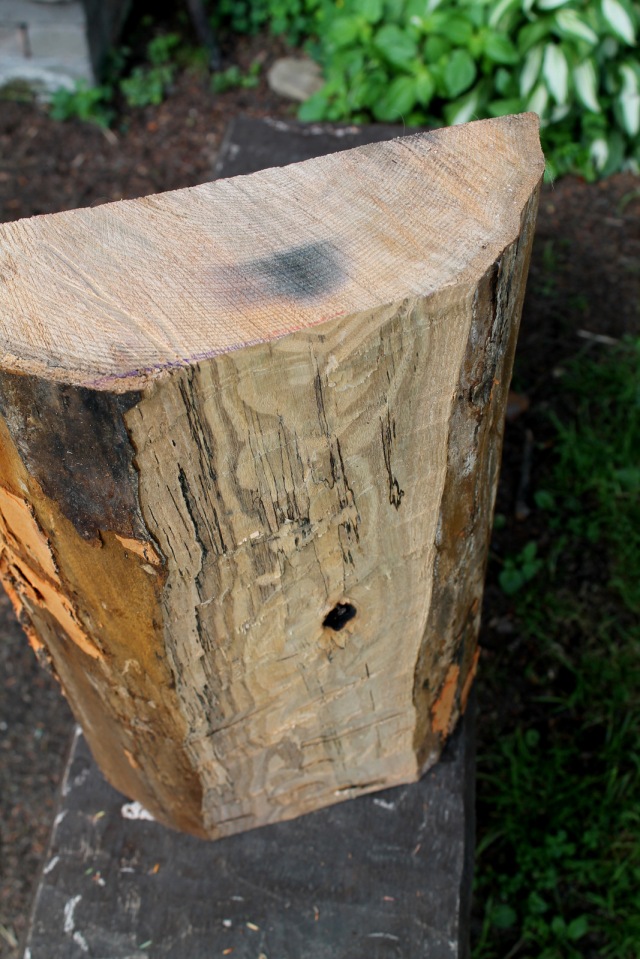
I carved it before the class, but from the same species of wood that we worked in the class this weekend.  Around here we call it bigtooth aspen, which is one of the poplars — in fact it’s scientific name is Populus grandidentata.  By the way, what we do call poplar here is not a poplar.  Anyway, it seems that this aspen is usually called popple or poplar in Massachusetts. Regardless if I have that all right or not, it is a white-yellow wood with undramatic grain that is nice to carve. Some of the students asked about painting possibilities and one of the options we discussed was artist’s oils.

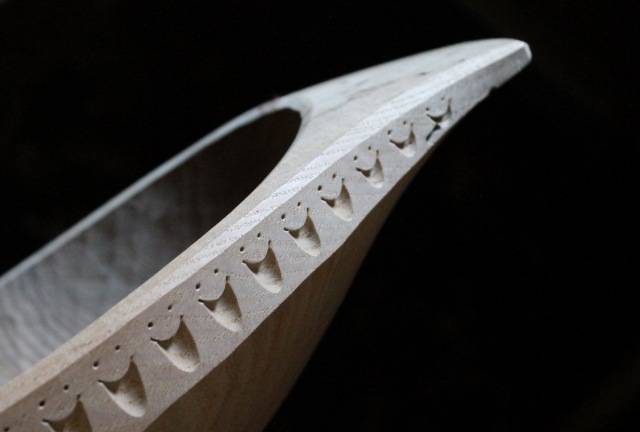
For this bowl I thinned artist’s oils with flax oil to create a consistency somewhere between a stain and a paint.  The blue-grey color is a mix of a few shades, while the top is titanium white (which is non-toxic if you were wondering.)  After it had dried I did the chip carving.  Then I treated the whole bowl, inside and out, with flax oil, followed by a mix of flax oil and beeswax.  The rubbing and buffing afterwards results, in sharply raised areas, in the subtlest rub-through of the paint, which I liked in this case.

Just one of many options for the twelve new bowls that were carved this past weekend.

Posted in ale bowls, bowls, paint, patterns, trees, Uncategorized | Tagged , , | 3 Comments

What’s Wrong with this Edge?

IMG_8714

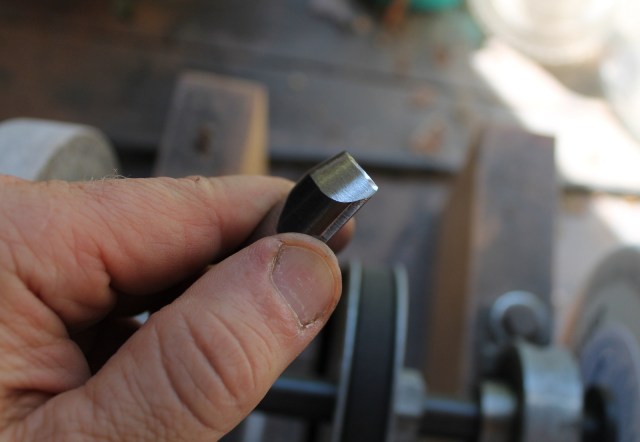
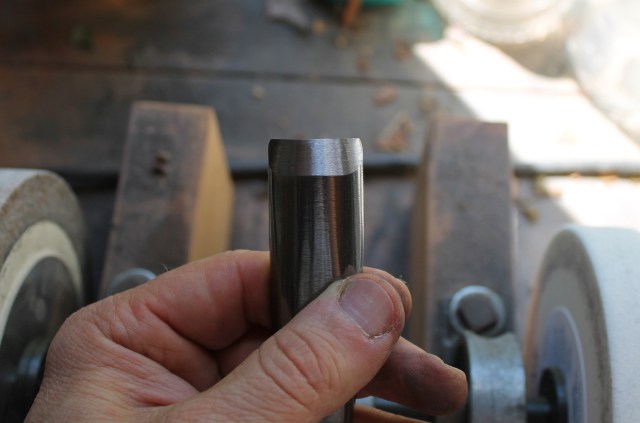
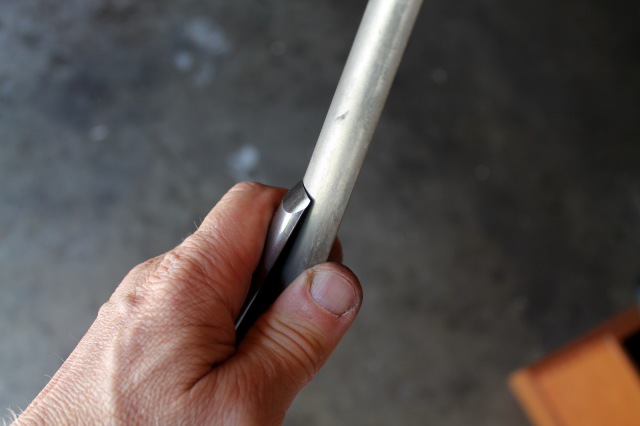
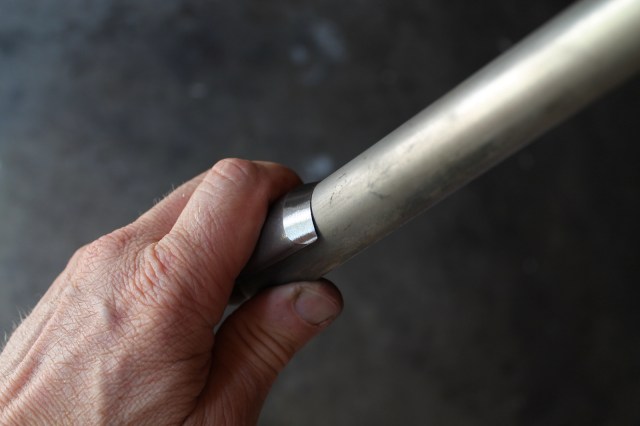
Look at the lines of reflection on the beautiful polished surface.  The polish is good.  The fact that the lines of reflection take a bit of a nosedive as they reach the cutting edge is a problem, and a very common one.  In this case, it is the result of aggressive work on the buffing wheel by the folks at Pfeil Swiss Made (they come pre-sharpened), but all edges eventually develop some rounding.  The wood does fight back somewhat, after all.

It’s no fun to obsess about sharpening.  The idea is to get it right and get to work.  That abrupt rounded bubble of steel behind the edge is like a water heater attached to the underside of your car; it hurts your performance.  Well, I’ve talked about the idea before in some of my other sharpening related posts.  In this one, I want to show how I go about getting an edge like this into shape.

IMG_8720

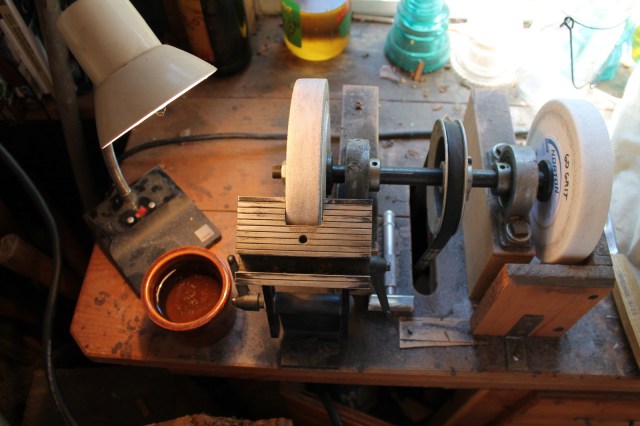
You can take care of it without a grinding wheel, it will just take a much longer time.  There can be a significant amount of metal to remove.  You could use a wet grinder.  I use a dry grinder.  Mine is a simple rig with an arbor and a belt that goes down to an old washing machine motor.  A friend and a hand-cranked grinder would be great.  I can never find any friends when I need to sharpen.  However you do it, just get an abrasive wheel to spin.  Disclaimer: This set up does not follow safety guidelines.  You should have a bunch of guards on yours (I live on the edge), and safety glasses, dust mask…

IMG_8718

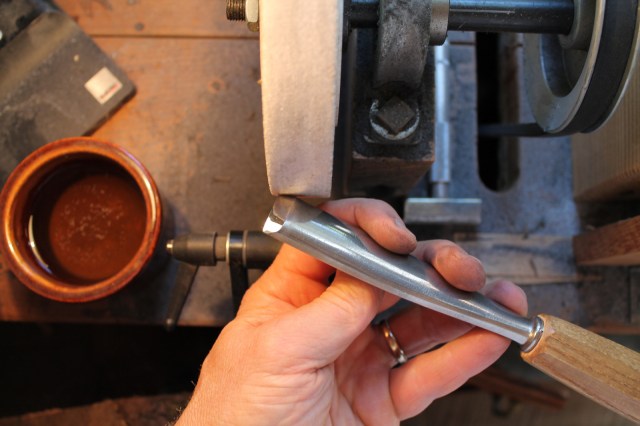
I drop my Veritas grinding support out of the way for this.  It will be a freehand operation.  Notice that the left side of the wheel has a slight convex area as the edge drops off.  This can be used to create a slight hollow grind on some tools.

IMG_8723

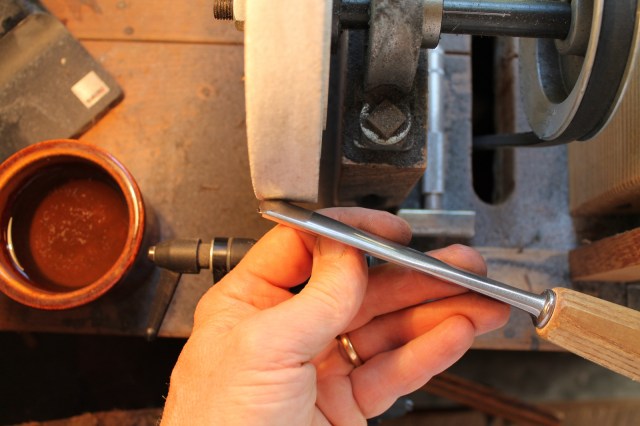
Sight from above so that you can see when the bevel is flat against the wheel.  My right hand steadies the back of the handle and provides rotation.  I start in this position, then…

IMG_8722

rotate the gouge while maintaining contact along the bevel…

IMG_8724

and finish in this position.  It becomes pretty natural and you can see exactly what’s happening all along the way.  With a light touch, you shouldn’t generate much heat in the tool at all.  If you do feel it starting to heat up, cool it in water before it is hot.

IMG_8727

I wanted to lengthen this bevel to give the tool a lower angle of attack.  Therefore, material is being removed from the heel of the bevel first.

IMG_8730

Continue grinding at the same angle, keeping the bevel flat.  Of course, the last shiny area is where the tool was abruptly rounded.  Don’t be tempted to tilt the tool to grind that.  Keep grinding the whole bevel until…

IMG_8733

the grinding marks are even and right to the edge.

IMG_8734

Since I lowered the angle of the outer bevel, I add a slight inner bevel that makes sure the edge is durable enough.  I move a slip stone (here a diamond cone) across and back and forth.

IMG_8735

another angle

IMG_8738

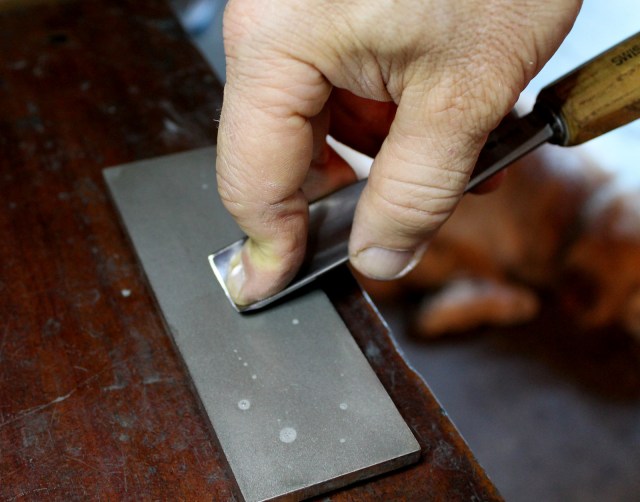
Then sharpen on your stones like always.

IMG_8751

When I get to my finest stone, I work both sides of the edge lightly with a very fine ceramic slip.  This takes the most patience — I keep going back and forth from outside bevel to inside bevel until the wire edge is removed.  Sometimes you don’t see it, sometimes you do. Then I strop and get to work.

IMG_8752

With practice, it becomes natural.  The gouge will now sing and be much easier to touch up next time.

Posted in sharpening, tools, Uncategorized | Tagged | 12 Comments

Ale Hen

IMG_8666

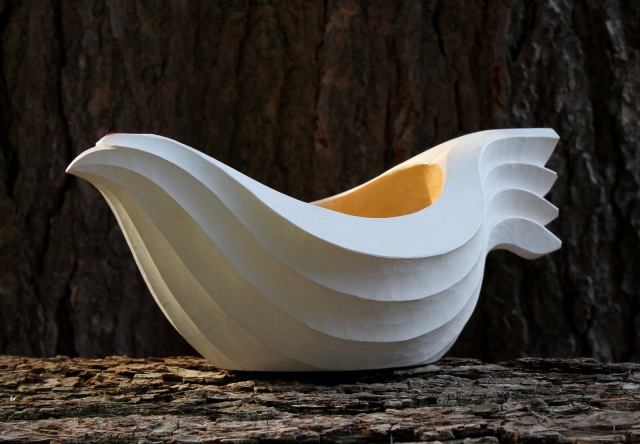
In one of my conversations with Beth Moen at Greenwood Fest, we talked about the use of aspen as a traditional wood for bowl carving.  Beth said that she liked Aspen because, although it is a relatively soft hardwood, the surface hardens nicely as it dries and holds up well.  I was able to salvage some aspen from a hillside that had been cleared nearby, and this is my first finished piece from it.

Ale hens are a traditional way of serving beer at special occasions.  You can see some of the incredible variety at the digital museum here.

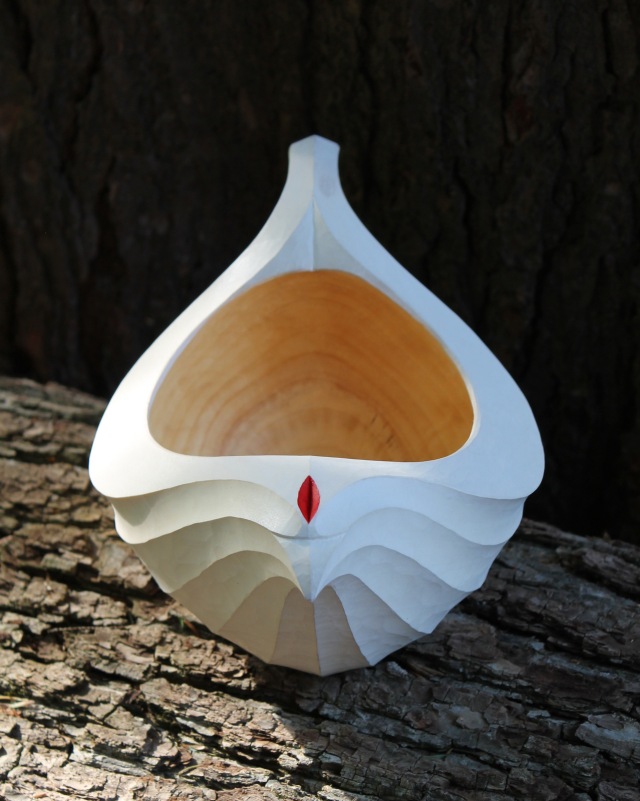
As you can see, my design features fluted facets that flow from the tail, along the full body, and up to the tip of the beak.  The outside has been painted with not-toxic titanium white artist oil paint thinned with flax oil — followed by a coat of wax.  The inside is treated with  flax oil and beeswax.

IMG_8648

It is hard to tell in the photos, but the hollow is deeply undercut beneath the wings, making the sidewalls nice and thin all the way down to the bottom.  It makes the hollowing process more difficult, but it is what works best for the design.  Subtle things like that can make a big difference.  It gives the bowl a nice feel, and makes room for more ale of course (about 24 ounces).  The bowl rests on a bottom that’s in the shape of an egg.  It is 11 inches long, 7 inches wide, and 4 3/4 inches high.

IMG_8652

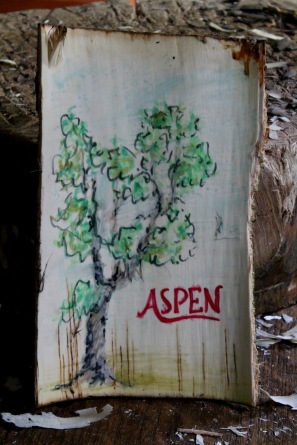
And one last idea: when you pop that fresh aspen bark off the log, take your watercolor pencils or greenwood pencil and draw a picture.  It’s almost like painting and works with other kinds of bark as well.  Great fun for kids — and for me.  When the bark dries, it’s all permanent.

IMG_7602


Posted in bird bowls, bowls, historical reference, trees, Uncategorized | Tagged | 9 Comments

Swallows in Wood and in Motion

IMG_8608

Last week, I finished these two swallow inspired bowls, one in maple and the other in cherry.  Then I found myself in Lou’s barn, a swallow haven.

My friend Lou is a part-time sawyer who knows more about trees than just about anyone I know.  Lou’s property is graced with an enormous grey time-worn barn that shelters lumber, equipment, and dozens of happy swallows.  Truthfully, it bothers Lou that the swallows don’t clean up after themselves, but that didn’t seem to matter as Lou and I watched the swallows dart after bugs over his garden in the evening.  And it’s not just that they catch bugs, it’s the way they catch bugs; truly poetry in motion.

Here is a short film that slows the magic down for us:

Here is the maple branch crook from which the larger of the swallows was carved.  How can you go wrong with a branch like that?  The swallow is practically flying out of it!

IMG_8172

And, speaking of birds, I also finished another cherry duck bowl (ale duck?).

And if you’re still not sure that it’s a duck….

IMG_8638

Posted in bird bowls, bowls, finding wood, nature, Uncategorized, video | Tagged , , , | 2 Comments

For Peace Comes Dropping Slow

IMG_8484

And I shall have some peace there, for peace comes dropping slow

–William Butler Yeats, from The Lake Isle of Inisfree


Posted in bowls, carving, green woodworking, photography, quotes and excerpts, Uncategorized | Tagged , | 6 Comments

Time for a Shave?


Hans Karlsson Scorp (or inshave) — photo from the Dictum website.

A few days ago Chris Schwarz shared a post on the Lost Art Press blog about an old Estonian scorp used for general hollowing tasks.  Check out the post here.  Coincidentally, I had just stumbled upon the existence of this scorp (left) made by Hans Karlsson.

I may have to explore the use of scorps, shaves, inshaves — whatever term one prefers — in bowl work.  I have messed around just a little with a chairmakers inshave on large bowls; same with a travisher. Beth Moen had a very cool little bowl shave with her, but I didn’t get the chance to try it out or see her use it.

For certain designs of bowls, these shaves could be a good transtitional tool following the adze work, and in some circumstances, possibly the finishing tool.  For now, I just thought I’d direct attention to the similarity between the Hans Karlsson tool and the Estonian shave.  I’m looking forward to reading Woodworking in Estonia when it ships next month.

And in case one is interested, the HK scorp may be available elsewhere too, but here is the link to Woodsmith and Dictum.


Posted in bowls, carving, tools, Uncategorized | Tagged , , , , | 6 Comments

Behind the Mask

IMG_8416Last week, I found myself in a house with this intriguing wooden mask on display.  It was about 17 inches high, 9 inches wide, and 7 1/2 inches deep.  I know very little about African masks, but to my untrained eye it looked to be old and authentic.  It had been carved quite thinly and still retained remnants of a woven web in the back that would secure it to the wearer’s head.  I had enough time to sit and make a sketch of it.
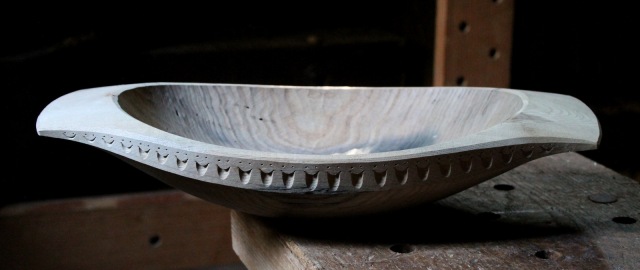
The experience reminded me of a documentary I had seen awhile back, part of which explores the way that the Dogon people of Mali carve masks.  There are many interesting scenes and thoughts in the ten-minute clip below, ranging from the respect shown for the tree to the importance of context in understanding such objects.

Check out the precision work performed with the adze as well as the other techniques demonstrated in the making of these beautiful and meaningful examples of greenwood carving.


Posted in adze, finding wood, green woodworking, historical reference, holding, sketch, Uncategorized, video | Tagged , | 3 Comments

Bowl for Beginners and Beyond

IMG_8144

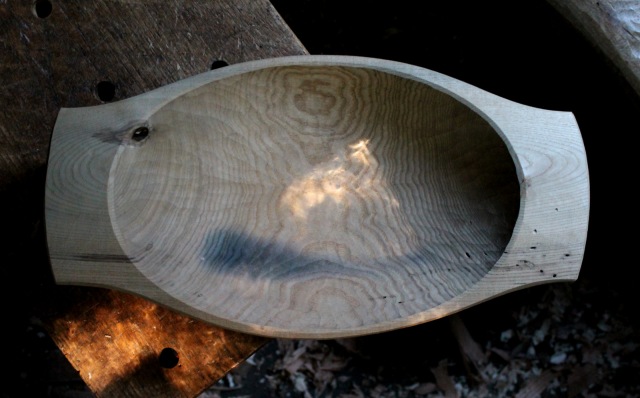
I had been thinking about an ideal bowl design for the Plymouth CRAFT class, now only a month away.  This sample bowl is the result of those thoughts.  In addition to providing challenges for development of various skills, I wanted the bowl to be useful, beautiful, and reasonable for students to achieve in a two day class.  But, even outside of a class, I think this is an ideal design for a beginner bowl, and one that provides a foundation that can be built upon as one’s skills improve.  In fact, more advanced students may wish to explore some of those options during the class.

One challenge of a two day course is the lack of drying time.  Therefore, when carving this sample bowl, I carved it, start to finish, in one go — green.  In fact, as you see it in the photos it is still green.  I’ll get a better surface finish if I go back over some areas after it dries; then again, I could just leave it dry then put on some oil.

IMG_8153

My sample bowl is in sassafras — twisted, bug-eaten, iron-stained, knot-holed sassafras.  But it is a relatively soft hardwood that is easy to work, and I had some around.  I started with a log of about twelve inches in diameter.  The bowl is about 18 1/2″ long, 9 3/4″ wide, and 4″ high.  Notice in the above photo that, as the sidewalls approach the corners of the handles, there is no outward return of the line.  This is just one example of simple design considerations that make the bowl easier to execute; the tool can exit right off of the handle without concern for grain direction issues.

IMG_8123

There is also no major undercutting beneath the handles.  The drawknife is able to flow right around the outside of the bowl and off the end of the handle.

IMG_8149

Elements like the arched rim add visual interest, and the side panel provides an opportunity for a variety of decorative carving.  In this case, I carved a series of simple gouge nail cuts, then jabbed the points of dividers above them.  Creates a simple cheery design!

So now I have the bowl wrapped in an old towel while it dries.  This sassafras is funny stuff.  As it dries, you can hear it snapping and crackling — very faintly, like Rice Crispies.  The only wood I’ve ever noticed to do that.  Scares me as I’m waiting for the “POP!”  The towel serves as a partial barrier to moisture loss, slowing the drying while avoiding mold.

IMG_8124

IMG_7990But one more thing — about that odd blue streak you may have noticed in the bowl.  The photo above shows another piece of the same sassafras tree.  Tannin-rich species such as oak, chestnut, and sassafras will react with iron, creating a bluish streak.  So, if you see something in the end grain like that in the above photo, beware!  I didn’t heed the warning, and it was almost too late for my axe when I noticed this embedded nail.
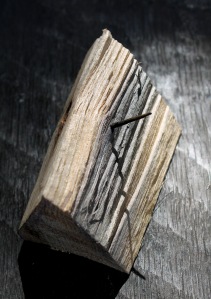
IMG_8130I had to reject that chunk.  In the case of my bowl, I was able to split off a piece containing the nail that caused the blue streak (left) and proceed with the bowl.
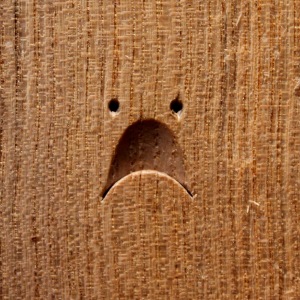
 

IMG_8163So, especially when working with yard trees or roadside trees, watch out for embedded metal.  If your adze hits that nail, you’ll look like this:


Posted in bowls, classes, drying, finding wood, layout, patterns, proportions, teaching, trees, Uncategorized | Tagged , , | 7 Comments

Necklace for a Bowl

IMG_8087

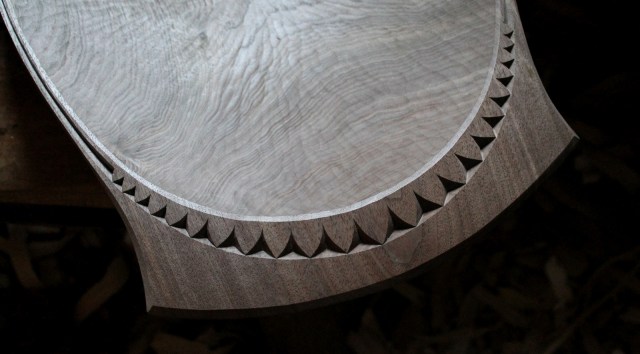
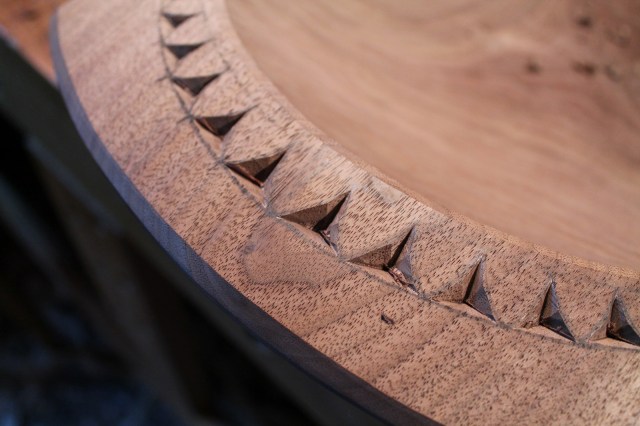
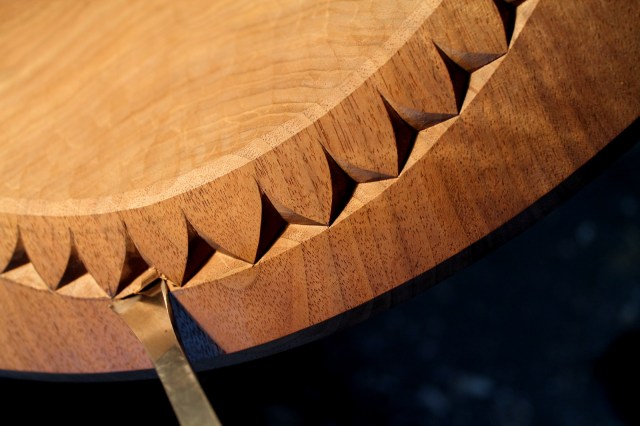
At least that’s the way I see a design like this — draping like a necklace around the rim.  l like how the facets of the recesses catch the light and shadows in different ways.  I’ve done several versions; one of them can be seen in the lead photo of my blog as a whole.  That version is simpler to layout and cut thanks to it’s parallel border, smaller chips, and straight cuts (as compared to this variation that I carved again today with larger, curved recesses that gradually diminish in size).

IMG_8028

IMG_8045Careful slicing with a drawknife leaves the upper surface of the handles cut clean and very subtly faceted.
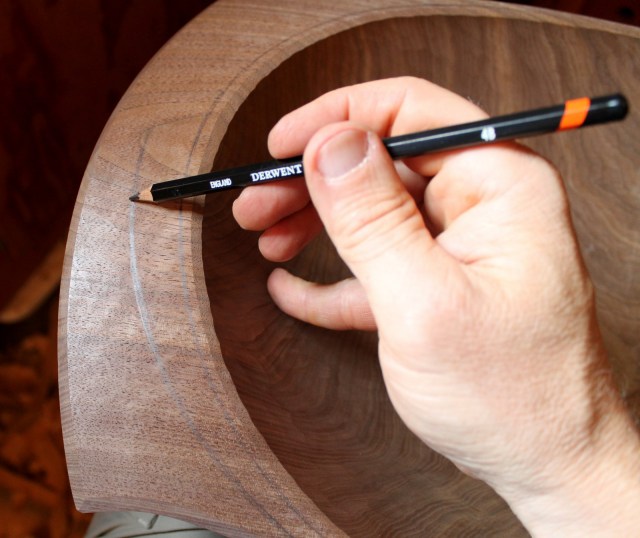


On these dry finished surfaces, I use a soft pencil (not water soluble), so that the wood is not indented and the graphite can be erased with a good non-abrasive eraser.  I just sketch on the outline by eye, using my little finger as a sort of pivot point to help with control.

IMG_8048

Recesses this large (about 3/4″ across) can’t be excavated in one chunk.  I remove much of the bulk with a v-tool and chisel…

IMG_8062

…then finish things off with careful curving slices of a skew chisel.  (My little work light casts an odd yellowish hue.)

IMG_8075

The long recesses along the sides start with a v-tool, but get cleaned up and trimmed with a knife.  Take your time.

IMG_8085

IMG_8093The carving gouge provides some size perspective; roughly 24″ x 14″.  Ready for oil.


Posted in carving, layout, patterns, tools, Uncategorized, walnut | 5 Comments

Back in the Swing

IMG_7979

Give me six hours to chop down a tree and I will spend the first four sharpening the axe.

— Abraham Lincoln

Although this is a widely known quote attributed to Lincoln, he probably never said it. Besides, Lincoln wouldn’t have required six hours to chop down a tree!  Regardless, my axe has now recovered from the sands of Plymouth and the chips are flying once again in the shop.

I have a number of projects underway and more in my mind.  Among them is an example bowl that will be the aim for the Plymouth Craft class at the end of July.  I have been thinking about the specific elements of a bowl design that is manageable for students to get to a complete pre-drying state in a couple days (with just light finishing cuts to go), while still possessing grace and pleasing lines. So, if you’ve signed up, or are thinking about it, more on the specifics will be coming before long.  I want folks to learn the concepts and skills, but also end up with pleasing and enduring bowls in their homes.

And I also want to get back to offering some bowls for sale on a somewhat regular basis. Now it’s back to swinging that sharp axe…


Posted in axe, bird bowls, quotes and excerpts, sharpening, teaching, Uncategorized | Tagged | 3 Comments