Dog Holes and Vise Jaws

I like holes in my benchtop. I use them for holdfasts, bench dogs, pegs of one sort or another, and for securing a carving vise. I’ve written many posts over the years that show me using these techniques in one way or another. Anyway, with my workbench built, it was time to bore some 3/4″ diameter holes in my pristine benchtop.

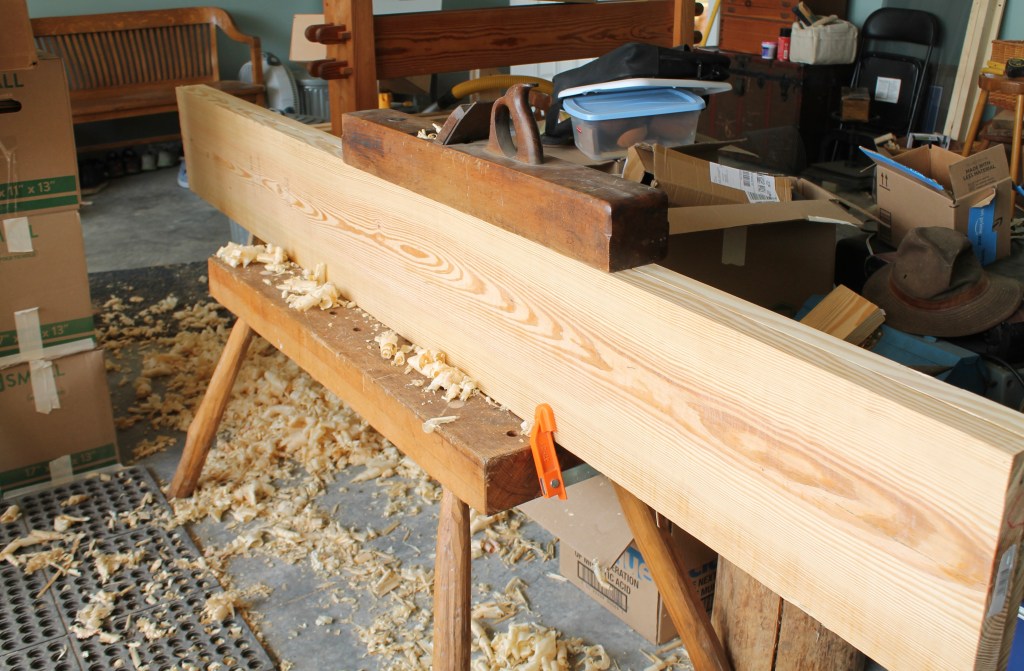
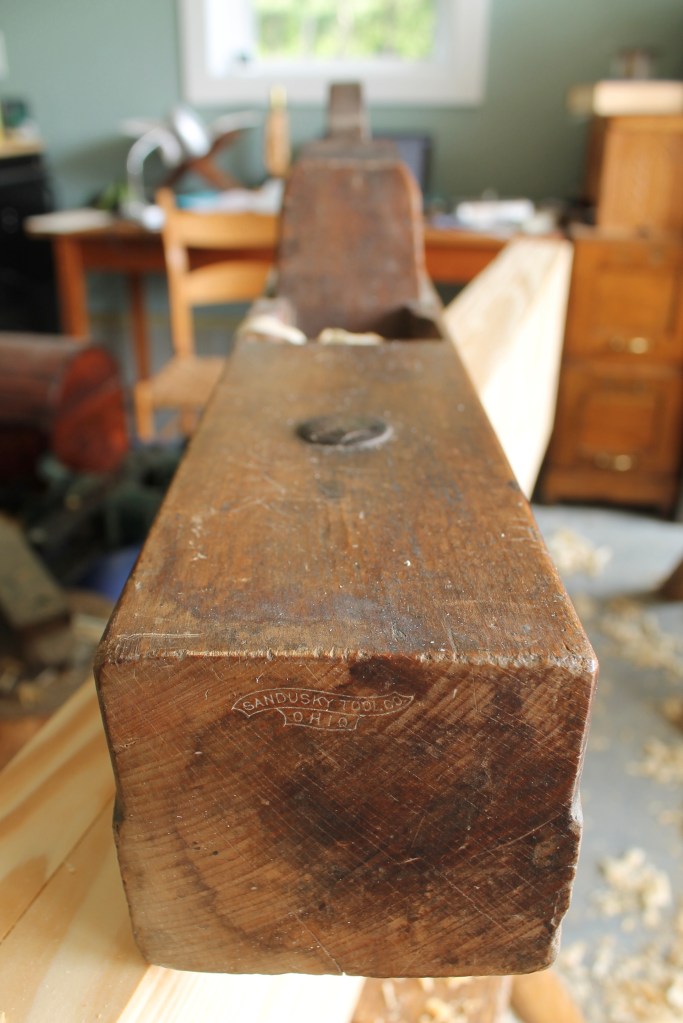
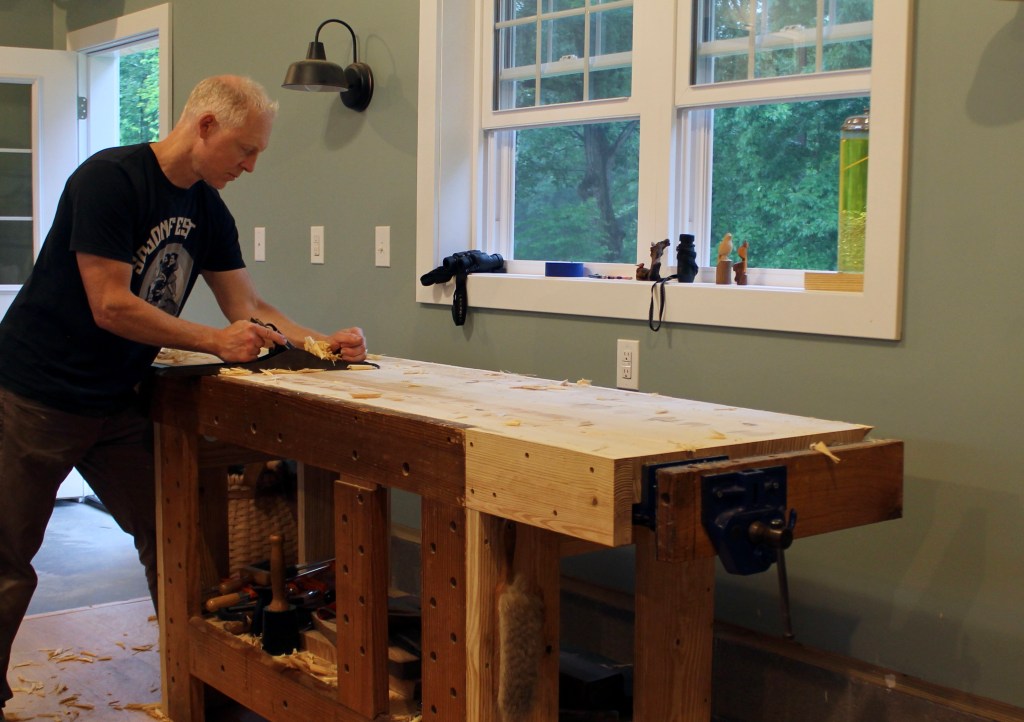
I found a full set of these long (17″) auger bits at a flea market years ago. I certainly don’t need them to drill through a 3″ thick benchtop, but they do make it convenient for a long reference to a square. I marked the locations of the dog holes on masking tape, propped up a couple squares, and bored each hole. Hearing the crunch of the cutter and watching those chips rise to the surface is one of the simple pleasures of woodworking that I never tire of.

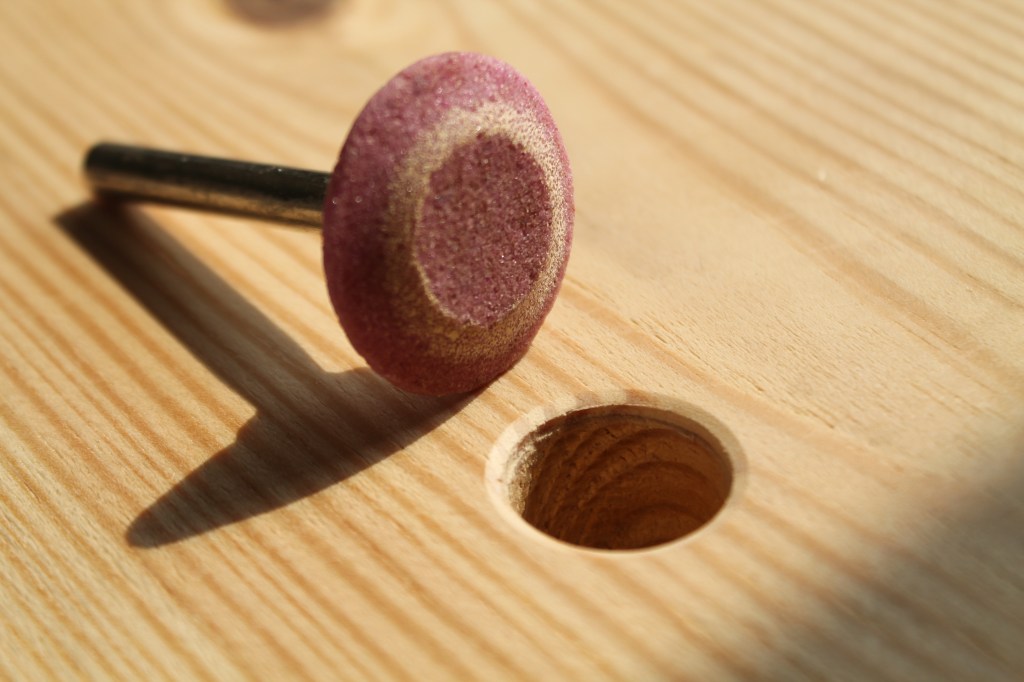
I had one of these little grindstones for a drill in a box of sharpening stuff. It worked surprisingly well to make a clean small chamfer at the top edge of each hole.

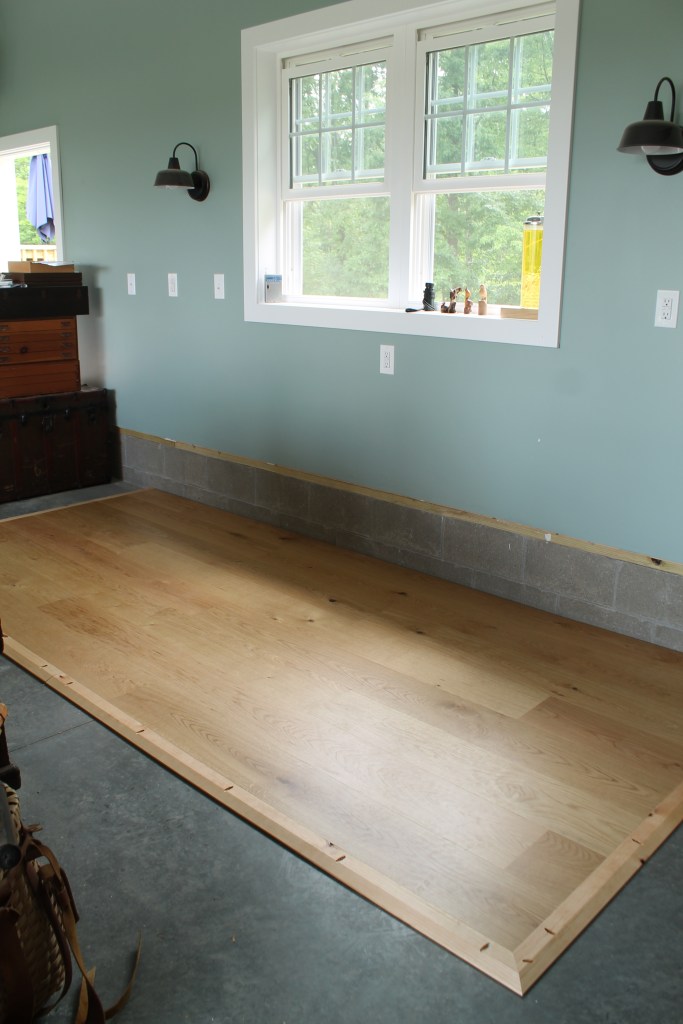
Based on my experience with my old bench, I arranged the dog holes in the pattern you can see above. The closest row is lined up with the center of the end vise (more on that later), so 5 1/2″ in from the front of the bench. The holes are 6″ apart side-to-side. The rear two rows of holes are 12″ side-to-side, and 6″ apart front-to-back. Given the reach of my holdfasts and vise range, I find that this arrangement allows me to adjust to any circumstance. Note that there are some slight departures from the pattern to avoid framing or whatever.

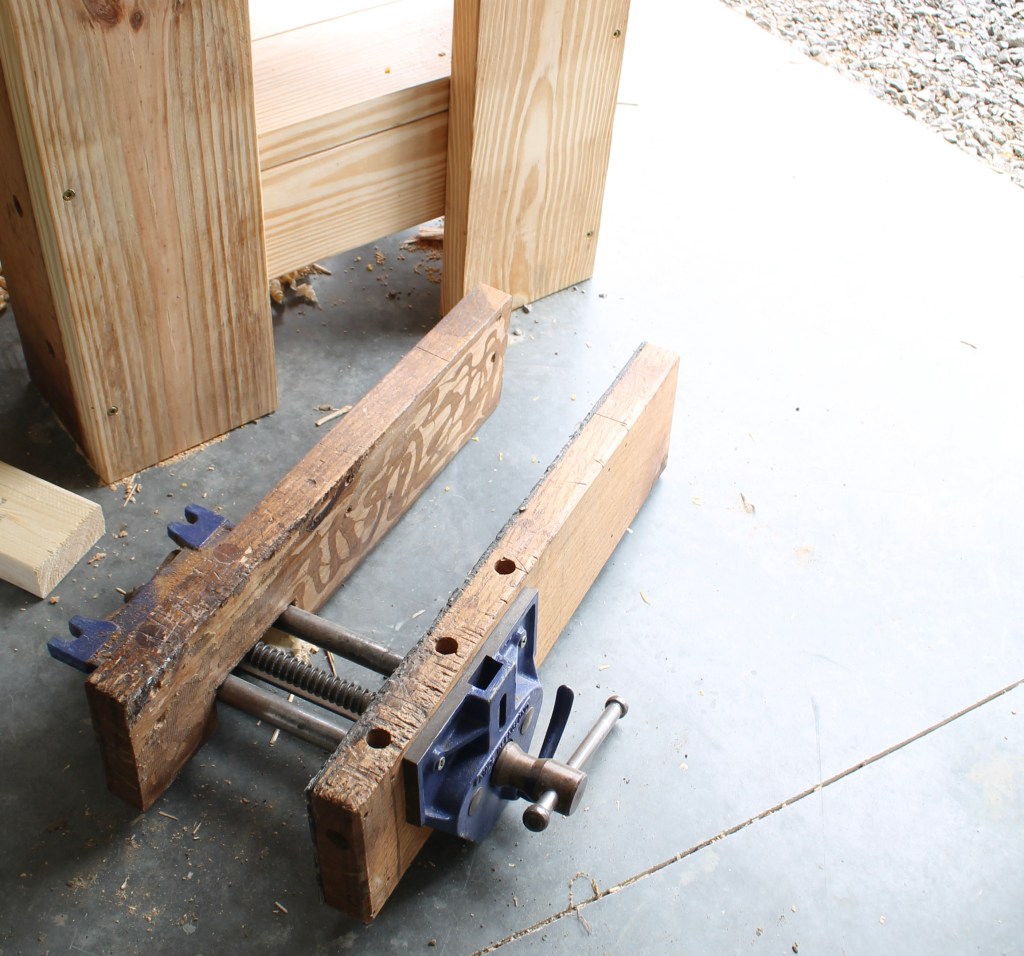
Now, onto those vise jaws. When I first built my old bench, I bought a 7″ Record quick-release bench vise and installed it on the right end of the bench to clamp stuff between the jaws and also act as an end vise to clamp things between dogs on the bench. Later, I added a wooden jaw that extended a foot or so beyond the right edge of the vise, so that I could clamp things in it free of the guide bars of the vise itself. In theory, there should be all sorts of potential racking issues and such, but in reality it worked out fine for my needs. So I wanted to do that same sort of thing with the new bench, so I decided to make new jaws that would be fit to the new benchtop.

I had this wide quarter-sawn piece of white oak, a cast off from a local sawmill that had been air drying in my shed for a couple years. It was just long enough for the job.

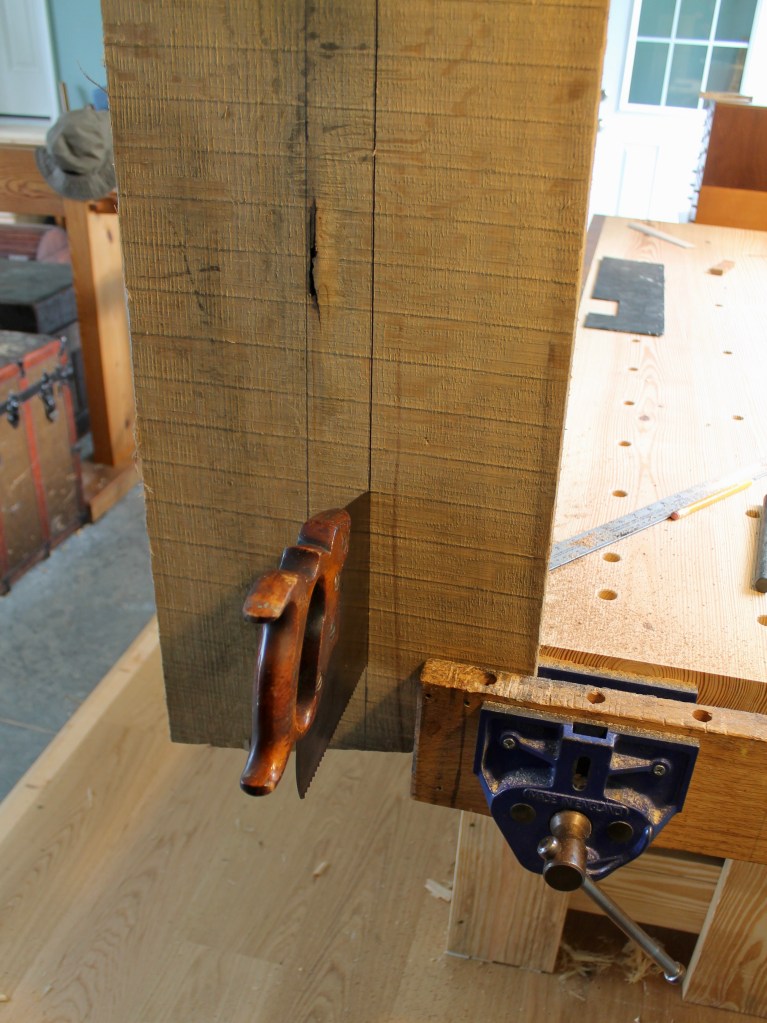
I clamped it in the incomplete vise and ripped two boards from it, cutting away the middle portion that had a big gash from something.

The vise is mounted to the benchtop from beneath with four 3/8″ diameter lag bolts. Rather than mortise the metal face into the bench top, I morticed the white oak jaw that would also cap the end of the bench completely.

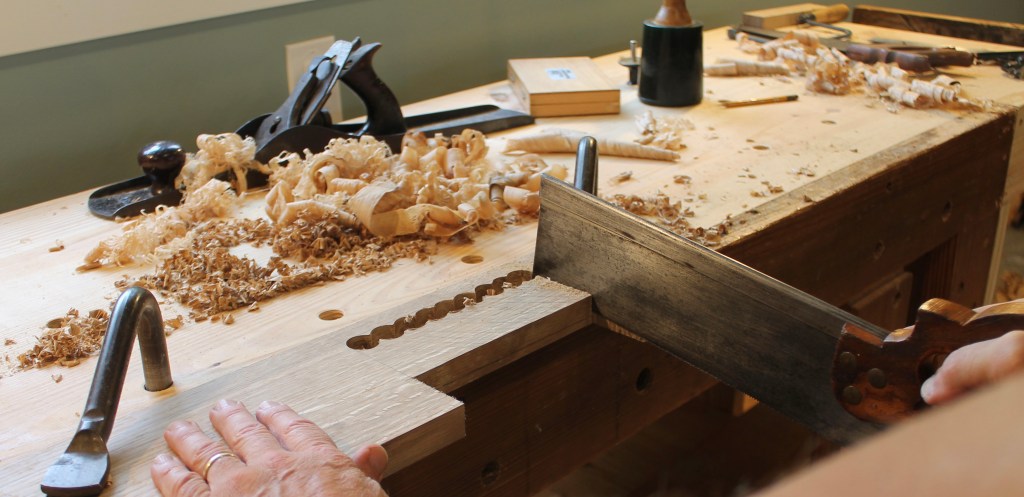
After planing the jaw stock to thickness, I bored a series of holes to depth at the top of the mortise. This provided a little room for the end of the saw as I cut a series of kerfs down to the depth of the mortise.

I knocked out the chunks between with a mallet and chisel.

Then cleaned up with paring cuts and test fitting. I also chiseled the peaks away at the top left by the original boring.

I secured that jaw to the end of the bench with screws, elongating the holes on the right side to allow for movement of the top. Fitting the front jaw was much more simple. I added the rib to stiffen the extended jaw.

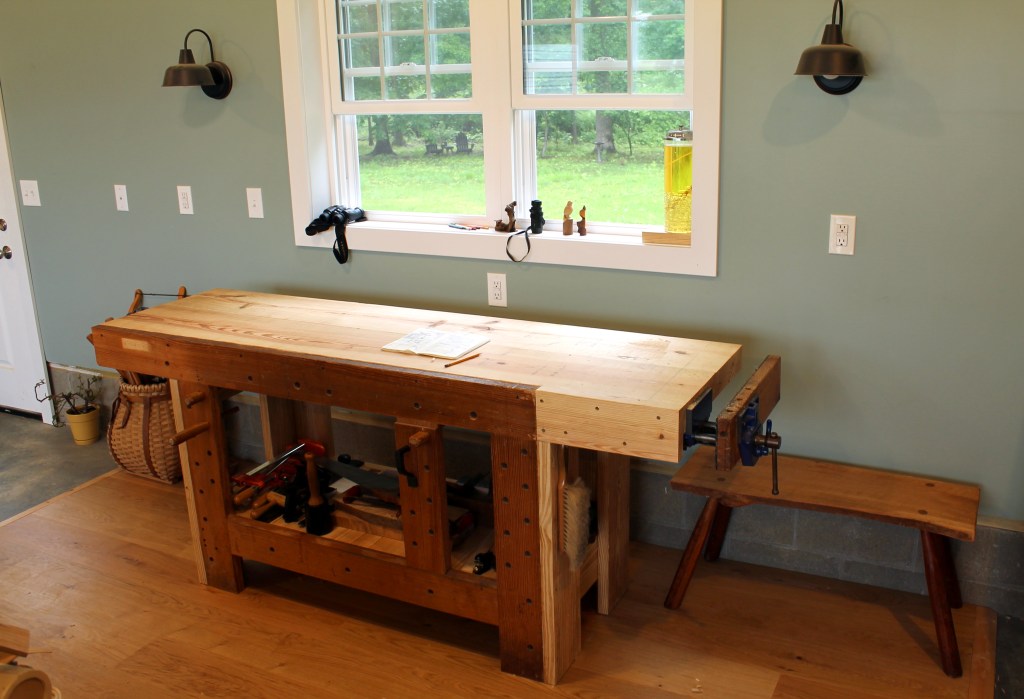
I left the top of both jaws proud then planed them down even with the benchtop. I’m all ready to make some wall-hung shelves for books and more, so I’ll have some shots of the bench in action soon.

Posted in holding, tools, Uncategorized | Tagged , , , | 12 Comments

My (New?) Workbench

What you see above is the face frame/apron from my old workbench. Southern yellow pine 2x6s joined with mortises and tenons, with a sliding deadman in the middle. I had made this as an addition to my old bench several years ago, and I was able to salvage it and bring it with me to the new place. I decided to make this the starting point for my new bench, so now I just needed to build the entire rest of the bench around it.

I wanted the workbench top to be about 2 feet deep and seven feet long. There are lots of ways to hold a workbench top above the ground, and there are names and plans for them all over the place. This isn’t really representative of any of those in particular. Rather, it’s just the result of some creative problem solving that applies to this situation.

I went to the lumber yard and picked up a bunch of southern yellow pine 2x8s, 2x10s, and 2x12s. With my old circular saw, I started ripping them down as needed by clamping a piece of straight flooring to the timbers as a fence. I hand-planed the edges and joined them with glue and deck screws into big L-shaped legs. So the general idea, as you may be able to tell from the photo above, was to begin with these legs and run two rings of skirts inside of them, with lots of bearing surface to resist racking. The legs support the upper and lower rails. The upper rails support the top and the lower rails support the shelf. All components are large and heavy to resist any movement.

I know it would have been sensible to laminate a bunch of boards into a stable top, but I did this instead. I face-glued two pairs of 2x12s together, using regular yellow glue and a crapload of 2 1/2″ deck screws from the eventual underside as temporary clamps. After the glue dried for a day or two, I removed all of the screws. This created two timbers that were 3″ thick, 11 1/4″ wide, and 8′ long. These were to be edge glued together to form the top, and one edge would also need to meet up with the back side of my old face frame. So I needed to joint the edges.

I started in with my old Stanley #7 jointer plane. I bought it for $10 at an antique mall about 25 years ago. It’s pitted and tattered and works great. But then I remembered this wooden jointer plane, a giant thing, that a neighbor had given me years ago. I had tuned it up, but hadn’t used it much over the years. Turned out that it was perfect for this. I set the timber on my low bench and attached a clamp to keep it from sliding forward. The wood sole of the jointer glided across the surface and the momentum of the massive plane kept it moving smoothly.

There are the two jointer planes side by side. The wooden plane is 30″ long with a 3″ wide iron.

Anyway, it all came together. The end shelf boards are screwed down as extra assurance against racking, but the rest of the shelf boards just rest in the rabbet formed by the timbers.

While I was working on the bench, a pair of Carolina wrens were trying to make a nest in this wall shelf. The photo is a little blurry, but there’s one of them on top of the tin. We’ve got less wall space in this house, so the shelf that I made years ago for the house now lives in the shop. But Carolina wrens should not.

The same pair also tried to make a nest in the shed. Again, not a good idea. They had no concern whatsoever if I was in there.

I looked up some Carolina wren box dimensions and nailed together a little house, which they started building in right away.

I had a couple boxes of salvaged engineered hardwood flooring (white oak). Just enough to make a little floating floor area on top of the concrete. I put down a vapor barrier underlayment first that has a slight bit of cushioning as well. I made tapered edging from pine boards and attached it with pocket screws all around. So, that’s not a dance floor, but more of a stage for the workbench. It will be a lot easier on my feet and on any dropped tools.

I left the top 1/8 or 3/16″ of the bench top proud of the old part to allow it to be planed flat and true. The top is held down to the rails with long lag bolts. The holes through the rails are elongated to allow for movement of the top over time.

I attached a temporary board across the back to avoid blowout at the far edge, then started in with the #7 jointer plane working across the grain. I’ve never been to Disney World, but I’ll tell you there’s no way it could be as much fun as was planing down that top.

So, there’s the bench still waiting for some accessories. A couple windows and a little paint really transforms a garage.

Next time I’ll get into the new jaws for this vise and the dog holes in the bench.

Posted in holding, nature, tools, Uncategorized | Tagged , , , , | 24 Comments

Thanks Plymouth CRAFT

Plymouth Craft bowl carving class in Marshfield Massachusetts, August 2016

In case you haven’t heard, Plymouth CRAFT has made some big changes. Peter Follansbee summed it up well in this recent blog post, which includes a link to a letter that he and Paula Marcoux wrote to the CRAFT community explaining things.

It was in the fall of 2015 that Peter asked me if I’d like to be a part of a festival idea (Greenwood Fest 2016) he and some friends were cooking up. It was something special, and it continued. Over the next few years, I met and worked with a bunch of incredible people. The Plymouth CRAFT community, including Paula, Peter, board members, tent-setter-uppers, instructors, students, have all been wonderful and have made a huge impact on me. I know I’ve learned much more from them than the other way around.

There’s way too much to express here, but I just want to say thanks, to all of you. Of course, Plymouth CRAFT’s mission and ideals will continue without a hitch, so keep on learning, sharing, carving, and exploring.

Posted in events, teaching, Uncategorized | Tagged | 1 Comment

Among the Boxes of Books

I’ve been making headway on setting up the new workshop, except when it comes to the books — so many books. The plan is to build some wall shelves to hold them (but some may have to go), so I’ve been building my workbench so that I can build the shelves. The bench is almost done, and I’ll share more about that soon. Meanwhile, I’ll mention a couple books that I revisited while packing up.

Freeing Art From Wood: The Sculpture of Leslie Garland Bolling was published by the Library of Virginia in 2006 to accompany an exhibition of Bolling’s work. The book was written by Barbara C. Batson. She also curated the exhibition and, from what I can gather, is largely responsible for the rediscovery of Bolling’s genius.

I must have purchased this back when it came out. If you can find a copy, it’s well worth picking up. It’s beautifully produced with clear photos of many of Bolling’s wood sculptures, mainly produced in the 1930s and into the ’40s. It also includes a biography of Bolling’s life in Richmond as well as a description of his working methods.

Bolling’s tools consisted of a vise, a scroll saw, and a bunch of pocket knives. There is a film record of Bolling carving; it can be viewed at this link. The first seven minutes or so of the video is about Bolling. You can see his knives and how he uses them in a slicing, twisting motion.

He carved his pieces from “poplar,” which I assumed is what is commonly called “tulip poplar” (Liriodendron tulipifera), but a comment in the book makes me wonder about that. Batson writes “In producing his sculptures Bolling preferred female poplar because of its softness.” Quaking aspen (Populus tremuloides), a true poplar, does have male and female trees, but tulip trees are typically monoecious, having bisexual flowers. Whatever he was using, he made magic from it.

The book also includes lots of interesting references. In a letter to Carl Van Vechten who purchased Bolling’s carving called “The Boxer” in 1933, Bolling wrote “I can do the carving but setting the price is the thing that gets me.” Van Vechten paid $50 for the piece. According to the Consumer Price Index calculator, that would be $1160 today. Still a bargain.

This other book, hadn’t seen the light of day for decades. It was a school record book given to parents to keep report cards and other mementos. That’s my mom’s writing on the cover. I was named after my dad, and they went with “II” because they didn’t want me to be called “Junior.” The strategy worked; of all the names I was ever called at school, “Junior” wasn’t one of them.

For some time perspective, I entered kindergarten in the fall of 1976, and this next page shows how times have changed.

Who knows, I could have been a model, but it was on the girls side. Then again, so was school teacher. And there wasn’t much call for cowboys in Pennsylvania. Gender role prescriptions aside, I certainly can’t blame my mother for the misspelling of “gym.” That’s my writing.

Posted in books, publications, Uncategorized | Tagged , , , | 9 Comments

Transitions

Over the last couple of weeks, I’ve been getting a few jobs done at the new place as part of the settling-in process. One of them was the fencing-in of a small area in the back to allow our dog, Chip, to roam a bit when unsupervised. It will also serve as a backdrop for flower gardens.

The short wall of the fence runs up (or down) a slope. Originally, I angled the rails to follow the slope, but I didn’t like it. So I reconfigured it with level rails and a step. I ran the pickets level across the top and cut them to length individually to follow the slope of the land at the bottom.

The photo above shows the step transition. Not bad, but I wanted it to be less abrupt.

I removed two pickets and replaced them with taller ones. Then I sketched a curve across three pickets to ease the transition from one level to the next.

I grabbed my bowsaw, tightened the toggle, and cut the three pickets along the curved line. I was able to find the bowsaw since it was one of the last things I packed.

I cleaned up the saw cut with a drawknife, then shaved the angle on the outside to match the rest of the pickets.

Above is a shot of shaving the outer angle on a different transition area of the fence. The drawknife makes quick work of the complex angles and leaves a nice surface.

Here’s the first area now. Just three pickets, widely separated, but the eye fills in the gaps in the curved line. I suppose I could have custom-cut a curved rail to match, but the line must be drawn somewhere. I’ve got a workshop to set up so that I can get to carving bowls instead of pickets.

Here’s that other transition area where the fence meets the stair railing heading up to the deck.

The fence is finished, but the “yard” is still dirt. The toads seem to love it. And I love the toads. But with no rain at all for the last 21 days, it has been a real dustbowl around the house. So we’ve spread seed and shaken straw. Rain is expected Monday, and, soon, we’ll have some green on the ground instead of dust or mud.

Meanwhile, there is plenty of green above the ground. I’ve been getting to know the trees around the edges of the lot. There are a few tulip trees among them, and a couple weeks ago, they were in bloom.

The leaves are as fantastic as the flowers.

There are hickories too. Anyone know what deposits these on the leaves? I’m guessing some sort of wasp, but I have no idea.

I suppose this maple over the woodpile would have a story to tell. It certainly found a way.

The black cherry trees were in blossom last week.

There are lots of black walnut trees in the area. This is a young one at the edge of the yard.

And this little grove of quaking aspens makes music just outside the side window of the workshop, which is where I’m headed now to move that transition forward.

Posted in nature, tools, trees, Uncategorized | Tagged , , , | 19 Comments

My Former Workshop

We turned over the keys yesterday. My workshop of the last 27 years, and the house to which it is attached, is in new hands.

To say the least, it has been an especially busy couple of months. I’m behind on just about everything, including replying to emails. We moved into the new place just last weekend. My next workshop is a shambles of boxes, chests, and containers of all sorts. I’ve got my work cut out for me to set up the new workspace once I get the chance to begin. And I’m looking forward to it.

I plan to write some posts about that process. In some ways, I’ll be setting up from scratch, but with three decades of experience in the way I like to work. So, there may be some useful insights. One of the first things to consider will be a main workbench. As it turned out, I had to leave the one in the old shop. The way I built it in made it, essentially, part of the structure of the garage. Live and learn. And there are many more things to think about — shelving, tool storage, books…. More later.

I appreciate your patience as I get ready for the next chapter. Then the chips will be flying again. Thanks for reading the blog and sticking with me. Oh — and I did remember to grab the saw hanging in the window.

Posted in events, Uncategorized | 27 Comments

Fine Woodworking Video-Workshop News

Photo by Jon Binzen

I’ve been meaning to mention this for over a week, but my spare moments have been hard to find lately (More news on the home transition coming soon). Fine Woodworking recently announced a new way to access the “Carve a Greenwood Bowl” video workshop we recorded a few years ago. Up until now it was only available with a yearly subscription to FWW online. Now they’ve made it available as a stand-alone workshop for much less. The details can be found here.

Photo by Jon Binzen

The video workshop goes through each step on the way from log to a finished bowl in the style in the photo above, including the carving of the necklace around the rim. Of course, the techniques are transferrable regardless of the design. Thanks to the work of FWW’s Ben Strano and Jeff Roos, it is a beautifully made video with multiple camera angles that really capture the process.

Another bowl-carving video workshop was recorded with Elia Bizzarri. It’s a completely different format than the FWW video. With little (no) editing, it’s an interactive experience between me (in Pennsylvania) and Elia (in North Carolina), with questions from folks participating via Zoom as we recorded. Lots of fun and packed with information and techniques as both of us make the chips fly. The link to that workshop is here at Elia’s site.

Both videos have a lot to offer in different ways. You can read more about them both here.

Posted in classes, teaching, Uncategorized | Tagged | 2 Comments

Riving a Cherry Crook

Some cherry branches with nice crooks fell during some recent windstorms. I snapped a few photos while splitting them into spoon blanks to show how I typically go about it. They can be split with an axe or wedge, but I like the leverage that a froe provides. Above, I’ve driven in the froe along a line that approximately divides the branch into two equal halves, usually right at the pith.

Sometimes a crook will pop apart like a piece of straight timber, but they’re usually more resistant. To get some good leverage, I position the crook concave-side-down on the ground or floor, along with the engaged froe.

Then I step across both the crook and the angle of the froe with my left foot. The floor and my foot combine to form a sort-of riving brake.

While pushing down with my left foot, I lift the handle of the froe. The froe blade rotates and begins to pry open the crook.

As the froe handle swings further up, the split opens up wider and further, following the fibers. You can shave the bark off of the sides before beginning the split to see things better, but I rarely bother.

If the crook still needs more persuasion, I can slide the blade of the froe further down and repeat the procedure. In the photo above, this has been done. The most stubborn fibers tend to be right around the bend itself; there they are just ahead of the froe, keeping the two halves from separating completely.

Often I know which end of the crook will be the handle of the spoon, and which the bowl, before splitting. In this case, I wanted to see how it split first, so I left the piece long enough for a handle to both sides of the bend. I decided to use the left bit for the handle, and I cut off the right side around the red line. As with most crooks, the upper side, on the outside of the bend, includes a broken branch-end within (which resulted in the tree following a side branch for growth), and isn’t typically useable for a spoon.

I sever the connecting fibers with some light axe strokes.

Often, I can get two spoon blanks from the crook half by splitting it again. I divide the surface area of the end grain approximately in half with the froe, parallel to the original split. I drive the froe in with a sharp blow of the club, then I can usually just pop it open while it’s upright.

Here are the two serving spoons roughed out of those two blanks, situated as they were in the crook. I axe them out and do some basic knife work while they’re green, taking them to this stage. I’ll come back to them after a day or two (or after a month or two) to do the final carving.

Here’s another cherry crook from the same windstorm, a real beauty. I split this one in the same way.

And there’s the ladle it provided. I’ll finish carving this one and some others in between house projects. Lots happening now at the point of transition.

Posted in cherry, finding wood, spoons, tools, Uncategorized | Tagged , , , | 8 Comments

Bright Bowl

Saw a king fisher on a tree over the water. Does not its arrival mark some new movement in its finny prey? He the bright buoy that betrays it!

Henry David Thoreau, Journal Entry, April 11, 1856

As I was carving this maple bowl with thoughts of spring on my mind, I decided to brighten it up with some color. I had been reading about kingfishers, learning more about the ones I watch around here — belted kingfishers. Why not let the bird inspire the colors for the bowl?

With that in mind, I carved an outline of a kingfisher into the foot of the bowl, then got out some artist oils (which are a mix of linseed oil and pigment). I did a ground coat of white, and let it dry for a few days. Then I went over that on the top and bottom with the blue shade, leaving the edges of the rim and handles white. As the paint wears over the years, hints of white will peak through the blue here and there.

Color like this is tricky to photograph; it changes so much depending on the characteristics of the light. I took some photos of the bowl this morning in our little cherry tree, full of spring blossoms now.

In the more subdued light of the workshop, the color seems to deepen.

And these last two from the cherry tree again, but in the evening light.

This bowl is available for purchase. The hollow has been treated with linseed oil and is ready for use. The dimensions are 16″ long, 8″ wide, and 3 1/4″ high. $625 includes shipping. Email me at dandkfish@gmail.com if you’re interested. Update: SOLD

Posted in bird bowls, bowls, nature, paint, quotes and excerpts, Uncategorized | Tagged , , | 11 Comments

Windfalls and Wheelbarrows

Close one! An uprooted maple tree beside the new shed.

High winds blew over a lot of trees in our area in two separate episodes recently. The tall maple in the photo stood strong in round one but was toppled in the second. Fortunately, it missed the shed — just. However, it did strike a direct blow on the wheelbarrow. It’s under there somewhere.

The shed, made by a craftsman, Edward, up the road, was constructed from local hemlock lumber sawn by his brother. No time for me to do it, and it’s a solid shed with windows on the opposite side. I’ve already got boards and other bits of wood stored in there, along with garden tools and other gear.

I’ve cut up the upper parts of the tree, but there may be some useful woodworking wood in the lower trunk section. It’s out of the way and up off the ground. I’ll leave it there for now.

Most of the limbs and branches will join the firewood that I’ll be restacking

In the neighboring woods, there were plenty of other windfalls, including some nice green cherry branches that I’ll be able to use. The tree above is anything but green, and I felt bad for the woodpeckers when I saw it. More work for them this spring I guess. I was exploring the old nest cavities a bit when a piece on the ground caught my eye.

This chunk snapped off when it hit the ground. I think there may be some sort of a bird in there.

The wood of that piece is surprisingly solid. I’m sure it has been standing dead for at least a few years. I cut across some of the end grain with a sharp gouge to help identify the species. R. Bruce Hoadley’s classic book Identifying Wood can be very helpful with excellent photos and detailed descriptions. So, I got out my copy and confirmed (I think!) that this is American Elm. Notice the latewood pores arranged in thin wavy bands. This is most clear in the photo within that darker growth ring a little to the right of my dark pencil line.

Anyway, I’ve got this bit of elm in the shop now where I can see it and think a bit more before digging in sometime. Some other pieces to finish up first, and soon.

After I cut up the upper part of the tree, it became clear that my old wheelbarrow might need a major chiropractic adjustment. It had was leaning upside down over the edge of my outdoor workbench. The workbench is still solid. I couldn’t help but think of William Carlos Williams. So, this is just to say that

So much depends

upon

A black wheel

barrow….

Posted in bird bowls, finding wood, nature, Uncategorized | Tagged , , , | 15 Comments