Curtis Buchanan

I’ve not had the good fortune to meet Curtis Buchanan, but he is an inspiration.  A friend recently drew my attention to a new short film featuring some thoughtful insights from Curtis.  I just had to share it:

Posted in green woodworking, quotes and excerpts, Uncategorized, video | Tagged | 5 Comments

Squirrels Love Bird Bowls


IMG_7579
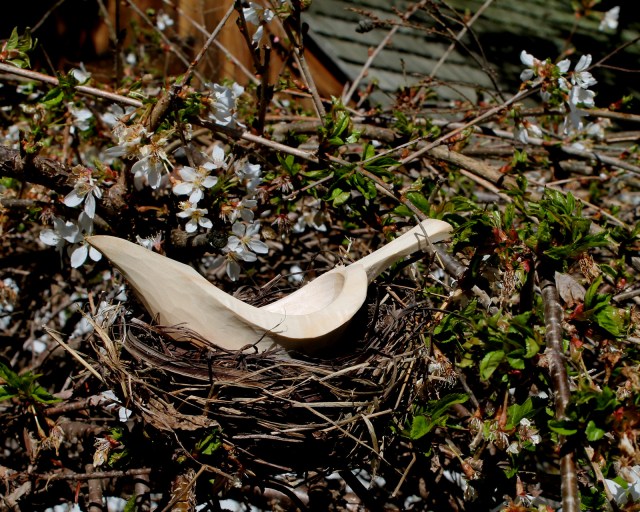
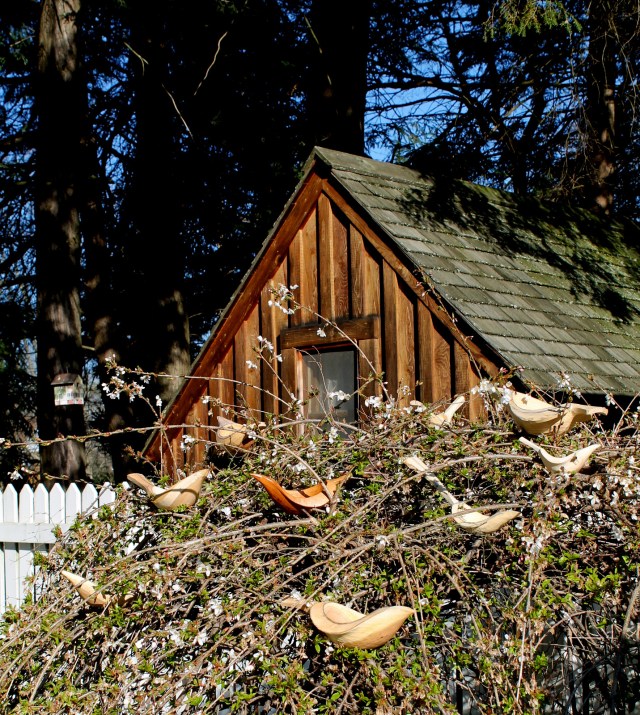
You can’t be suspicious of a tree, or accuse a bird or a squirrel of subversion or challenge the ideology of a violet.

— Hal Borland, Sundial of the Seasons (1964)

This slideshow requires JavaScript.

Posted in bird bowls, nature, quotes and excerpts, Uncategorized | Tagged , , , | 2 Comments

Beautiful Weather for Carving

IMG_7514

Well, for carving inside anyway.  Temperatures in the low 40s, rain, and even snow this morning!  More encouragement to stay in the shop and continue work on some of the things I want to take as examples to Greenwood Fest in June — right around the corner.  I’ve been working on a variety of bird bowl ideas, as well as a few other bowls.  I usually have a few projects going at once, in various stages.  I’ll share more about these ones as things move along.  For today, I’m going to keep the chips flying around the shop.

Posted in bird bowls, bowls, carving, patterns, Uncategorized | Tagged | 2 Comments

Exploring Bowl

IMG_7487

IMG_6801As I began to hew this round cherry bowl, inspiration struck and I decided to have the exterior form flow over the rim as if to explore the interior.  Since then, the form has brought other ideas to mind, including that of a lily pad.  Hopefully, the photos in the slideshow below provide an idea of the various textures as well as the subtle quilted figure within this cherry log.

This slideshow requires JavaScript.


Posted in bowls, cherry, Uncategorized | Tagged | 6 Comments

Sharpening an Adze

IMG_7424

I took some photos tonight while I sharpened my adze.  I wrote about my general sharpening procedure for an axe in this post a while back.  The general idea is the same, but sharpening an adze can be more intimidating due to the curves and geometry of the cutting edge.  I wrote a bit about that stuff here.  But really, its pretty straightforward.  There are lots of good sharpening techniques.  Here’s the way I go about it.

IMG_7400

Just slightly convex.

First check for excessive rounding of the outer bevel.  Carefully rock a straightedge down onto the bevel (see below).  It is absolutely acceptable if the bevel is very slightly and gradually convex. It is a tool for hollowing after all, and with this slight roundness, the edge will still bite instantly and glide through the cut.  However, roundness much beyond this — especially any abrupt rounding at all near the cutting edge — is a problem.  If that is the case, the bevel needs to be reshaped/flattened.  Rather than go into that right now, let’s assume all is well in general with the bevel, and the tool just needs to be honed.

I hold the adze in my left hand with the edge pointing up.  This allows me to manipulate the adze and see when the stone, held in my right hand, is flat on the bevel.  I rock the stone onto the bevel, and I’m ready to hone.

I move the stone in small circles, maintaining contact with the bevel throughout. the movement from corner to corner.

The scratch pattern provides feedback on how well contact across the bevel has been maintained.  It may be helpful to blacken the bevel with a Sharpie to see the contrast more clearly.

IMG_7416

Once I feel a slight burr along the entire inner bevel, I continue working the outer bevel with a finer stone.  Once I am finished with the extra fine stone, which may be all that was needed in the case of a little touch-up, I move on to the inner bevel.


I use a very fine ceramic teardrop slip at this point, rocking it down onto the bevel, then sliding along the inner bevel until the burr is on the outside.

I can feel the burr on the outside.  Then i use the flat portion of the same slip to lightly hone the outer bevel, which pushes the burr to the inside… This procedure continues until the burr is gone.  Sometimes the wire edge can be seen as it falls away.

Stropping polishes the edge and removes any fine burr that might remain.  I use a slip strop on the inner bevel.

I protect the edge with a good guard or sheath.  This is my favorite, a gift from a friend, and fellow carver, in Indiana who had it custom made.


Posted in adze, sharpening, tools, Uncategorized | Tagged | 6 Comments

By Hand and Eye: The New Website

IMG_7359

Here are two of the most important tools in my shop, other than my hands and eyes.  The uses of a compass extend far beyond striking circles.  I use one, or more, on just about every project to aid in design, work out proportions, establish perpendiculars…the list goes on and on.  I’ve discussed some of those ideas in more detail in my posts related to layout.  It may not seem as exciting, but the thoughtful preliminary design considerations shape a piece as much as the axe.

That should not be intimidating.  Which is why I admire the efforts of George Walker and Jim Tolpin in encouraging people to develop and trust their designer’s eyes.  They have recently expanded upon those efforts with their new website and blog that already includes some enlightening thoughts, procedures, and videos with more to come — check out the blog.

George and Jim have immersed themselves in design from an artisan’s perspective.  They balance classical design theory with very practical layout procedures.  You’ll get the idea from the creative animated video on the opening page of the website.

And if you’re looking for a big compass or two, I got mine years ago here through Lee Valley.  Same as mine, but I see they leave them shiny now instead of black.


Posted in layout, proportions, Uncategorized | Tagged , , | Leave a comment

Do Justice, Love Kindness, Walk Humbly

IMG_7152

I recently completed this commission for the congregation of a California church.  They wished to honor their minister’s ten years of leadership with a bowl featuring their church motto, Micah 6:8.  It is a beautiful verse.  I was happy to play a small role in their celebration, and I was fortunate enough to have a suitable log on hand.

I decided on a design I hadn’t carved before, a large (20″ long and 14″ wide) oval bowl in black walnut with a rim that flares out all around.  This provided room for the lettering, but made for some challenging hewing and carving on the exterior. Below is a slideshow of some more photos of the bowl.

This slideshow requires JavaScript.

It is a relief when the last painstaking cut is made on the lettering, and all is spelled correctly and so on.  There’s not much room for error, so the process begins long before the cutting.

It starts with some brainstorming mentally and on paper.  Then I do a small-scale very simple sketch in a straight line, just to determine general halfway and quarter points to help achieve the right spacing.  In this case, I then made a full-scale sketch on paper, after laying out a full size oval matching the bowl.

IMG_6969

I sketch lightly in pencil, darkening the lines as the ideas become more firmly established and the spacing shapes up. As I sketch, I keep in mind the common characteristics of the letter form, but I am still free to adjust individual letters with the goal of achieving a more pleasing whole.  Since the bowl rim is not planar (it is angled downward away from the hollow all around), the flat paper can’t be used to transfer the lettering onto the wood without puckering and distortion.  I just mark a few reference points onto the wood, and then draw the inscription with a soft pencil onto the wood.  These pencil lines are the general guidelines for the cutting, but it is the cutting itself that matters.

IMG_7108

Cutting the lettering into the bowl rim.

This is v-incised lettering, the sidewalls of the letters form a v profile, creating a nice contrast of light and shadow.  For relatively small letters like this, I rely almost exclusively on my pen knife blade, as I’ve discussed before on the blog.  I sometimes use a very narrow knife point for tight areas.

I find it best to do this with the bowl free to be manipulated with my left hand, legs, etc. to position it in different ways while making various cuts.  I also like a strong directional light.  The window is good during the day, and a clamp light works well at night.

Lettering doesn’t have to be so painstaking, depending on the piece.  More spontaneous lettering with the knife, even with no sketching at all can be a lot of fun and achieve very cool results, especially for smaller pieces like shrink boxes, spoon handles, etc.  For practice, I would encourage the use of a softer wood.  It makes a big difference.


Posted in bowls, holding, Lettering, quotes and excerpts, sketch, Uncategorized, walnut | Tagged , , | 16 Comments

April Rain

SAM_2750

Let the rain kiss you

Let the rain beat upon your head with silver liquid drops

Let the rain sing you a lullaby

— Langston Hughes, from April Rain Song

SAM_2783SAM_2774

Taken on a wonderfully rainy walk this evening.


Posted in nature, quotes and excerpts, Uncategorized | Tagged | 1 Comment

Spring has Sprung

IMG_7327

Last weekend, we had snow and lows in the teens — Winter’s last gasp, I think.  Today’s warm sun put me in the mood to snap these shots of some of the bird bowls I’ve been roughing out in preparation for Greenwood Fest.   Now I’m off to keep carving on them — outside!

IMG_7315

Escapees

Posted in bird bowls, bowls, nature, trees, Uncategorized | Tagged | 8 Comments

Chip Carving for Warlike Men and School Girls

IMG_7275-001

It is difficult to conceive the contradictory fact that this apparently simple form of art [chip carving] was once the exponent of a struggling desire for refinement on the part of fierce and warlike men, and that it should, under the influence of polite society, become the all-too-easy task of æsthetically minded school girls.

— Fred T. Hodgson, Easy Lessons in the Art of Practical Wood Carving (1905)

I assume Mr. Hodgson meant that in the best possible way, with no offense to school girls and all that.  Either way, what a sentence!  In that chapter, he does go on to point out the merits and possibilities of chip carving and even suggests some pretty interesting patterns and techniques.

Chip carving, regardless of the design, can be executed well or poorly.  Still more important than the technical prowess involved are the design choices.  Ideally, one adapts or creates a design to uniquely suit the piece on which it is carved.  The underlying form of the piece itself is most important.  The surface decoration should serve to enhance the whole, like a tastefully selected piece of jewelry.

Here is a 150 year old example of a custom design featuring various elements.  This ale bowl is a smallish personal-size ale bowl — with a bowl portion about 6 1/2 inches wide, just a little larger than the two I made and mentioned in my last post.

Some may prefer something a little more understated, but it still demonstrates the adaptability of design elements with a little creativity.

Chip carving is an accessible way, with a minimum number of tools, to capture a little light and shadow and draw the eye.  I was walking with Sam through a local cemetery a few days ago and snapped a shot of this example of, what is essentially, chip carving in stone.  An effective design that could easily be executed in wood.  Inspiration is all around us.

SAM_2715

And, how could I leave him out?

SAM_2714


Posted in books, carving, historical reference, patterns, quotes and excerpts, Uncategorized | Tagged , , | 2 Comments