For those interested in starting to carve bowls and spoons from green wood, the unfamiliarity and variety of the tools can be a little intimidating and confusing, especially when they see the large kits built up over many years by experienced carvers. Compounded with the frustration of limited tool availability and/or limited funds, some put off making shavings: “I’ll start next year when my adze order is filled .” or, “I’ll start when I have the money to buy all of the tools on this list.” Don’t wait. Dig in.
Well designed, sensitively crafted tools do typically work better and their cost often reflects that. However, you can get started carving bowls, spoons and other things from green wood with a very small inexpensive tool kit and begin to develop the fundamental skills and knowledge of the material. Later you can expand your options with additional tools from the growing number of talented blacksmiths doing incredible work. As with most of the things in our lives, it is better to have a few good tools rather than a bunch that don’t work well.
A good adze, for example, will cost two or three times as much as a bad one, and be worth every penny. You will form a relationship with it and one day pass it on to another lucky soul. If, however, you can’t afford a quality adze right now, or there is a long wait, there’s good news. You can start carving bowls without an adze, and without a lot of other stuff too. And you’ll be able to find wood for free — it literally grows on trees. You don’t really even need a dedicated workshop.
If you’ve already been doing other types of woodworking, you can start by using and adapting some of the tools you already have — bench chisels, vises, workbenches, coping saws, spokeshaves, planes, band saws, etc. — and pick up some specialty tools along the way. But let’s assume you are starting with no materials or tools and a small budget — where should you begin? Here are the first three tools, in order, that I’d buy to get started carving bowls, spoons, hooks, and other things from green wood.
 If I had only $25 available, I would start by buying a Frosts (Mora) #106 knife. If I didn’t have $25, I would shovel sidewalks or skip some lunches, then I’d buy the knife. With that tool alone, one could carve spatulas, hooks, figures, and all sorts of other things — all while developing knife skills and strengthening his or her hands. There may be lots of reasons to own a higher-end sloyd knife, but in terms of performance, the 106 gets the job done superbly. And after hogging away lots of wood with a knife, you’ll really appreciate the capabilities of the next tool.

In retrospect, the axe on the left was a bit of a bear to carve with; too heavy, bad handle (in spite of my ingenious wrap), and not an ideal shape. But it was what I had, and I made many bowls with it before I bought my Swedish Carving Axe.
My second purchase would be a small axe/hatchet, providing the ability to split branches and shape wood quickly and precisely, leaving less work for the knife. Tuning up an old axe is probably the most frugal and satisfying solution, but many old, and new, hatchets generally available would require a great deal of grinding to establish an edge effective for carving; the bits are typically just too thick. Still, your first axe doesn’t have to break the bank; you may be able to find worthwhile examples available at prices to fit a limited budget. We may hear of some examples in the comment section. Robin Wood has addressed the situation with the Robin Wood Axe — a well designed axe and a real bargain. There are many makers producing wonderful axes today. Look into Jason Lonon, Julia Kalthoff, and many others.
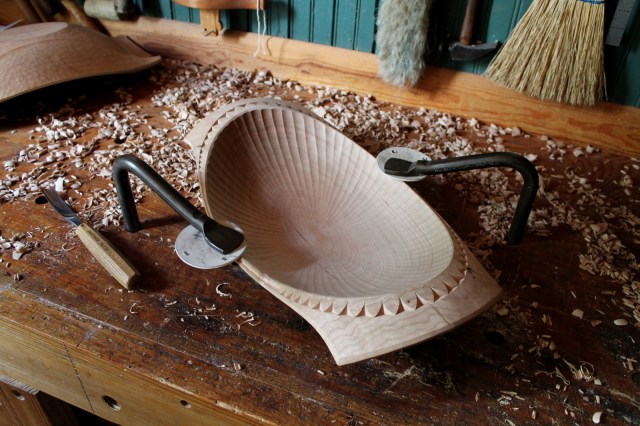
 To make spoons and bowls, you need something to make a hollow, which is beyond the realm of a straight blade. If you’ll be sticking with spoons, pick up a hook knife. For bowls (and it can hollow spoons as well) I’d buy a long-bent gouge. If it were to be my only one, it would be something like a #8 sweep and around 30mm (1 1/4″) wide, although that exact size is not at all critical. There are several good brands available through different suppliers. It opens up all sorts of possibilities due to its versatility. You can drive it with a mallet or pare with hand pressure. A mallet is pretty cheap, but you can also easily make one as simply as shaping a branch with your axe and knife. A bowl could be made, start to finish, with the axe, the gouge, and the knife.
With the axe, you could hew the exterior to shape (you’ve found a chunk of log for a chopping block by now) and even rough out the hollow somewhat. Continue shaping that hollow with the gouge and mallet. An adze is faster, but you can still make quick progress; just get in a rhythm and keep hitting that handle. Refine the exterior as well with the same dynamic duo, then refine all surfaces by paring with the same gouge. For more holding options, make a low bench or just bore some 3/4 inch holes in a picnic bench (yours) and get a couple holdfasts. Finish up with some chamfering and detailing with the knife.
So have fun digging into some green wood and exploring the possibilities with resourcefulness. With experience you’ll know what additional tools you may want to add for your preferred ways of working. I’ve written some other posts about tools, just check the topic list and search feature on the right sidebar.

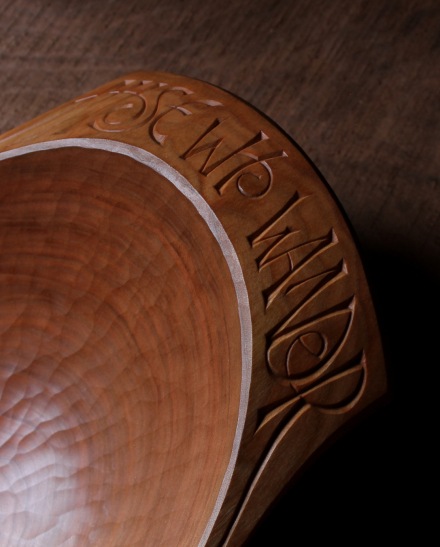


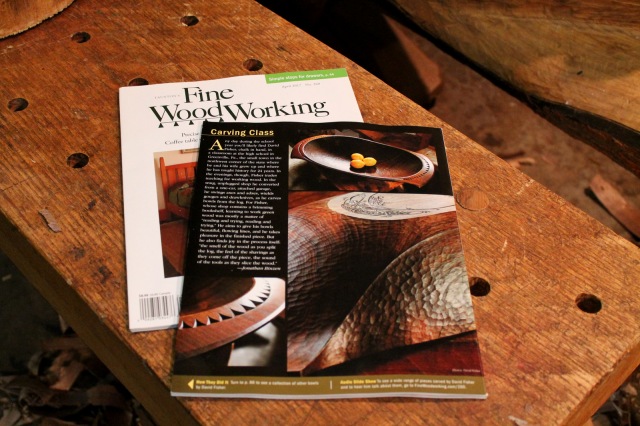
 I recently had the opportunity to play a part in a very special occasion, the celebration of fifty years of marriage. The family had decided to honor the occasion with a lovely painting of the family tree by one of the couple’s talented grandchildren. She creatively features each family member as a bird in the tree. A son had made the frame — beautifully and solidly built from figured quartersawn cherry, 25″ x 21″. I was asked to design and carve lettering into the frame and also to incorporate elements related to the tree theme.
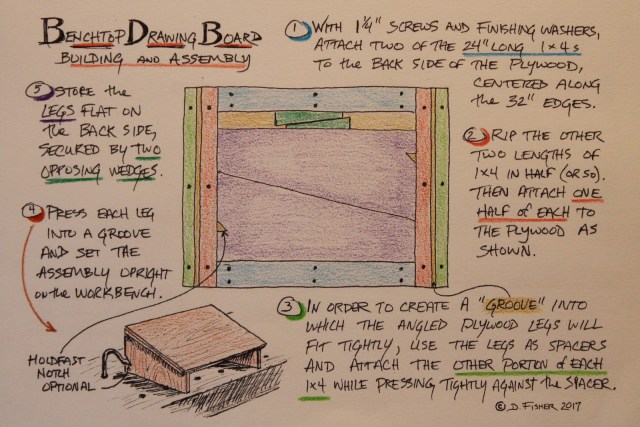
 So I came up with an idea for a drawing board that sets up on my workbench top and can be broken down into a flat panel for easy storage. I just slide it between a cabinet and the wall when not in use. It can be built with nothing more than a hand saw and a screwdriver, and with a total of $20 of materials. It only takes about an hour to build, which is a nice change of pace.


 Not long ago, this book arrived in the mail, an unexpected and thoughtful gift from a friend. In it, Robert Penn writes of his experience of felling one ash tree in Herefordshire and having as many things made from it as he could. Among the dozens of things crafted are turned bowls by Robin Wood and a
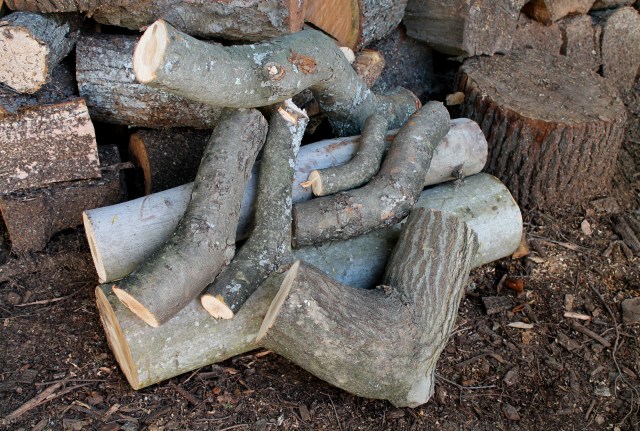
  There is also pleasure in using parts of a tree that would have otherwise been discarded. You can often find such pieces in fallen trees or branches left behind from utility company trimming operations and the like. I collected these pieces in the top photo last weekend from treetops left behind at a logging site a couple miles up the road. Notice the big sharp oak crook at the bottom. I’m hoping there’s a cool bird in there.