Round Walnut Bowl Underway

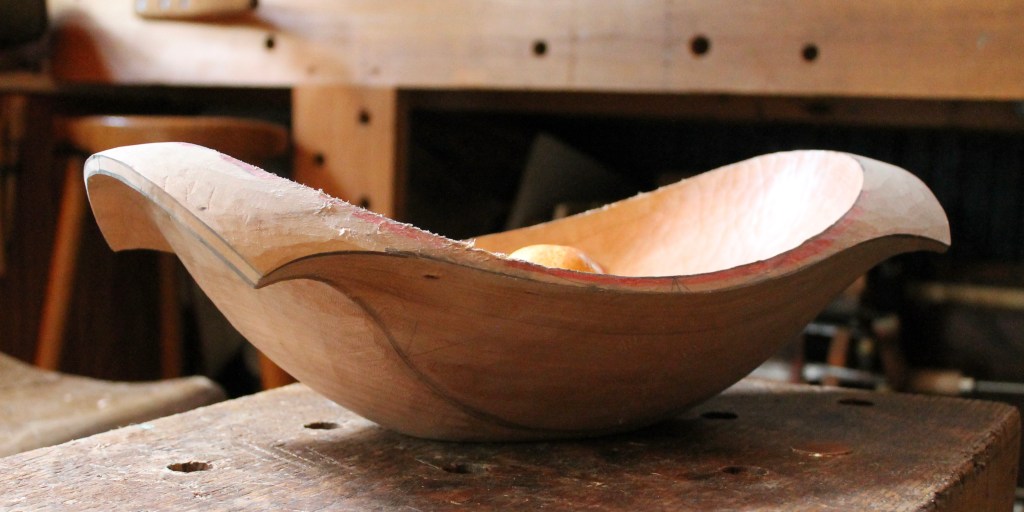
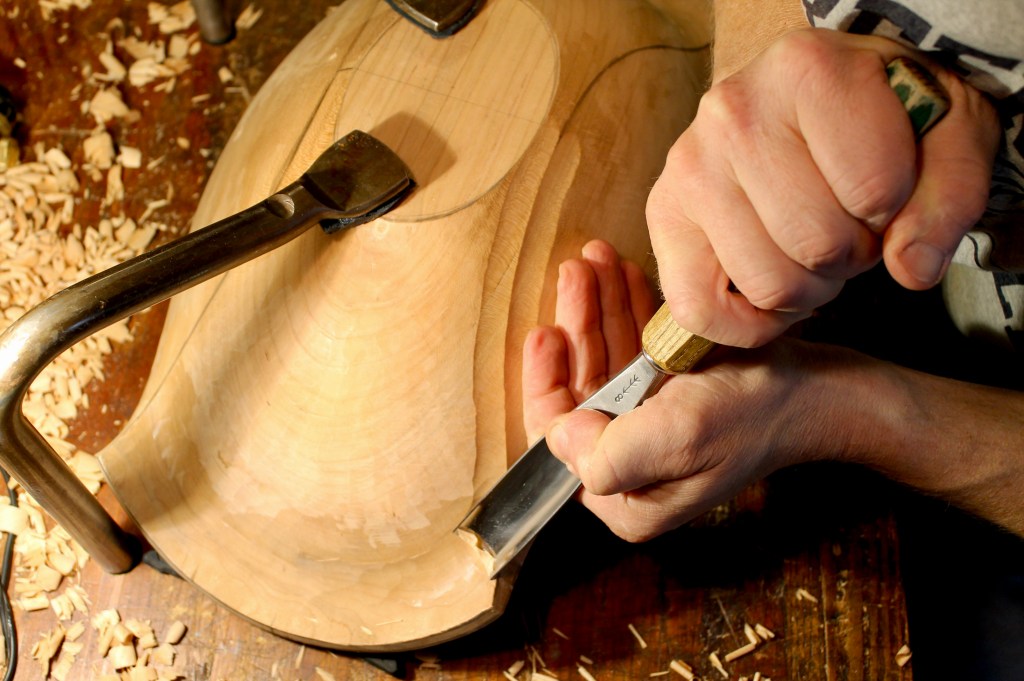
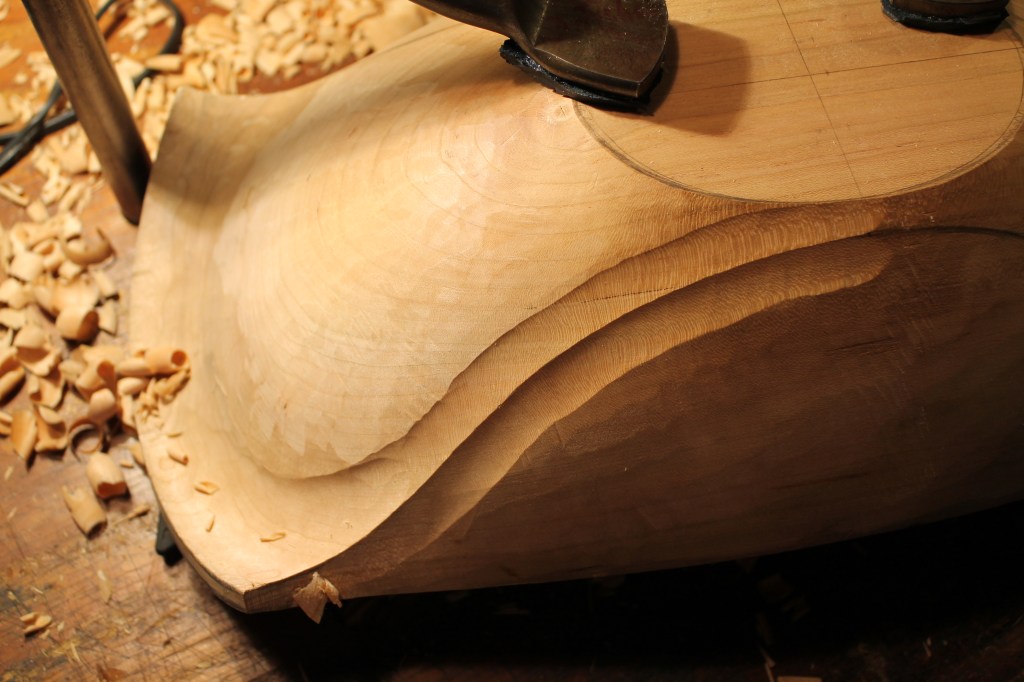
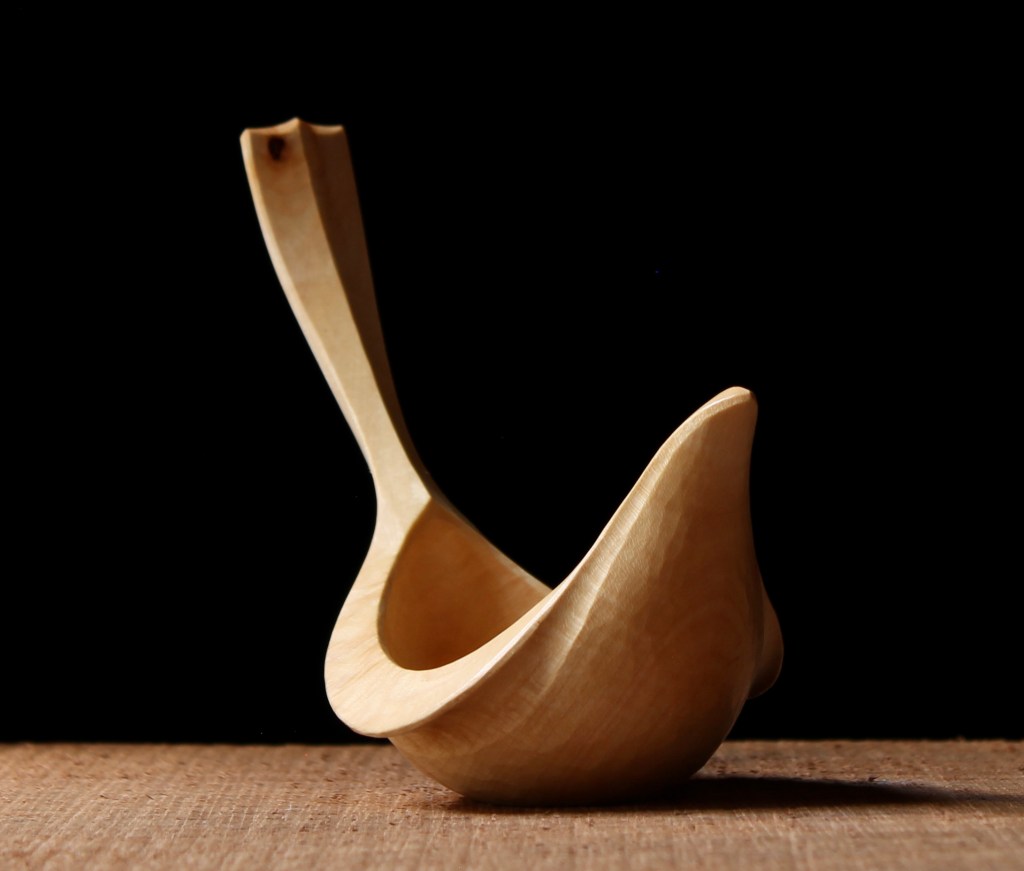
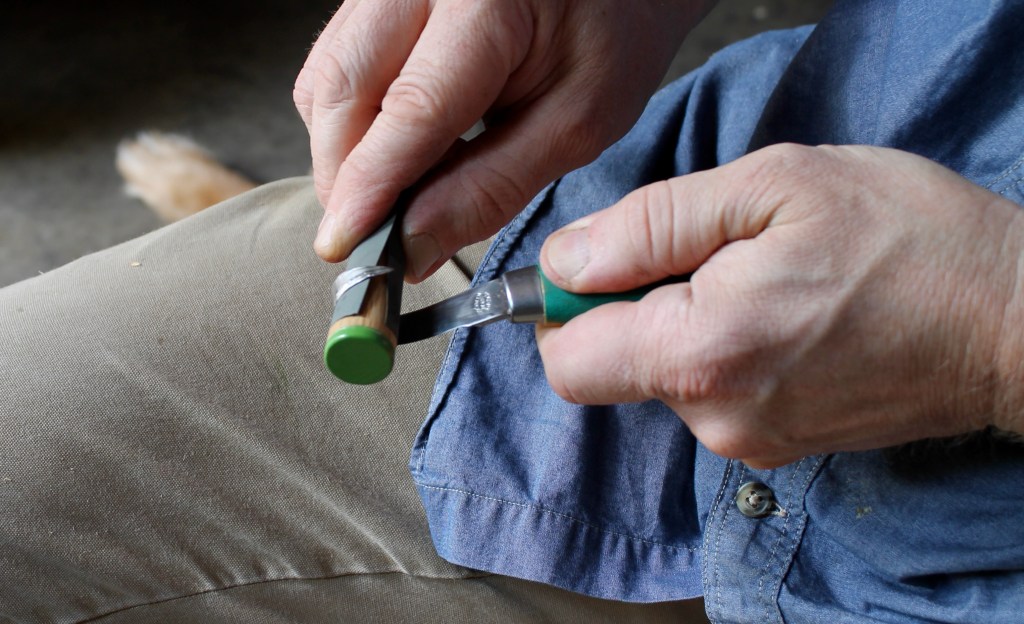
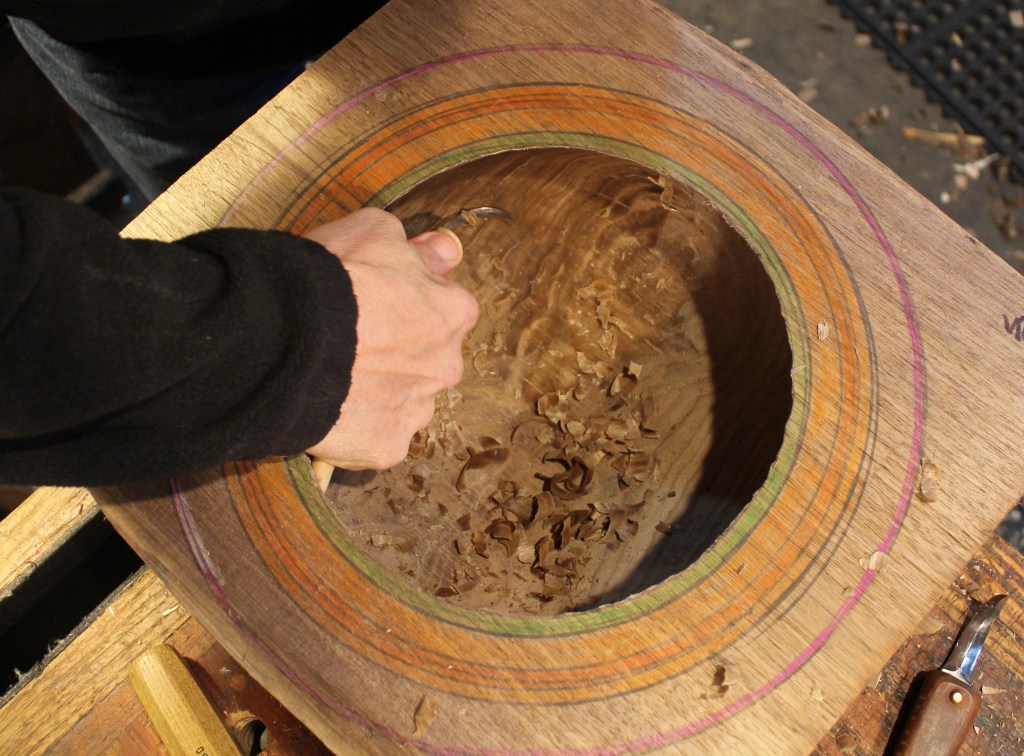
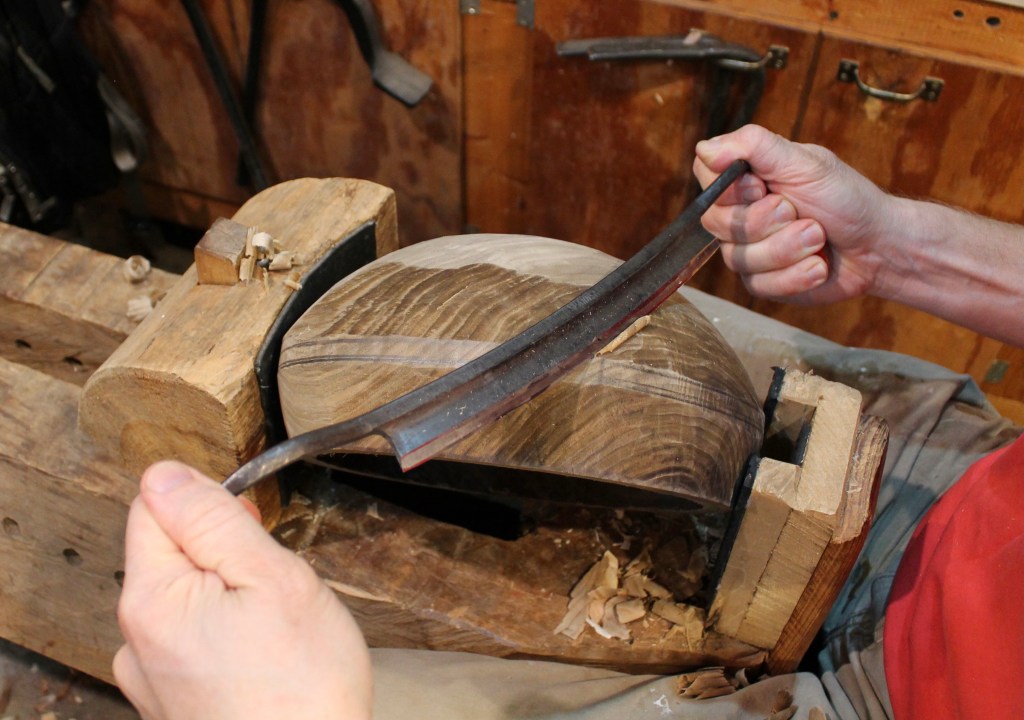
The plan is to carve a deep round bowl from black walnut with a wide surface below the rim for a lettered inscription. Here, I’m refining the hollow with a crooked knife after having done the rest of the hollowing with a little adze work and a lot of bent gouge work. In order to accommodate the outer shape I want, I carved a substantial undercut below the rim on the interior.

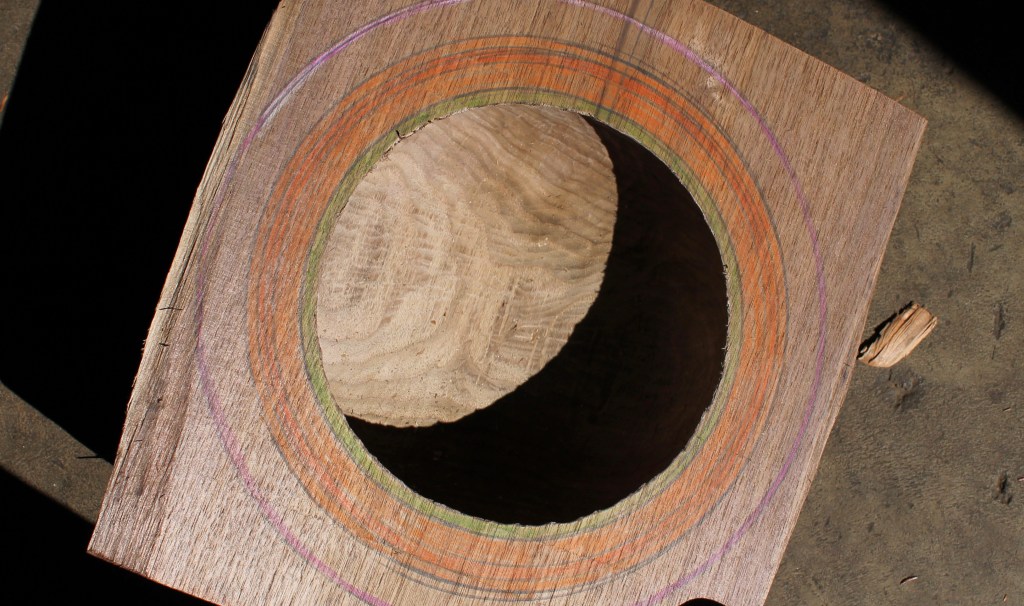
Laying out a round bowl is pretty straightforward. I wrote about it in this post. Sometimes I tweak that process as I did with this bowl. It may be hard to tell, but in the photo above, the “circle” is wider across the grain than with the grain — by about 3/8″ (10mm). I just use two focal points to strike the compass arc on each side of the center line — each focal point is 3/16″ (5mm) away from center. You end up with two semi-circles with a narrow gap between them to just bridge by eye.

Before drying, fibers/grain running perpendicular to the ruler

I stuck a ruler up to it while the bowl was still green. The shot above shows the inside measurement across the grain at about 9″.

Before drying, fibers/grain running parallel to the ruler.

While the measurement with the grain is about 8 5/8″. I know the bowl will shrink across the grain as it dries, but not in the direction of the grain. So the idea is that the bowl will start out as a bit of a wide oval but shrink to round. It’s not that important, but it’s really no trouble to do. You could look up expected shrinkage percentages on tables based on species and such, but I just took a guess since it’s not critical that the bowl end up absolutely round. Plus there are too many variables at play to predict with certainty.

After hollowing the inside, I hewed away all of that excess from the outside with the axe. Just finishing that process in the photo above.

I followed up with a drawknife at the bowl horse. A spokeshave works well to fair these surfaces too.

To mark the guidelines around the bowl, I lay it on the bench and, using whatever is convenient as a spacer, I do a combination of spinning the bowl and sliding the pencil/spacer stack. You can accomplish the same thing with a pencil compass, a stack of books, or whatever.

After drying, fibers/grain running perpendicular to the ruler.

After roughing, I set the bowl aside wrapped in an old sheet for a for the first few days. After that, I removed the sheet and let the drying continue. It has now been nearly three weeks of drying. I’ve been weighing it periodically, which is unusual, so I might as well report the results. It is just about done losing weight, losing a third of it’s weight at this point — dropping from 3 lb. 4 oz. (1474g) to 2 lb. 1 oz. (934g). So that’s 1 lb. 3oz. of water evaporated, or, in terms of volume, about 2 1/4 cups (540ml)

It was able to move as it dried, resulting in the dimension across the grain decreasing from 9″ to 8 5/8″. It may end up around 8 1/2″, so I underestimated a bit. Close enough.

After drying, fibers/grain running parallel to the ruler.

With the grain, the bowl actually gained 1/8″, going from 8 5/8″ to 8 3/4″. Maybe it was the combination of the flexibility of the shape and the forces as it shrunk across the grain — sort of like squeezing a plastic cup. I guess.

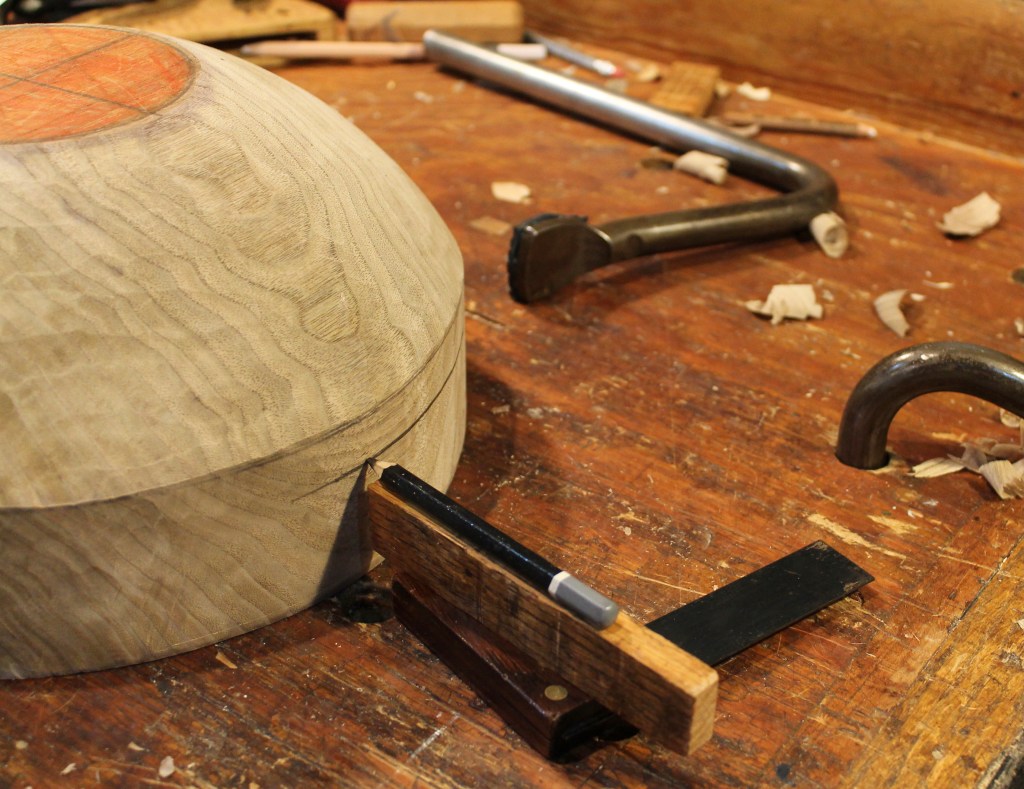
That’s just the beginning. It’s waiting for the next stage when I get a chance.

Posted in bowls, drying, layout, proportions, Uncategorized, walnut | Tagged , | 8 Comments

Frost and Form

You know, I’ve often said that every poem solves something for me in life. I go so far as to say that every poem is a momentary stay against the confusion of the world. But, of course, any psychiatrist will tell you that so is making a basket or making a horseshoe. Giving anything form gives you a confidence in the universe, that it has form.

Robert Frost, A Lover’s Quarrel With the World (1963 documentary film)

More about the bowl underway in the photos in the next post. . . .

Posted in bowls, quotes and excerpts, Uncategorized, walnut | Tagged , | 5 Comments

Moon Spoons?

A fellow carver directed me toward this short film documenting the traditional making of spoons from boxwood in Spain. Filmed in 1994, it features a man named Pascual Mairal who had been practicing this craft since he was a child.

There are many things to consider in this short film, beginning with the harvest of the boxwood. Pascual explains that he cuts the trees only during a waning moon. I’ve heard of this before, and seeing it here refreshed my curiosity.

In Woodworking in Estonia, Ants Viires writes: “In felling trees not just the season was important, but also phases of the moon and wind direction were born in mind in the interest of the quality of timber, such as was done also in the case of many other chores. The respective regulations derived from a very old idea that life on earth grew and developed during the new moon but everything grew old, dried and died during the waning moon.”

Folklore or not, there are at least some modern companies that support the notion that harvesting according to the moon phases matters, including this architectural firm. And a Swiss tonewood supplier that supports the notion of moon harvesting as well. Or is it mainly advertising hype?

I have no idea. Just about all of the chunks of wood I use come from trees that have been cut down by somebody else for some other reason or were blown down by the wind. Tree trimmers and removers aren’t concerned with moon phases any more that the wind is, I suppose. Whether the moon matters or not, there are some interesting techniques shown in the video, including a cool sawing method, use of a stock knife, work holding, and working with rasps, scrapers, and burnishers. The channel has lots of other traditional craft videos posted as well. I’ll look forward to checking them out over time.

Posted in finding wood, green woodworking, historical reference, holding, spoons, Uncategorized | 12 Comments

That Line on the Outside of the Bowl

Mullet, D.A., rattail, fade, French braid — there are many options for what to do with the hair on the back of your head. Likewise for the outside of a bowl. Maybe it’s because my own hair situation provides me with so few options that I get creative with the bowls. Ridiculous theories and connections aside, on bowls with oval feet, I often carve a raised curved line that flows from one handle to the other, as seen on the cherry bowl above that I finished a few weeks ago.

Another cherry bowl, above, was ready for the final dry carving of the surfaces when I took the photo recently. It sits there after drying, with the overall form already established during the green carving stage. The line is just sketched on in pencil, descending there from the lower corner of the near handle. I snapped a few more photos as I went about carving it.

As usual, at this stage, I secure the bowl on the bench with holdfasts. Then, with body pressure, I use a shallow gouge (a #3 16mm in this case) to carve a flute to each side of the pencil line.

As I near the handle, I switch to a steeper and wider gouge (in this case a #8 25mm) to merge the flute into the concave area under the handle without the corners of the gouge digging in.

These are the gouges. The specifics aren’t important. Lots of other combinations would work, and much depends on the form and proportions of the individual bowl.

So, at this stage, the line is now established and it’s time to merge the raised areas to either side with the surrounding surfaces.

Here, I’m doing that with a wide double-bevel chisel, keeping the corner free of the wood in the previously carved flute. You could do this with a wide single bevel chisel as well, I just prefer the touch and control of the bevel geometry provided by the double bevel in this case.

Same on the other side.

Then it looks like this. Could be refined more, depending on the final surface texture. In this case, the final gouge surface cuts will do the final blending of the form just as in the example in the first photo.

By the way, these recent bowls have all been for commissions, but I’m gaining on it and hope to finish up some other pieces soon that I’ll be able to post for sale.

And I’m still searching for a good name,for ease of reference, for this design feature. Something less cumbersome than “Curved line flowing across the outside of the bowl from handle to handle.” Suggestions are welcome!

Posted in bowls, cherry, layout, patterns, Uncategorized | Tagged , | 35 Comments

Otis Tomas and The Fiddletree

Maybe art is not a quest to conquer the secrets of perfection, but rather it is the revelation of that which is personal and unique, and which defies the very concept of perfection. This old tree has its own story to tell — of it’s singular and incomparable life on the hillside above my house. So I am listening for a voice that will sing of this here and now, of my own life and of this land and forest that I have come to know so well.

Otis Tomas, The Fiddletree

When I wrote about a carved spoon a couple weeks ago, my friend Scott reminded me of Otis Tomas‘ book The Fiddletree. In it, Tomas tells of his harvesting of a venerable old sugar maple near his home on Cape Breton Island, Nova Scotia, and recounts, in thoughtful detail, the making of a violin from its wood.

The description of the process is full of practical woodworking advice, along with Tomas’ insights and experienced reflections. It’s a combination of woodworking, design, music theory, history, and philosophy — beautifully written.

Then it gets even more special. The second part of the book features a collection of tunes composed by Tomas, wonderfully annotated. I can’t make much of the musical notation, but many people will.

Then the icing on the cake: Tomas includes a CD, in a neat envelope inside the back cover, recordings of an ensemble of Tomas and his friends playing the songs. There are some samples here. And their instruments — violins, viola, cello, mandolin, guitar, and a harp — were all made by Tomas from the Fiddletree.

I’ll end this one with a quote from Tomas that accompanies his song Handle with Care:

What more advice need be given? In this rough and tumble world, care and compassion in all things. It’s that simple.

Otis Tomas
Posted in books, finding wood, publications, quotes and excerpts, trees, Uncategorized | 17 Comments

When Life Hands You Hickory

Along with some walnut logs I was collecting a couple weeks ago, there was a bonus hickory log. When I split it, it was clear and straight. The new edition of Make a Chair From a Tree by Jennie Alexander has had me itching to shave some posts and rungs, and this log provided the perfect opportunity. At around 28″, not long enough for the back posts of a full chair, but I thought of the one-slat truncated version that I saw in some photos in the book. I had to get to it; hickory isn’t decay resistant, so it wouldn’t be good to keep it green for long. So the idea was to get the parts shaved down so they could start to dry.

It was nice to be back at the shaving horse I built way-back-when based on JA’s instructions. Another piece of equipment that comes in handy is the folding sawbuck. The upper arms don’t need to be that long, but I just haven’t cut them off for some reason. I had found the plans online and made mine from former playhouse pieces.

I usually use the sawbuck for crosscutting logs, then fold it back up. I rarely rive any pieces long enough to require a riving break, but this folding sawbuck actually does the trick decently.

The stock can be placed in the gap at the top and pressure applied downward to flex the stock while levering the split open with the froe. This hickory didn’t require much finessing anyway.

Three posts ready for shaving.

With some of the odd leftover bits of the hickory log, I roughed out a few gluts to help split that walnut.

The chair posts and rungs are shaved and are airing out a bit until I get back to them sometime. No rush now. I think I’ll have enough parts for two chairs.

Some of the green shaved hickory rungs on the left with some split-out pieces to the right. I use the straight 3/4″ piece laying on top to help check the rungs for straightness and thickness as I shave. I can strike pencil lines from it onto the rung blank as well.
Posted in chairs, green woodworking, holding, Uncategorized | Tagged , | 5 Comments

Into the Woods Exhibition

The lag since my last post along with the reports of Ida rains drenching Pennsylvania led some folks to kindly email me to see if all was well. The upper edge of Ida’s swath fell short of us here in northwestern PA, by maybe 30 miles. Not a drop. And the pause in posts was not due to water, but rather a concentrated flood of other stuff, mainly the first couple busy weeks of the school year.

I did manage to finish up the three pieces in the photo above and they’re now in a box on the way to New Hampshire for the Into the Woods exhibition hosted by Two Villages Art Society.

Here are a few more photos of the three pieces I’m sending up:

This medium-sized (13 1/2″ x 8 1/4″ x 4 1/2″) cherry bowl has lots of character streaks, so I didn’t interfere with any decorative carving, just the texture from the tools and the raised line running between the lower corners of the handles.

This little bird bowl came from a maple branch with a tight bend. The tail rises up with the flow of the fibers to about 5″ high.

The third piece, a long ladle, came from the piece in the photo above, split from a maple branch crook. I knew the bowl would be down in the tight bend area in the middle, but I had to think a lot about which end would become the handle and which end would be lopped off. I went with the lower end, deciding to run with the slow waves in the fibers there. After some more careful splitting and, of course, carving, the flow was still there in the ladle:

It’s actually very comfortable to use — for right-handers. Light but strong. 13″ x 2 3/4″.

While I did my best to make this bit of tree useful and beautiful in its “second life”, I got to thinking about how it pales in comparison to the living tree. And I started imagining the memories that this piece might have from its years high in the treetop. Then I grabbed my penknife — and my “cheater” glasses, the smaller letters being maybe 3/8″ high — and carved the lettering into the handle.

So, if you’re in the neighborhood of Hopkinton, NH, stop in and check out the show. I don’t know what the rules will be there, but I hope you can touch and hold the pieces. Truly, that is much of experiencing any work like this. Maybe they’ll have a big sign up that reads, “Please Touch.”

Posted in bird bowls, bowls, events, finding wood, Lettering, nature, trees, Uncategorized | Tagged , | 8 Comments

Since You Gotta Brush Your Teeth Anyway

All of the used toothbrushes in the house make their way to the workshop where I use them for all sorts of odd jobs from cleaning, to gluing, to finishing. The one above, made by Mable, was handed down to me from my environmentally conscious daughter, Emma, last week. Solid bamboo with a slim tapered cone for a handle and a painted end for identification. Now this is a workshop toothbrush.

Of course, it can be used for all sorts of brushing tasks in the shop, like any toothbrush, but that bamboo handle can have all sorts of additional uses. It tapers from just over 3/4″ (19mm) at the base to just under 1/4″ (5.5mm) below the handle. The handle portion, excluding the head, is 6 5/16″ (16cm) long. In the photo above, I’ve wrapped some fine sandpaper around it to sharpen the inner curve of a hook knife. Honing compound can also be rubbed onto the handle.

Above, I’m polishing the inner curve of a small gouge, but this is all just scratching the surface. The bamboo is incredibly strong. With some divergent thinking, you may have a set of legs for a quirky box or a handle for a small carving tool. At the very least, you’ll have a toothbrush that won’t still exist in a landfill or in the ocean a few centuries from now.

You may have noticed on the Mable site, they have a natural bamboo travel case for your toothbrush, but instead you could make one of these skinny shrink tubes. I wrote a post about making these a while ago, including a special groove cutter made from a chunk of broomstick and a couple screws. I received an email over the weekend asking for clarification about the shape of the cutters, so I made the little sketch below and added it to the original post.

And just to be clear, I have no economic connection to Mable or broomsticks.

Posted in sharpening, sketch, tools, Uncategorized | Tagged , , | 5 Comments

Ten Spoons

In between other projects, I’ve been able to squeeze in some spoons. I have these ten finished and available. I’ll provide another shot of each one below. If you’re interested, send me an email at dandkfish@gmail.com. I’ll update the status of each spoon below as they sell. Update: All of the spoons in this batch have sold now, thank you. Updates won’t show up in your email browser. If you would like to pay by sending a check, please let me know your shipping address. Otherwise, I’ll assume you’d prefer to receive a Paypal invoice. Shipping is included in the price listed for each spoon. All of these spoons are straight from the knife, finished with pure food-safe linseed oil, cured in my lightbulb kiln.

It’s worth noting that I don’t think these spoons would be here without the influence of Wille and Jögge Sundqvist. Check out Peter Follansbee’s post from earlier today to see why I’m mentioning that again.

#1: Maple, 8 3/4″ x 2 3/8″. Ladle/serving spoon. The form of this spoon practically jumped out at me when I saw the crook laying on the ground. The flow of the curve seemed like an ideal setting for a school of fish, along with a chaser on the finial. The crook bent on two planes as you can see from the second photo below. SOLD

#2: Lefty cherry eating spoon, 7 1/2″. This one is definitely for a lefty. The bowl is sort of coming toward you in this shot, so it is foreshortened. Another view is in the overall shot at the top. SOLD

#3: Maple serving spoon, 9 x 2 5/8″. This maple crook had a lot of figure, making it tough to split out, but a nice spoon. SOLD

#4: Righty maple eating spoon, 7 1/2″. That dark little pin knot on the handle led me to a fun detour with the chip carving as you can see in the detail photo below. SOLD

#5: Maple serving spoon, 7 3/4″ x 2 1/4″. Short crook that made for a nice server. SOLD

#6: Cherry serving/cooking spoon, 9 5/8″ x 2 1/4″. There are magical times in the fall, walking in the woods on breezy days, when leaves are tumbling and floating down all around you. Those times led to this pattern. SOLD

#7: Cherry serving spoon, 9 1/8″ x 2″. SOLD

#8: Rhododendron little server, 6 5/8″ x 2 1/8″. This is a shallow server with just a little bend. I had some fun with sort of an hourglass idea on the handle. SOLD

#9: Cherry stirring/cooking spoon, 14″ x 2 5/8″. Unusual for me, this spoon is made from a straight piece of wood, rather than a crook. With just a little bit of crank and a long beefy handle, it can handle stirring the stiffest of batters. SOLD

#10: Rhododendron serving spoon, 7 1/4″ x 2 1/8″. From a nice little rhododendron crook, this one could also serve as an eating spoon if you have a really wide mouth and are focused on efficiency. Otherwise, it would be most ideal as a server. SOLD

Posted in patterns, spoons, Uncategorized | Tagged , , | 12 Comments

Make a Chair from a Tree: Third Edition

This chair not only serves to hold my can comfortably eighteen inches above the ground, it is a constant reminder of an exciting journey with wood. When I made the chair, nearly twenty years ago, I couldn’t seem to get my hands on a copy of Make a Chair from a Tree. But Jennie Alexander had just produced a video (available for streaming here) that covered the entire process. I bought the VHS tape from Drew and Louise Langsner at Country Workshops. I don’t know what I would have done without the resources and tools available through Drew and Louise.

Anyway, I watched that video over and over, compiling pages of notes and sketches. The whole process seemed magical, and Jennie was extremely encouraging. I could, indeed, build a chair from a tree. I made a shaving horse, simple kiln, and a slew of other things in preparation, all according to Jennie’s guidance. All of those things continue to serve me well in the shop. As I began to rive the white ash log into chair parts, the wonder of wood was reinforced in me and I was equipped with a whole new set of skills and understanding — and a chair!

I could go on and on about my gratitude for Jennie’s contributions, and I’ve written a bit about that here and here. This is just to say that Make a Chair from a Tree: Third Edition is available. It happened due to the efforts of Jennie herself, before her death in 2018, and the dedication of Chris Schwarz, Megan Fitzpatrick, Larry Barrett, Peter Follansbee, Drew Langsner, Brendan Gaffney, and many others who contributed to bringing it to fruition. They did a superb job. All the methods are clearly explained and photographed. The team effort is a tribute to Jennie’s influence and relationships.

It’s all in that beautifully designed package with the cloth cover in the photo above. A ticket to a new understanding of wood and your ability to make a strong, comfortable chair with simple tools. You’ll feel the truth in Jennie’s words, words that Peter Follansbee, having heard them often, reminds us of in the book: “Wood is Wonderful.”

Posted in books, chairs, green woodworking, Uncategorized | Tagged , | 7 Comments