
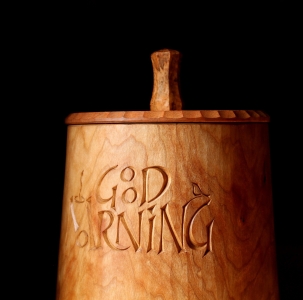
For many folks, the morning cup of coffee is one of life’s great joys, a sacred ritual and/or an absolute necessity. I’m happy that this big shrink pot will become a part of the morning routine for one coffee lover.
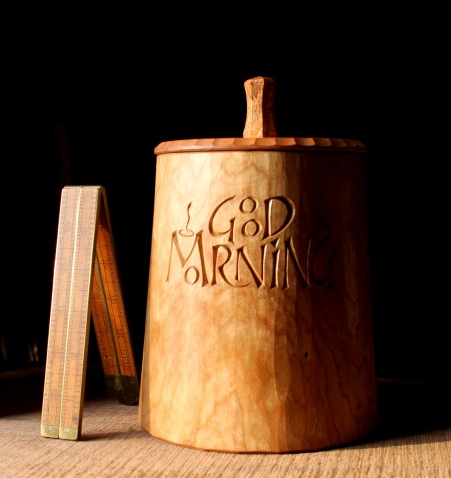
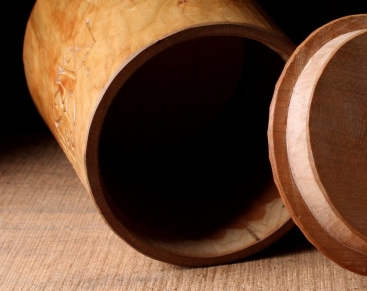
For a larger pot like this in cherry (6″ diamer a the base and 7″ high, excluding the finial), I hollow the interior with a gouge and mallet after boring a 2″ hole through with a T-handle auger. Should hold a lot of ground or whole coffee beans for her.

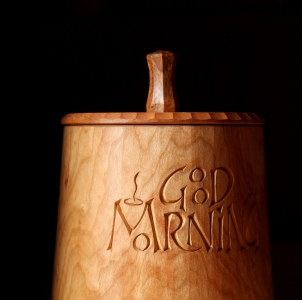
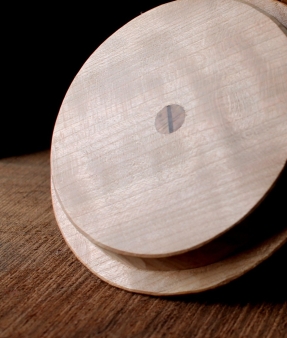
A good lid will keep that coffee fresh. Making it can take as long as making the pot. I made this lid from a radially-split billet of dry cherry. The “quarter-sawn” grain orientation should keep seasonal movement to a minimum.
I carved a rabbet into the underside of the lid. The wall of the rabbet is tapered to match the taper carved inside the rim of the pot. This allows the lid to settle in with no wiggle room as the heavy lid seats. The finial was carved from cherry burl and through-tenoned into the lid. The interior was left unfinished.

I couldn’t resist a little carved sketch on the basswood bottom. I’ve written several posts on shrink pots. Check out the “shrink box” category from the pull-down menu to the right, and have some fun making a new partner for your morning ritual.

Dave, the coffee pot is magnificent. It’s one lucky person who will be having their morning coffee in a work of art.
LikeLiked by 1 person
Absolutely gorgeous Dave. I truly envy the fortunate
recipient FANTASTIC!!
LikeLiked by 1 person
Dave, I love every detail about that coffee Pot. You really pulled out all the stops on that piece! Wow! It is simply beautiful and amazing. Tad
Sent from my iPhone
>
LikeLiked by 1 person
Gorgeous shrink pot, perfectly balanced.
Do you always carve your lids from a single piece of wood? I think it’s a lot nicer than a glued two-piece lid, but looks fairly challenging. What would you say is the easiest way to carve the rabbet?
LikeLike
The method of gluing a smaller circle below a larger circle is a handy way to do it, Marco, and I don’t really see any problem with it. Maybe it’s just stubbornness that keeps me cutting the rabbet in one piece. Of course there’s also the option of a tapered lid without a rabbet that fits into the top sort of like a cork.
If I’m making a lid from softer wood, I usually just remove the bulk of the wood from the rabbet with a v-tool with the lid held on edge in a vise. Then I refine the rabbet with a knife and/or gouge. For a lid this large in a harder wood, I mark the depth of the rabbet shoulder with masking tape on a saw, and remove much of the bulk with saw cuts first. There’s more specifics for getting a tight fit and all that. I’ll try to take some photos and get into that sometime.
LikeLike
As always, such an accomplished work! Does the top have a single seat orientation or can it be set on randomly?
LikeLike
In the case of this shrink pot, the top will fit the same in any orientation. I made sure the inner edge of the pot rim was an exact circle by marking such a circle in pencil after the pot had dried thoroughly then trimming to the line with a knife. Doesn’t take much if you keep things pretty close in the green stage. I’ve made pots in other shapes or ones that follow the natural wonky shape of the branch, which require a single seat orientation, and that’s fine too.
LikeLike
It’s always a joy to be able to admire the work and artistry of a humble master.
LikeLike
Thanks Scott. “Awed apprentice” would be more accurate.
LikeLike
Dave, are you saying that you only drilled one 2″ hole and hollowed the rest with gouges? Or did you drill several holes to clear more waste? It’s such a fun look. Makes me wanna brew a cup right now.
LikeLike
In this case it was one 2″ hole through the middle then expanded that with gouge and mallet. For large pots, the second technique you mentioned is good too, but I would have switched to a 3/4″ or 1″ auger bit in a brace (rather than a 2″ T-handle auger), and drilled a ring of slightly connected holes just inside the perimeter. This frees the core and removes it. First way=more mallet, second way=more drilling. Both ways good for body and mind.
LikeLike
Absolutely stunning!
LikeLiked by 1 person
Great pot! I love it..
LikeLiked by 1 person
Beautiful coffee pot top to bottom. The edge detail carving on the lid looks like it would be prone to tear out…how did you accomplish that part?
LikeLike
Thanks. Just gouge cuts. Sharp gouge, light cuts.
LikeLike
I love your carved details. The bird and the steaming hot coffee on the side and the fish (?) on the bottom. Apart from that, the pot is beautiful overall.
LikeLike
Thanks. The fish on the bottom is my maker’s mark — sort of a combination of a “D” and a fish. Sometimes I add the “air bubbles”, sometimes not.
LikeLike
What a lovely design. It’s never occurred to me to use basswood for the base but it makes perfect sense. I’ve seen 1/2″ boards for carving at various stores, is that what you used here?
LikeLike
That would work fine. I bought a bunch of roughsawn basswood awhile ago from a local sawyer. It’s easy to resaw with a hand rip saw and plane down to thickness.
LikeLike
Pingback: In the Beginning | David Fisher, Carving Explorations