

I just finished a hen bowl in maple and left it natural except for the bit of red paint on the comb. Besides the lack of paint on the body, I made a couple other changes compared to those I’ve carved before.
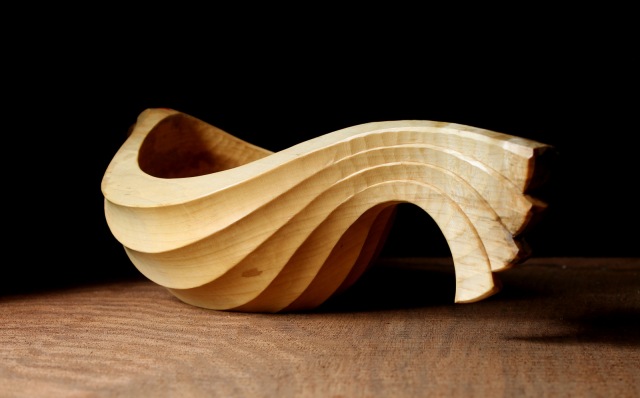
The most obvious difference is the longer tail feathers. This log was long enough to allow for them, so I used it up. The finished bowl is 15 inches long, 7 inches wide, and 4 3/4 inches high. The coloration of the wood near the beak and tail occurred while the log was in storage. Begins pretty quickly in maple, and I like the effect in this case.

Here’s the blank prepared and laid out.
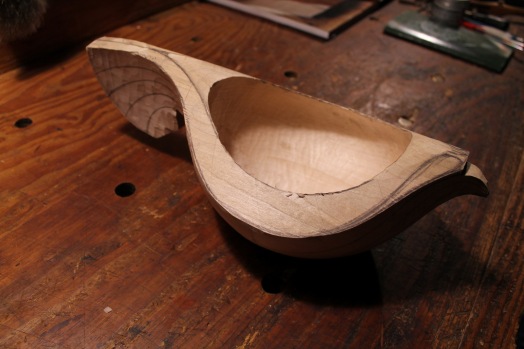
I hollow it out first. The adze does a bit of the work, but with such a deep and undercut hollow it gets put aside pretty quickly in favor of a bent gouge. After that, the remainder of the hollowing work is done with a spoon bent gouge and hook tools. Then I hew the outside with an axe and follow up with a spokeshave. Then it’s ready to dry before moving on.
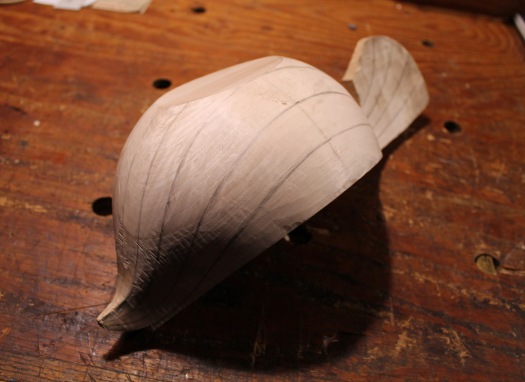
After drying, I sketch on the ridge lines between the flutes to be carved and dig in with a gouge. Just keep it between the lines. I wrote a post about that general process here.
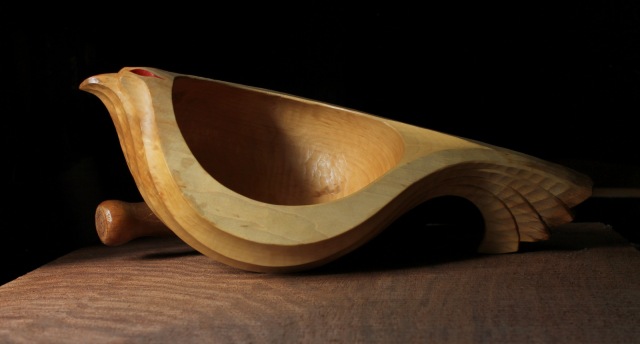
One last shot with the oiled hen tilted for a better view of the hollow and crest.

Certainly a grand champion poultry winner at the fair Dave. The touch of red comb is just right. I always appreciate your “in process ” photos along with the end product. It’s good to see from where it comes, answering which was first, the chicken or the log?
LikeLiked by 1 person
oh yeah, really nice–beauty–
LikeLiked by 1 person
Really like this a lot! Carving cross grain on the tail feathers? Thanks David
LikeLike
Yes, for the tail feathers I carved the division between them with a v tool then removed the wood along the sides with distinct cuts across the grain with a gouge. At least, that was the method for this one. We’ll see on the next one. Thanks John.
LikeLike
Beautiful.
LikeLiked by 1 person
More good work and good explanation of the steps.
Thanks!
LikeLiked by 1 person
Hi Dave, a beautiful bowl! I’m impressed with how you keep expanding your designs and executions! I was in your class at Fine Woodworking back in April; thanks for the knowledge and inspiration! Don’t know if you recall, but after that class I sent you a pic of a walnut ladle I had carved… I now have roughed out and dried a bowl blank from walnut we cut here on our farm in Virginia for the next “challenge”. Just curious; have you ever carved scrolled bowl handles, like the scroll on a fiddle head? Any suggestions on the layout/carving sequence? All the best, and thanks, John Fielding
Sent from my iPad
>
LikeLike
Thanks, John. Glad to hear you’ve continued to do more with the walnut from the farm. I have carved a few scroll ends. Here’s one example in this post https://davidffisherblog.wordpress.com/2015/07/18/and-now-for-something-completely-different-chestnut/
Here’s another https://davidffisherblog.wordpress.com/2016/12/04/a-bowl-for-enkidu/
In my website gallery https://davidffisher.com/gallery_1#Next there are a couple other examples (image #41 and #48)
As you see, I’ve explored different ways of transitioning from the surfaces of the bowl into the scroll, ending the scroll, and so on. I try to carve a clean surface on the sides of the scroll to sketch the outline onto. Once I’m happy with one, I transfer some key points over to the other side then sketch that as well. Sorry for the lack of details on the layout and carving. It will require a individual post or article to get more into that. I’ll aim for that sometime in the future.
LikeLike
Thanks for your feedback, Dave. Carve on!
LikeLike