
Cutting lettering into a bowl or spoon can be daunting. You’ve already invested a lot of time and effort into a project and it could all go down the tubes with one slip of the knife during the lettering. Even if all goes as planned, what if the design doesn’t look like you thought it would? Grab some flatwood and dig in.

Risky Business: If the lettering goes wrong here, there’s a lot more at stake than with a board. The curved, irregular surface is also an added challenge.
Small flat boards and scraps are an ideal platform for working on your lettering designs and techniques. This is low risk; if things aren’t working out, you don’t have to scrap a bowl or other project, just grab another hunk of wood. A relatively soft cooperative wood like basswood is ideal for the situation.
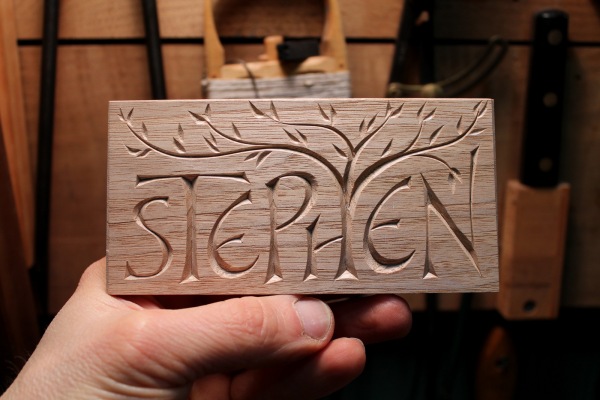
These boards aren’t just for practice. They can be fun projects in their own right. I enjoy making little name signs and things like that. The “Stephen” sign above was carved in butternut.
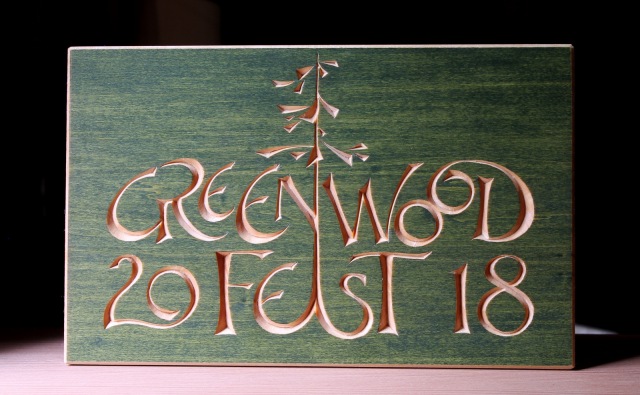
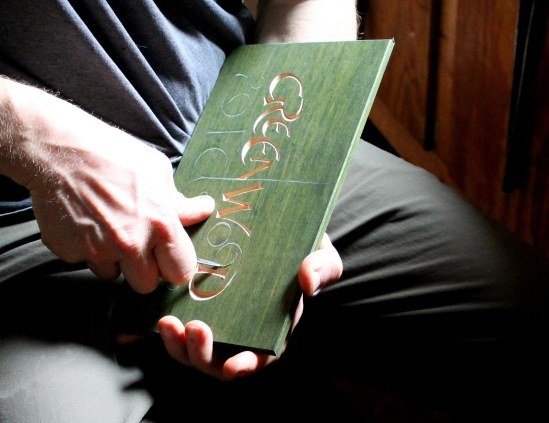
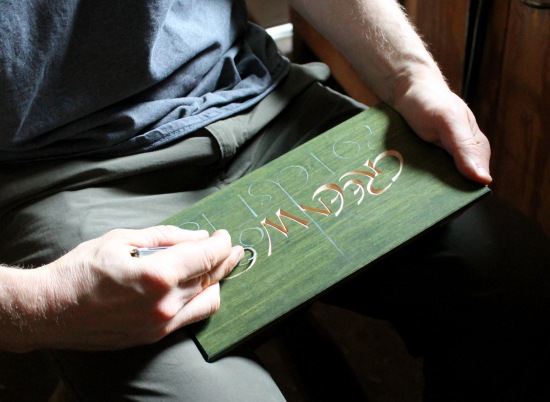
The photo at the top of this post is a 6 1/2″ x 10″ sign freshly carved to take with me to Plymouth tomorrow. I’ll use it as an example for my lettering workshop and then it will be raffled off in the Greenwood Fest fundraising raffle. I just planed the surface of a basswood board, then painted it with some thinned artist’s oil paints. After the paint dried, I sketched on the letters and cut them with my pen knife. The two photos below show two of the most common grips I use with the knife.
When I have a choice, I prefer to work with light coming from my left, but the light filtering through the pines in Plymouth will suit me fine.

Beautiful work!
Have a great/fun time at Greenwood Fest this year.
Sorry to miss it.
LikeLike
Thanks Gene. Hope to see you next time!
LikeLike
Lettering goals. I would love to take a class with you.
LikeLiked by 1 person
I must try carving through a coloured surface. Thanks for the inspiration.
Lovely work.
If you do run a course please I’m right behind Nancy.
LikeLiked by 1 person
I’d like to consider myself as third in line, then. (not just an idle comment.)
LikeLiked by 1 person
Thanks Nancy, St. John, and Arthur. Four of us together now just like that! I’ll keep you posted if something comes up.
LikeLike
as always, just fabulous–see you soon at Greenwood–
LikeLike
You bring the birds, Marie. See you there.
LikeLike
With so many different delivery companies these days (since the Royal Mail was privatized), they often have trouble locating houses in our old village. I carved some house numbers in exterior construction “pine” for self and neighbour, rather coarse but does the job but not a fine finish. I should really do something fancier. My home also has a name but it’s quite long so I have put off starting that but perhaps now is the time!
LikeLike
Of course it is!
LikeLike
David, Do thin you oil paints with raw linseed oil or BLO? Some old time artists used other oils, such as poppy-seed oil. The oil paints I use (Winsor & Newton Artisan) can be thinned with oil or water (modern water-miscible oils paints). I tried thinning with raw linseed oil recently and it took forever to dry – much longer than unthinned paint (which takes a long time to dry) and it was actually wet for perhaps 2 weeks.
LikeLike
I just got some natural boiled linseed oil-no additives or driers-called “Furniture Clinic Boiled Linseed Oil.” I’ve yet to try it, but I’m going to use it on some spoons. Supposed to dry faster than raw oil.
LikeLike
My tubes are of a few different brands, but the ones I have all are a simple mixture of linseed oil and pigment, so I can’t thin with water. I just stick with linseed oil (not hardware store “boiled” linseed oil) and sometimes a little citrus solvent depending on the situation. As with linseed oil in general, I find that heat reduces curing time of artist oils greatly, so I pop small things in my little lightbulb kiln to speed up the drying.
LikeLike
The “Stephen”-sign fills the piece of wood, did you have any trouble holding that while carving? I would imagine cutting yourself could be a distinct danger with such a piece – I’d be tempted to clamp it down rather than hold that one. Or perhaps cutting if from a longer piece after carving it.
LikeLike
No trouble holding while carving. In fact, I would have a much harder time if it were clamped down. With small pieces like this, the piece itself rotates more than the knife during carving. It’s a bit of a dance between the two. There’s no more danger in cutting oneself in this situation than in carving a spoon. In either case, you consider where force is being applied and where the knife will safely stop. The same control that allows for crisp carving facilitates safe carving as well. If you’re manipulating the knife sensibly, being near the edges of the wood is no problem at all. But, listen to the little voice in your head. When it’s saying “you should do this differently,” do that differently.
LikeLike
Dave, your post content, lettering style and photos thereof are always so well done and inspiring along with all of your other carving. I’m sure you’ll be very appreciated at the fest. On a side note, what can you tell me if anything, about Hackberry wood for carving? After a hard wind the other day there is plenty of this available to me if I want it.
LikeLike
I don’t think we have hackberry around here, Scott, but oddly enough, I do have some experience with it. Some tree cutters were cutting one down in Virginia maybe fifteen years ago when I was on a little trip. I brought some home and carved a couple bowls. It was nothing spectacular, but as I recall it was pleasant enough to work with. My brother-in-law still has one of the bowls in his kitchen with fruit in it. If it’s available, go for it.
LikeLike
Thanks Dave, I believe I will. Enjoy the coming week.
LikeLike
Spalted hackberry is distinctive and sought out here in the deeper South.
LikeLike
Your lettering is so creative and impressive! I do enjoy you posts.
LikeLiked by 1 person
Thanks, Ida.
LikeLike
Love that lettering! Flows so nice and easy, and the overall design is fantastic. Also like the way the letters transmogrify into trees and leaves.
LikeLike
Thanks, Andy. Great word too — transmogrify! Perfect.
LikeLike
Taking your class at GWF… can’t wait!
LikeLike
I think I might have a go at carving the word “transmogrify” probably using the David F. Fisher font. I’m still gobsmacked at your pen knife technique, I’m still working on it. Thanks Dave. Have good weather and good vibes.
LikeLiked by 2 people
“Gobsmacked” is the perfect word. Maybe I’ll try and carve it.
LikeLiked by 1 person
Beautiful work, Dave.
LikeLiked by 1 person
I love the letters. I want to work on a couple projects just like these.
LikeLiked by 1 person
Nice work!
LikeLiked by 1 person