
I don’t know much about cheese or scotch, but I’ve heard they can improve if you just let them sit around awhile. The same might be said for wood sometimes. This maple bowl underway is from a log that hung around in my shop longer than planned, sealed in a plastic bag. By the time I got to it, it had developed some nice coloration — early spalting of a sort, I guess. So, if you’d like to promote character development in maple, try procrastinating. Just don’t wait too long or you’ll have mushy maple.
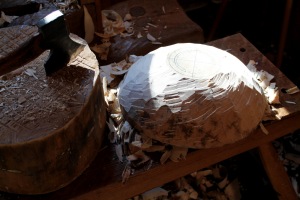
The bowl during hewing.
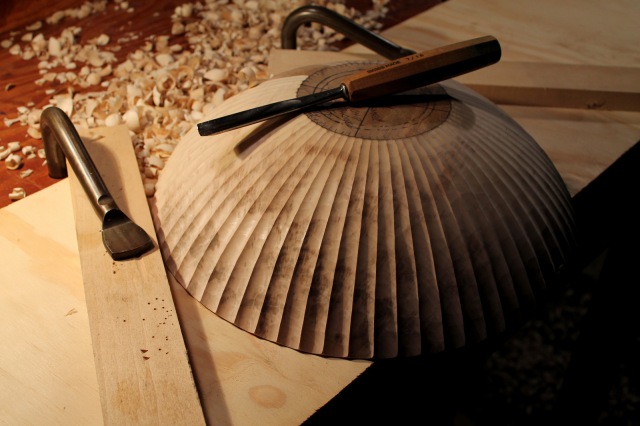
I carved a round bowl from this piece, then carved flutes around the exterior surface. The fluting itself came after hewing the exterior with an axe, then refining with a spokeshave. To maintain some consistency in the fluting, I paced around the bottom perimeter and the top perimeter with dividers until I arrived at the same number of divisions around each circle. Lines connecting the marks indicate the arrises between the flutes.
Each flute is carved from the base of the bowl to the rim. My set up for this can be seen in the photo. The boards and the holdfasts form a sort of funnel to keep the bowl from sliding forward, but still allow the bowl to be rotated freely as the carving proceeds from flute to flute. The plywood piece just serves to protect the benchtop as the gouge plunges downward at the end of the flute.
I still have some carving to do on this piece, then I should have some more photos to share sometime.

I love it, Dave. What sweep gouge do you use – a 4 or a 5 or some other sweep (I want to get a sense of how deep you carve those flutes)? And is it the same gouge the whole length of the flute – or do you swap out a narrower one for a wider one as you move down the flute?
LikeLike
Geoff, I used a #7 sweep 18mm gouge in this case. These flutes at their widest point are around 11/16″. I used the same gouge for all of the flute work. For the narrow portion near the base of the bowl, only the middle third or so of the gouge edge is engaged. As the cut proceeds toward the rim, the flute gets both wider and deeper as more of the gouge edge is engaged in the cut.
Of course, the design can be tweaked by varying the sweep of the gouge and the width of the flutes.
LikeLike
Oh, wow, this is stunning already. I can only imagine what the finished piece will look like! Thanks for the inspiration!
LikeLike
Amazing! I follow your blog all the time and am always impressed. Thank you for taking the time to share your well honed craft. Always inspiring.
Cheryl
LikeLike
Dave, That is a beauty! Will you paint the outside of this one, or leave it naked. A yellow or red underneath that deep blue you used would look amazing as the bowl wears.
LikeLike
Deneb, I’m not planning on paint for this one, but I do like the your idea. The paint rubbing through on the ridges would be a great look.
LikeLike
lovely
LikeLike
I just remembered that I had snapped a photo back when I was hewing this bowl. I’ve added it to the post.
LikeLike
Hi Dave, I think you do beautiful work. I have one question on how you manage to keep the symmetry of the bowl (this are for round bowls). The outside as well as the inside of it. I am really curious if it’s just by eye or is there actually a science behind this.
LikeLike
Thanks Andrew. Great question, and I hope to elaborate on my answer further in a post sometime. The layout for round bowls is very basic. Vertical and horizontal center lines are struck on top and bottom. Two compass-struck circles are made on top — one representing the border of the inner hollow, the other representing the outer perimeter. A third circle is struck on the bottom, representing the outer edge of the bottom surface. All else is by eye — and feel. I don’t bother with any templates or anything like that. It is amazing what subtle differences one’s eye and hand can detect. And if the symmetry isn’t perfect, that’s ok too. Trust your eye.
As I mentioned in the post, I did make some further guidelines before carving the flutes.
Again, you’ve hit on a good topic. I’ll try to clarify some thoughts and share my two cents soon.
LikeLike
Pingback: Carving Round Bowls can be Super | David Fisher, Carving Explorations
so beautiful~!.
I am very inspired by your work.
thank you.
LikeLike