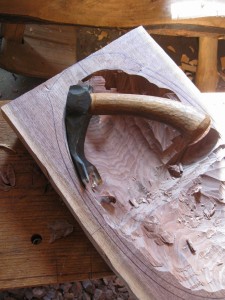
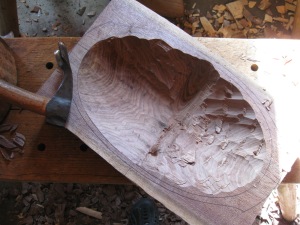
Following up on my last post about adze design, I wanted to share a series of photos that show the procedure for my adze work. At the stage of the first photo (above), I’ve hewn and hand planed the upper and lower surface of the future bowl from a half of a walnut log. I have laid out the line of the inner hollow and the outer perimeter of the rim and handles. This one is around 21 inches long and 12 1/2 inches wide. I’ve hogged out much of the bulk of the hollow with the adze. The rough adze work to this point goes pretty quickly — maybe twenty to thirty minutes. Lots of fun and chunks of wood flying all over the shop. Then things ease up and slow down as I get closer to the line.
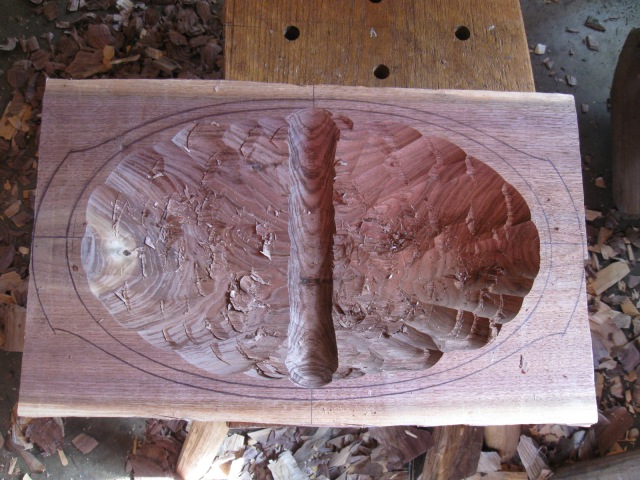
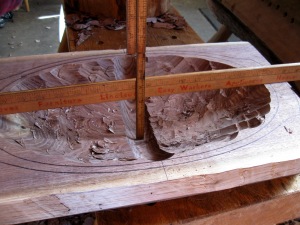
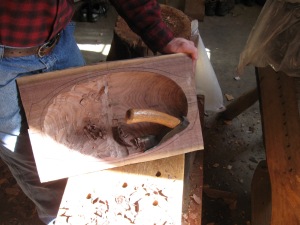
Once I am within an inch or so of the sides and bottom, I use the adze (often my smaller adze) to cut across the grain along the short axis of the bowl. This establishes an even curve across the width of the bowl and establishes the final depth (see photo below). It also lessens the possibility of having a split or cut run into the opposite side of the bowl as the far side is hollowed. This trench now becomes the landing zone for the final strokes of the adze as it cuts from upper rim to the trench. The rest of the adze work will be done in a direction generally perpendicular to the trench — cutting “downhill” with the grain.
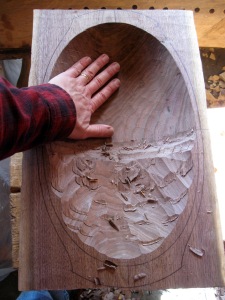
Along the long axis, I cut a channel from the rim to the trench, then continue that procedure to the left side rim.
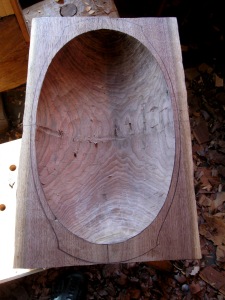
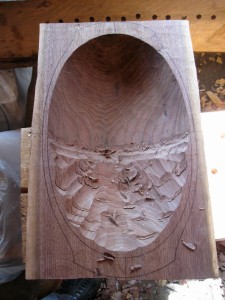
Adze work complete. The bottom of the trench is still visible here and there. All will be cleaned up with gouge paring after hewing the outside and drying.

Great stuff Dave!
LikeLike
Dave = that trench across the middle is worth the price of admission. Nice.
LikeLiked by 1 person
🙂
LikeLike
🙂 ditto on the trench.
LikeLike
Gad zooks, you are surgical with an adze…
LikeLike
Thanks for your blog. I’m finding it extremely educational. Just starting to learn, myself. Your effort is generous.
LikeLike
Thanks for the comments guys.
LikeLike
Very Helpful. My first bowl (big leaf maple) I carved with my adze I didn’t even think about how thick the bottom would be and also failed to compensate for tearout. I kept chasing the tearout to even out the bottom and this left me with spots with light that would show through. I even had one small hole that i glued a matching “Chip” over. Confessions right? I am glad to have found your site Dave. Looking back I think that i really just wanted to use my adze- watching the chips fly part is so darn fun. You’re helping me to see the value to planning.
LikeLiked by 1 person
I’m starting out with wood carving ~ I’ve lived in a forest for the last 2.5 years, but it took 2 years for me to “see the beautiful wood in the trees”… !
Ive been surfing the web in search of wood carving knowledge; and of all the people sharing their work on the web, your approach and style of teaching, David, I find to be the most logical and easy to follow. Great teacher. Thank you for putting time and effort into your online world for us to enjoy and learn from.
I have two questions; I’m about to buy my first adze. I’m thinking of going with the HK 700gram (60mm). You mention that you sometimes use the “smaller adze” – with that in mind, I’m wondering if it would be advisable for me to start with the smaller HK 600gram adze?
Also, are you planning to make a video that shows you work with the drawknife etc on the outer of the bowl? I would love to see you completing a bowl.
Your work is incredible, David !
LikeLike
Thanks for your nice comments, Sean. I have the HK 60mm (700 gram) adze, so that would be my recommendation of the two — especially if you plan to do some larger bowls at times. The weight works in your favor with proper technique.
If you go to my website, there are two videos that both show drawknife work on the outside of a bowl. Particularly, the “Log to Bowl” video shows the whole process of a basic bowl, including the work on the outer parts of the bowl.
Thanks again for the encouragement.
LikeLike
I found the “medium” SD Adze today. It looks quite similar to the HK 60mm. Same dimensions too I think. its a bit cheaper than it though. Do you have any opinion, David, re the SD Adze? Below is the URL;
http://www.djarv.se/djarvenglish/yxor.asp
LikeLike
Pingback: Chips | David Fisher, Carving Explorations
Pingback: Chestnut Bowl: Forming a Full Hollow | David Fisher, Carving Explorations